

DIY Luxury Press-Ons: How to Start Your Dream At-Home Nail Studio
Hello, my loves! There is something so incredibly magical about looking down at your hands and seeing a masterpiece. For the longest time, I thought that kind of salon-quality perfection only happened in a crowded shop with chemical smells and expensive appointments. But then, I discovered the soft, creative sanctuary of the at-home press-on studio, and my life—and my self-care routine—completely changed.
Imagine a quiet Sunday morning, your favorite candle flickering, a warm cup of tea beside you, and a palette of colors waiting for your touch. Creating your own luxury press-ons isn’t just about the aesthetic; it’s a love letter to yourself. It’s about taking those few moments to slow down, breathe, and create something beautiful that you carry with you throughout your week. It’s like a cloud-soft embrace for your creativity.
Whether you’re looking to save a little money, express your unique style, or even start a heart-centered business, I’m here to walk you through every tiny detail of building your dream nail studio right from your kitchen table. Let’s dive in, darling.
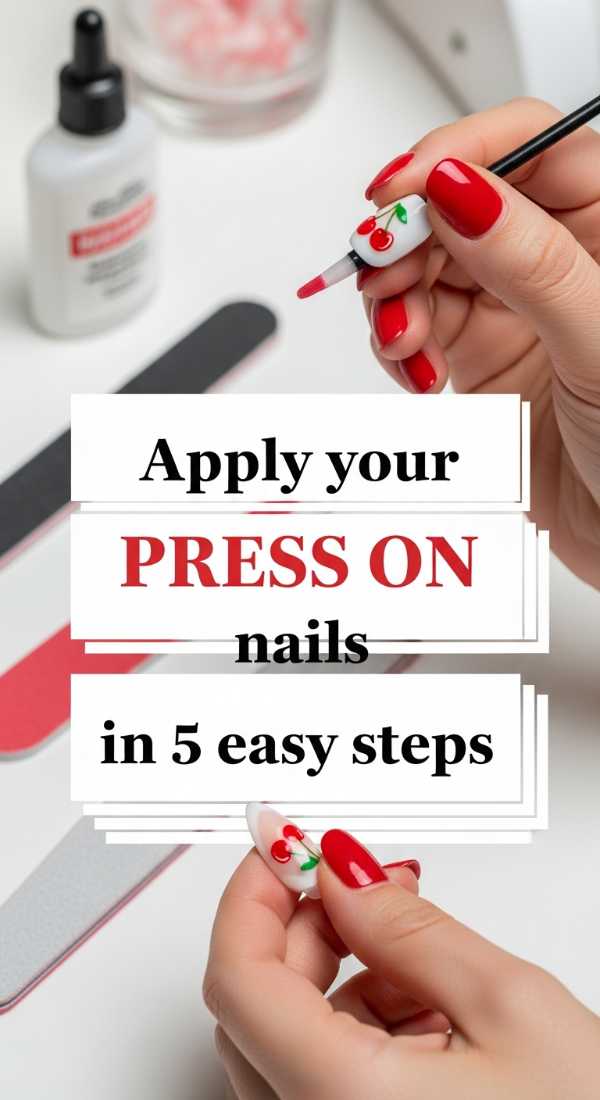
Apply your press on nails in 5 easy steps
Why to love these Nails:
There is nothing quite like the instant gratification of a fresh set. These nails are perfect for my loves who want a high-end look without the commitment of acrylics or the damage of a salon drill. They feel light, look professional, and give you that ‘put-together’ feeling in minutes.
Essential Items:
- High-quality press-on nails
- Nail glue or adhesive tabs
- Alcohol prep pads
- Wooden cuticle pusher
- Nail file and buffer
How to Prepare:
- Gently push back your cuticles to create a clean canvas.
- Lightly buff the surface of your natural nails to remove shine.
- Wipe each nail with an alcohol pad to remove oils.
- Apply a small drop of glue to both the press-on and your natural nail.
- Press and hold firmly for 30 seconds, starting from the cuticle and pressing down.
Budget Range
- KISS PowerFlex Precision Nail Glue: $5.00
- Reusable Press-on Set: $15.00 – $25.00
- Basic Prep Kit: $4.00
Create these 3D cherry nail designs in 4 steps

Why to love these Nails:
Oh, these are just the sweetest! 3D nail art adds such a tactile, whimsical element to your look. It’s like wearing tiny jewels on your fingertips that catch the light and start conversations everywhere you go.
Essential Items:
- Red rhinestones or 3D nail charms
- Green liner gel or polish
- Strong nail charm glue or resin
- Tweezers or a wax picker tool
How to Prepare:
- Paint your base color and let it dry completely.
- Use a tiny dot of charm glue where you want your cherries to sit.
- Carefully place two red rhinestones side-by-side using your picker tool.
- Paint a delicate green ‘V’ above them for the stems and leaves.
Budget Range
- Nail Art Rhinestone Kit: $8.00
- Wax Picker Tool: $3.00
- Beetles Liner Gel Set: $12.00
7 simple ways to style short press on nails

Why to love these Nails:
Short nails are the ultimate ‘quiet luxury.’ They are practical for our busy lives—typing, gardening, or holding a little one—but they look incredibly chic and sophisticated when styled with intention.
Essential Items:
- Short squoval or round press-ons
- Stackable gold rings
- Nourishing cuticle oil
- Neutral-toned polish
How to Prepare:
- Select a length that just clears your fingertip for a natural look.
- Use sheer ‘milky’ colors to elongate the appearance of the fingers.
- Add a single minimalist gold stud to one accent nail.
- Layer thin gold bands on your fingers to draw attention to the manicure.
Budget Range
- Short Nude Press-on Set: $10.00
- Gold Plated Ring Set: $15.00
- Cuccio Revitalize Cuticle Oil: $7.00
Launch your press on nails business in 6 weeks

Why to love these Nails:
Turning your passion into a business is a beautiful way to share your art with the world. It’s about building a community and helping other women feel confident and beautiful from the comfort of your own home.
Essential Items:
- Branding materials (Logo, cards)
- Packaging (Boxes, mailers)
- A dedicated Instagram or TikTok page
- Etsy shop setup
How to Prepare:
- Weeks 1-2: Perfect your signature style and create 5 sample sets.
- Weeks 3-4: Take high-quality photos in natural light and design your logo.
- Week 5: Set up your online storefront and order shipping supplies.
- Week 6: Launch on social media with a ‘behind-the-scenes’ storytelling video.
Budget Range
- Canva Pro (Branding): $12.99/mo
- Custom Shipping Boxes: $30.00 (bulk)
- Etsy Listing Fees: $0.20 per item
Prep your cuticles for nails in 3 minutes

Why to love these Nails:
Good prep is the secret foundation of any luxury manicure. Taking care of your cuticles makes your nails look longer, cleaner, and significantly more professional. It’s a tiny ritual that yields big results.
Essential Items:
- Cuticle remover cream
- Metal or glass cuticle pusher
- Nail nippers (for hangnails only)
- Warm water soak
How to Prepare:
- Apply cuticle remover and wait 30 seconds to soften the skin.
- Gently use the pusher to lift the dead skin away from the nail plate.
- Wipe away the excess cream with a damp towel.
- Carefully trim only the loose, dead hangnails—never the living tissue!
Budget Range
- Sally Hansen Instant Cuticle Remover: $6.00
- Stainless Steel Pusher: $5.00
- Glass Nail File: $9.00
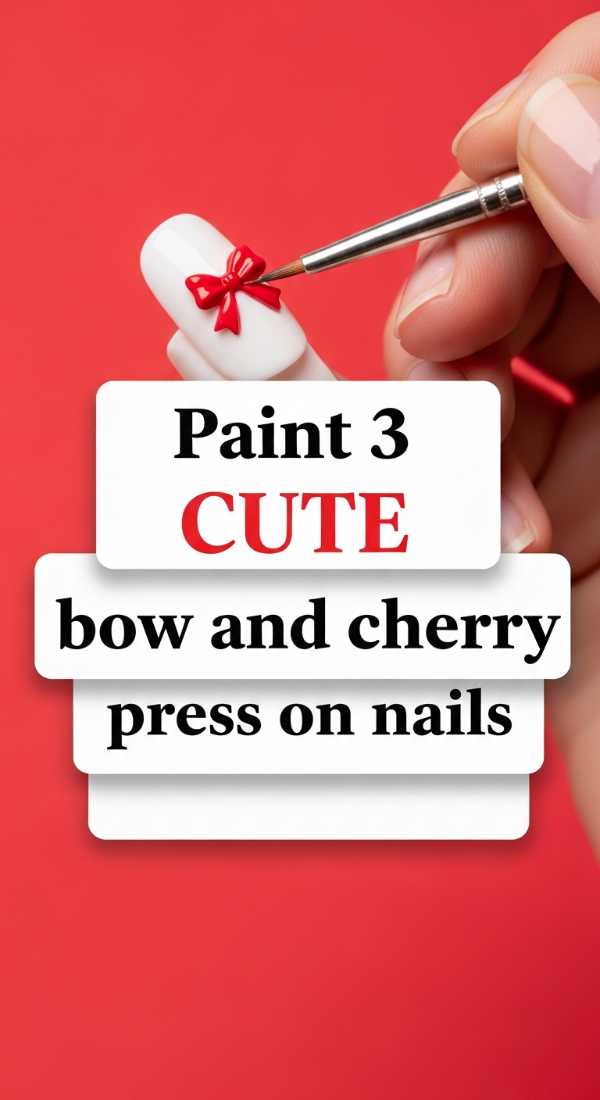
Paint 3 cute bow and cherry press on nails
Why to love these Nails:
This design is pure Coquette-core magic. It’s soft, feminine, and deeply nostalgic. Wearing bows and cherries feels like a celebration of girlhood and elegance all at once.
Essential Items:
- Pale pink base polish
- Ultra-fine detail brush
- Red and white gel paint
- Matte or glossy top coat
How to Prepare:
- Apply two coats of pale pink and cure or dry.
- Use a detail brush to paint two small loops and two tails for a bow.
- On a different nail, paint small red circles for cherries.
- Connect the cherries with thin green lines and add a tiny white ‘highlight’ dot on the fruit.
Budget Range
- Detail Brush Set: $6.00
- White and Red Gel Paint: $10.00
- Essie Ballet Slippers Polish: $9.00
Remove your press on nails in 5 safe steps

Why to love these Nails:
Safe removal is just as important as application, my loves! It ensures your natural nails stay strong and healthy, so you can keep switching up your look without any guilt or pain.
Essential Items:
- Warm water and dish soap
- Olive oil or cuticle oil
- Wooden stick
- Buffer
How to Prepare:
- Mix warm water, soap, and a generous amount of oil in a bowl.
- Soak your fingertips for 10-15 minutes to break down the adhesive.
- Gently use a wooden stick to see if the edges are lifting.
- If they don’t pop off easily, soak for another 5 minutes—never pull!
- Buff away any remaining glue residue gently.
Budget Range
- Household items (Soap/Oil): $0.00
- Nail Buffer Block: $2.00
- Wooden Orange Sticks: $3.00
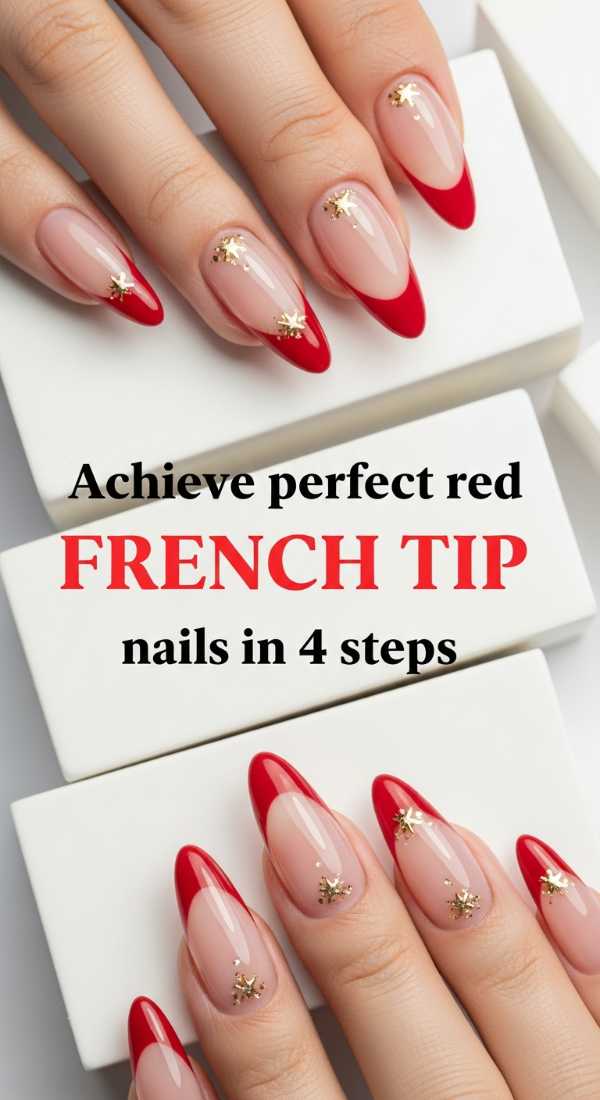
Achieve perfect red French tip nails in 4 steps
Why to love these Nails:
The red French tip is a modern classic. It’s bold yet refined, giving you that ‘femme fatale’ energy while maintaining the clean lines of a traditional French manicure. It’s total boss-lady vibes.
Essential Items:
- Classic red polish
- French tip guide stickers or a silicone stamper
- Clear base and top coat
- Cleanup brush with acetone
How to Prepare:
- Apply your base coat and let it dry completely.
- Place a guide sticker just below the free edge of your nail.
- Swipe the red polish across the tip.
- Peel the sticker while the polish is still slightly tacky for a crisp line.
Budget Range
- Red Polish (OPI Big Apple Red): $11.00
- Silicone Nail Stamper: $6.00
- French Tip Guides: $4.00
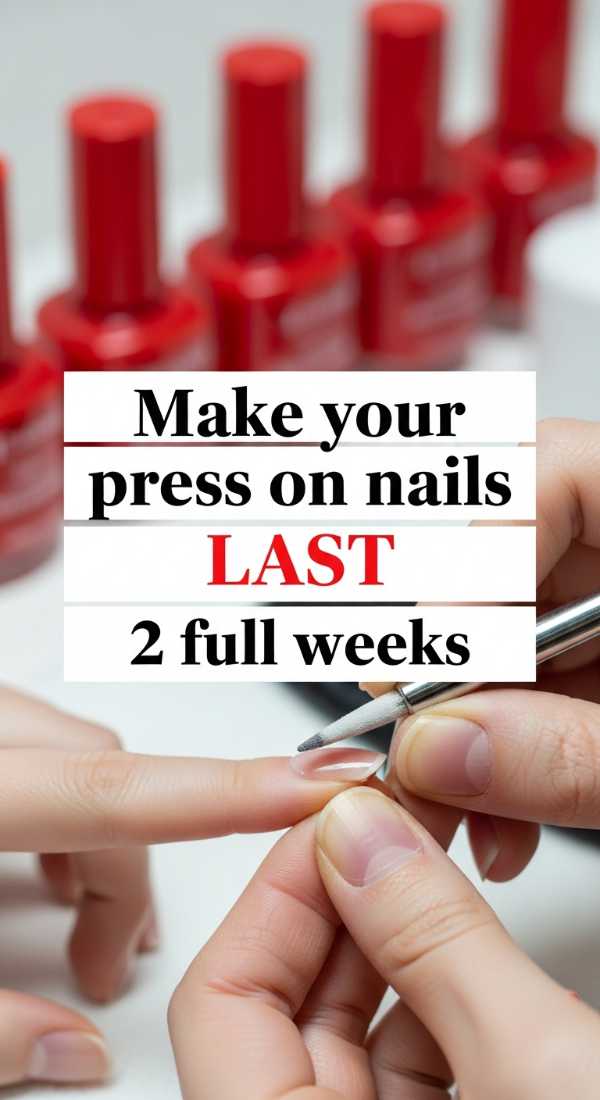
Make your press on nails last 2 full weeks
Why to love these Nails:
There is such peace of mind in knowing your nails are secure. When you follow these longevity steps, you don’t have to worry about a nail popping off during a meeting or a dinner date. It’s about reliability and beauty.
Essential Items:
- Dehydrator or 91% Alcohol
- Nail primer
- Professional strength glue
- UV lamp (if using gel glue)
How to Prepare:
- Dehydrate the nail plate thoroughly to remove every trace of moisture.
- Apply a primer to create a ‘sticky’ surface for the glue.
- Apply glue to both the nail and the press-on to avoid air bubbles.
- Avoid water for at least 2 hours after application to let the bond set.
Budget Range
- Modelones Nail Dehydrator & Primer: $12.00
- Makartt Nail Glue: $8.00
- Mini UV Lamp: $10.00
Shape your almond press on nails in 5 minutes
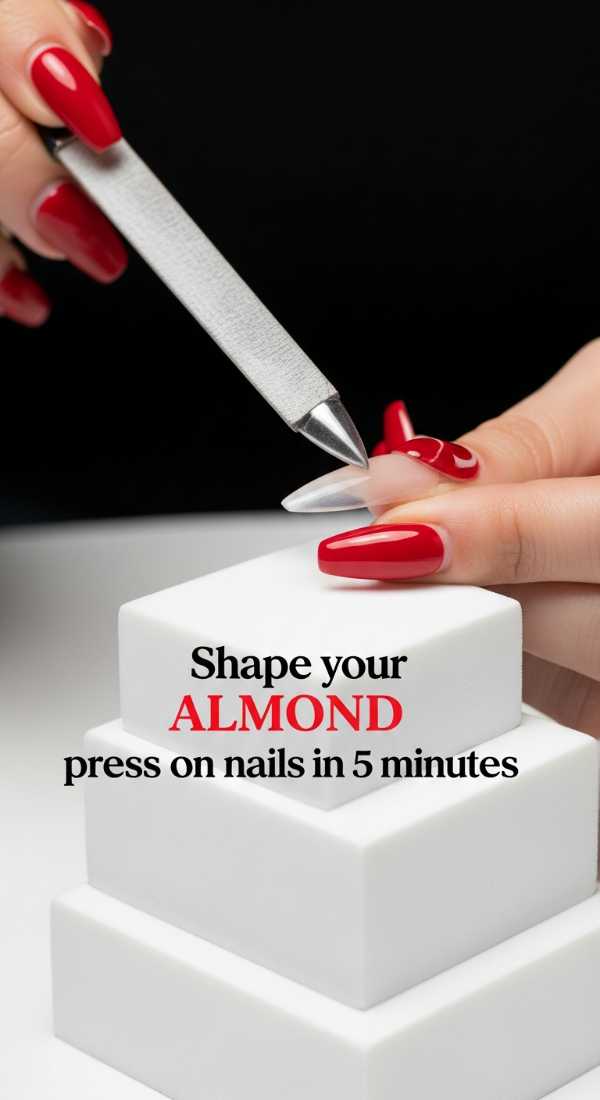
Why to love these Nails:
Almond is the most flattering shape for almost every hand. It elongates the fingers and provides a soft, elegant silhouette that feels modern and sophisticated.
Essential Items:
- Long square press-ons (to reshape)
- 180 grit nail file
- Buffer
- Fine-grit glass file
How to Prepare:
- Mark the center point of the nail tip with a tiny dot.
- File the sides at an angle toward that center point.
- Round off the sharp peak to create a soft ‘almond’ curve.
- Smooth the edges with a glass file to prevent snagging.
Budget Range
- 180/240 Grit Files: $4.00
- Clear Almond Press-on Base: $8.00
- Glass Finishing File: $10.00
Closing the Studio
Darlings, I hope this guide helps you realize that luxury isn’t something you have to go out and buy—it’s something you can create for yourself, right in the comfort of your own home. Your hands do so much for you; they create, they comfort, they work, and they love. Treating them to a beautiful set of press-ons is just one way to say ‘thank you’ to yourself. I can’t wait to see the beautiful designs you create in your own at-home studio. Keep shining, loves!