

There is a specific kind of magic that happens when you turn onto your street after a long day and your home greets you with a literal smile. We often focus so much on our interior sanctuaries—the perfect linen sheets or the organized spice drawer—that we forget our home’s exterior is the world’s first handshake. Curb appeal isn’t just about neighborhood pride; it’s about creating a transition zone that signals to your brain that you are safe, you are home, and you are surrounded by beauty.
I remember looking at my own patchy lawn and weathered porch last spring and feeling a sense of ‘maintenance fatigue.’ But once I started layering in modern textures, vertical elements, and intentional greenery, the energy of my entire property shifted. You don’t need a massive renovation budget to transform your outdoor space into a modern oasis; you just need a few weekend hours and a vision for how you want to feel when you pull into your driveway. Let’s dive into these fast, high-impact upgrades that will make your home the star of the block.
How to Build a Wood Trellis for Vertical Garden Beauty
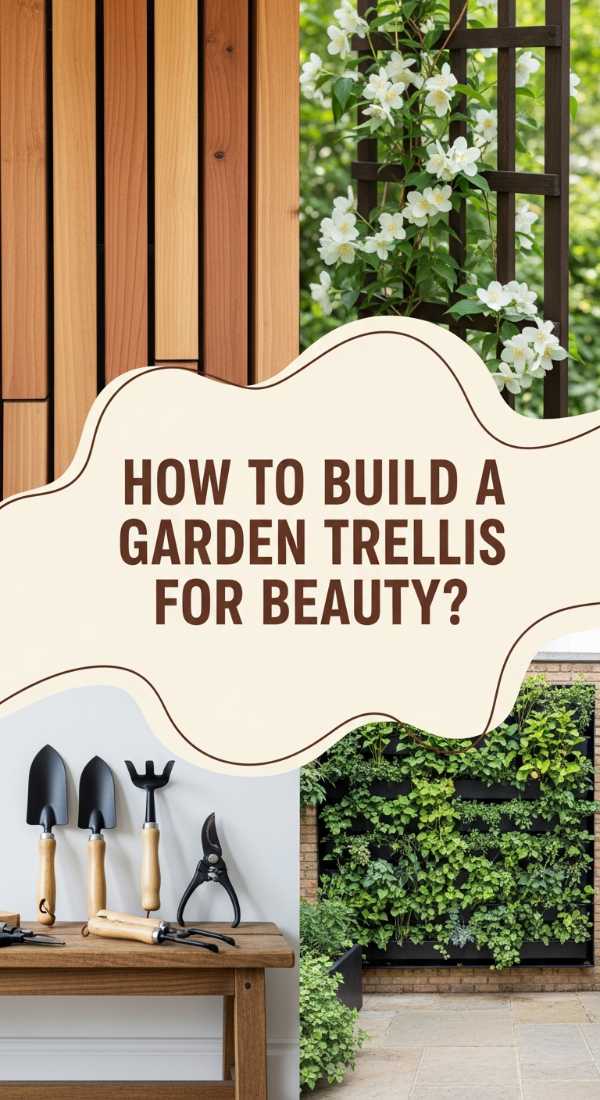
Why we love this
There is something inherently romantic and sophisticated about greenery that reaches for the sky. A custom wood trellis adds an architectural element that breaks up flat siding while providing a fragrant, tactile experience as star jasmine or climbing roses weave through the slats. We love the way the warm cedar tones catch the late afternoon sun, casting rhythmic shadows across the garden bed. As the vines grow, you’ll enjoy the delicate rustle of leaves in the breeze and a floral aroma that hits you the moment you step out the front door.
Essential Elements:
- 8-foot Cedar or Pressure-Treated 2×2 boards
- Outdoor wood screws (2-inch)
- Wood glue (exterior grade)
- Potted climbing plant (Clematis, Jasmine, or Honeysuckle)
- Drill and miter saw
- Stain or sealant
How to make it
- Measure your designated wall space and cut your vertical rails to the desired height, typically 6 to 7 feet for a standard garden bed.
- Cut your horizontal cross-slats at uniform lengths; for a modern look, keep them between 18 and 24 inches wide.
- Lay your two vertical rails on a flat surface and mark equal increments—roughly 8 to 10 inches apart—where the horizontal slats will sit.
- Apply a bead of exterior wood glue to each joint and pre-drill holes through the slats into the rails to prevent the cedar from splitting.
- Drive your screws flush with the wood surface, ensuring the frame is perfectly square by measuring diagonally from corner to corner.
- Apply a UV-resistant clear sealant or a dark ebony stain; let it cure for at least 24 hours until the surface is no longer tacky.
- Mount the trellis to your exterior wall using spacers (like small blocks of wood) to allow air circulation behind the plants, then plant your vine at the base and gently weave the first few tendrils through the bottom slats.
How to Use River Rocks for a Low Maintenance Front Yard

Why we love this
River rocks introduce an earthy, grounded texture that instantly elevates a tired flower bed into a Zen-like retreat. We love the visual contrast between the smooth, rounded surfaces of grey Mexican beach pebbles and the vibrant green of ornamental grasses. There is a satisfying, rhythmic ‘crunch’ underfoot if you use them for a path, and they offer a cooling effect to the soil during the heat of summer. The way the stones darken and glisten after a light rain adds a dynamic, changing beauty to your landscape that mulch simply cannot replicate.
Essential Elements:
- Polished River Rocks or Mexican Beach Pebbles (various sizes)
- Heavy-duty landscape fabric
- Garden staples
- Plastic or metal landscape edging
- Rake and shovel
How to make it
- Clear the area of all weeds, old mulch, and debris, digging down approximately 2 to 3 inches to create a recessed bed for the stones.
- Install your landscape edging along the perimeter to keep the rocks contained; ensure the edging is driven deep enough that it won’t trip passersby but sits high enough to create a firm border.
- Roll out high-quality landscape fabric across the entire area, overlapping seams by at least 6 inches to prevent stubborn weeds from pushing through.
- Secure the fabric tightly using garden staples every 12 inches, ensuring there are no ripples or bunches in the material.
- Pour your river rocks onto the fabric, starting from the center and working outward; use a heavy-duty rake to distribute them evenly until the fabric is completely obscured.
- For a professional finish, use larger ‘accent’ stones near the edges and smaller pebbles to fill the gaps, creating a natural, tiered look.
- Rinse the stones with a garden hose to remove dust and reveal their true colors and luster.
How to Style Front Porch Flower Pots for Instant Curb Appeal
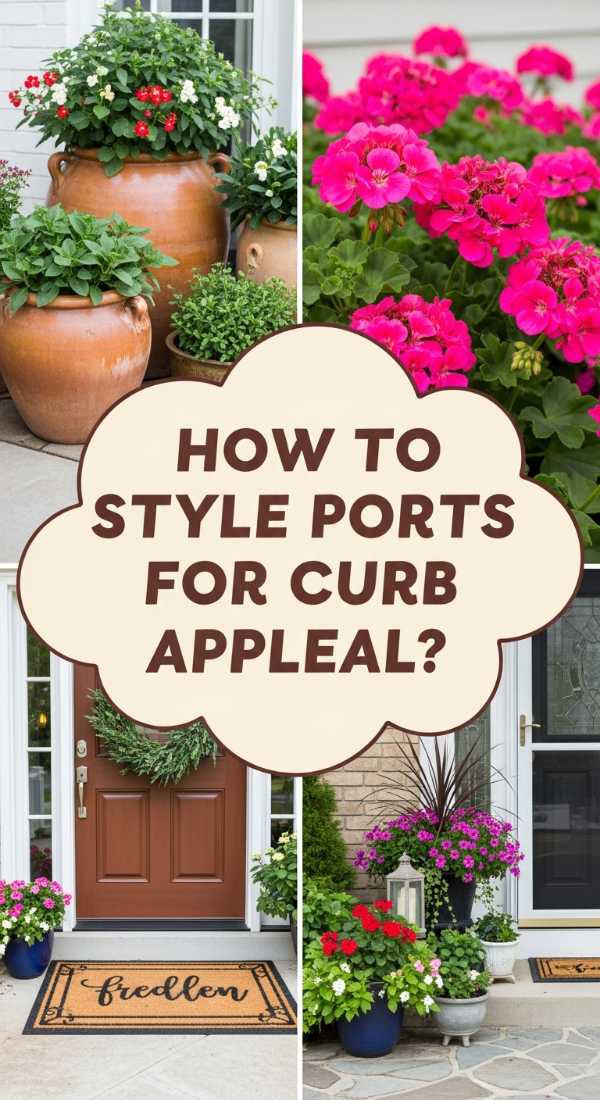
Why we love this
Flower pots are the jewelry of the home; they provide that final sparkle and pop of personality. We love the ‘thriller, filler, spiller’ method because it creates a lush, multi-dimensional display that feels professional and intentional. The scent of damp potting soil mixed with the sweet fragrance of petunias or geraniums creates an immediate sense of freshness. Touching the soft, velvety leaves of a Dusty Miller or the waxy petals of a Begonia as you walk by provides a moment of sensory grounding that makes coming home a delight.
Essential Elements:
- Large ceramic or lightweight resin planters
- High-quality potting mix with perlite
- A ‘Thriller’ plant (e.g., Dracaena or Canna Lily)
- ‘Filler’ plants (e.g., Marigolds or Lantana)
- ‘Spiller’ plants (e.g., Sweet Potato Vine or Creeping Jenny)
- Slow-release fertilizer
How to make it
- Select a pot with adequate drainage holes; if it lacks them, carefully drill three half-inch holes in the bottom to prevent root rot.
- Fill the planter two-thirds full with potting mix, lightly patting it down to remove large air pockets without compacting it too tightly.
- Incorporate a tablespoon of slow-release fertilizer granules into the top layer of soil to ensure consistent nutrient delivery over the season.
- Position your ‘Thriller’ plant—the tallest, most eye-catching piece—slightly off-center toward the back of the pot.
- Arrange your ‘Filler’ plants around the base of the thriller, ensuring they are spaced closely enough to look full but have room to breathe and expand.
- Plant your ‘Spiller’ varieties along the very edge of the pot, angling them slightly outward so they are encouraged to cascade over the rim.
- Water the arrangement thoroughly until water runs out the drainage holes, then top off any settled soil to ensure the root balls are fully covered.
How to Recreate a Nostalgic Teen Room for the Ultimate Retro Vibe
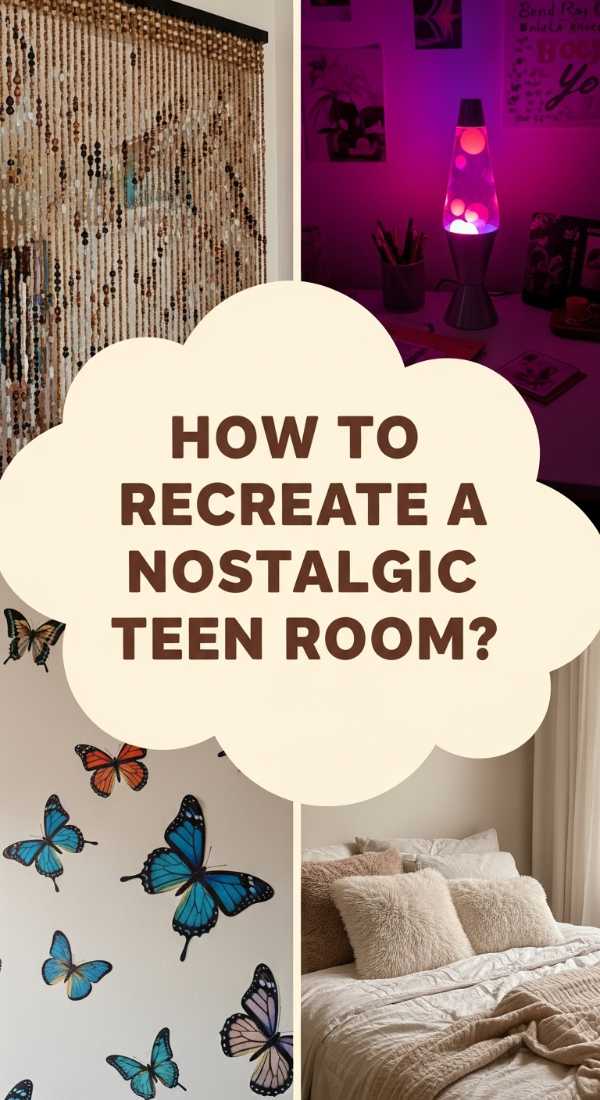
Why we love this
This is all about recapturing the effortless cool of the 90s and early 2000s—a space that feels like a warm hug of nostalgia. We love the tactile contrast between fuzzy faux-fur rugs and the sleek, glowing lines of neon signs or LED strips. The room should smell like vanilla candles and old magazines, creating a sanctuary that feels completely removed from the adult world. It’s a sensory explosion of bold colors, soft textures, and curated clutter that celebrates personal history and the joy of being young and unbothered.
Essential Elements:
- Glow-in-the-dark stars or LED light strips
- Vintage-style posters and Washi tape
- Beaded curtains for doorways
- Inflatable chairs or bean bags
- Record player or retro boombox
- Checkerboard or shag rugs
How to make it
- Clear the walls and start with a base color that feels ‘retro’—think a muted sage green, a dusty lavender, or even a classic off-white to let the decor shine.
- Map out your ‘poster wall’ by laying out your prints on the floor first; use colorful Washi tape to adhere them to the wall in a dense, overlapping collage for that lived-in look.
- Install LED light strips along the ceiling perimeter or under the bed frame, setting them to a soft purple or warm amber glow to set the mood.
- Layer your flooring by placing a small checkerboard rug over a larger neutral carpet to create visual depth and a ‘zone’ for lounging.
- Set up a dedicated ‘analog corner’ with a record player or a collection of cassettes; organize them in clear acrylic bins for easy browsing.
- Hang a beaded curtain in the doorway or over a closet to add movement and a satisfying tactile ‘clack’ every time you enter the room.
- Finish the space with a mix of high and low lighting—use a lava lamp or a neon lightning bolt sign to provide a soft, nostalgic hum of light.
How to Stencil Concrete Patios for a Custom Tile Look
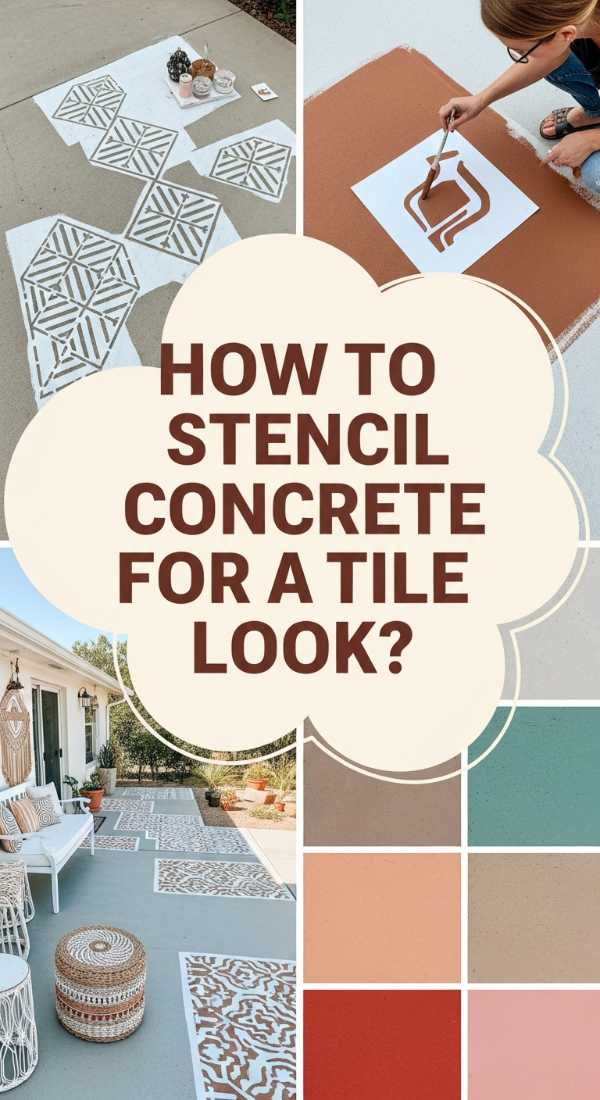
Why we love this
There is something incredibly satisfying about transforming a boring, grey slab of concrete into a work of art using just paint and a pattern. We love the crisp, clean lines of a geometric stencil that mimics expensive Mediterranean tile. Under bare feet, the painted surface feels smoother and cooler than raw concrete, and the visual transformation is so dramatic it feels like you’ve added an entire new room to your home. It’s a budget-friendly way to bring high-end design to your backyard, making every morning coffee feel like a vacation in a boutique hotel.
Essential Elements:
- Large-scale floor stencil
- Concrete-grade porch and floor paint (two colors)
- Small foam rollers and painter’s tape
- Concrete cleaner and scrub brush
- Stipple brush for touch-ups
- Clear concrete sealer
How to make it
- Thoroughly power wash or scrub the concrete with a heavy-duty degreaser to remove all oils and dirt; let it dry for a full 48 hours to ensure the paint adheres.
- Apply two thin, even base coats of your primary color using a long-handled roller; wait 24 hours for the base to fully cure before stenciling.
- Find the exact center of your patio and lay your first stencil down, securing the edges tightly with painter’s tape to prevent shifting.
- Load your foam roller with the secondary paint color, then ‘offload’ most of it onto a paper towel; the roller should feel almost dry to prevent ‘bleed’ under the stencil.
- Apply the paint using a light, dabbing motion or a very gentle roll; lift the stencil carefully to check for crisp edges before moving to the next section.
- Overlap the stencil’s registration marks with the previously painted section to ensure the pattern remains perfectly aligned across the entire floor.
- After the paint has dried for 24 hours, apply two coats of a high-quality clear concrete sealer to protect your work from UV rays and foot traffic.
How to Organize a Walk In Pantry for a Stress Free Kitchen

Why we love this
A perfectly organized pantry is the ultimate ‘deep breath’ for a busy home. We love the visual rhythm of matching glass jars filled with grains, pastas, and snacks, which allows you to see exactly what you have at a glance. The aroma of dried herbs and freshly roasted coffee beans becomes a localized sensory experience every time you open the door. There is a profound sense of peace that comes from removing visual ‘noise’ (like mismatched cardboard boxes) and replacing it with clean lines and tactile materials like wicker and bamboo.
Essential Elements:
- Airtight glass canisters in various sizes
- Woven baskets for bulky items
- Tiered shelves for canned goods
- Label maker or chalk markers
- Lazy Susans for oils and vinegars
- Uniform spice jars
How to make it
- Empty the entire pantry and wipe down every shelf with a mild cleaner; this is the time to check expiration dates and toss anything past its prime.
- Categorize your items into groups: baking, breakfast, snacks, dinner staples, and ‘backstock’ (extras of what you already use).
- Decant dry goods like flour, sugar, and pasta into glass canisters; ensure the seals are tight by pressing down firmly to maintain freshness.
- Place your tiered shelving on the middle racks for cans, ensuring the labels face forward so you can ‘shop’ your own pantry with ease.
- Install Lazy Susans in the corners or on deep shelves to hold tall bottles; spin them to ensure nothing gets lost in the dark ‘dead zones’ of the pantry.
- Use matching woven baskets for ‘ugly’ items like bags of chips or potatoes, placing them on lower shelves for easy access by children or for heavy lifting.
- Apply uniform labels to all containers at the same height to create a cohesive, professional look that reduces cognitive load during meal prep.
How to Paint a Shed Mural for an Artistic Backyard Statement

Why we love this
Why settle for a utility shed when you can have a focal point? A shed mural turns a functional structure into a canvas that expresses your home’s soul. We love the vibrant energy that a splash of botanical art or abstract shapes brings to a garden corner. As you paint, you’ll feel the sun on your back and the smooth glide of the brush against the wood grain. It’s a chance to play with color—bright oranges that mimic a sunset or deep teals that blend into the foliage—creating a whimsical atmosphere that sparks conversation at every garden party.
Essential Elements:
- Exterior latex house paint (various colors)
- High-quality synthetic brushes and rollers
- Chalk or pencil for sketching
- Painter’s tape and drop cloths
- Clear exterior topcoat (optional but recommended)
How to make it
- Clean the shed surface with a damp cloth and sand down any peeling paint or rough spots to create a smooth, workable canvas.
- Apply a high-quality exterior primer if the wood is bare or if you are moving from a very dark to a very light color; let it dry for 4-6 hours.
- Sketch your design lightly onto the shed using a piece of chalk; chalk is superior to pencil because it can be easily wiped away with a damp cloth if you make a mistake.
- Start with your ‘background’ colors first, using a roller for large areas to ensure an even, streak-free finish.
- Move to your ‘middle ground’ and ‘foreground’ details using smaller brushes; for crisp lines, use painter’s tape, but for a hand-painted look, embrace the slight imperfections of freehand strokes.
- Watch the ‘drying cues’—if the paint looks matte and no longer reflects light, it is usually safe for a second coat, which will give the colors more depth and vibrancy.
- Once the mural is fully dry (usually 24-48 hours), apply a UV-protective clear coat to prevent the colors from fading in the direct sun.
How to Design a Duck Enclosure for a Happy Backyard Flock

Why we love this
Ducks bring a playful, rhythmic energy to a backyard with their soft quacks and waddling charm. We love a well-designed enclosure because it balances the ducks’ need for safety and splashing with the owner’s need for a clean, odor-free garden. The sound of water splashing in a small pond and the sight of happy birds foraging through the grass creates a rustic, homestead-chic vibe. It’s a sensory experience that connects you to the seasons and the cycle of nature, all while providing your feathered friends with a secure, beautiful sanctuary.
Essential Elements:
- Hardware cloth (not chicken wire) for predator proofing
- Pressure-treated lumber for the frame
- A ‘splash zone’ (kiddie pool or pre-formed pond)
- Bedding (pine shavings or hemp)
- Automatic waterer and feeder
- Nesting box
How to make it
- Level the ground where the enclosure will sit; ducks are heavy and prone to ‘bumblefoot’ if they spend too much time on uneven or rocky terrain.
- Build a sturdy wooden frame at least 4 feet tall to allow for easy cleaning; attach hardware cloth to the exterior using heavy-duty staples every 2 inches.
- Dig a trench 6 inches deep around the perimeter and bury the hardware cloth to prevent burrowing predators like foxes or raccoons from entering.
- Install a dedicated ‘wet zone’ using a sturdy plastic tub; ensure there is a ramp for the ducks to exit easily and a drainage system (like a ball valve) for daily water changes.
- Layer the ‘dry zone’ with 4-6 inches of hemp bedding; hemp is more absorbent than straw and does a better job of neutralizing the aroma of the enclosure.
- Construct a small, elevated coop within the enclosure for nighttime safety; ensure it has wide doors for ventilation and a soft nesting area for egg-laying.
- Check the ‘comfort cues’—if the ducks are lounging quietly and preening their feathers, your layout provides the perfect balance of security and stimulation.
How to Create a Private Hot Tub Oasis for Maximum Relaxation

Why we love this
Imagine stepping out of your back door into a world of rising steam, the scent of cedar, and the soft glow of amber string lights. A private hot tub oasis is the ultimate luxury DIY, providing a tactile escape from the digital world. We love the feeling of warm water against cool night air and the way privacy screens create a ‘room’ within the garden. It’s a space that appeals to every sense: the bubbling sound of the jets, the visual beauty of surrounding plants, and the sheer physical relief of heat on tired muscles.
Essential Elements:
- Hot tub (plug-and-play or permanent)
- Cedar privacy lattice or outdoor curtains
- Weather-resistant outdoor rug
- Submersible LED lights
- Side table for towels and drinks
- Potted palms or tall grasses
How to make it
- Select a level, reinforced surface (like a concrete pad or a heavy-duty deck) that can support the weight of the tub when filled with water and people.
- Place the tub in a position that maximizes views of the garden while keeping the ‘mechanical side’ (the panel) accessible for maintenance.
- Install vertical privacy screens on at least two sides; use cedar slats with 1-inch gaps to provide seclusion without blocking the cooling evening breeze.
- Lay down a high-quality outdoor rug around the base of the tub to create a soft landing for bare feet and to keep grass and dirt out of the water.
- String warm-toned Edison bulbs overhead, ensuring they are connected to a GFCI-protected outlet and hung high enough to stay dry.
- Arrange large planters with ‘living walls’ (like bamboo or tall grasses) to further soften the edges of the tub and provide a lush, jungle-like feel.
- Test the water chemistry and adjust the heat to a comfortable 100-104 degrees; wait until the water is crystal clear and the steam is rising steadily before your first soak.
How to Plan a Rectangular Backyard for Better Outdoor Living

Why we love this
The ‘bowling alley’ backyard can be a challenge, but when planned correctly, it becomes a sophisticated series of outdoor ‘rooms’ that draw you through the space. We love the way long, clean lines can be used to create a sense of journey and discovery. The smell of charcoal from the dining zone, the soft grass of the play zone, and the crackle of a fire pit at the far end provide distinct sensory milestones. It’s about maximizing every square inch of your property to create a flow that feels both expansive and intimate.
Essential Elements:
- Graph paper or landscape design software
- Hardscape materials (pavers, gravel, or decking)
- Zoning elements (low hedges, planters, or rugs)
- Multi-functional furniture
- Strategic lighting (path lights and spotlights)
How to make it
- Divide your rectangular lot into three distinct ‘zones’: a dining area near the house, a transition/greenery area in the middle, and a lounge/fire pit area at the back.
- Create a ‘spine’ or pathway that connects these zones; a diagonal path can actually make a narrow yard feel wider by drawing the eye across the space.
- Use hardscaping (like large format pavers) for the dining zone to ensure a level surface for tables and chairs; leave 2-inch gaps between pavers and fill with thyme for a fragrant, green ‘grout.’
- Incorporate ‘vertical breaks’ such as a pergola or a row of tall Italian Cypress trees to prevent the eye from seeing the entire yard at once, which adds a sense of mystery.
- Place your largest furniture pieces against the perimeter to keep the center of the ‘rooms’ open and airy, preventing a cluttered feel.
- Install path lighting at 6-foot intervals along the main walkway; use warm-toned bulbs that point downward to illuminate the ground without creating glare.
- Evaluate the ‘flow’ by walking the path multiple times; if you can move easily from the grill to the fire pit without feeling cramped, your rectangular plan is a success.
The Final Touch: Why Your Home Deserves This Love
Transforming your home’s exterior is more than just a weekend project; it’s an investment in your daily happiness. Whether you choose the structural elegance of a wood trellis or the cozy nostalgia of a retro-inspired room, these upgrades serve as a reminder that your environment has the power to shift your mood. Curb appeal isn’t just for the neighbors—it’s for you. It’s the visual exhale you take when you pull into the driveway. So, pick one project, grab your tools, and start creating the haven you deserve.