
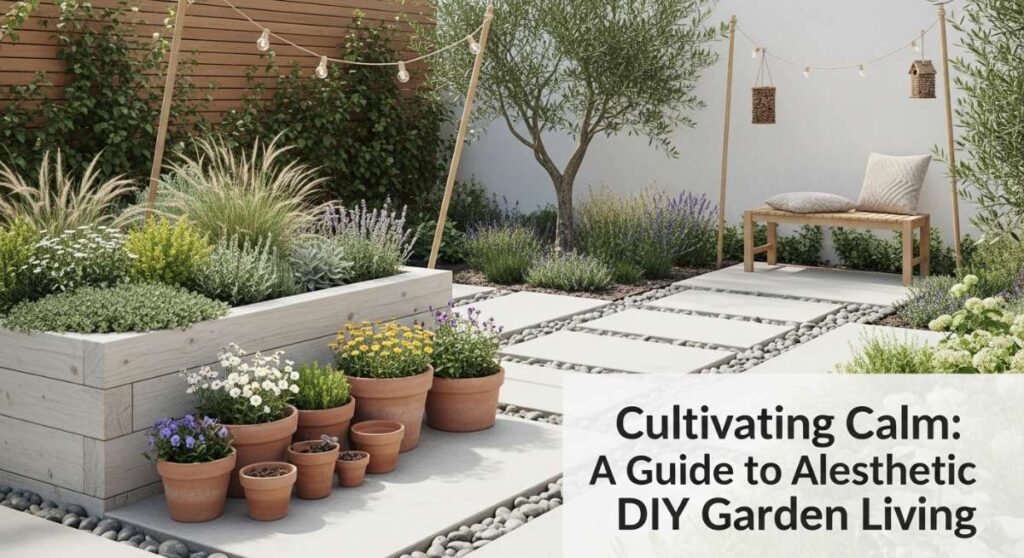
There is a specific kind of magic that happens when the world slows down and the only sound is the gentle rustle of leaves against a soft breeze. For me, that magic lives in my garden—a space I’ve slowly transformed from a patch of grass into a living, breathing sanctuary. It’s more than just landscaping; it’s about creating a lifestyle where every morning coffee feels like a retreat and every sunset is a private viewing of nature’s finest art.
In our fast-paced digital age, cultivating calm has become an essential act of self-care. We often look for peace in vacations or spa days, but I’ve found that the most sustainable tranquility is built right outside our back doors. By infusing our outdoor spaces with DIY charm and aesthetic intention, we create a bridge between our busy lives and the grounding power of the earth. It’s about the tactile joy of soil between your fingers and the visual delight of a well-placed lantern.
Today, I’m sharing my ultimate guide to aesthetic DIY garden living. Whether you have a sprawling backyard or a tiny balcony, these projects and styling tips will help you craft a space that feels uniquely yours. Let’s dive into the art of slow living and discover how to turn your garden into a whimsical, boutique-inspired haven that nourishes the soul and sparks endless inspiration.
How to Create a Dreamy Sanctuary for Ultimate Peace
Why we love this
Creating a sanctuary is about more than just aesthetics; it’s about crafting an emotional escape where the weight of the day simply melts away. Imagine sinking into a pile of weather-resistant velvet pillows while the scent of lavender and jasmine wafts through the air, wrapping you in a botanical embrace. This setup provides a tactile and olfactory experience that grounds the senses, offering a soft place to land after a long day. The visual harmony of muted tones against vibrant greenery creates a curated, high-end feel that makes your own backyard feel like a hidden five-star resort.
Essential Elements:
- Weather-proof floor cushions and outdoor rugs
- A hammock or a low-profile lounge chair
- Potted fragrant herbs like lavender, rosemary, and jasmine
- Sheer outdoor curtains for privacy and soft light diffusion
- A small side table for tea or books
How to make it
- Identify the most secluded corner of your garden that receives dappled sunlight; this creates a natural play of light and shadow that enhances the ‘dreamy’ vibe.
- Clear the ground of debris and lay down a durable, aesthetic outdoor rug to define the space and provide a clean foundation for your textiles.
- Install your main seating element, such as a freestanding hammock or a group of oversized floor cushions, ensuring the arrangement faces the most lush part of your garden.
- Hang sheer white outdoor curtains from nearby branches or a simple DIY timber frame to create a sense of enclosure and filter harsh afternoon sun into a soft, ethereal glow.
- Surround the perimeter with large terracotta pots filled with fragrant plants, placing them close enough so that their scent is easily carried to your seating area by the breeze.
- Finish the space with a small, rustic wooden table and a woven basket filled with lightweight linen throws for those cooler twilight hours.
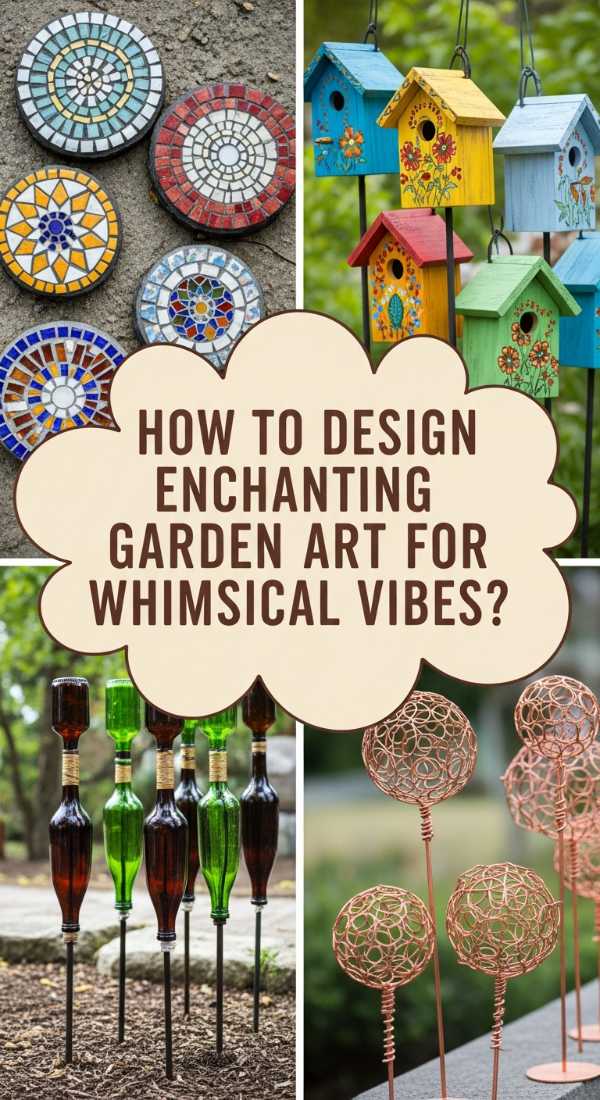
How to Design Enchanting Garden Art for Whimsical Vibes
Why we love this
Garden art acts as the jewelry of the outdoor world, adding those tiny, sparkling details that catch the eye and ignite the imagination. There is something deeply satisfying about stumbling upon a handcrafted mosaic or a delicate wire sculpture nestled among the ferns; it suggests a space that is loved and lived-in. The textures of smooth glass, rugged stone, and twisted metal provide a beautiful contrast to the soft organic shapes of foliage. These whimsical touches turn a standard garden into a narrative space, telling a story of creativity and personal expression through every shimmering piece.
Essential Elements:
- Smooth river stones or concrete stepping stone kits
- Colorful glass gems or broken ceramic tiles
- Copper or galvanized steel wire
- Waterproof outdoor adhesive or thin-set mortar
- Exterior-grade sealant
How to make it
- Sketch out a simple whimsical design, such as a dragonfly or a swirling galaxy, on a piece of paper to use as a template for your mosaic.
- Mix your concrete or mortar in a bucket until it reaches a thick, peanut-butter-like consistency; pour it into a circular mold or directly onto a pre-cleaned stone surface.
- Carefully press your glass gems and ceramic shards into the wet mortar, following your design and ensuring no sharp edges are sticking up too far.
- Let the piece cure for at least 24 hours in a dry, shaded area to prevent cracking from rapid moisture loss.
- If creating wire art, use pliers to bend copper wire into organic shapes like oversized flower petals or spiral stakes, then push them firmly into the soil near eye-level plants.
- Once the mosaic is dry, apply a clear, UV-resistant exterior sealant with a soft brush to protect the colors from fading and the mortar from crumbling.
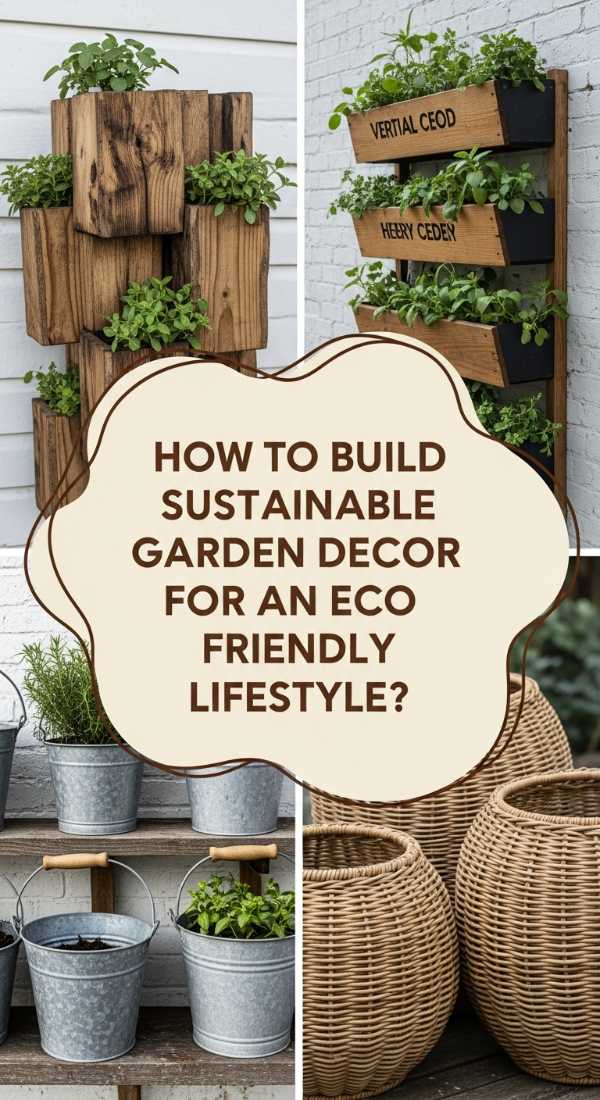
How to Build Sustainable Garden Decor for an Eco-Friendly Lifestyle
Why we love this
Sustainability is the ultimate luxury in modern gardening, as it honors the very earth we are trying to beautify. Using reclaimed wood or upcycled materials gives your garden a soulful, storied feel that brand-new store-bought items simply can’t replicate. We love the rugged texture of weathered pallet wood paired with the industrial chic of recycled metal accents. It creates a ‘lived-in’ boutique aesthetic that feels both sophisticated and environmentally conscious, proving that high-style design doesn’t have to come at the expense of our planet’s health.
Essential Elements:
- Reclaimed wooden pallets or cedar scraps
- Non-toxic wood stain or linseed oil
- Galvanized screws and a power drill
- Recycled glass bottles or tin cans
- Heavy-duty twine or natural jute
How to make it
- Dismantle your wooden pallets carefully using a crowbar, removing all old nails and sanding the planks down to a smooth finish to reveal the natural grain.
- Measure and cut the planks into four equal sides to create a box-style planter, ensuring you pre-drill holes to prevent the aged wood from splitting during assembly.
- Secure the sides together using galvanized screws, and add a base with small gaps for drainage to keep your plants’ roots healthy.
- Apply a coat of natural linseed oil or a low-VOC exterior stain to protect the wood from rot while maintaining its beautiful, raw texture.
- For hanging decor, clean old tin cans, paint them in muted earth tones, and punch holes in the sides to create lantern patterns or hanging herb holders.
- Assemble your pieces in a tiered arrangement in your garden, using the varying heights to create visual interest and maximize growing space.
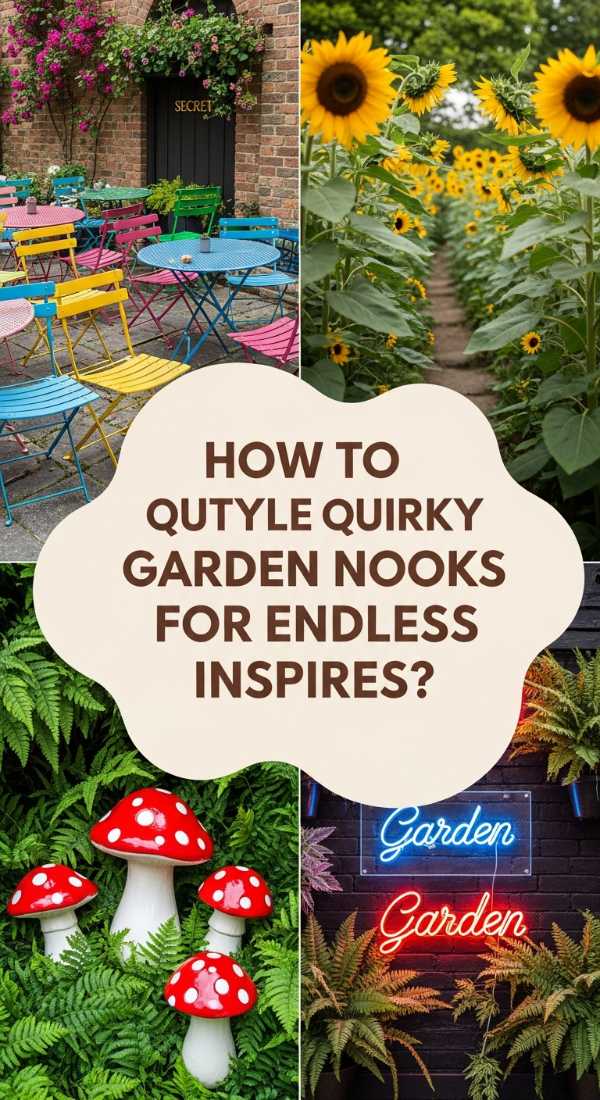
How to Style Quirky Garden Nooks for Endless Inspiration

Why we love this
Quirky nooks are the secret chapters of your garden, offering unexpected moments of delight that break the traditional rules of landscaping. These spots are perfect for those who love an eclectic, curated look that blends vintage charm with botanical lushness. Whether it’s a repurposed chair acting as a plant stand or a tiny hidden bookshelf, these nooks invite you to linger a little longer and look a little closer. The mix of hard and soft textures—like rusted iron against velvet moss—creates a visual tension that is incredibly photogenic and endlessly inspiring for any creative soul.
Essential Elements:
- An antique chair or a vintage stepladder
- Eclectic, mismatched ceramic pots
- A collection of hardy succulents and trailing vines
- Small weather-resistant trinkets or figurines
- Outdoor-safe paint in a bold, accent color
How to make it
- Select a small, overlooked area of the garden, perhaps under a large tree or at the end of a path, to serve as your ‘secret’ nook.
- Take your vintage chair or ladder and give it a ‘distressed’ look with a light sanding and a coat of weather-proof chalk paint in a soft sage or terracotta hue.
- Place the furniture piece in your chosen spot, ensuring it is stable on the ground (you may need to place a few flat stones under the legs).
- Arrange your mismatched pots on the seat, rungs, or around the base, choosing a mix of heights and textures to create a tiered, overflowing look.
- Plant a ‘hero’ plant like a String of Pearls or Ivy in the highest pot so it can drape down over the furniture, softening the hard edges.
- Tuck a few personal treasures, like an old brass bell or a quartz crystal, among the foliage to give the nook a sense of mystery and personality.
How to Execute Creative Garden Decor Projects for a Boutique Look
Why we love this
The boutique look is all about those high-contrast, polished finishes that make a space feel professionally designed yet deeply personal. We love this approach because it elevates the DIY experience, using sharp lines and sophisticated color palettes to create a high-end outdoor environment. Think matte black finishes against lush emerald greens, or crisp white stencils on natural wood. These projects give your garden a structured, architectural feel that serves as the perfect backdrop for hosting elegant garden parties or simply enjoying a quiet, stylish afternoon in the sun.
Essential Elements:
- Custom stencils or painter’s tape
- Matte black or crisp white exterior spray paint
- Large, uniform planter boxes or concrete pavers
- Clear matte outdoor varnish
- Geometric design templates
How to make it
- Start with a set of plain concrete pavers or simple wooden planters; ensure they are completely dry and free of dust or oils before you begin.
- Using your stencils or painter’s tape, mark out a sharp geometric pattern—like a chevron or a minimalist grid—on the surface of the item.
- Apply the exterior spray paint in thin, even coats, holding the can about 10 inches away to avoid drips and ensure a smooth, professional finish.
- Carefully peel away the tape while the paint is still slightly tacky to achieve the sharpest lines possible, then let it dry completely for 4 hours.
- Apply a coat of clear matte varnish over the design to protect it from foot traffic or watering, ensuring the ’boutique’ look lasts through the seasons.
- Position these pieces in symmetrical groups to create a sense of order and high-design intentionality within your more organic garden beds.
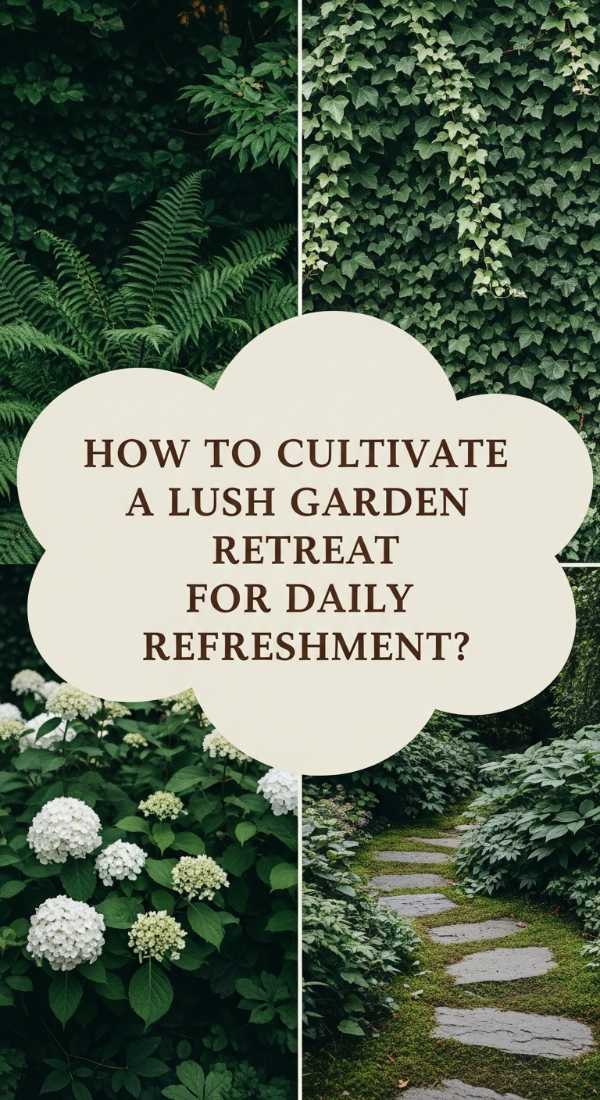
How to Cultivate a Lush Garden Retreat for Daily Refreshment
Why we love this
A lush garden retreat is the ultimate antidote to the ‘concrete jungle’ feeling of modern life. It’s a sensory immersion into deep greens, varied leaf textures, and the cooling presence of water. We love this because it creates a microclimate of freshness, where the air feels cleaner and the temperature feels a few degrees cooler. The sound of a small bubbling fountain combined with the visual density of ferns and hostas creates a cocoon-like effect that completely shuts out the outside world, making it the perfect spot for daily meditation or a refreshing morning stretch.
Essential Elements:
- A variety of foliage plants (ferns, hostas, caladiums)
- A solar-powered water fountain or birdbath
- Organic mulch (like cedar chips or cocoa hulls)
- Slow-release organic fertilizer
- Drip irrigation or a high-quality watering can
How to make it
- Focus on ‘layering’ your plants: place taller shrubs in the back, medium perennials in the middle, and low-growing groundcovers at the front to create a wall of greenery.
- Enrich your soil with high-quality compost and slow-release organic fertilizer to ensure your plants have the nutrients they need for that deep, vibrant green color.
- Install a small solar-powered fountain in the center of the retreat; the sound of moving water is crucial for masking neighborhood noise and attracting birds.
- Apply a thick 3-inch layer of organic mulch around all your plants to retain moisture in the soil and provide a clean, finished look to the beds.
- Group plants with similar water needs together to make maintenance easier and ensure every plant stays hydrated and turgid.
- Prune any dead leaves weekly to keep the retreat looking intentional and healthy, allowing the light to reach the lower layers of your botanical sanctuary.
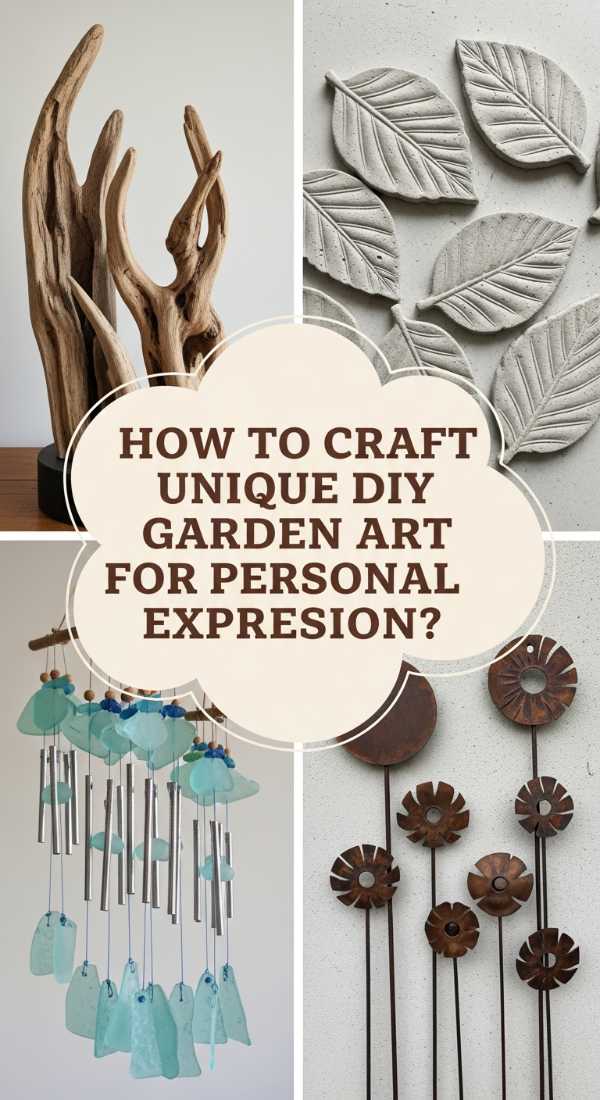
How to Craft Unique DIY Garden Art for Personal Expression

Why we love this
There is nothing more satisfying than seeing your own artistic personality reflected in your garden. DIY garden art allows you to break away from big-box store trends and create something that truly resonates with your soul. Whether it’s a hand-painted terracotta pot or a custom wind chime made from found objects, these pieces are conversation starters. We love the vibrant energy that hand-painted designs bring to a space—the brushstrokes add a human touch that complements the wild, untamed beauty of the plants, creating a balanced and artistic outdoor gallery.
Essential Elements:
- Terracotta pots in various sizes
- Acrylic outdoor paints or paint pens
- Sealing primer
- Natural elements like driftwood or large seashells
- Nylon threading for chimes or hanging art
How to make it
- Clean your terracotta pots thoroughly with a stiff brush and water to remove any salt deposits; let them dry completely in the sun.
- Apply a clear or white sealing primer to the pots; this prevents the porous clay from soaking up all your paint and ensures your colors stay bright.
- Use your acrylic paints to create abstract designs, botanical illustrations, or even simple color-blocked sections that match your garden’s palette.
- If making a chime, drill small holes in pieces of driftwood or large shells and thread them onto nylon cord, spacing them so they gently clink together in the wind.
- Seal all painted surfaces with a UV-resistant gloss or matte spray to prevent the sun from bleaching your artwork over time.
- Display your creations at different heights—place some on the ground, some on pedestals, and hang others from branches—to create a dynamic visual experience.
How to Light a Magical Garden Path for Dreamy Evenings
Why we love this
Lighting is the ‘fairy dust’ of garden design; it completely transforms the space the moment the sun dips below the horizon. A well-lit path creates a sense of journey and mystery, beckoning you to take a twilight stroll. We love the warm, amber glow of low-voltage or solar lights because it mimics the cozy ambiance of candlelight. The way the light catches the edges of leaves and casts long, soft shadows on the ground creates a cinematic, dreamy atmosphere that turns your backyard into an enchanted forest after dark.
Essential Elements:
- Solar-powered path lights or fairy light strings
- Gravel, wood chips, or flat stepping stones
- Low-voltage LED spotlights for ‘uplighting’ trees
- Hanging lanterns with LED candles
- Small garden stakes
How to make it
- Outline your path with a garden hose to find a natural, curving shape that flows with the landscape rather than a stiff straight line.
- Clear the grass and soil to a depth of about 2 inches and fill it with light-colored gravel or wood chips to help reflect the light upwards.
- Space your solar path lights about 3 to 4 feet apart along the edges, staggering them on either side of the path to avoid a ‘runway’ look.
- Place one or two LED spotlights at the base of your most dramatic trees, aiming them upwards to highlight the bark texture and canopy.
- Weave copper fairy lights through the branches of nearby shrubs or along a fence line to create a background ‘glimmer’ effect.
- Hang several lanterns at eye level from tree branches or shepherd’s hooks to add vertical interest and a soft, diffused glow to the walkway.
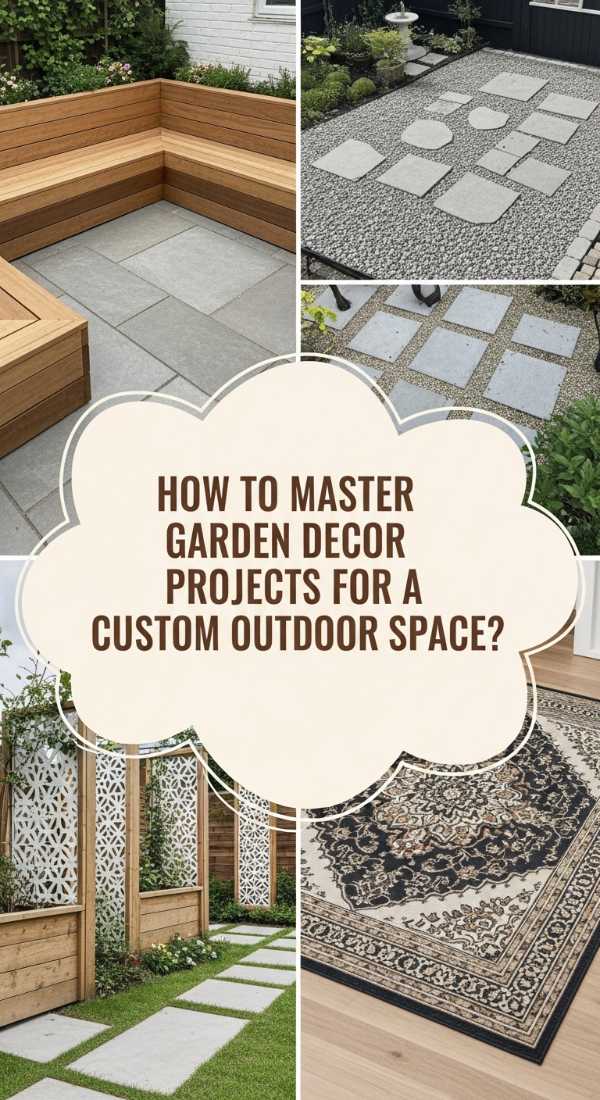
How to Master Garden Decor Projects for a Custom Outdoor Space
Why we love this
Mastering custom garden projects is about taking control of your space’s functionality and style simultaneously. When you build something specifically for your garden’s dimensions, like a custom herb wall or a built-in bench, it feels integrated and permanent. We love the architectural strength that custom timber projects provide; they anchor the garden and give it a ‘backbone.’ The smell of fresh-cut cedar and the sight of perfectly joined wood slats bring a sense of craftsmanship and pride that makes every moment spent outdoors feel like an accomplishment.
Essential Elements:
- Cedar or redwood lumber (naturally rot-resistant)
- Heavy-duty wood glue and exterior screws
- Level and measuring tape
- A miter saw or circular saw
- Sandpaper (80 and 120 grit)
How to make it
- Measure the exact dimensions of the area where you want your custom piece (like a vertical herb wall) and create a detailed cut list for your lumber.
- Cut your wood to size, ensuring all edges are square; sand the surfaces thoroughly starting with 80 grit and finishing with 120 grit for a professional feel.
- Assemble the frame of your project first, using wood glue and screws to create a rock-solid foundation that won’t wobble on uneven ground.
- If building a vertical wall, attach horizontal slats with 1-inch gaps between them to allow for air circulation and easy attachment of pot hangers.
- Check your work with a level frequently; in a garden, even a small tilt can become very obvious once you add heavy plants.
- Finish the project with a high-quality exterior stain or sealer that complements the existing colors of your home’s exterior for a seamless, ‘built-in’ look.
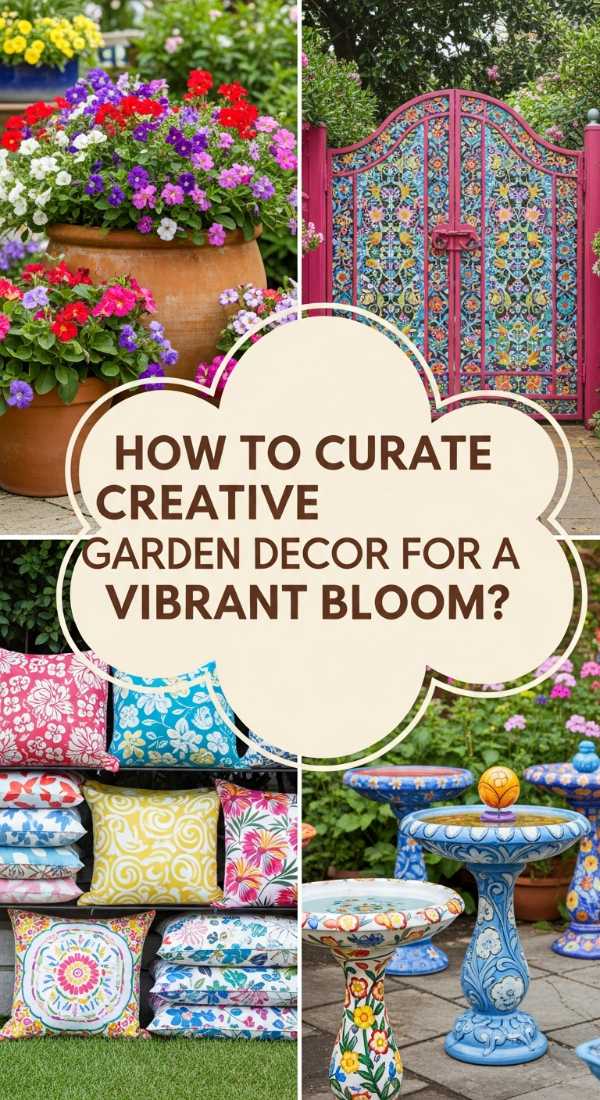
How to Curate Creative Garden Decor for a Vibrant Bloom
[IMAGE_10]
Why we love this
A vibrant bloom is a celebration of life and color, and the right decor can amplify this natural beauty to spectacular heights. By curating your decor to match or contrast with your flowers, you create a high-impact visual feast. We love the way a bright cobalt blue pot makes a yellow marigold ‘pop,’ or how a white trellis provides a clean canvas for deep purple clematis. This approach is about intentionality—treating your garden like a living painting where every planter, stake, and trellis is a carefully chosen stroke of color that enhances the overall masterpiece.
Essential Elements:
- Color-coordinated planters and pots
- Obelisks or trellises for vertical blooming
- High-quality potting mix with perlite
- A selection of high-impact flowering plants (dahlias, petunias, zinnias)
- Liquid seaweed or flower-boosting fertilizer
How to make it
- Choose a color palette for your season—such as ‘Sunset Tones’ (oranges, pinks, yellows) or ‘Cool Serenity’ (purples, blues, whites).
- Select planters that either match your palette for a monochromatic look or sit opposite on the color wheel for a high-contrast, ‘vibrant’ effect.
- Install vertical elements like obelisks or wire trellises in the center of your pots to encourage climbing flowers to grow upwards, creating a pillar of color.
- Fill your containers with a high-quality potting mix and plant your flowers densely (the ‘thriller, filler, spiller’ method) for an immediate look of abundance.
- Deadhead (remove) spent blooms every few days to encourage the plants to put their energy into creating new, vibrant flowers rather than seeds.
- Feed your blooming plants with a high-potassium liquid fertilizer every two weeks to keep the colors intense and the foliage lush throughout the growing season.
The Final Flourish: Embracing the Garden Life
Cultivating an aesthetic DIY garden is a journey, not a destination. It’s about the small joys—the first sprout of a dahlia, the way the light hits your handmade mosaic, and the quiet peace of a sanctuary you built with your own two hands. As you implement these projects, remember that perfection isn’t the goal; personal expression and tranquility are. Your garden is a reflection of your inner landscape, a place to grow alongside your plants. So, take a deep breath, grab your trowel, and start creating your own slice of botanical heaven.