

Class of 2026: The Ultimate Graduation to Summer Transition Nail Guide
Oh, my loves, can you feel it? That sweet, buzzing energy in the air that only comes when one chapter is softly closing and a bright, sun-drenched one is about to begin. To my beautiful Class of 2026, you’ve worked so hard, poured your heart into every late-night study session, and now, the finish line is finally sparkling in front of you. It’s a moment of pure magic, a time to celebrate how far you’ve come while looking forward to those long, lazy summer days that are just around the corner.
I wanted to create something special for you—a little cloud-soft embrace for your hands as you hold that hard-earned diploma and then, eventually, a cold iced latte by the pool. This guide is more than just polish; it’s about expressing the joy, the growth, and the vibrant spirit of this milestone year. Whether you’re walking across the stage or dancing under the sunset, your nails should tell your story. So, let’s dive into these dreamy designs together, shall we?
5 simple steps to style your graduation nails

Why to love this Design:
Graduation nails are all about that timeless, sophisticated glow. You want something that looks elegant in photos but still feels uniquely you as you flip your tassel. It’s a clean, polished aesthetic that says, ‘I’ve arrived, and I’m ready for the world.’
Essential Elements:
- Soft milky white or sheer nude base
- Subtle shimmer or micro-pearl finish
- Short to medium almond or coffin shape
- A touch of school color (optional)
How to Prepare:
- Gently push back cuticles for a clean canvas.
- Apply a strengthening base coat to prevent chipping.
- Layer two thin coats of a milky white polish.
- Add a single thin layer of pearl top coat for that glazed effect.
- Finish with high-shine top coat and cuticle oil.
Budget Range
- OPI Nail Envy Strengthener – $19
- Essie ‘Marshmallow’ Polish – $10
- Sally Hansen Miracle Gel Top Coat – $11
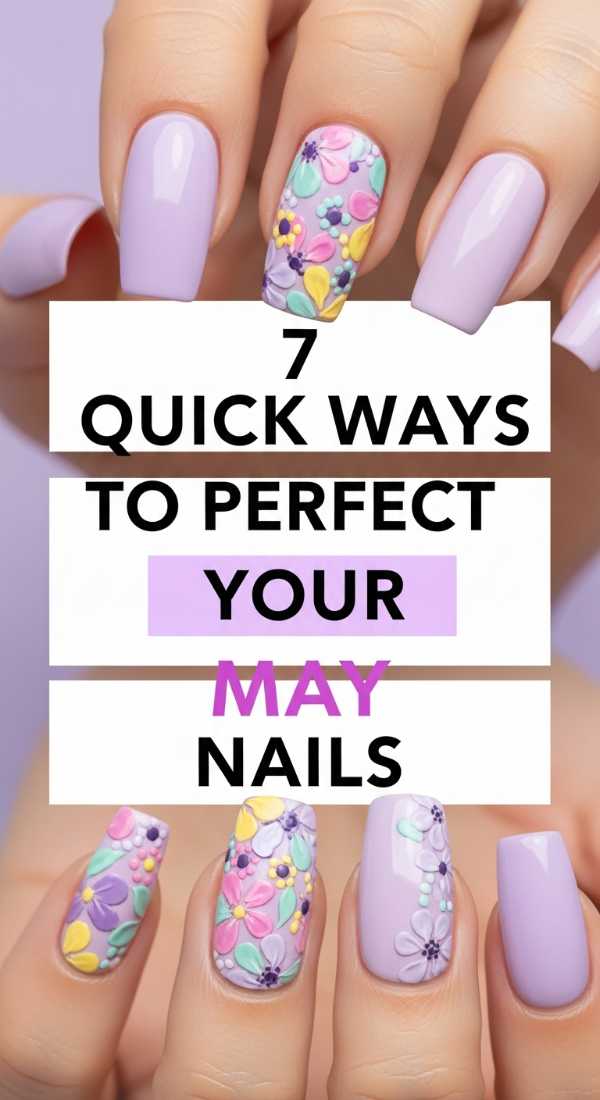
7 quick ways to perfect your May nails
Why to love this Design:
May is the bridge between spring’s whispers and summer’s shouts. It’s the perfect time for ‘blooming’ nails that feel fresh, hopeful, and light. These designs are like a gentle garden party at your fingertips, capturing the essence of new beginnings.
Essential Elements:
- Pastel lavender or soft sage green
- Tiny hand-painted floral accents
- Matte or satin finish
- Negative space designs
How to Prepare:
- Shape nails into a soft square or round.
- Apply a matte base color.
- Use a dotting tool to create simple five-petal flowers.
- Place a tiny gold stud in the center of each flower.
- Use a fine liner brush for thin green stems.
- Seal with a matte top coat for a velvet feel.
- Keep hands hydrated with a rose-scented lotion.
Budget Range
- Zoya ‘Abby’ Lavender Polish – $12
- Nail Art Dotting Tool Set – $6
- Olive & June Matte Top Coat – $9
4 easy techniques for sunset chrome nails

Why to love this Design:
Imagine the sky at 8:00 PM on a June evening—that’s what sunset chrome is all about. It’s mesmerizing, ethereal, and has that ‘lit from within’ look. It’s perfect for the girl who wants to carry a piece of the golden hour with her everywhere she goes.
Essential Elements:
- Orange, pink, and gold gradient
- Chrome or iridescent powder
- Glossy gel-like finish
How to Prepare:
- Sponge on a gradient of pink and orange.
- While still slightly tacky, buff in a gold chrome powder.
- Remove excess powder with a soft brush.
- Apply a thick, plush top coat to lock in the shine.
Budget Range
- Holo Taco ‘Sunset Shimmer’ – $14
- Born Pretty Chrome Powder – $8
- Seche Vite Dry Fast Top Coat – $10
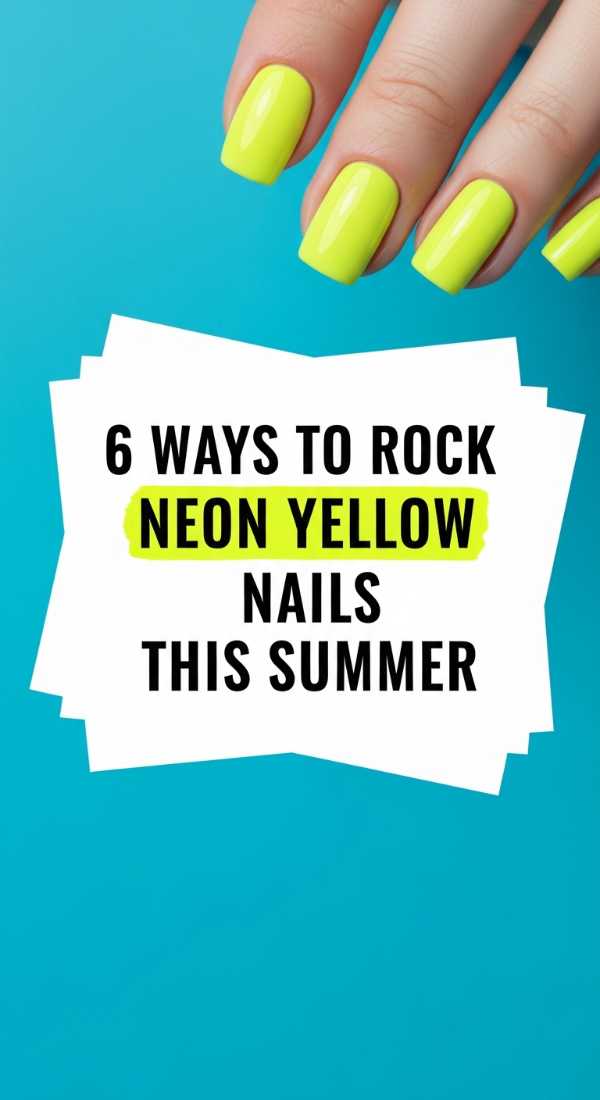
6 ways to rock neon yellow nails this summer
Why to love this Design:
Nothing says ‘summer has arrived’ like a pop of neon yellow! It’s bold, it’s energetic, and it looks incredible against a summer tan. This is for my loves who aren’t afraid to stand out and want to bring a little sunshine to every room they enter.
Essential Elements:
- High-pigment neon yellow polish
- Squoval or long stiletto shape
- White base coat to make the neon pop
How to Prepare:
- Apply a solid coat of white polish first (this is the secret!).
- Apply two coats of neon yellow.
- Ensure each coat is completely dry to avoid bubbling.
- Add a ‘pop’ finger with silver glitter.
- Seal with a UV-protectant top coat to prevent fading.
- Finish with a citrus-scented hand cream.
Budget Range
- Orly ‘Electric Glow’ Neon – $12
- China Glaze ‘White on White’ – $9
- Superchic Lacquer Top Coat – $15
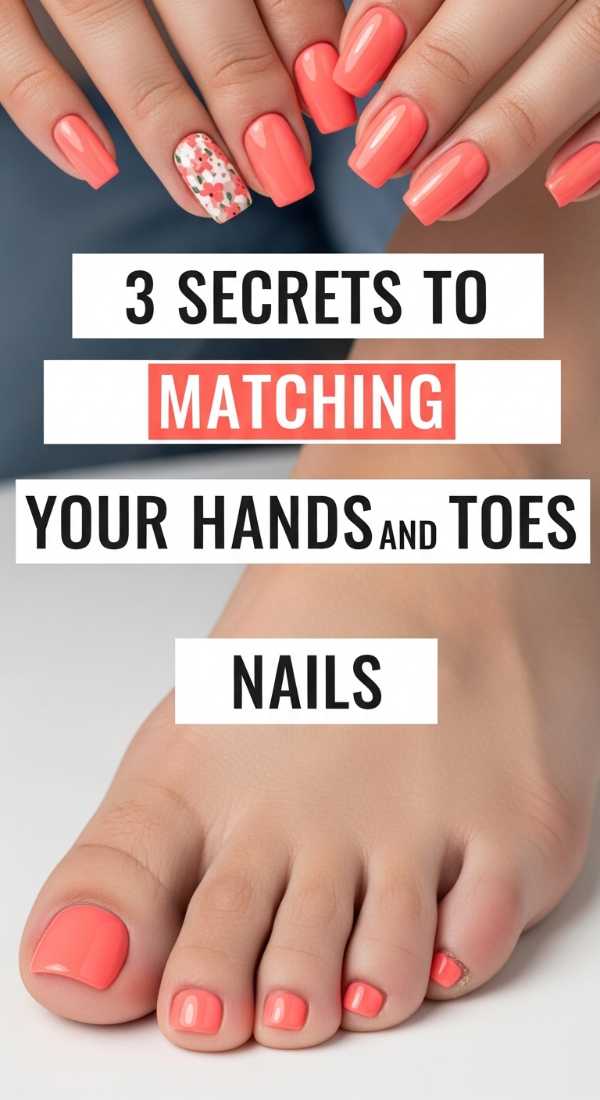
3 secrets to matching your hands and toes nails
Why to love this Design:
There is a certain ‘put-together’ magic that happens when your mani and pedi are in total harmony. It feels intentional and luxurious, like you’ve really taken the time to care for yourself from head to toe. It’s the ultimate lifestyle flex for summer sandal season.
Essential Elements:
- Coordinating (not identical) color palettes
- Consistent finish (both glossy or both matte)
- A shared accent detail or shimmer
How to Prepare:
- Choose a ‘hero’ color for your hands (e.g., coral).
- Choose a ‘support’ color for your toes (e.g., a lighter peach).
- Use the same shimmer topper on one nail of each for a cohesive look.
Budget Range
- Lights Lacquer ‘Summer Bundle’ – $50
- Revlon Enamel Polish Duo – $16
- Deborah Lippmann Foot File – $25
8 steps to achieve the summer goth nails look

Why to love this Design:
Who says dark colors are only for winter? Summer goth is all about that edgy, moody vibe paired with airy summer fabrics. It’s sophisticated, slightly mysterious, and provides a stunning contrast to white graduation gowns or bright beachwear.
Essential Elements:
- Sheer black or deep plum tones
- Star or moon decals
- Ultra-glossy ‘jelly’ finish
How to Prepare:
- Start with a clear base.
- Apply one coat of a ‘jelly’ black polish for translucency.
- Add a second coat only to the tips for a smoky gradient.
- Place a silver moon decal on the ring finger.
- Apply a ‘plumping’ top coat.
- Clean up edges with an acetone-dipped brush.
- Massage in a dark berry cuticle oil.
- Pair with silver rings for the full effect.
Budget Range
- Cirque Colors ‘RRR’ Jelly – $12.50
- Mooncat ‘Stumped’ Dark Polish – $14
- Nail Art Moon/Star Decals – $5
5 tips to create lemon and blue nails

Why to love this Design:
Think Mediterranean vacations and chilled lemonade. This color combo is the ultimate refreshing duo. It’s whimsical, vibrant, and looks absolutely darling for a graduation garden party or a seaside getaway.
Essential Elements:
- Bright lemon yellow and Mediterranean blue
- Fruit decals or hand-painted citrus
- Crisp white accents
How to Prepare:
- Alternate blue and yellow on your fingers.
- On the white accent nail, paint a half-circle lemon slice.
- Add tiny white pips and a green leaf.
- Use a toothpick to add blue ’tiles’ or dots on the yellow nails.
- Finish with a high-shine top coat.
Budget Range
- Manucurist ‘Lemon’ Eco-Polish – $14
- Kiko Milano Blue Polish – $7
- Nail Art Liner Brushes – $8
4 proven steps for stunning sunset aura nails

Why to love this Design:
Aura nails are all about capturing your inner energy. By using sunset colors, you’re showcasing a soul that is warm, radiant, and ever-changing. It’s a very ‘main character’ look that feels incredibly modern and artistic.
Essential Elements:
- Diffused center color (hot pink or orange)
- Softer outer border color (pale yellow or peach)
- Blurry, airbrushed effect
How to Prepare:
- Apply your border color and let dry completely.
- Use a small eyeshadow sponge to dab a circle of the ‘aura’ color in the center.
- Wait for it to dry and repeat for intensity.
- Apply a thick top coat to blend the edges of the colors together.
Budget Range
- Beauty Pie ‘Wondercolour’ Polish – $15
- Makeup Sponges (Bulk) – $5
- Glisten & Glow Top Coat – $9
10 ideas to celebrate with Taurus birthday nails

Why to love this Design:
For my April and May babies, Taurus season is about luxury, nature, and being grounded. These nails should feel expensive and earthy—perfect for the reliable, stylish Bull of the zodiac who is celebrating their big 2-0 or 2-1 this year.
Essential Elements:
- Forest greens and emeralds
- Gold leaf accents
- Floral or leaf patterns
- Marble textures
How to Prepare:
- Start with an emerald base.
- Drop white and gold polish into water for a marble effect (or use a brush).
- Apply gold leaf flake sparingly while the polish is tacky.
- Incorporate a small ‘Taurus’ constellation on the thumb.
- Top with a nourishing oil.
Budget Range
- ILNP ‘Deep End’ Emerald – $10
- Gold Leaf Flakes – $7
- Maniology Stamping Plate (Zodiac) – $5
6 methods to design retro pucci nails

Why to love this Design:
Pucci-inspired swirls are the ultimate throwback to 60s glamour. They are fun, high-fashion, and full of movement. If you’re heading into summer with a bold wardrobe, these nails are the perfect accessory to tie everything together with a vintage flair.
Essential Elements:
- Abstract swirl patterns
- Contrasting bright colors (pink, orange, blue, green)
- Thin black or white outlines
How to Prepare:
- Paint a base of soft pink.
- Use a long liner brush to drag large ‘S’ shapes across the nail.
- Fill in the gaps with alternating colors.
- Add thin white lines to separate the colors for that ‘print’ look.
- Cure or dry thoroughly between colors to prevent bleeding.
- Seal with a mirror-shine top coat.
Budget Range
- Beetles Gel Polish Liner Set – $20
- Modelones Summer Set – $15
- Makartt Rhinestone Glue (for accents) – $10
Congratulations and Happy Summer
As you step out into that summer sun with your diploma in hand and your nails looking absolutely radiant, remember that this is your time to shine. You’ve earned every moment of joy, every sunset beach walk, and every compliment on your stunning manicure. These nails are just a small way to celebrate the incredible person you’ve become. Go out there and make the Class of 2026 proud, my loves! I’ll be here, cheering you on every step of the way.