
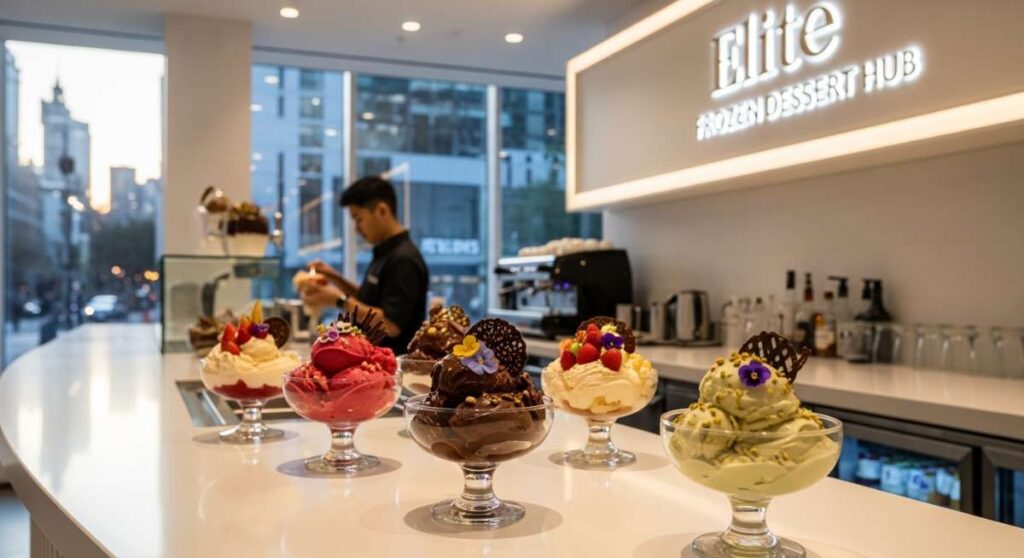
Chilling in Style: Inside the Elite Frozen Dessert Hub
Hi loves! Welcome back to my little corner of the internet where everything is draped in sunlight and tastes like a soft, sweet dream. Today, I am so incredibly excited to pull back the curtain on my ‘Elite Frozen Dessert Hub,’ a collection of recipes that aren’t just treats, but actual moments of self-care. There is something so magical about opening your freezer to find a curated selection of aesthetic, chilled masterpieces that you crafted with your own two hands.
We often forget that the simplest joys—like the way a perfectly creamy popsicle melts or the vibrant hue of a berry infusion—can totally shift our mood. This guide is my love letter to summer and to you, designed to help you elevate your snacking game to something truly gourmet. So, grab a glass of iced tea, settle into your favorite chair, and let’s dive into the art of chilling in style together.
Secret To Perfectly Creamy Homemade Ice Pops
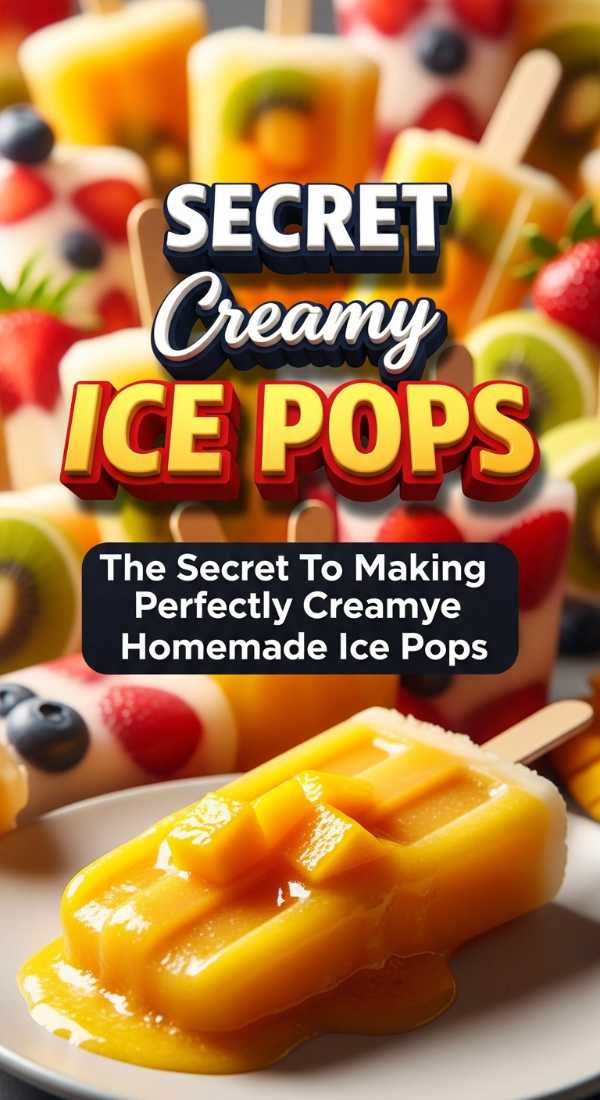
Why we love this
There is nothing quite like the velvet texture of a popsicle that doesn’t just shatter into ice, but melts slowly on your tongue like a dream. We love this because it transforms a humble frozen treat into a gourmet experience that feels incredibly high-end yet remains so simple to create in your own cozy kitchen. It’s the perfect way to pamper yourself after a long, sunny day spent basking in the warmth of the garden with your favorite book. The richness is simply unmatched, bringing a soft, cloud-like embrace to your palate with every single bite you take.
Ingredients
- 2 cups full-fat coconut milk or heavy cream
- 1/2 cup sweetened condensed milk
- 1 teaspoon pure vanilla bean paste
- A pinch of sea salt
- 1/2 cup fresh fruit puree (optional)
How to make it
- In a large glass mixing bowl, whisk together the full-fat coconut milk and the sweetened condensed milk until the mixture is completely smooth and glossy.
- Gently stir in the vanilla bean paste and the pinch of sea salt, ensuring the vanilla flecks are evenly distributed throughout the creamy liquid base.
- If you are using fruit puree, swirl it into the mixture gently with a spoon to create beautiful ribbons of color rather than mixing it in completely.
- Carefully pour the mixture into your favorite silicone popsicle molds, leaving a tiny bit of space at the top for the liquid to expand as it freezes.
- Insert the wooden sticks and place the mold in the coldest part of your freezer for at least 8 hours, though overnight is always best for the perfect set.
The Ultimate Refreshing Summer Popsicle Hack
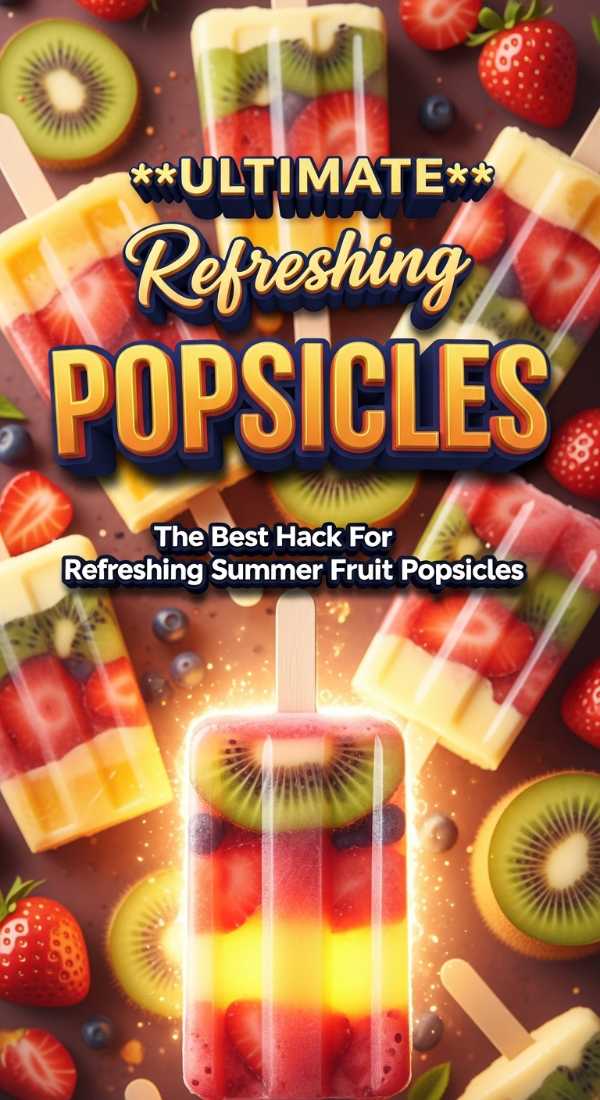
Why we love this
When the heat becomes a bit too much to handle, this hack is the absolute savior that keeps us feeling cool and collected. We love this because it uses a secret ingredient that prevents the popsicles from melting into a sticky mess too quickly, giving you more time to savor the flavor. It’s a total game-changer for backyard parties or those quiet moments of reflection on the porch. You’ll feel like a professional confectioner with this simple trick that yields the most vibrant, refreshing results every single time.
Ingredients
- 3 cups fresh watermelon juice or lemonade
- 1 tablespoon unflavored gelatin or agar-agar
- 2 tablespoons honey or agave nectar
- Fresh mint leaves for a botanical touch
- Thinly sliced citrus wheels
How to make it
- Take half a cup of your chosen juice and sprinkle the gelatin over it, letting it bloom for about five minutes until it thickens slightly.
- Gently warm the remaining juice in a small saucepan over low heat, adding the honey and stirring until it is completely dissolved into the liquid.
- Combine the bloomed gelatin mixture with the warm juice and whisk vigorously until no lumps remain and the liquid is perfectly clear and smooth.
- Place a fresh mint leaf and a citrus wheel into each popsicle mold to create a stunning, professional aesthetic that looks like it came from a boutique.
- Pour the juice mixture over the fruit and herbs, secure the lids, and freeze for 6-7 hours until the popsicles are firm and ready to be enjoyed.
How To Make Irresistible Swirled Frozen Yogurt Bites
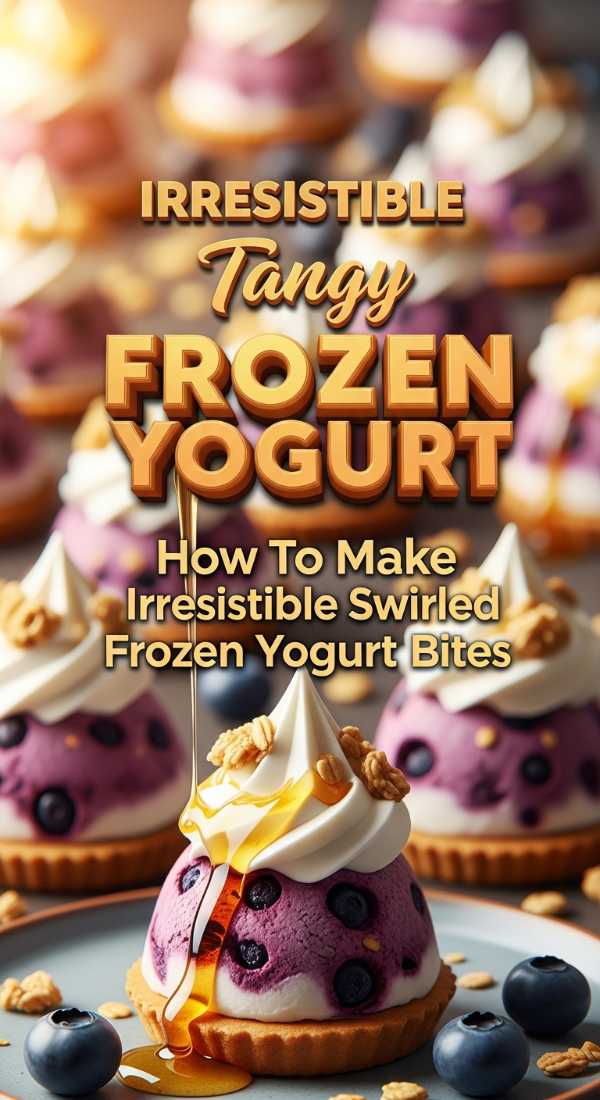
Why we love this
These little bites are the perfect bite-sized escape for when you need a tiny burst of sweetness without committing to a full dessert. We love them because the swirl technique makes each one look like a miniature piece of modern art, perfect for sharing on your feed. They are light, tangy, and incredibly satisfying, offering a sophisticated alternative to heavy ice creams. Plus, they are so easy to pop out of the mold and enjoy whenever a craving strikes during your busy afternoon routine.
Ingredients
- 1.5 cups thick Greek yogurt (plain or vanilla)
- 1/4 cup local honey
- 1/2 cup raspberry or blueberry jam
- 1/4 cup crushed pistachios or granola
- A squeeze of fresh lemon juice
How to make it
- Mix the Greek yogurt with the honey and lemon juice in a medium bowl until it reaches a silky, spreadable consistency that feels light and airy.
- Prepare a mini muffin tin or a silicone bite-sized mold by lightly greasing it or using small paper liners for easy removal after freezing.
- Spoon the yogurt mixture into the molds until they are about three-quarters full, smoothing the tops with the back of a small spoon or spatula.
- Drop a small dollop of the fruit jam onto the center of each yogurt bite and use a toothpick to create delicate, swirling patterns across the surface.
- Sprinkle the crushed pistachios or granola on top for a delightful crunch, then freeze for 4 hours until the bites are solid and hold their shape.
Creative Ideas For Gourmet Frozen Yogurt Aesthetic Treats
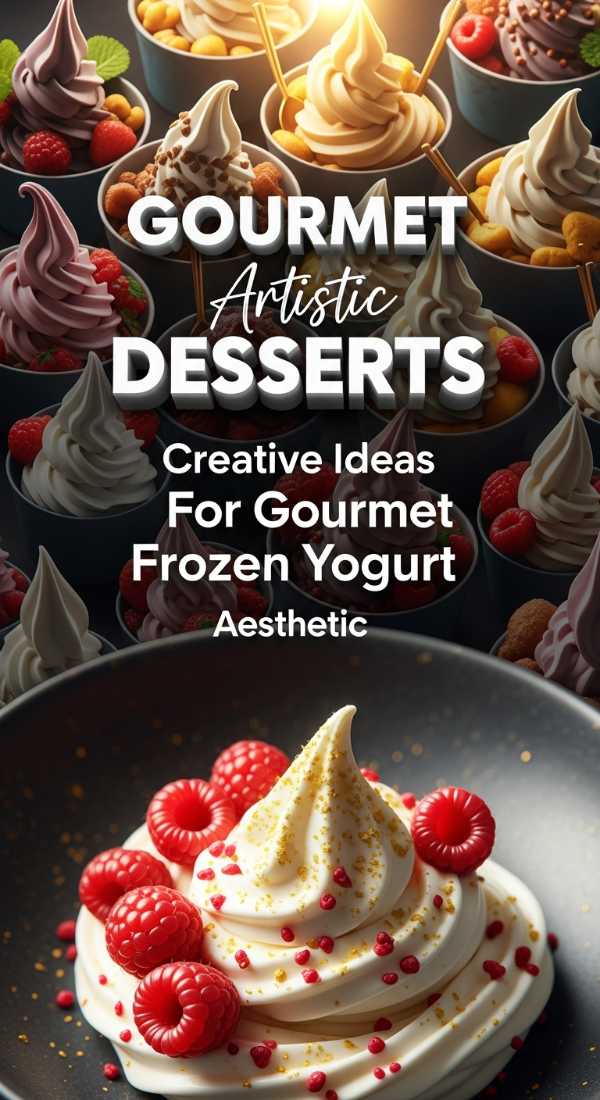
Why we love this
Elevating your daily snacks into gourmet treats is the ultimate form of self-love, and these aesthetic frozen yogurt bars do exactly that. We love this approach because it focuses on the visual harmony of edible flowers and geometric shapes, making your freezer feel like a high-end patisserie. It’s about more than just taste; it’s about the joy of creating something beautiful that nourishes your body and delights your senses. These treats are guaranteed to be the star of any brunch or summer gathering you host this season.
Ingredients
- 2 cups organic whole milk yogurt
- 1/4 cup maple syrup
- Edible pansies or rose petals
- Gold leaf flakes (optional for extra glam)
- Freeze-dried strawberries, crushed
How to make it
- Whisk the yogurt and maple syrup together until the sweetener is fully integrated and the yogurt has a glossy, inviting sheen to its texture.
- Spread the mixture onto a parchment-lined baking sheet about half an inch thick, ensuring the surface is as flat and even as possible for clean cuts.
- Artistically arrange your edible flowers and rose petals across the yogurt, pressing them down very gently so they are partially submerged but still visible.
- Scatter the crushed freeze-dried strawberries and gold leaf flakes over the top to add layers of color, texture, and a hint of luxury to the bark.
- Freeze the sheet for at least 5 hours, then use a sharp knife to cut into perfect rectangles or shards that showcase the beautiful floral inclusions.
The Ultimate Guide To Silky Smooth Homemade Ice Cream

Why we love this
There is a profound sense of accomplishment that comes with making your own ice cream from scratch, especially when it turns out this smooth. We love this recipe because it avoids the icy texture of many homemade versions, giving you that professional churned feel right in your own kitchen. It is the definition of comfort food—rich, decadent, and customizable to whatever flavors your heart desires in the moment. It’s a classic staple that every lifestyle lover needs to have in their culinary repertoire for special occasions.
Ingredients
- 2 cups heavy whipping cream
- 1 cup whole milk
- 3/4 cup granulated sugar
- 1 tablespoon vanilla bean extract
- 5 large egg yolks (for the custard base)
How to make it
- In a medium saucepan, simmer the milk, sugar, and half of the heavy cream over medium heat until the sugar is completely dissolved and bubbles form.
- In a separate bowl, whisk the egg yolks until they are pale and slightly thickened, then slowly temper them by adding a splash of the warm milk.
- Pour the egg mixture back into the saucepan and cook over low heat, stirring constantly with a wooden spoon until the custard coats the back of it.
- Strain the custard into a clean bowl containing the remaining cold heavy cream and vanilla, then chill the mixture in the fridge for at least 6 hours.
- Pour the chilled base into your ice cream maker and churn according to the manufacturer’s instructions until it reaches a soft-serve consistency before final freezing.
Mind Blowing Ways To Create Healthy Frozen Dessert Bites
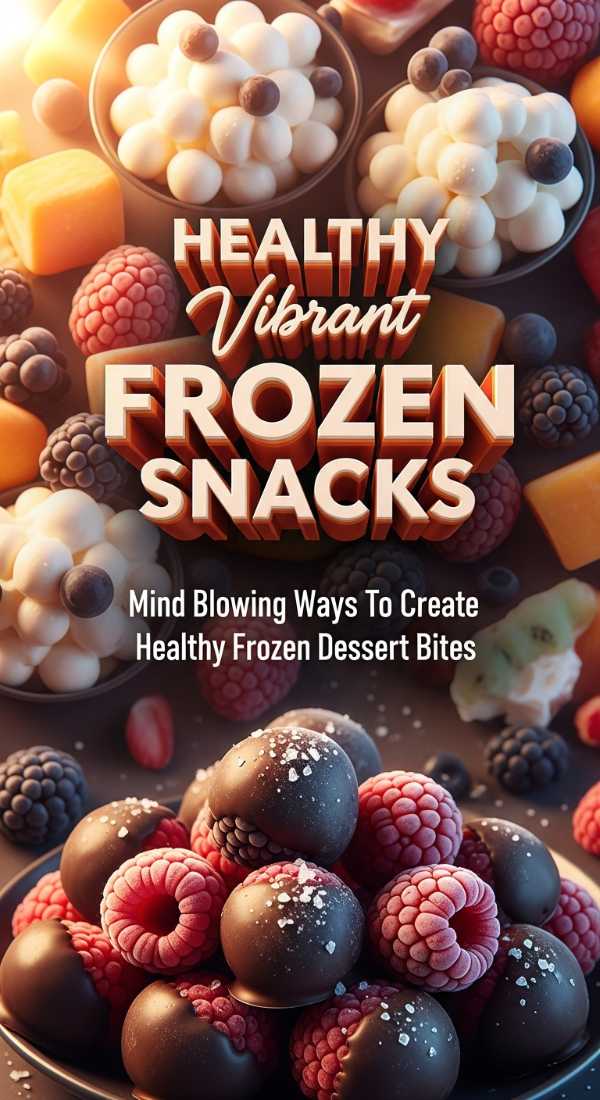
Why we love this
Living a healthy lifestyle doesn’t mean you have to skip the dessert course; it just means you get to be more creative with your ingredients. We love these bites because they rely on the natural sweetness of fruit and the richness of nut butters to create a satisfying treat. They are the perfect ‘pick-me-up’ for that mid-afternoon slump when you need a boost of energy and a little something sweet. You can feel good about every ingredient while still feeling like you are indulging in a total luxury.
Ingredients
- 2 large ripe bananas
- 1/2 cup almond butter or peanut butter
- 1/2 cup dark chocolate chips, melted
- 1 teaspoon coconut oil
- Flaky sea salt for topping
How to make it
- Slice the bananas into even rounds, approximately half an inch thick, and lay half of them out on a tray lined with wax paper.
- Place a small dollop of almond butter onto each banana slice, then top with another banana slice to create a tiny, fruit-based sandwich.
- Place the banana sandwiches in the freezer for about an hour to firm up, which makes the dipping process much easier and cleaner.
- Melt the dark chocolate chips with the coconut oil in the microwave in 30-second intervals until the mixture is perfectly smooth and drizzly.
- Dip each frozen banana bite into the chocolate to coat it halfway, sprinkle with flaky sea salt, and freeze for another hour until the chocolate is set.
Secret Tips For Infusing Fresh Berries Into Popsicles
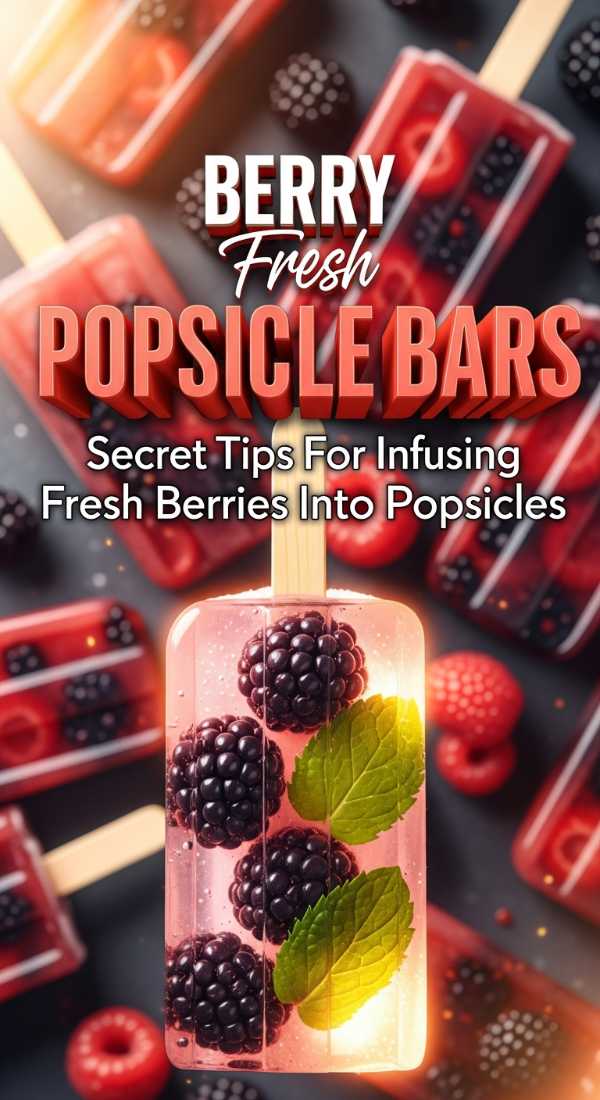
Why we love this
Infusing fresh berries is an art form that brings out the most incredible, deep flavors and stunning natural colors in your frozen treats. We love this method because it moves beyond just adding fruit chunks, creating a sophisticated infusion that permeates every single lick of the popsicle. It’s a beautiful way to celebrate the bounty of the season and make use of the freshest produce from your local farmer’s market. The result is a vibrant, antioxidant-packed treat that feels as refreshing as a cool breeze on a humid day.
Ingredients
- 2 cups mixed berries (strawberries, raspberries, blackberries)
- 1/4 cup elderflower syrup or simple syrup
- 1 cup filtered water or coconut water
- A squeeze of lime juice
- Fresh thyme sprigs (optional)
How to make it
- Place the fresh berries in a bowl and muddle them gently with the syrup and lime juice to release all those beautiful juices and aromas.
- Allow the berries to macerate at room temperature for about 20 minutes, which deepens the flavor and creates a more cohesive infusion for the popsicles.
- Mix the macerated berries with the water or coconut water, stirring well to ensure the syrup is evenly distributed throughout the entire liquid base.
- If you want a smoother texture, you can pulse this mixture in a blender for just a few seconds, or keep it chunky for a rustic look.
- Pour into molds, add a sprig of thyme for an earthy note, and freeze for 8 hours to allow the berry flavors to fully develop and meld.
The Most Aesthetic Marble Style Frozen Yogurt Recipe

Why we love this
There is something incredibly soothing about the swirling patterns of a marble-style dessert; it’s like holding a tiny galaxy in your hand. We love this recipe because it looks incredibly complicated and high-end, but it is actually one of the easiest techniques to master at home. It allows you to play with different color palettes—from soft pastels to deep jewel tones—depending on the fruits you choose to use. It’s the ultimate way to impress guests at your next summer dinner party with very little effort.
Ingredients
- 2 cups Greek yogurt
- 1/2 cup blackberry puree (strained)
- 1/2 cup mango puree (strained)
- 3 tablespoons honey
- Vanilla bean seeds
How to make it
- Start by sweetening your Greek yogurt with the honey and vanilla bean seeds, mixing until the base is perfectly uniform and sweet.
- Divide the yogurt into three separate bowls, leaving one plain and mixing the blackberry puree into the second and mango into the third.
- In your popsicle molds or a shallow dish, add alternating spoonfuls of the three different yogurt colors until the container is full to the top.
- Take a long skewer or a thin knife and gently drag it through the layers in a figure-eight motion to create those signature marble swirls.
- Tap the molds firmly on the counter to remove any air bubbles, then freeze for 6-8 hours until the marble pattern is firmly set in place.
The Best Method For Perfectly Sweetened Tropical Ice Pops

Why we love this
Transport yourself to a white-sand beach with every bite of these tropical ice pops that perfectly balance sweetness and acidity. We love this specific method because it uses natural fruit sugars and a hint of sea salt to enhance the tropical notes of pineapple and mango. It’s like a vacation in a popsicle mold, bringing a sun-drenched vibe to your afternoon regardless of where you actually are. These are incredibly hydrating and provide that perfect tropical punch that makes summer feel like it could last forever.
Ingredients
- 1 cup fresh pineapple juice
- 1 cup mango nectar
- 1/2 cup coconut cream
- A squeeze of fresh lime juice
- Small chunks of fresh kiwi for garnish
How to make it
- In a large pitcher, combine the pineapple juice, mango nectar, and lime juice, stirring well to ensure the flavors are perfectly balanced and bright.
- Whisk in the coconut cream slowly; it might look separated at first, but keep whisking until it creates a beautiful, creamy tropical emulsion.
- Place a few small chunks of kiwi at the bottom of each popsicle mold to provide a pop of green color and a slight texture contrast.
- Pour the tropical mixture into the molds, leaving a small gap for expansion, and insert your sticks firmly into the center of each mold.
- Freeze for at least 7 hours, then dip the bottom of the molds in warm water for a few seconds to easily release your tropical treats.
Why This Watermelon Mint Popsicle Is The Ultimate Refresher
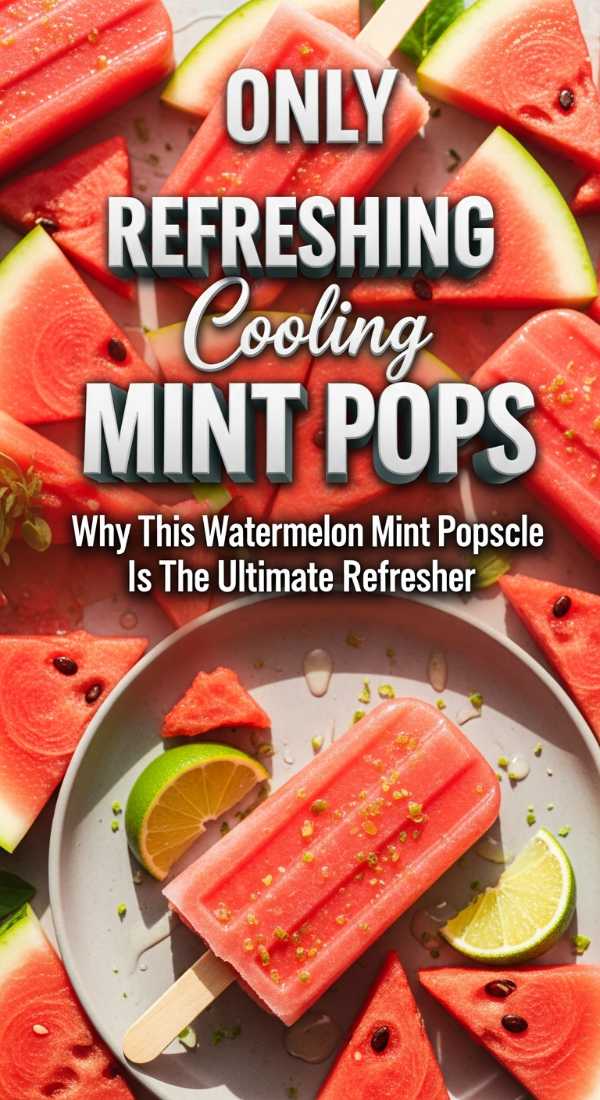
Why we love this
When the temperature reaches its peak, the combination of watermelon and mint acts like a natural internal cooling system for your body. We love this recipe because it is incredibly light and hydrating, making it the perfect post-workout or post-sunshine snack for any day. The mint provides a sophisticated herbal finish that cuts through the sweetness of the watermelon, creating a flavor profile that is mature and refreshing. It’s the kind of treat that makes you feel instantly revitalized, glowing from the inside out with every bite.
Ingredients
- 4 cups cubed seedless watermelon
- 1/4 cup fresh mint leaves, finely chopped
- 2 tablespoons lime juice
- 1 tablespoon agave nectar (optional)
- Thin cucumber slices for an extra cooling effect
How to make it
- Place the watermelon cubes in a high-speed blender and process until the mixture is completely liquid and free of any large fruit chunks.
- Strain the watermelon juice through a fine-mesh sieve into a pitcher to remove the pulp, resulting in a crystal-clear, vibrant red liquid base.
- Stir in the finely chopped mint leaves, lime juice, and agave nectar, allowing the mixture to sit for 10 minutes so the mint can infuse.
- Slide a thin cucumber slice into each mold before pouring the watermelon mixture over it, adding a beautiful and functional cooling garnish.
- Freeze the popsicles for 6 hours, ensuring they are kept level in the freezer to maintain that gorgeous, layered aesthetic we all love.
Embrace the Chill
And there you have it, my loves! A complete tour through my elite frozen dessert hub. I truly believe that taking the time to make something this beautiful for yourself is a radical act of joy. Whether you’re swirling yogurt or infusing berries, remember that the process is just as sweet as the result. I can’t wait to see your gorgeous creations—don’t forget to tag me so I can see how you’re chilling in style this season. Until next time, stay cool and stay sweet!