
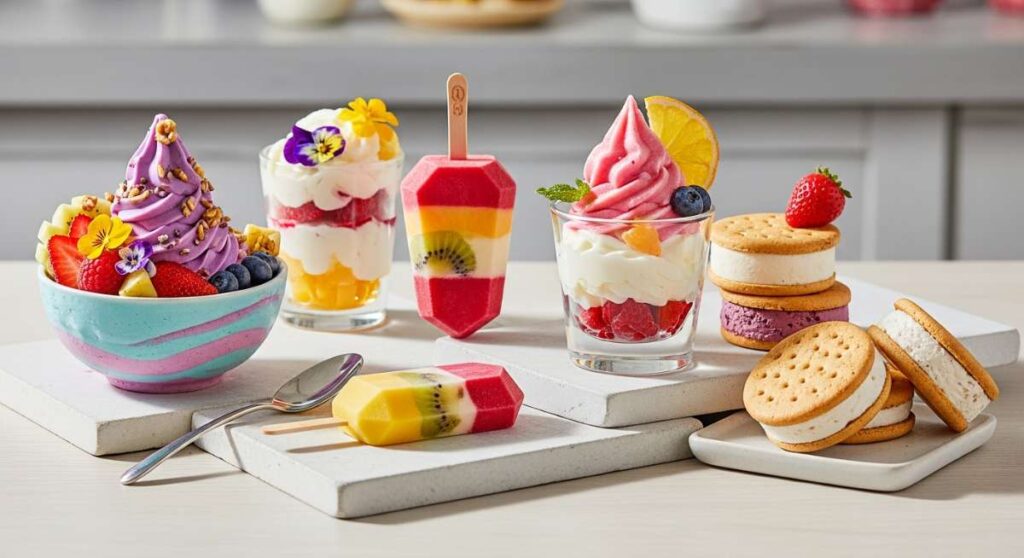
Hello, my loves! There is something truly magical about these golden, sun-drenched afternoons when the light hits just right and the only thing on the agenda is staying cool. I’ve been spending so much time in my kitchen lately, experimenting with textures and colors that feel like a soft, ethereal dream, and I couldn’t wait to share these little treasures with you. It’s more than just a snack; it’s about creating a moment of pure, chilled bliss that looks as beautiful as it tastes.
We are diving deep into the world of aesthetic frozen treats today, from the creamiest swirls to the most vibrant fruit layers that look like captured sunsets. I want your freezer to be a treasure chest of treats that make you smile every time you open it. Whether you’re hosting a backyard garden party or just treating yourself after a long day of soaking up the rays, these recipes are designed to wrap you in a cloud-soft embrace of flavor and style.
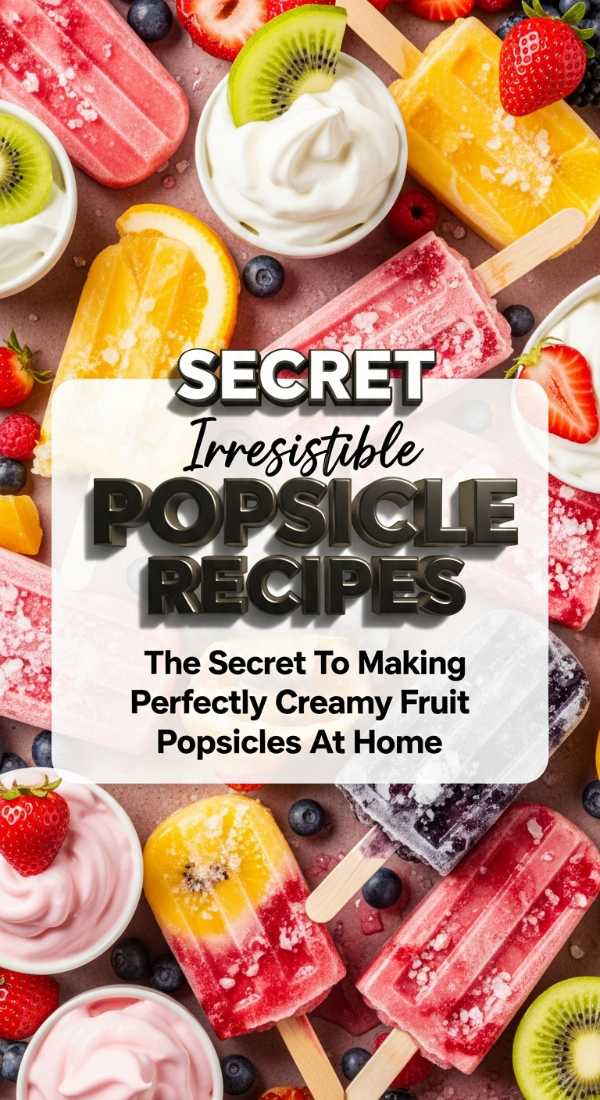
The Secret To Making Perfectly Creamy Fruit Popsicles At Home
Why we love this
There is nothing quite like the silkiness of a popsicle that doesn’t just crumble into ice crystals the moment you take a bite. We love this technique because it bridges the gap between a refreshing fruit bar and a decadent gelato, offering a mouthfeel that is incredibly luxurious and smooth. By balancing natural sugars with a touch of healthy fats, we create a treat that feels sophisticated enough for an adult dinner party but simple enough for a Tuesday. It is the ultimate way to preserve the fleeting magic of summer fruit in a way that feels totally high-end and indulgent.
Ingredients
- 2 cups of ripe seasonal fruit (strawberries or peaches work best)
- 1/2 cup of full-fat coconut milk or Greek yogurt
- 2 tablespoons of honey or agave nectar
- 1 teaspoon of pure vanilla bean paste
- A squeeze of fresh lemon juice to brighten the flavors
How to make it
- Start by washing and roughly chopping your chosen fruit, ensuring you remove any pits, stems, or bruised spots to maintain a clean flavor profile.
- Place the fruit into a high-speed blender along with the coconut milk, sweetener, vanilla, and lemon juice, blending until the mixture is completely homogenous.
- To ensure that signature creamy texture, pour the mixture through a fine-mesh sieve to remove any remaining fruit fibers or tiny seeds that might crystallize.
- Carefully pour the silky liquid into your favorite popsicle molds, leaving about a quarter-inch of space at the top to allow for natural expansion during the freezing process.
- Insert your sticks and freeze for at least six hours, or preferably overnight, to allow the structure to set firmly before gently unmolding them under warm water.
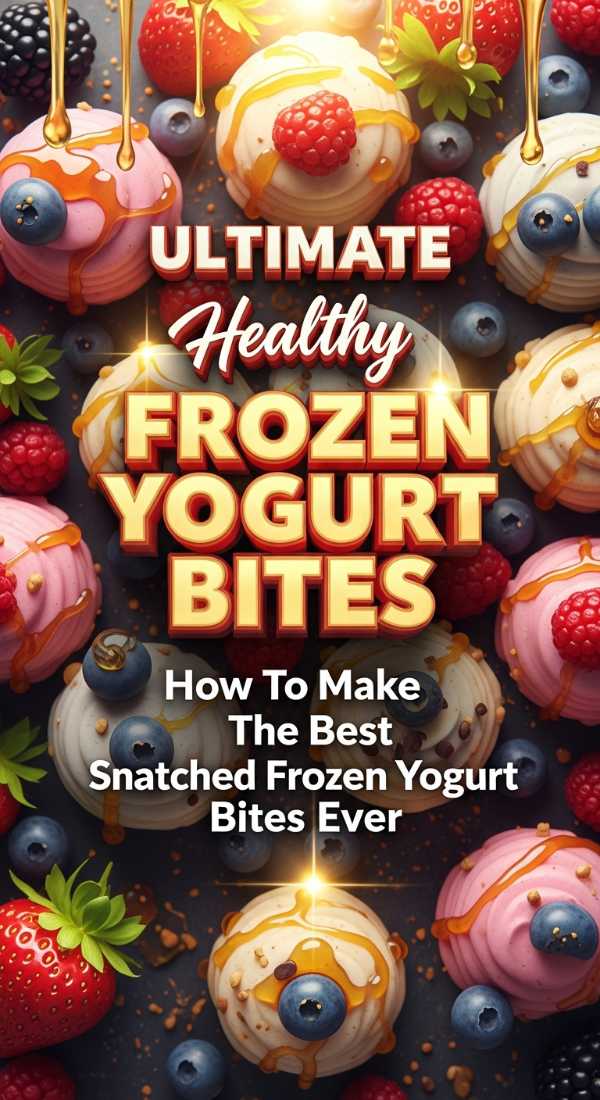
How To Make The Best Snatched Frozen Yogurt Bites Ever
Why we love this
These little bites are the definition of ‘snatched’ because they are perfectly portioned, visually stunning, and packed with a tangy punch that keeps you coming back for more. We adore how they look like little gems scattered on a plate, especially when topped with tiny garnishes that catch the light. They are the perfect solution for those moments when you want just a tiny taste of something sweet without committing to a full bowl of dessert. Plus, they are incredibly customizable, allowing you to play with different colors and toppings to match your current aesthetic or mood.
Ingredients
- 1 cup of thick, plain Icelandic or Greek yogurt
- 1 tablespoon of maple syrup
- A handful of pomegranate seeds or mini blueberries
- Finely chopped pistachios for a bit of crunch
- Dried edible rose petals for that viral aesthetic look
How to make it
- In a small mixing bowl, whisk together your thick yogurt and maple syrup until the sweetener is fully integrated and the yogurt looks glossy and inviting.
- Line a small baking sheet with parchment paper, ensuring it lies completely flat so your bites don’t slide around or lose their circular shape.
- Using a small spoon or a piping bag, drop small dollops of the yogurt mixture onto the parchment, spacing them about an inch apart to prevent sticking.
- Gently press a few pomegranate seeds and a sprinkle of chopped pistachios into the top of each dollop, finishing with a delicate pinch of dried rose petals.
- Place the tray in the freezer for at least two hours until the bites are solid, then peel them off the paper and store them in a chilled glass jar for easy snacking.
Elevate Your Summer With These Refreshing Tropical Ice Pops

Why we love this
Transporting yourself to a private island has never been easier than with these vibrant, multi-layered tropical pops that scream vacation vibes. We love how the layers of mango, pineapple, and coconut create a beautiful gradient effect that looks like a tropical sunset trapped in ice. Each bite offers a different explosion of flavor, moving from sweet and tangy to creamy and mellow, keeping your palate excited and refreshed. They are the perfect accessory for a pool day, looking absolutely stunning in photos while providing a much-needed cooling sensation against the afternoon heat.
Ingredients
- 1 cup of fresh mango puree
- 1 cup of fresh pineapple juice
- 1/2 cup of coconut cream
- A dash of lime zest
- Tiny slices of kiwi for a visual pop inside the mold
How to make it
- Begin by preparing your fruit layers separately; blend the mango into a thick puree and set aside, then ensure your pineapple juice is pulp-free for clarity.
- Place a thin slice of kiwi against the inside wall of each popsicle mold, using a small stick to press it firmly so it stays visible from the outside.
- Pour the mango puree into the bottom third of the mold and place it in the freezer for about 45 minutes to let it firm up slightly.
- Gently pour the pineapple juice over the mango layer to fill the middle third, then return to the freezer for another 45 minutes to maintain distinct layers.
- Top off the molds with the coconut cream mixed with lime zest, insert the sticks, and freeze for a final four hours until the entire pop is rock solid and ready.
Discover The Best Way To Style Your Summer Ice Cream

Why we love this
We believe that we eat with our eyes first, and taking an extra minute to style your ice cream can turn a simple snack into a total main-character moment. This approach isn’t just about the taste; it’s about the ritual of beauty and self-care that comes with presenting something lovely to yourself. By using unexpected textures like sea salt, fresh herbs, and edible gold, you elevate the humble scoop into a work of art that feels like it belongs in a high-end boutique. It’s all about those tiny, intentional details that make everyday life feel a little more poetic and inspired.
Ingredients
- High-quality vanilla or honeycomb ice cream
- Fresh sprigs of mint or basil
- A pinch of flaky Maldon sea salt
- Edible gold leaf or luster dust
- Waffle cone shards or crushed honeycomb brittle
How to make it
- Start by chilling your serving bowl in the freezer for ten minutes; this prevents the ice cream from melting too quickly while you are styling it.
- Use a heated ice cream scoop to create two or three perfectly spherical rounds, nesting them closely together in the center of your chilled bowl.
- Lightly sprinkle the flaky sea salt over the peaks of the scoops to enhance the creaminess and provide a beautiful, crystalline texture to the surface.
- Carefully place a few shards of waffle cone or honeycomb around the base of the scoops to add height and architectural interest to the presentation.
- Finish the look by tucking a fresh mint leaf into the side and using tweezers to apply a tiny fleck of gold leaf for that ultimate viral glow.
This Is Why Your Frozen Yogurt Recipes Never Taste This Good

Why we love this
Most home-made frozen yogurt ends up being too icy or lacking that signature ‘tang’ we crave, but this method changes everything by focusing on the moisture balance. We love this specific approach because it uses a secret technique to concentrate the flavors while maintaining a velvety, soft-serve consistency that feels like a cloud. It’s the perfect balance of healthy and indulgent, giving you all the probiotic benefits of yogurt with the soul-satisfying texture of a premium gelato. Once you try this, you will never go back to those watery, store-bought versions that leave you feeling unsatisfied.
Ingredients
- 2 cups of full-fat Greek yogurt (strained through cheesecloth for 2 hours)
- 1/2 cup of wildflower honey
- 1 teaspoon of lemon zest
- 1/4 cup of heavy cream (optional, for extra richness)
- A pinch of fine sea salt
How to make it
- The most important step is straining your yogurt; place it in cheesecloth over a bowl in the fridge to remove excess whey, resulting in a much thicker base.
- Whisk the thickened yogurt with honey, lemon zest, and a pinch of salt until the mixture is incredibly smooth and the honey is completely dissolved.
- If you want that extra-luxurious mouthfeel, gently fold in the heavy cream using a spatula, being careful not to overwork the mixture and lose the air.
- Pour the base into an ice cream maker and churn according to the manufacturer’s instructions until it reaches the consistency of soft-serve ice cream.
- Transfer the churned yogurt to a shallow container and freeze for just one more hour before serving to ensure it is firm enough to scoop but still soft.
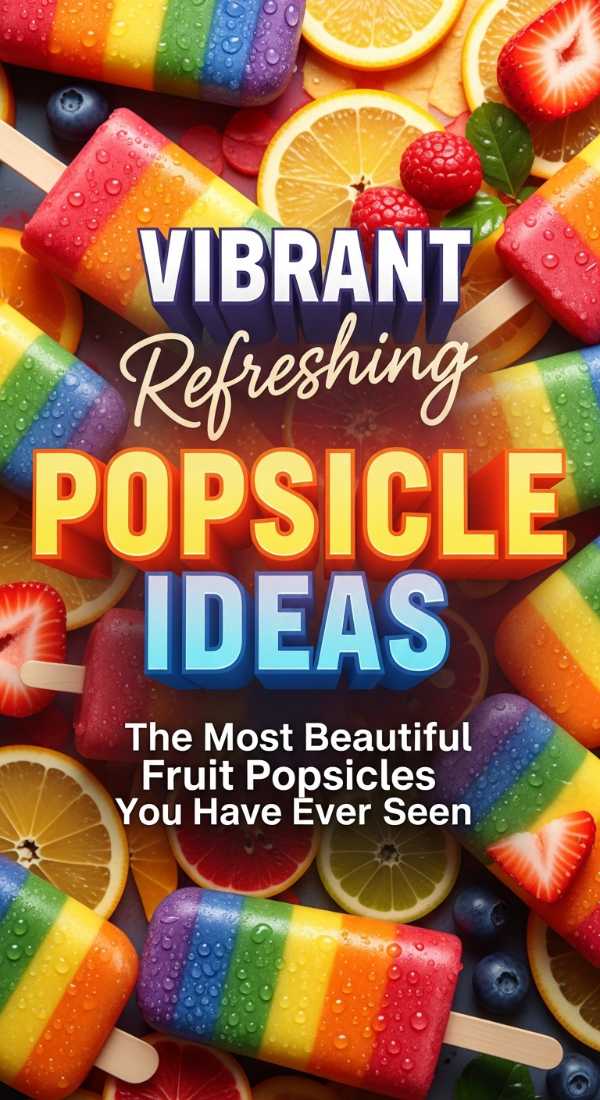
The Most Beautiful Fruit Popsicles You Have Ever Seen
Why we love this
These popsicles are designed to look like botanical specimens frozen in time, featuring whole slices of fruit and delicate herbs that are visible through a clear base. We love them because they are naturally stunning without any artificial dyes, relying purely on the vibrant colors provided by Mother Nature herself. They make a statement at any gathering and are so beautiful that you almost don’t want to eat them—almost! They represent a perfect marriage of health-conscious eating and high-fashion aesthetics, making them the ultimate summer accessory for your social media feed.
Ingredients
- 2 cups of white grape juice or coconut water (for a clear base)
- Thinly sliced strawberries, peaches, and starfruit
- Fresh blueberries and raspberries
- Small mint leaves or edible pansies
- A splash of elderflower syrup for a floral note
How to make it
- Stir the elderflower syrup into your clear base (grape juice or coconut water) to add a subtle, sophisticated flavor profile that complements the fresh fruit.
- Carefully slide your thinnest fruit slices—like the starfruit and strawberries—down the sides of the popsicle molds so they lie flat against the plastic.
- Drop in a few whole berries and a couple of mint leaves, using a chopstick to position them artistically so they appear suspended in mid-air.
- Slowly pour the clear liquid into the molds, being careful not to displace the fruit you have so carefully positioned against the sides.
- Freeze the popsicles for at least eight hours to ensure the clear base is fully transparent and solid, then unmold carefully to reveal your edible art.
Master The Art Of Chocolate Dipped Frozen Yogurt Treats

Why we love this
There is a sensory delight in the ‘crack’ of a thin chocolate shell giving way to a cool, creamy interior, and these treats deliver that experience in spades. We love how the bitterness of dark chocolate perfectly offsets the tartness of the frozen yogurt, creating a balanced flavor profile that feels very grown-up. The aesthetic appeal of a half-dipped treat is undeniable, especially when finished with a sprinkle of contrasting colors or textures on the chocolate. It’s a simple way to make a healthy snack feel like a gourmet dessert from a high-end chocolatier’s shop.
Ingredients
- Pre-frozen yogurt bars or bites
- 1 cup of high-quality dark chocolate chips
- 1 tablespoon of coconut oil (for that perfect snap)
- Crushed freeze-dried raspberries
- Flaky sea salt
How to make it
- Melt the dark chocolate chips and coconut oil together in a double boiler or microwave in 30-second intervals until the mixture is silky and fluid.
- Pour the melted chocolate into a tall, narrow glass; this makes it much easier to dip your frozen treats and get a clean, even coating.
- Take your yogurt treats directly from the freezer and dip them halfway into the warm chocolate, letting the excess drip off for a few seconds.
- Immediately, while the chocolate is still wet, sprinkle the crushed freeze-dried raspberries and a tiny bit of flaky salt over the dipped portion.
- Place the treats on a piece of parchment paper for thirty seconds—the coldness of the yogurt will set the chocolate almost instantly—then enjoy immediately.
Create The Most Luxurious Honey Infused Frozen Yogurt Bites

Why we love this
Honey isn’t just a sweetener; it’s a flavor enhancer that adds a floral, earthy depth to frozen yogurt that sugar simply cannot replicate. We love these bites because they feel like a warm hug in frozen form, combining the comfort of honey with the refreshing chill of the yogurt. The golden hue of the honey swirls creates a beautiful visual contrast against the white yogurt, looking like little ripples of sunshine. They are incredibly easy to make but taste like something you would find at a luxury spa or a boutique wellness retreat in the hills.
Ingredients
- 1.5 cups of Greek yogurt
- 1/4 cup of high-quality Manuka or wildflower honey
- 1/2 teaspoon of cinnamon
- Toasted almond slivers
- Extra honey for drizzling
How to make it
- Mix the Greek yogurt with the cinnamon until it is evenly distributed, creating a warm, spiced base that will pair perfectly with the honey.
- Fill a silicone mini-muffin mold or a small ice cube tray halfway with the yogurt mixture, smoothing the tops with a small spatula or spoon.
- Place a small half-teaspoon of honey into the center of each yogurt-filled cavity, then use a toothpick to gently swirl it into a beautiful marble pattern.
- Top each bite with a few toasted almond slivers for a crunch that complements the smooth texture of the frozen honey and yogurt.
- Freeze for at least three hours, then pop them out of the molds and give them one final tiny drizzle of honey right before serving for a glossy finish.
How To Get That Intense Watermelon Flavor In Every Bite
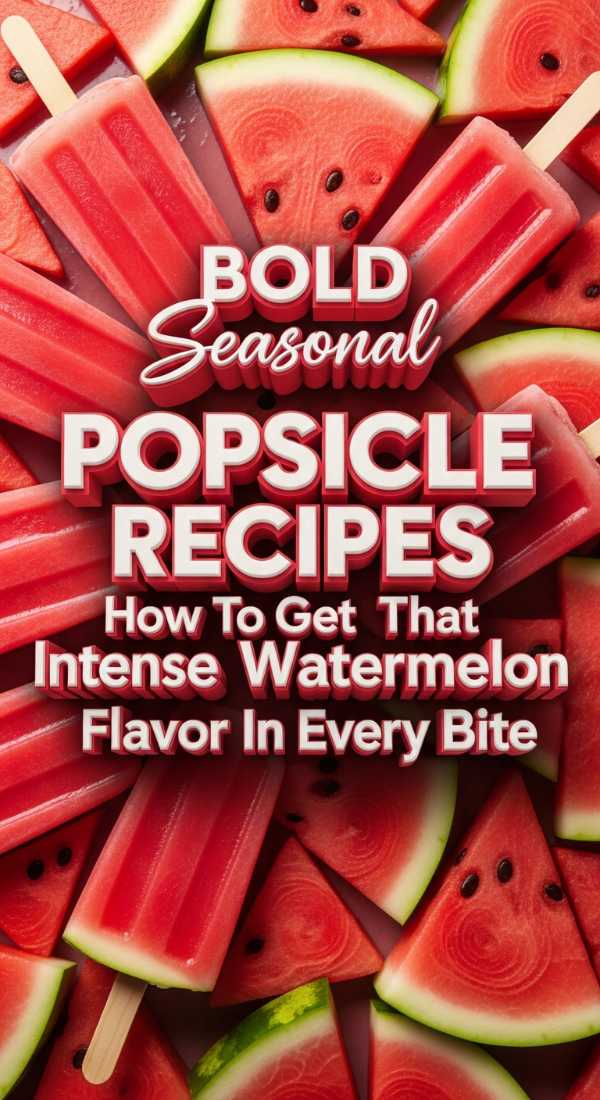
Why we love this
Watermelon treats often end up tasting like flavored water, but this method ensures a concentrated, vibrant explosion of fruit in every single lick. We love this recipe because it captures the very essence of summer—that sticky, sweet, cooling sensation of a perfect melon—without the mess of seeds or rind. By using a reduction technique, we intensify the natural sugars and colors, resulting in a treat that looks like a neon pink dream on a stick. It’s the ultimate refreshing snack for those sweltering days when you need something light, hydrating, and packed with real fruit power.
Ingredients
- 4 cups of fresh watermelon cubes (seedless)
- 1 tablespoon of lime juice
- A pinch of salt (to make the sweetness pop)
- Fresh mint leaves, finely minced
- 1 tablespoon of agave (only if the melon isn’t sweet enough)
How to make it
- Blend the watermelon cubes until they are completely liquid, then pour the juice through a sieve into a large saucepan to remove any pulp.
- Simmer the juice over medium heat for about 15 minutes, allowing it to reduce by about one-third; this concentrates the flavor and the beautiful pink color.
- Let the concentrated juice cool completely to room temperature before stirring in the lime juice, salt, and the finely minced mint leaves.
- Pour the mixture into your popsicle molds, adding an extra small piece of fresh watermelon to each mold if you want a bit of texture to bite into.
- Freeze for a minimum of six hours; the reduction process ensures that the pops stay flavorful and bright even when completely frozen through.
The Simple Trick For Perfect Berry Swirled Frozen Treats
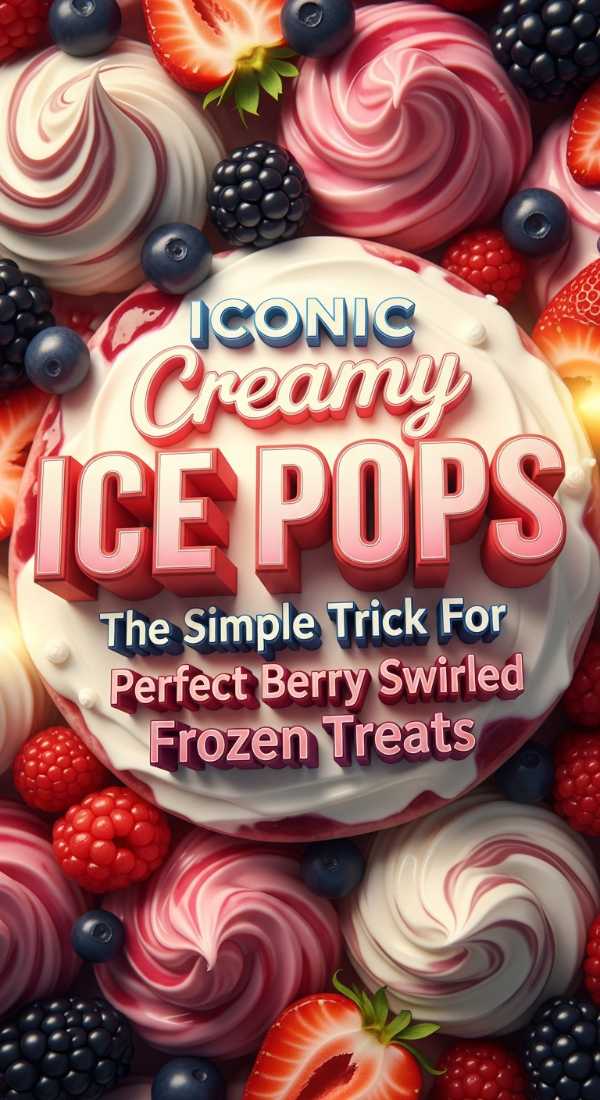
Why we love this
There is something so romantic and whimsical about a berry swirl, reminiscent of old-fashioned ice cream parlors and summer fairs. We love this trick because it allows you to control the ‘swirl’ so it looks intentional and artistic rather than just a messy, blended purple blob. It provides a beautiful variety of flavors in every bite, ranging from the creamy base to the tart, concentrated ribbons of fruit jam. It’s a visually stunning way to show off the harvest of berry season, making your treats look like they were crafted by a professional pastry chef.
Ingredients
- 2 cups of vanilla yogurt or softened vanilla ice cream
- 1 cup of mixed berries (blackberries, raspberries, blueberries)
- 1 tablespoon of sugar
- A splash of water
- A squeeze of lemon
How to make it
- In a small saucepan, combine the berries, sugar, water, and lemon juice, simmering until the berries break down and the liquid becomes a thick syrup.
- Press the berry mixture through a sieve to create a smooth, seedless coulis, then let it cool completely in the refrigerator before using.
- Layer your popsicle molds or container by alternating a large spoonful of the vanilla base with a small drizzle of the chilled berry coulis.
- Take a thin skewer or a knife and dip it into the mold, making a ‘figure eight’ motion only twice to create the swirl without over-mixing the colors.
- Freeze the treats for at least five hours, ensuring the different densities of the yogurt and the syrup have time to bond together perfectly.
Embrace the Chill
I hope these recipes bring a little extra sparkle and coolness to your beautiful summer days, my loves. There is so much joy to be found in these small, sweet moments, and I can’t wait to see your own versions of these aesthetic treats lighting up my feed. Remember to take a deep breath, enjoy the sunshine, and always make time for a little bit of frozen magic. You deserve to feel as refreshed and radiant as these treats look!