
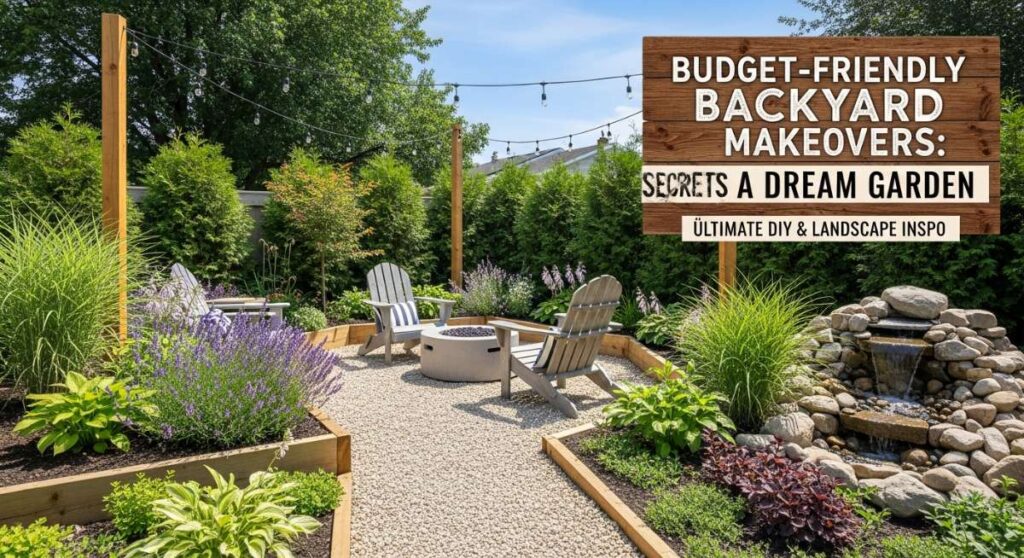
I remember sitting on my back porch last spring, looking at a patchy lawn and a stack of rusted chairs, feeling like my dream of a backyard sanctuary was miles away—and thousands of dollars out of reach. We often think that a ‘dream garden’ requires a professional crew and a massive budget, but I’ve learned that the magic really happens when you roll up your sleeves and get creative with what you have. There is something so incredibly soul-soothing about turning a neglected corner of your yard into a space that reflects your personality and invites you to slow down.
Today, I’m sharing the ultimate DIY and landscape inspiration to help you reclaim your outdoor space without breaking the bank. Whether you’re dreaming of a modern ranch exterior or a whimsical glass-filled garden, these projects are designed to be approachable, stylish, and deeply satisfying. Let’s dive into these secrets and transform your backyard into the retreat you deserve!
How to Design Rock Landscaping for a Maintenance Free Yard
Why we love this
There is a profound sense of serenity that comes with rock landscaping; the cool, smooth texture of river stones beneath your fingers and the earthy, mineral scent of damp slate after a light rain are pure bliss. We love this approach because it replaces the constant chore of mowing with a permanent, architectural beauty that looks intentional year-round. Imagine the satisfying crunch of gravel underfoot and the way the afternoon sun hits the varied grey and tan hues of the stones, creating a visual calm that grounds the entire garden.
Essential Elements:
- Landscape fabric (heavy-duty weed barrier)
- Landscape staples
- Metal or plastic edging
- River rocks, pea gravel, or crushed slate
- Feature boulders for focal points
- Drought-tolerant accent plants (like agave or lavender)
How to make it
- Clear the area by removing all existing grass and weeds using a flat-head shovel, ensuring you dig deep enough to remove root systems.
- Grade the soil to ensure proper drainage away from your home’s foundation, using a rake to create a slight slope.
- Lay down high-quality weed barrier fabric, overlapping the seams by at least six inches to prevent stubborn growth from peeking through.
- Secure the fabric with landscape staples every 12 inches, then install your edging material to create a crisp border between the rocks and other garden areas.
- Position your large feature boulders first, burying the bottom third of the rock so it looks like it’s naturally emerging from the earth rather than just sitting on top.
- Spread your chosen decorative stone in a layer at least 2-3 inches thick; visual cues for ‘doneness’ include a completely hidden landscape fabric and a level, uniform surface.
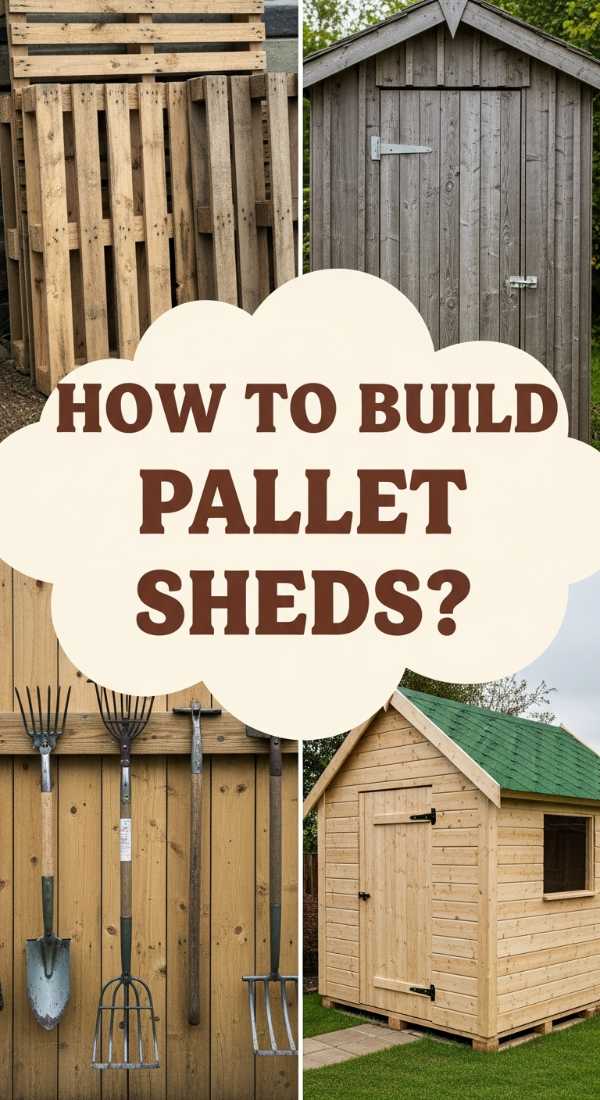
How to Build a Shed Out of Pallets for Stylish Storage
Why we love this
This project captures that perfect rustic-chic aesthetic while being incredibly eco-friendly and kind to your wallet. The scent of raw, weathered pine combined with the sturdy, tactile weight of the wood creates a structure that feels integrated into the landscape. We love the way the light filters through the gaps in the wood before it’s sealed, and the immense pride that comes from turning discarded industrial materials into a functional piece of backyard architecture that smells of sawdust and sunshine.
Essential Elements:
- 10-15 heat-treated pallets (look for the ‘HT’ stamp)
- Pressure-treated 4×4 posts for the base
- Corrugated metal roofing sheets
- Galvanized wood screws
- Door hinges and a simple latch
- Exterior-grade wood stain or sealant
How to make it
- Level the ground where the shed will sit and build a base frame using pressure-treated 4x4s, ensuring the corners are perfectly square.
- Select pallets of similar thickness and height to ensure your walls remain level as you build upward.
- Verticalize the first pallet at a corner, bracing it and screwing it directly into the base frame using heavy-duty galvanized screws.
- Connect subsequent pallets to each other by drilling through the internal stringers, which provides maximum structural integrity.
- For the roof, create a simple lean-to frame using 2x4s at a slight angle to allow for water runoff, then attach the corrugated metal sheets using roofing screws with rubber washers.
- The visual cue for a finished ‘shell’ is when the structure doesn’t wobble when pushed; finish by sanding any rough splinters and applying a generous coat of UV-resistant stain.
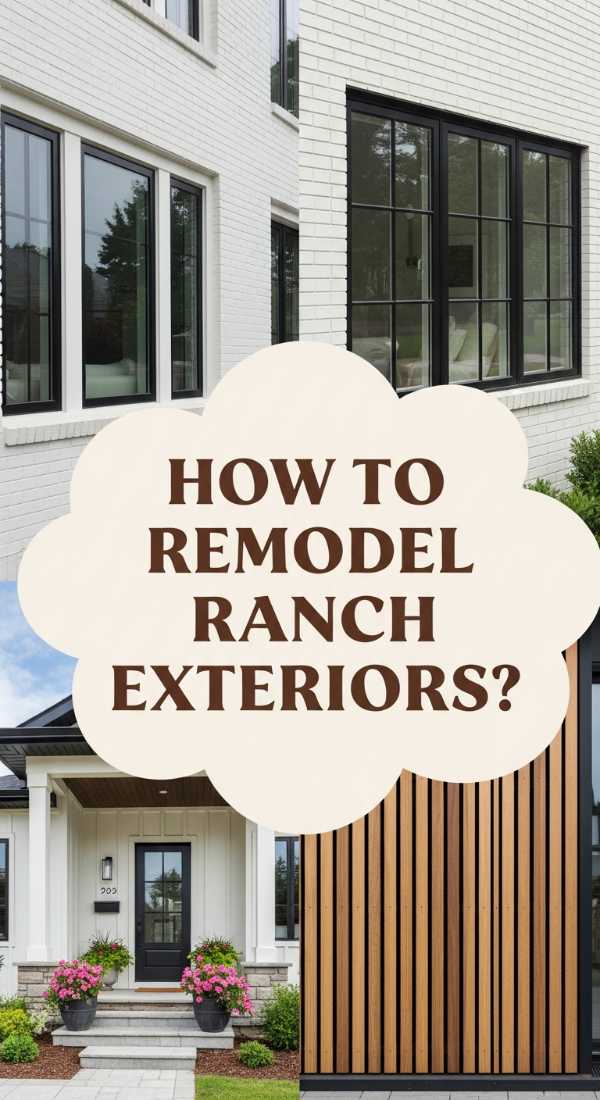
How to Update a Ranch Exterior Remodel for Modern Curb Appeal
Why we love this
Updating a ranch exterior is like giving your home a fresh, deep breath of air; the transformation from dated to modern provides an instant emotional lift every time you pull into the driveway. We love the contrast of matte black hardware against crisp white or charcoal siding, and the way the smooth, clean lines of modern trim feel sophisticated yet welcoming. The ‘aroma’ of fresh paint and the tactile smoothness of a newly installed wooden door create a sensory experience that signals a new chapter for your home.
Essential Elements:
- High-quality exterior latex paint (Matte or Eggshell)
- Modern house numbers (Black or Brushed Brass)
- Cedar planks for accent shutters or porch columns
- Contemporary light fixtures
- New mailbox and door hardware
How to make it
- Thoroughly power wash the entire exterior to remove chalking paint, dirt, and mildew; wait at least 48 hours for the surface to be bone-dry before painting.
- Patch any cracks in the siding or stucco with exterior-grade caulk, smoothing it with a wet finger for a seamless finish.
- Apply a high-adhesion primer if you are making a drastic color change, especially when going from a dark to a light shade.
- Paint the body of the house using a professional sprayer or high-nap roller, working in sections to maintain a ‘wet edge’ and avoid lap marks.
- Install cedar accents by measuring and cutting planks to fit existing columns or as decorative shutters, securing them with finish nails.
- The ‘doneness’ cue is a uniform color saturation with no shadows or bleed-through; once dry, install the modern hardware and lighting for that final designer touch.
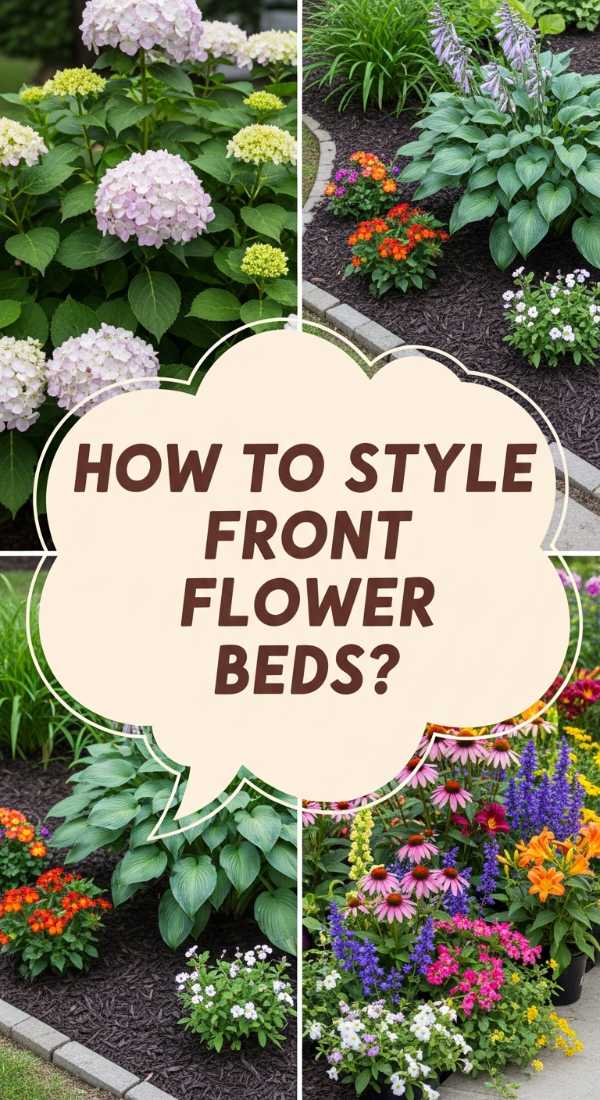
How to Arrange Flower Beds in Front of House for Instant Beauty

Why we love this
There is nothing quite like the intoxicating perfume of blooming jasmine or gardenias wafting through your front door on a summer evening. We love the layers of texture here—the velvety softness of lamb’s ear against the waxy sheen of magnolia leaves—and the vibrant pops of color that greet you daily. It’s a sensory feast that changes with the light, moving from bright and energetic in the morning sun to soft and romantic during the ‘golden hour’ at dusk.
Essential Elements:
- Organic garden soil and compost blend
- Mulch (shredded bark or pine needles)
- A mix of ‘Thriller, Filler, and Spiller’ plants
- Evergreen shrubs for year-round structure
- Natural stone or brick for edging
How to make it
- Map out your bed shape using a garden hose to create natural, flowing curves rather than rigid straight lines.
- Remove the grass within the curved line and till the soil to a depth of 8 inches, mixing in a generous amount of compost to enrich the ‘cooking’ environment for the roots.
- Place your tallest ‘thriller’ plants (like ornamental grasses or upright shrubs) toward the back of the bed or the center if it’s a 360-degree island.
- Surround the tall plants with ‘fillers’ (like hostas or mid-sized perennials) that provide bulk and texture.
- Plant ‘spillers’ (like creeping phlox or trailing petunias) at the very front edge so they can tumble over your stones or bricks.
- Apply a 3-inch layer of mulch, keeping it away from the direct stems of the plants; the visual cue for success is a lush, tiered look where no bare soil is visible.
How to Create DIY Duck Enclosure Ideas for Happy Backyard Pets

Why we love this
A duck enclosure brings a delightful, rhythmic energy to the backyard, characterized by the soft, comical ‘waddle-clucking’ and the splashing sounds of water. We love the combination of rustic wood, sturdy hardware cloth, and the fresh, grassy scent of clean straw bedding. It creates a dedicated space where you can connect with nature, feeling the cool splash of water as they play and the warmth of the sun on a well-constructed coop that keeps your feathered friends safe and happy.
Essential Elements:
- Hardware cloth (not chicken wire, for predator protection)
- Pressure-treated lumber for the frame
- A pre-formed pond or large galvanized tub
- Secure locking latches
- Pea gravel for the ‘splash zone’
- Straw or pine shavings for bedding
How to make it
- Frame out a walk-in enclosure using 2x4s, ensuring the height allows you to comfortably enter for cleaning and feeding.
- Attach hardware cloth to the exterior using heavy-duty staples, burying the bottom 6 inches of the mesh underground to prevent digging predators like foxes.
- Build a simple, elevated ‘house’ inside the enclosure with a sloped roof and a ramp, providing a dry place for the ducks to sleep.
- Dig a hole for the pond or tub, ensuring it sits flush with the ground so the ducks can easily hop in and out.
- Surround the water area with a thick layer of pea gravel to provide drainage and prevent the area from becoming a mud pit.
- The enclosure is ‘ready’ when all gaps are sealed and the water is crystal clear; add your ducks and watch them explore their new habitat!
How to Design an Outdoor Play Area for Kids for Endless Summer Fun

Why we love this
An outdoor play area is the heartbeat of a family backyard, filled with the sounds of laughter and the tactile joy of cedar chips and smooth climbing stones. We love this because it encourages a screen-free connection to the outdoors, where the scent of freshly cut wood and the bright, primary colors of play equipment spark pure imagination. It’s a space that feels energetic and alive, designed to withstand the rugged, joyful use of childhood while still looking beautiful in your landscape.
Essential Elements:
- Rubber mulch or engineered wood fiber (EWF)
- Timber borders or landscape timbers
- A chalkboard wall or mud kitchen
- Natural elements like ‘stump jumpers’ (tree trunk slices)
- A sun sail or shade structure
How to make it
- Select a level area in the yard, preferably with some natural afternoon shade, and clear it of any large rocks or debris.
- Install a perimeter using 4×4 landscape timbers, securing them with rebar driven through pre-drilled holes into the ground.
- Lay down a heavy-duty weed barrier and fill the area with at least 6-9 inches of certified playground mulch for impact absorption.
- Incorporate ‘zones’—a zone for active play (swings/slides), a zone for creative play (chalkboard/mud kitchen), and a zone for quiet time.
- Install a UV-rated sun sail overhead by anchoring it to 4×4 posts or the side of the house to keep the area cool during peak heat.
- Safety check: Ensure all bolts on equipment are recessed and there are no sharp edges; the ‘ready’ signal is a bouncy, soft floor and secure, wobble-free structures.
How to Achieve Realistic Pantry Organization for a Stress Free Kitchen
Why we love this
While technically indoors, a perfectly organized pantry is the engine that fuels your outdoor lifestyle, making it easy to grab snacks for a garden picnic or supplies for a backyard BBQ. We love the visual rhythm of matching glass jars, the faint, comforting aroma of dried herbs and spices, and the tactile satisfaction of a drawer that glides open perfectly. It’s about the peace of mind that comes from knowing exactly what you have, wrapped in a beautiful, minimalist aesthetic that turns a chore into a joy.
Essential Elements:
- Clear glass or BPA-free plastic airtight containers
- Uniform labels (minimalist or script)
- Tiered shelf organizers for canned goods
- Woven baskets for ‘loose’ items like potatoes or snacks
- Lazy Susans for oils and vinegars
How to make it
- Empty the entire pantry completely—this is the ‘clean slate’ phase where you check expiration dates and wipe down every shelf with a mild vinegar solution.
- Categorize your items into groups: baking, breakfast, snacks, dinner staples, and ‘backstock’ for extras.
- Decant dry goods like flour, sugar, and pasta into your clear containers; this visual cue allows you to see at a glance when you are running low.
- Place frequently used items at eye level, while heavy items (like flour bags or appliances) should go on lower shelves and rarely used items go up top.
- Use baskets to hide the ‘visual noise’ of mismatched packaging, labeling each basket clearly so family members know where things belong.
- The project is complete when every item has a ‘home’ and there is breathing room on the shelves, creating a curated, boutique-grocery feel.
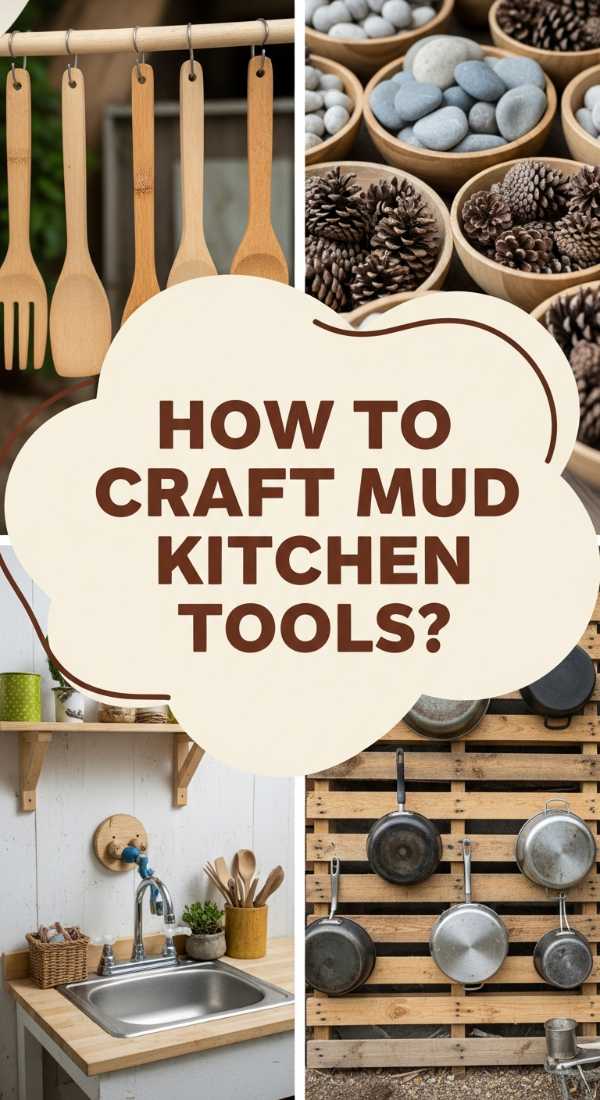
How to Make Mud Kitchen Accessories for Creative Nature Play
Why we love this
This is sensory play at its absolute finest—the squelch of mud between fingers, the floral scent of crushed marigold ‘soup,’ and the grainy texture of sand ‘cupcakes.’ We love that mud kitchen accessories are often upcycled treasures that give children permission to get messy and creative. It’s a rustic, whimsical addition to the garden that smells of damp earth and woodsmoke, providing a tactile experience that no plastic toy can ever replicate.
Essential Elements:
- Old stainless steel pots, pans, and colanders
- Wooden spoons and whisks
- Muffin tins and cake pans
- A ‘sink’ (a plastic washbasin or old metal bowl)
- Hooks for hanging utensils
- Natural ‘ingredients’ (pinecones, pebbles, flower petals)
How to make it
- Scour thrift stores or your own kitchen cabinets for durable metal or wooden items—avoid anything glass or ceramic that could break outdoors.
- Install a simple wooden workbench or use an old potting bench as the ‘stove’ and ‘counter’ area.
- Drill small holes in the bottom of your ‘sink’ basin if you want it to drain slowly, or keep it solid for ‘soup making.’
- Screw small ‘C’ hooks into the backsplash of the kitchen to hang whisks and spoons, keeping them organized and accessible.
- Create a ‘spice rack’ using small plastic containers filled with dried lavender, sand, or crushed leaves to add to the sensory experience.
- The mud kitchen is ‘open for business’ when you have a dedicated water source nearby and a bucket of clean dirt ready for the first ‘recipe.’
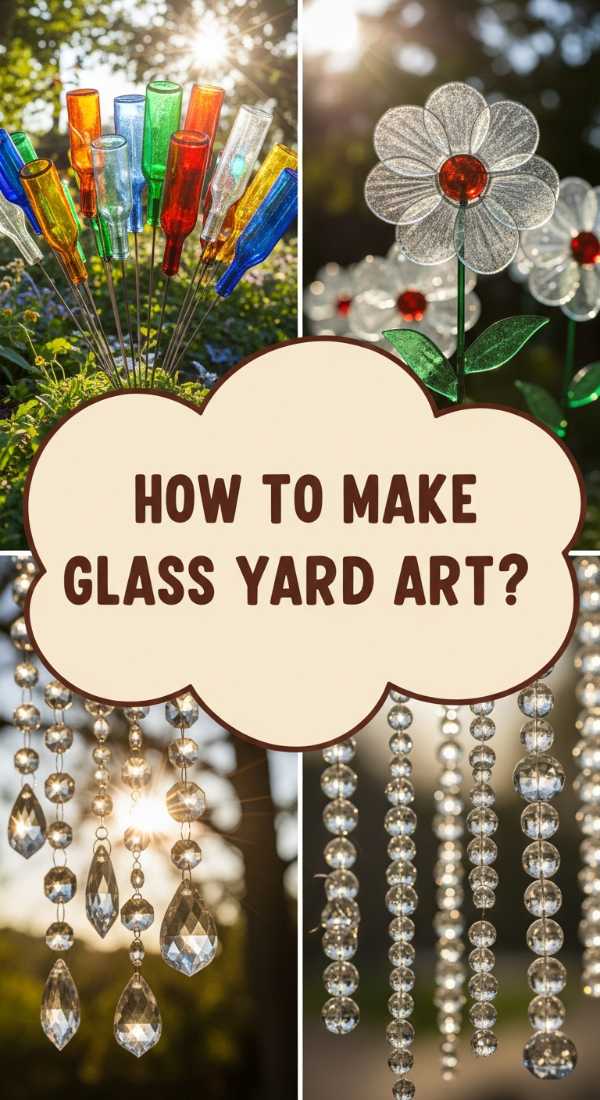
How to Craft Glass Yard Art for a Whimsical Garden Vibe
Why we love this
Glass yard art brings a magical, kaleidoscope quality to the garden, catching the light and casting dancing shadows of cobalt, emerald, and amber across the grass. We love the tinkling sound of glass pieces catching a light breeze and the smooth, cool-to-the-touch surface of vintage plates and bowls. It adds a layer of sparkle and ‘grown-up whimsy’ that feels like finding hidden treasure among the greenery, especially when the evening light hits it just right.
Essential Elements:
- Vintage glass plates, bowls, and vases (various colors)
- Heavy-duty waterproof adhesive (like E6000 or clear silicone)
- Copper pipes or sturdy rebar for stakes
- Drill with a diamond-tipped masonry bit (if creating hanging pieces)
- Glass beads or marbles for accents
How to make it
- Lay out your glass pieces on a flat surface to ‘dry fit’ the design, stacking plates and bowls to create flower shapes or totem-like towers.
- Clean all glass surfaces thoroughly with rubbing alcohol to ensure a professional-grade bond for the adhesive.
- Apply a generous bead of waterproof adhesive to the contact points, pressing the pieces together firmly and allowing them to ‘cure’ for a full 24-72 hours (depending on humidity).
- To create a ‘glass flower’ stake, glue a small glass vase to the back of your plate assembly; the vase will eventually slide over the copper pipe.
- If drilling holes, keep the glass submerged in a shallow tray of water to prevent overheating and cracking, using a slow, steady pressure with your diamond bit.
- The visual cue for completion is a crystal-clear bond with no visible air bubbles; place your art where it will catch the most direct sunlight for maximum sparkle.
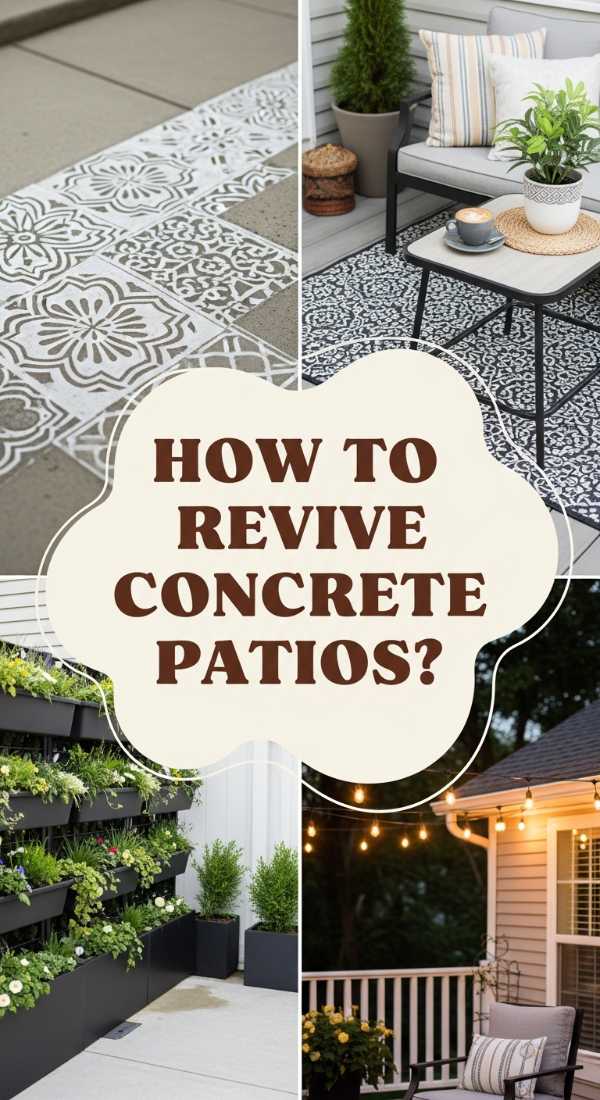
How to Complete a Concrete Slab Patio Makeover for a Luxe Outdoor Living Space
[IMAGE_10]
Why we love this
There is nothing quite like the sleek, sophisticated feel of a revived concrete patio; it’s the difference between a ‘backyard’ and an ‘outdoor living room.’ We love the cool temperature of the treated concrete under bare feet and the way a fresh, stenciled pattern or high-gloss sealer can make old cement look like expensive tile. The aroma of a new sealer signifies a space that is protected and ready for summer dinner parties, providing a clean, expansive canvas for your most comfortable outdoor furniture.
Essential Elements:
- Concrete cleaner and degreaser
- Concrete patch compound for cracks
- Etching solution (to open the pores of the concrete)
- Concrete paint or stain
- Large-scale stencil (optional for a ’tile’ look)
- High-quality exterior concrete sealer
How to make it
- Deep clean the slab using a pressure washer and degreaser; visual cues for ‘clean’ mean no oil spots remain and the water no longer beads on the surface.
- Fill any cracks or pits with concrete patch, smoothing it with a trowel and allowing it to dry until it matches the surrounding texture.
- Apply an etching solution according to the manufacturer’s instructions (it will bubble and ‘fizz’ as it works), then rinse thoroughly and let dry for 24 hours.
- Apply your base coat of concrete stain or paint using a long-handle roller, working in 4×4 foot sections to ensure even coverage.
- If stenciling, wait for the base coat to be fully dry (usually 12-24 hours), then secure the stencil with painter’s tape and use a ‘dry brush’ technique to avoid bleed-through.
- Apply two thin coats of sealer; the patio is ‘done’ when it has a uniform sheen and water beads up on the surface rather than soaking in.
Transforming Your Garden, One Project at a Time
Your backyard is more than just an outdoor space—it’s an extension of your home and a canvas for your creativity. By taking on these DIY projects, you’re not just saving money; you’re infusing your environment with your own energy and style. Whether you start small with a bit of glass art or go big with a patio makeover, the key is to enjoy the process and the sensory rewards that follow. Happy gardening!