
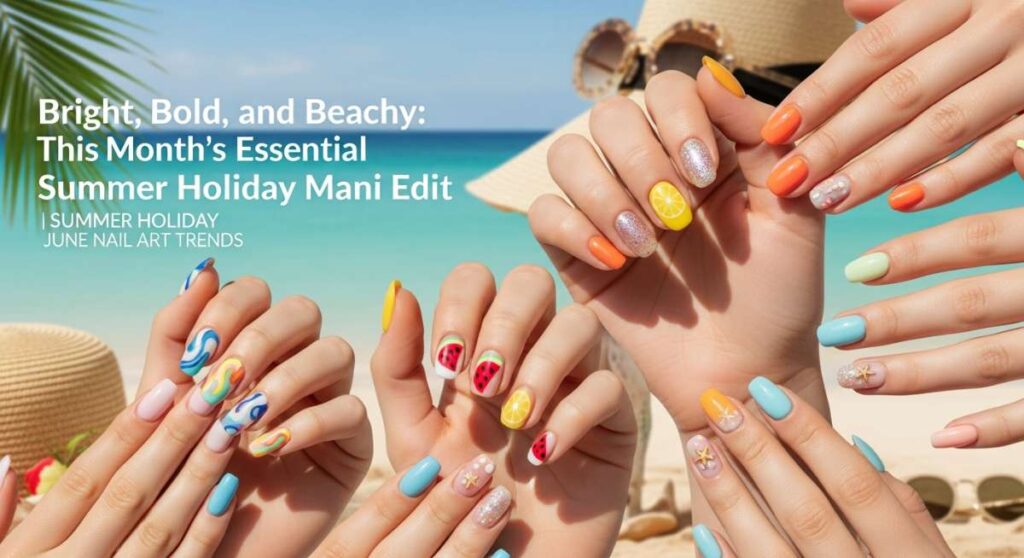
Bright, Bold, and Beachy: This Month’s Essential Summer Holiday Mani Edit
Hello my loves! Can you feel that? There is a certain magic in the air right now—a mixture of salt spray, blooming jasmine, and the sheer, unadulterated excitement of a suitcase waiting to be filled. June is finally here, and with it comes that dreamy transition into our sun-drenched holiday selves. I’ve been spending my mornings sipping iced lattes and dreaming of turquoise waters, and you know me—I couldn’t let us head into the season without the perfect set of tips to match our vacation glow.
Your manicure is so much more than just a color choice; it’s the finishing touch on your holiday mood. It’s that flash of neon against your favorite linen dress, or the shimmer of a gold charm as you reach for a cocktail by the pool. Today, I’m wrapping you in a cloud-soft embrace and sharing my ultimate June nail edit. We’re talking about every trend that is making my heart skip a beat right now, from 3D textures to those nostalgic tropical patterns we all adore. Let’s dive into this little oasis of inspiration together!
5 Steps to Create June Trending Hibiscus Nails

Why to love this Design:
Hibiscus nails are the ultimate love letter to the early 2000s tropical aesthetic. They bring a playful, feminine energy that looks absolutely stunning in your vacation photos, especially when paired with a bright bikini. It feels like wearing a little piece of paradise right on your fingertips.
Essential Elements:
- Neon pink and vibrant orange base colors
- White linework gel
- A fine detailing brush
- Tiny gold gems for the flower center
How to Prepare:
- Apply two coats of your chosen vibrant base color and cure.
- Using a fine brush, sketch five teardrop shapes in a circle to form the petals.
- Fill in the petals with a softer shade or white for contrast.
- Add a thin line (the stamen) extending from the center and dot with gold polish or a gem.
- Seal with a high-shine top coat for that glossy, floral finish.
Budget Range
- Beetles Tropical Gel Set: $12.99
- Winstonia Detail Brushes: $7.50
Prepare Your Summer Trip Nails in 4 Phases

Why to love this Design:
Preparation isn’t just a chore; it’s a ritual of self-care. Ensuring your nails are prepped properly means your holiday mani will actually last through the sand, salt, and sun, keeping you looking polished from the first flight to the final sunset.
Essential Elements:
- Cuticle softener
- Glass nail file
- Nail dehydrator and primer
- Long-wear base coat
How to Prepare:
- Soften and gently push back cuticles to create a clean canvas.
- Shape your nails with a glass file to prevent peeling and snagging.
- Apply a dehydrator followed by a primer to ensure maximum adhesion.
- Apply and cure a high-quality base coat to protect the natural nail.
Budget Range
- Sally Hansen Instant Cuticle Remover: $5.99
- Modelones Nail Prep Dehydrator & Primer: $9.99
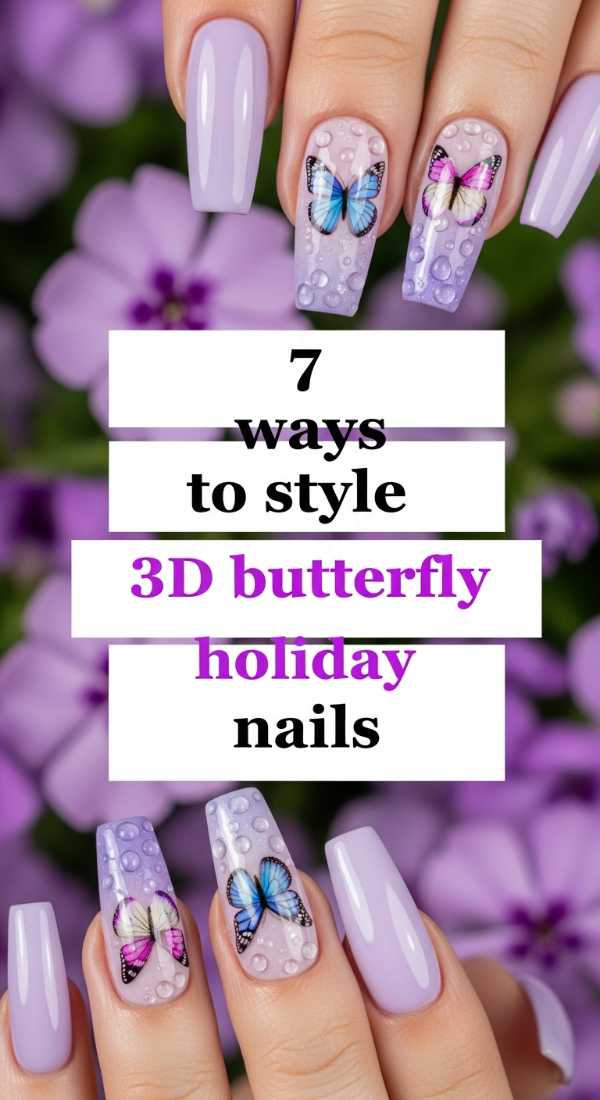
7 Ways to Style 3D Butterfly Holiday Nails
Why to love this Design:
There is something so ethereal and whimsical about 3D butterflies. They catch the light beautifully and add a sense of movement to your look. It’s a trend that feels both high-fashion and incredibly sweet, perfect for those dreamy European getaway vibes.
Essential Elements:
- Iridescent butterfly charms
- Clear builder gel or rhinestone glue
- Pastel ombre base
- Tweezers for precision
How to Prepare:
- Create a soft pastel gradient base and cure.
- Apply a small bead of builder gel where you want the butterfly to sit.
- Using tweezers, carefully place the charm into the gel.
- Secure the edges by adding a tiny bit more gel around the base of the charm.
- Cure for double the time to ensure the 3D element is locked in.
- Avoid top-coating over the charm to keep its facets sparkling.
- Finish the rest of the nail with a glossy top coat.
Budget Range
- Makartt Rhinestone Glue: $8.99
- 3D Acrylic Butterfly Charms (50pcs): $6.50
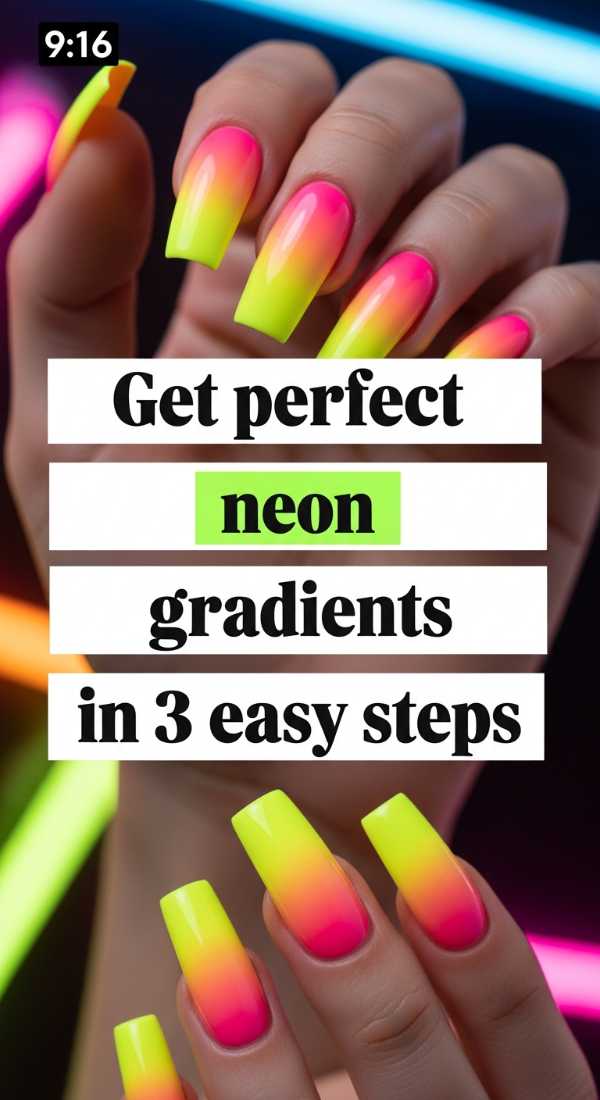
Get Perfect Neon Gradients in 3 Easy Steps
Why to love this Design:
Nothing screams summer like neon! A gradient effect softens the intensity of the bright colors, creating a sunset-like transition that looks incredible against a tan. It’s bold, it’s fun, and it’s surprisingly easy to achieve at home.
Essential Elements:
- Makeup sponge (wedge style)
- Liquid latex (for easy cleanup)
- Neon yellow, orange, and pink polishes
How to Prepare:
- Apply liquid latex around your cuticles to protect your skin.
- Paint the neon colors in stripes directly onto the makeup sponge.
- Dab the sponge onto your nail repeatedly until the colors blend perfectly, then peel the latex and seal.
Budget Range
- Modelones Neon Gel Polish Set: $15.99
- Latex Tape for Nails: $7.00
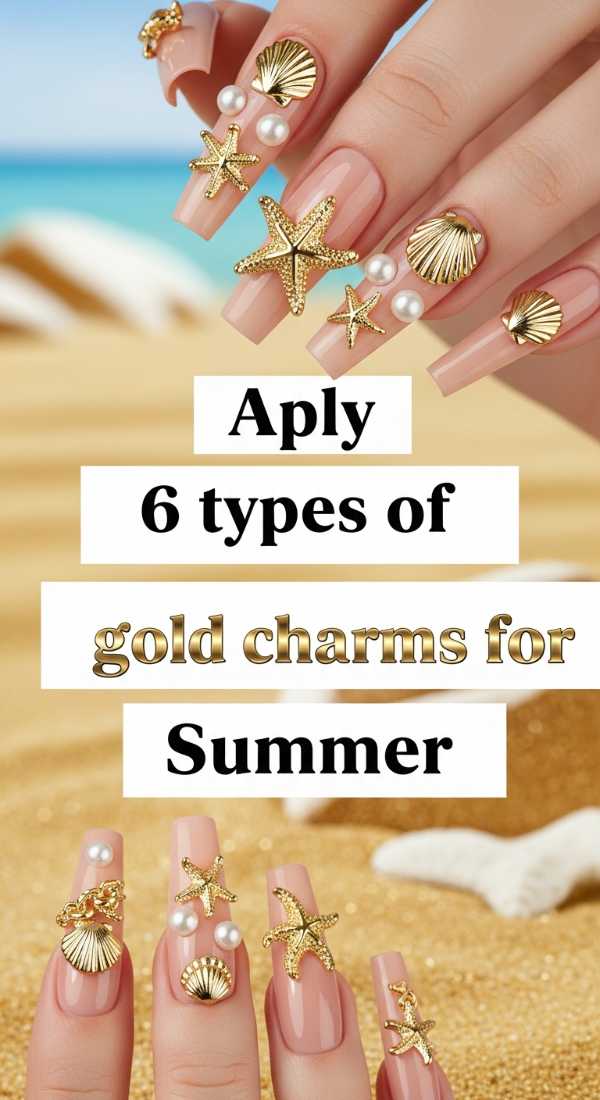
Apply 6 Types of Gold Charms for Summer
Why to love this Design:
Gold charms transform a simple manicure into a piece of jewelry. Whether it’s a tiny seashell or a celestial star, these metallic accents add a touch of luxury and ‘old money’ beach vibes that look sophisticated and expensive.
Essential Elements:
- Gold shells, stars, and coin charms
- Nail art tweezers
- Thick top coat
- Gold foil flakes
How to Prepare:
- Choose your base—nude or white works best to make the gold pop.
- Apply a dab of foil glue or thick top coat.
- Place your charm and press down gently.
- Layer foil flakes around the charm for extra dimension.
- Seal the entire design with two layers of top coat to prevent snagging.
- Ensure there are no sharp edges exposed.
Budget Range
- Mixed Gold Nail Art Studs: $9.50
- Mylar Gold Flakes: $5.00
Design June Nails with 5 Tropical Patterns

Why to love this Design:
Tropical patterns are like a vacation for your hands! From palm fronds to pineapple motifs, these designs are eclectic and full of personality. They tell a story of adventure and are the perfect conversation starter at the beach bar.
Essential Elements:
- Emerald green and deep teal polishes
- Dotting tools
- Matte and gloss top coat combo
- Fine liner brush
How to Prepare:
- Paint your base in a neutral or sandy tone.
- Use a liner brush to create the spine of a palm leaf.
- Add small, flicking strokes outward for the fronds.
- Use a dotting tool to add tiny ‘coconuts’ or fruit accents.
- Mix matte and gloss finishes for a high-end, textured look.
Budget Range
- Saviland Nail Art Liners: $18.00
- Dotting Tool Set: $4.00
Make 3D Water Droplets in 4 Simple Moves

Why to love this Design:
This is one of my favorite ‘hidden’ trends. It looks like you’ve just stepped out of the ocean and the water is still clinging to your nails. It’s incredibly fresh, cooling to look at, and adds a futuristic touch to a simple blue mani.
Essential Elements:
- Matte top coat (for the base)
- Non-wipe clear builder gel
- Large dotting tool
- UV/LED lamp
How to Prepare:
- Apply your base color and a matte top coat, then cure.
- Dip a dotting tool into thick, clear builder gel.
- Place random ‘droplets’ of different sizes onto the matte surface.
- Flash cure immediately so they don’t lose their rounded shape.
Budget Range
- NYK1 Nail Bond Glue/Builder: $14.00
- Kodi Matte Top Coat: $12.00
Recreate These 8 Holiday Nails for Your Trip
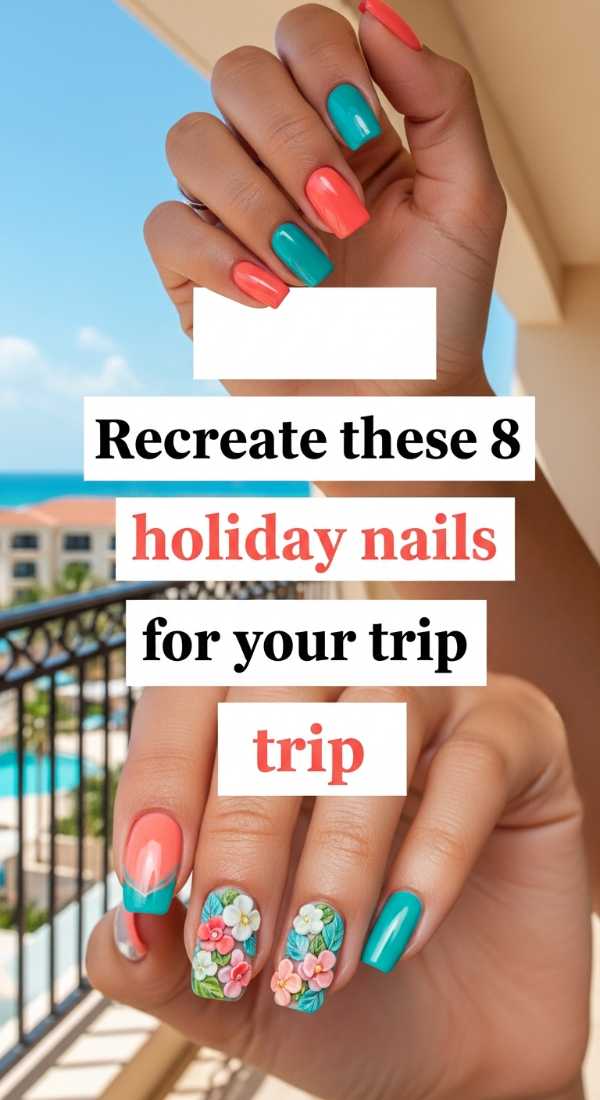
Why to love this Design:
Variety is the spice of life, loves! Having a repertoire of holiday designs means you can match your nails to the vibe of your destination—be it the chic streets of Paris or the rugged coast of Amalfi.
Essential Elements:
- Assorted gel polish set
- Striping tape
- Transfer foils
- Selection of stickers
How to Prepare:
- Map out your colors for each nail to ensure a cohesive palette.
- Layer thin coats of color to build opacity without bulk.
- Use striping tape for clean, geometric lines.
- Apply stickers or foils for quick, intricate details.
Budget Range
- Gellen 8-Color Summer Set: $16.99
- Holographic Nail Foil Kit: $8.00
Master 5 June Nail Designs for the Beach

Why to love this Design:
Beach-specific nails are all about reflecting the natural beauty of the shoreline. Think ocean waves, sandy textures, and the colors of a sea-glass collection. It’s a serene and beautiful way to connect with your environment.
Essential Elements:
- Shimmering sea-foam blue polish
- White ‘blooming’ gel for waves
- Real sand or textured glitter
- Small pearl accents
How to Prepare:
- Apply a blue ombre base to represent the depth of the water.
- Use blooming gel and white polish to create a sea-foam effect.
- Press fine glitter into the tacky layer of the ‘shore’ edge.
- Add a tiny pearl near the cuticle and seal with a protective top coat.
- Cure thoroughly to lock in the textures.
Budget Range
- Lavender Violets Blue Tones: $13.99
- Tiny Faux Pearls: $4.50
Finish Your Summer Nails in 10 Quick Minutes
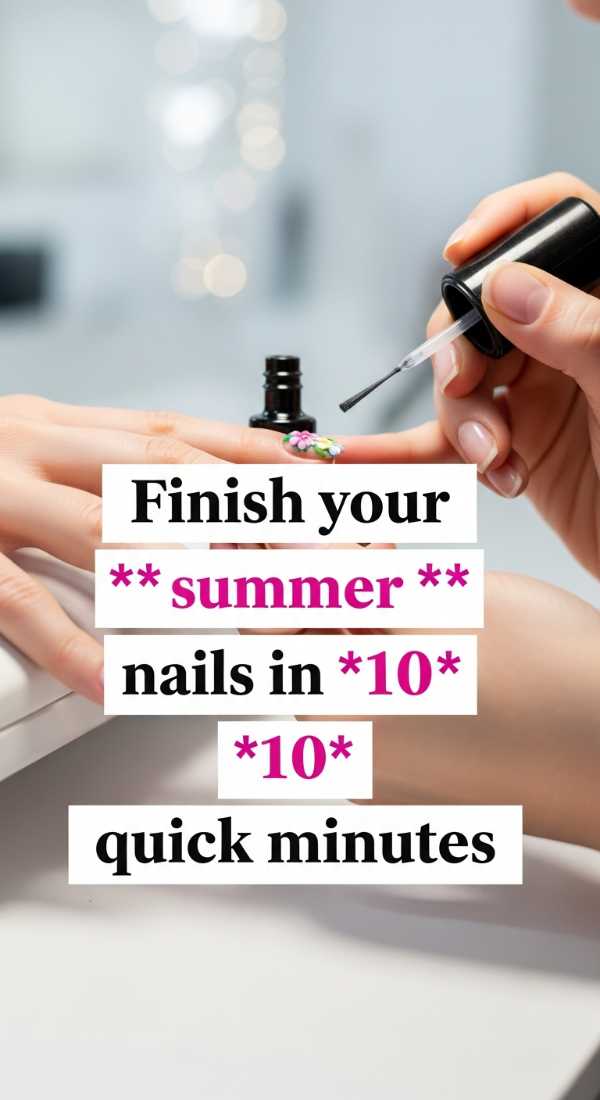
Why to love this Design:
We’ve all been there—the taxi is waiting, and your nails aren’t done! This quick-fix method is a lifesaver. It’s for the busy girl who wants maximum impact with minimum effort, leaving more time for packing and prosecco.
Essential Elements:
- High-quality press-on nails
- Adhesive tabs or fast-set glue
- Instant-dry top coat
- Cuticle oil pen
How to Prepare:
- Quickly buff the nail surface to remove shine.
- Wipe with alcohol to ensure a clean bond.
- Apply adhesive and press the nail firmly for 15 seconds.
- Swipe on a quick-dry top coat for extra shine and go!
- Hydrate cuticles on the way to the airport.
Budget Range
- imPRESS Press-On Manicure: $8.99
- Cuccio Cuticle Revitalizer Oil: $6.00
Wishing You the Most Magical Summer
I hope this edit has sparked a little flame of creativity in you, my loves. Whether you go for the bold neons or the delicate water droplets, remember that your holiday is a time to shine from the inside out. There is nothing quite like the confidence a fresh set of nails gives you as you explore new horizons. I can’t wait to see which designs you choose to take on your adventures! Stay bright, stay bold, and most importantly, stay you. Happy travels!