
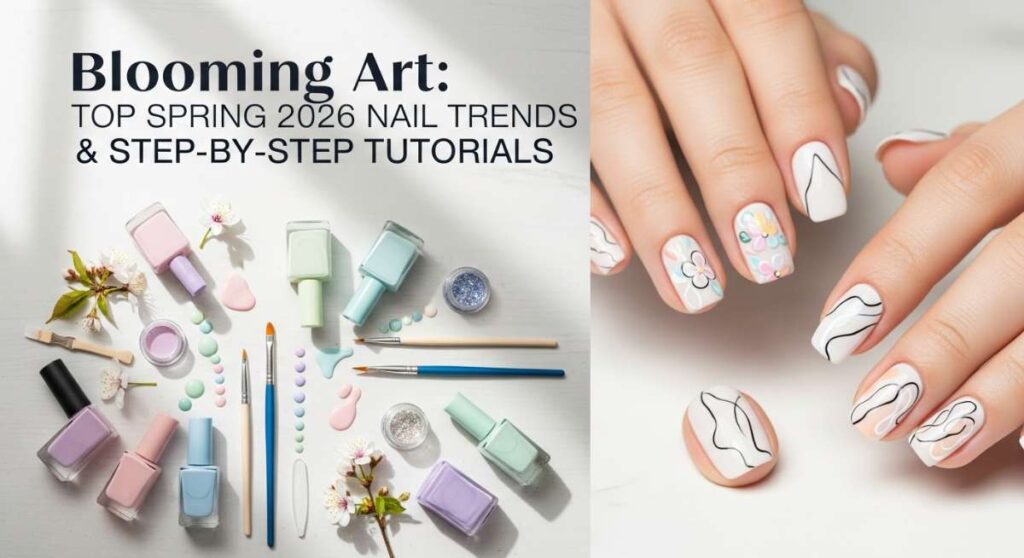
Blooming Art: Top Spring 2026 Nail Trends & Step-by-Step Tutorials
Hello, my sweet loves! Can you feel it? There’s a gentle shift in the air, a whisper of warmth that tells us winter is finally tucking itself away. As the first blossoms start to peek through the soil, I find myself craving that same sense of renewal at my very fingertips. For me, spring isn’t just a season; it’s a soft, cloud-like embrace that invites us to shed our heavy layers and embrace the vibrant, artistic spirit within.
This year, Spring 2026 is all about storytelling through color and texture. Our nails are no longer just an accessory; they are tiny canvases reflecting the joy of a sunny morning or the nostalgic charm of a vintage scarf. I’ve spent the last few weeks experimenting with the dreamiest palettes and the most whimsical designs, and I am so beyond excited to share these little pieces of art with you today. Grab a cup of lavender tea, settle into your favorite sunlit corner, and let’s explore the trends that will make your heart bloom.
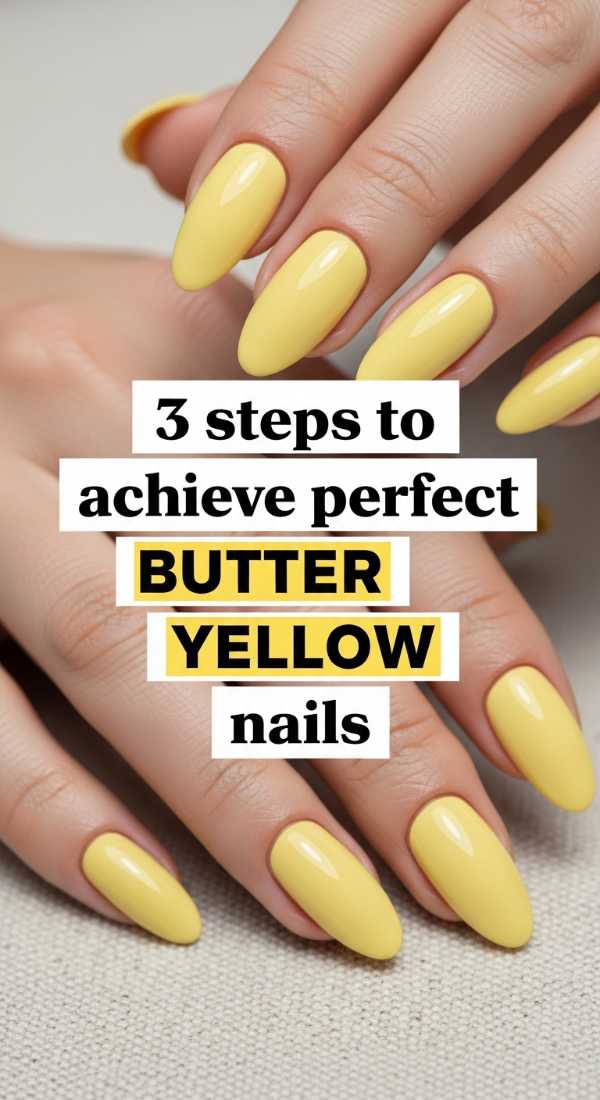
The Softest Whisper: 3 Steps to Butter Yellow Nails
Why to love this Design:
Butter yellow is the ultimate ‘quiet luxury’ color for Spring 2026. It’s like wearing a warm ray of sunshine on your hands without being too loud. It’s creamy, comforting, and looks absolutely divine against the soft knits we transition into during the early spring months.
Essential Elements:
- Creamy Pastel Yellow Polish
- Ridge-filling Base Coat
- High-gloss Top Coat
How to Prepare:
- Apply a ridge-filling base coat to ensure a perfectly smooth surface for the pale pigment.
- Apply two thin, even coats of butter yellow polish, allowing each to dry fully to avoid streaks.
- Finish with a thick layer of gloss top coat to give it that ‘melted butter’ finish.
Budget Range
- Essie ‘Butter Please’ ($10)
- OPI ‘Sun, Sea, Sand in my Pants’ ($11)
- Sally Hansen Insta-Dri Top Coat ($7)
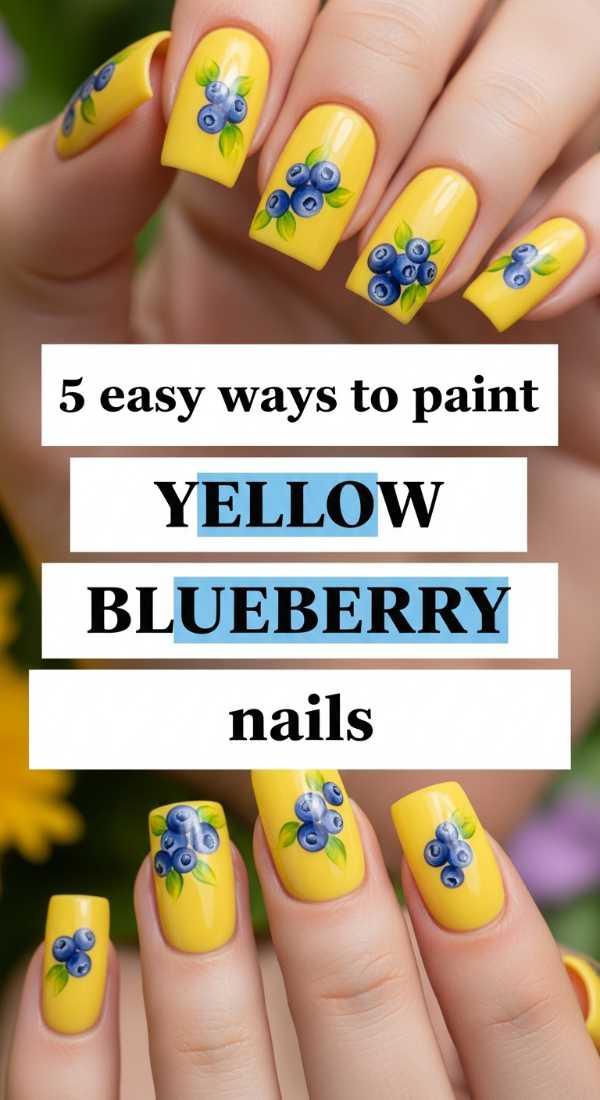
Fruitful Whimsy: 5 Easy Ways to Paint Yellow Blueberry Nails
Why to love this Design:
There is something so incredibly charming and ‘cottage-core’ about mixing sunny yellows with deep berry blues. This design feels like a picnic in a hidden garden, blending the zest of citrus with the sweetness of spring fruit. It’s playful, artistic, and always starts a conversation.
Essential Elements:
- Bright Lemon Yellow Polish
- Deep Navy or Cornflower Blue Polish
- Fine Detail Nail Brush
- Dotting Tool
- Matte Top Coat (Optional for a velvet fruit look)
How to Prepare:
- Paint your base in a soft lemon yellow and let it dry completely.
- Using a dotting tool, place two or three small clusters of blue dots to represent the blueberries.
- With a fine brush, add a tiny speck of white or light blue on each ‘berry’ for a highlight.
- Add a tiny green leaf or stem using a toothpick or thin brush.
- Seal the design with a clear coat to protect your fruit art.
Budget Range
- Zoya ‘Darcy’ Yellow ($12)
- Holler and Glow Blue Liner ($8)
- Nail Art Dotting Tool Set ($5 on Amazon)
Power and Petals: 4 Secrets for Bold Red Spring Nails

Why to love this Design:
Whoever said red was only for winter hasn’t seen the ‘Cherry Blossom Red’ trend of 2026. This is a bright, poppy-infused red that feels energized and alive. It brings a sophisticated edge to your floral dresses and makes you feel instantly put-together and powerful.
Essential Elements:
- Vibrant Tomato-Red Polish
- Cuticle Oil
- Precision Clean-up Brush
- Nail Buffer
How to Prepare:
- Buff the nails to a high shine before application to ensure the red pigment lays flat and vibrant.
- Apply the red polish in three strokes: down the center, then once on each side for total coverage.
- Use a precision brush dipped in acetone to clean the edges for a professional, sharp look.
- Apply cuticle oil daily to keep the skin around the bold color looking hydrated and soft.
Budget Range
- Dior Vernis ‘999’ ($30)
- Revlon ‘Cherries in the Snow’ ($9)
- Cuccio Milk & Honey Cuticle Oil ($13)
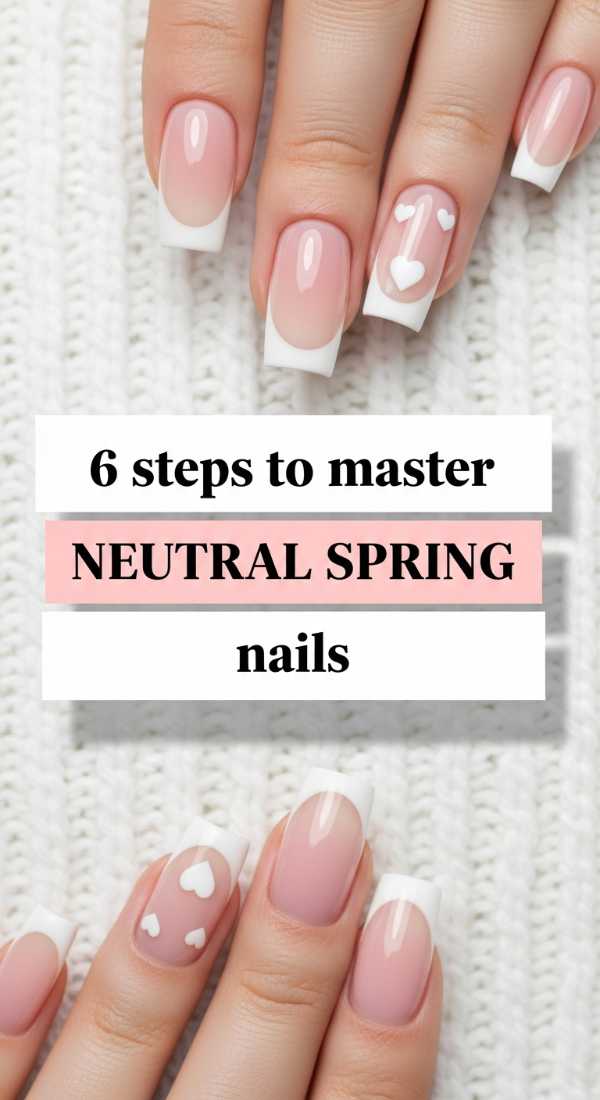
Sweet Simplicity: 6 Steps to Master Neutral Spring Nails with Hearts
Why to love this Design:
This is for my minimalists who still want a touch of romance. It’s like a love letter to yourself. The neutral base keeps things professional and clean, while the tiny hearts add a whisper of playfulness that catches the light when you’re typing or holding your coffee.
Essential Elements:
- Sheer Nude or ‘Milky’ Polish
- Crimson or Soft Pink Polish
- Toothpick or fine dotting tool
- Steady hand!
How to Prepare:
- Start with two coats of your favorite sheer nude base.
- Place two small dots of the heart color side-by-side where you want the heart to live.
- Use a toothpick to drag the bottom of the dots together into a ‘V’ shape to form the heart.
- Repeat on one or two accent nails for a subtle look.
- Let the hearts dry longer than usual as they are thicker.
- Seal with a gentle top coat swipe.
Budget Range
- Londontown Kur Illuminating Nail Concealer ($20)
- Wet n Wild ‘Red Red’ ($3)
- Mani-Me Heart Decals (Optional – $12)
Futuristic Glow: 5 Tips to Apply Spring Chrome Nails
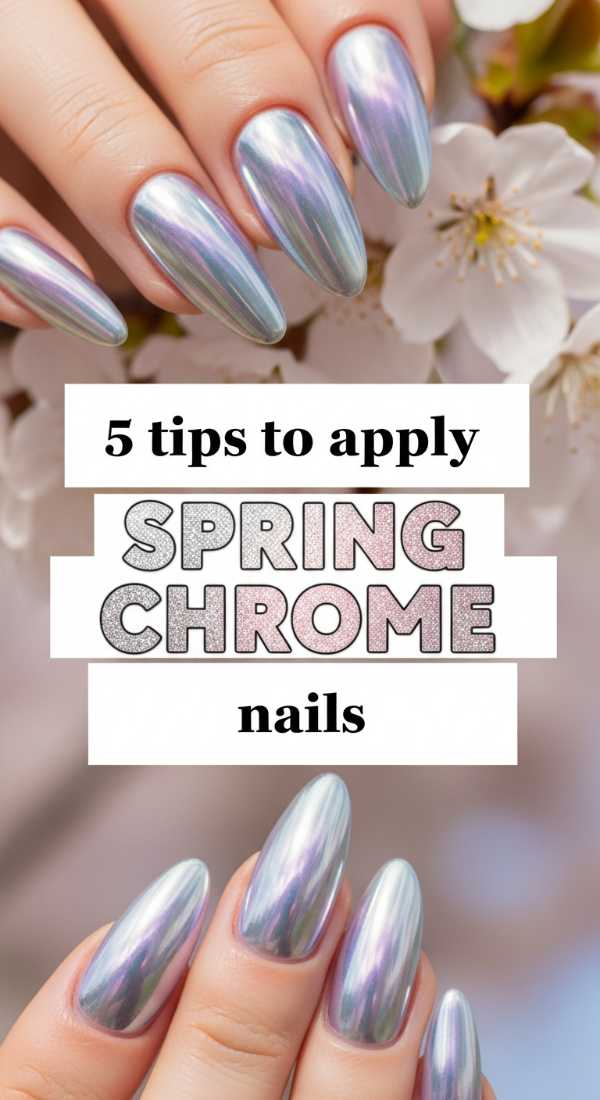
Why to love this Design:
Spring 2026 chrome isn’t the heavy metallic of the past; it’s ‘Pearl-Core.’ Think of the inside of a seashell or a dewdrop on a leaf. It gives your hands an ethereal, otherworldly glow that feels incredibly fresh and modern.
Essential Elements:
- White or Pale Pink Gel Polish
- Iridescent Chrome Powder
- Sponge Applicator
- UV/LED Lamp
- No-Wipe Top Coat
How to Prepare:
- Apply and cure your base color, then apply a ‘No-Wipe’ top coat and cure it for only 30 seconds.
- Use the sponge to rub the chrome powder onto the warm nail until it turns into a mirror finish.
- Gently brush off excess powder with a soft fluffy brush.
- Apply another layer of top coat, making sure to ‘cap’ the free edge to prevent peeling.
- Cure for a final 60 seconds for a rock-hard, glowing finish.
Budget Range
- Born Pretty Pearl Powder ($7)
- Beetles No-Wipe Gel Top Coat ($8)
- SunUV Mini Lamp ($20)
Retro Revival: 4 Simple Techniques for Spring Checkered Nails
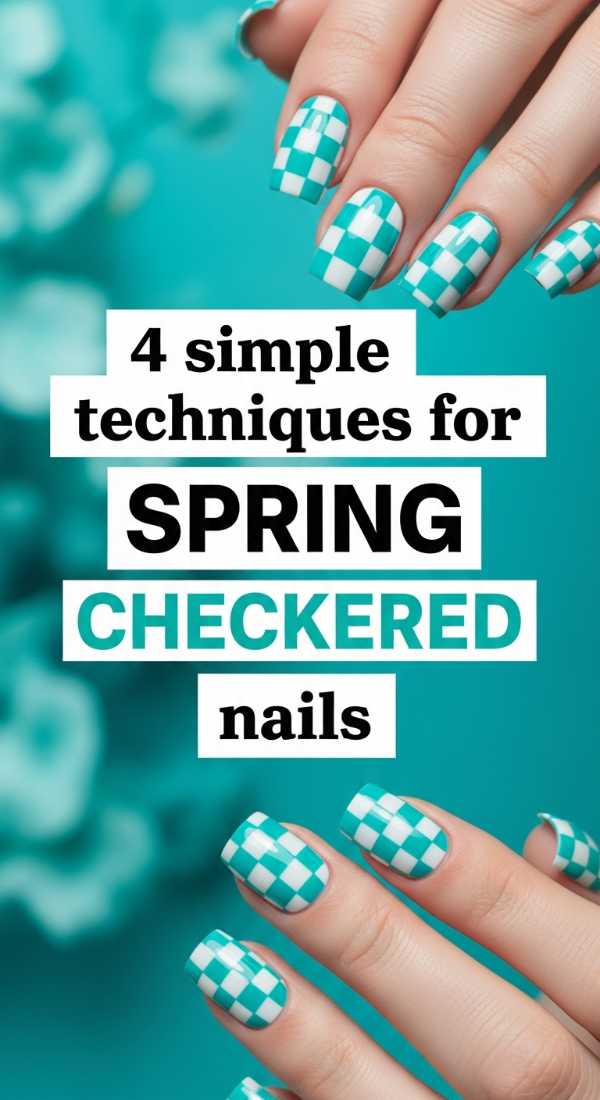
Why to love this Design:
Checkered patterns are back in a big way, but for spring, we’re doing them in ‘picnic pastels.’ It’s a bit 70s, a bit mod, and entirely stylish. It’s the perfect way to wear multiple spring shades at once without it feeling chaotic.
Essential Elements:
- Two contrasting pastel polishes (e.g., Lavender and Mint)
- Striping Tape or a steady Liner Brush
- Patience
How to Prepare:
- Paint the entire nail with the lighter of your two colors.
- Use a fine liner brush to draw a vertical line down the center and a horizontal line across.
- Carefully fill in the alternating squares like a chessboard.
- If you struggle with straight lines, use striping tape to mask off the squares before painting.
Budget Range
- Essie ‘Mint Candy Apple’ ($10)
- Olive & June ‘Bold & Unshaken’ Purple ($9)
- Winstonia Professional Nail Art Brushes ($12)
Gothic Garden: 3 Bold Looks for Edgy Black Spring Nails
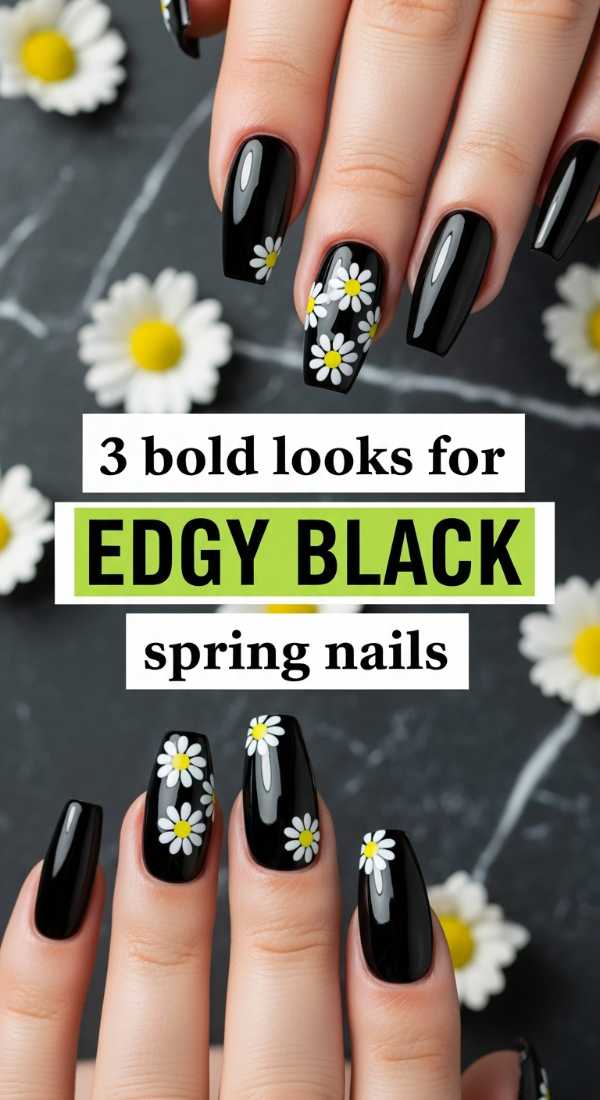
Why to love this Design:
Who says spring has to be all sunshine? For my loves who embrace their dark side, ‘Edgy Black’ in spring is all about high contrast. Pairing black with floral accents or negative space makes it feel intentional and chic rather than heavy.
Essential Elements:
- High-shine Black Polish
- Matte Top Coat
- Silver Studs or Floral Stickers
How to Prepare:
- The ‘French Edge’: Paint a black tip over a clear base for a modern, edgy French manicure.
- The ‘Matte Mix’: Paint the nail black, then use a matte top coat leaving only a glossy black heart in the center.
- The ‘Spring Contrast’: Apply black polish and once dry, add one small white daisy sticker to the base of the nail.
Budget Range
- Chanel Le Vernis ‘Rouge Noir’ or Black ($32)
- Orly ‘Liquid Vinyl’ ($15)
- Deco Miami Nail Stickers ($8)
Artistic Flow: 5 Creative Strokes for Spring Abstract Nails
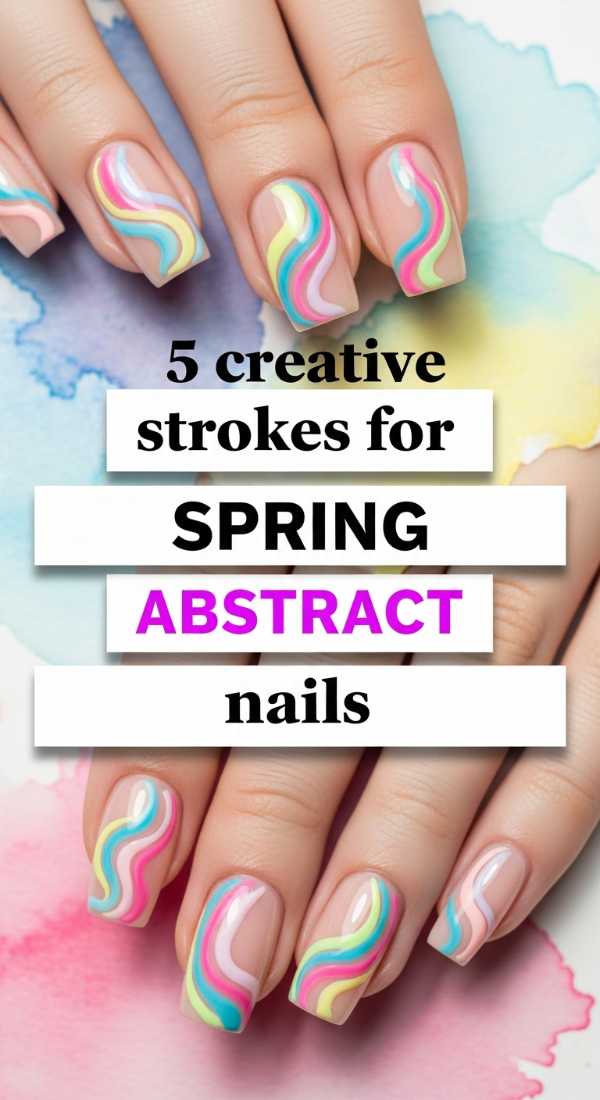
Why to love this Design:
Abstract nails are the ultimate form of self-expression. There are no rules! It’s about movement, color blocking, and organic shapes. This trend is perfect because every single nail becomes a unique piece of art that no one else has.
Essential Elements:
- 3-4 Coordinating Spring Colors
- Gold Leaf or Gold Flakes
- Flat Brush
How to Prepare:
- Start with a ‘blob’ of color in one corner using a flat brush.
- Layer a second color overlapping the first slightly.
- Add a thin, curved line in a darker shade to create ‘movement.’
- Press a tiny bit of gold leaf into the tacky polish for a touch of luxury.
- Seal with a thick top coat to level out the different layers of polish.
Budget Range
- Modelones Pastel Gel Set ($20)
- Gold Leaf Flakes for Nails ($6)
- Sally Hansen ‘Hard as Nails’ ($4)
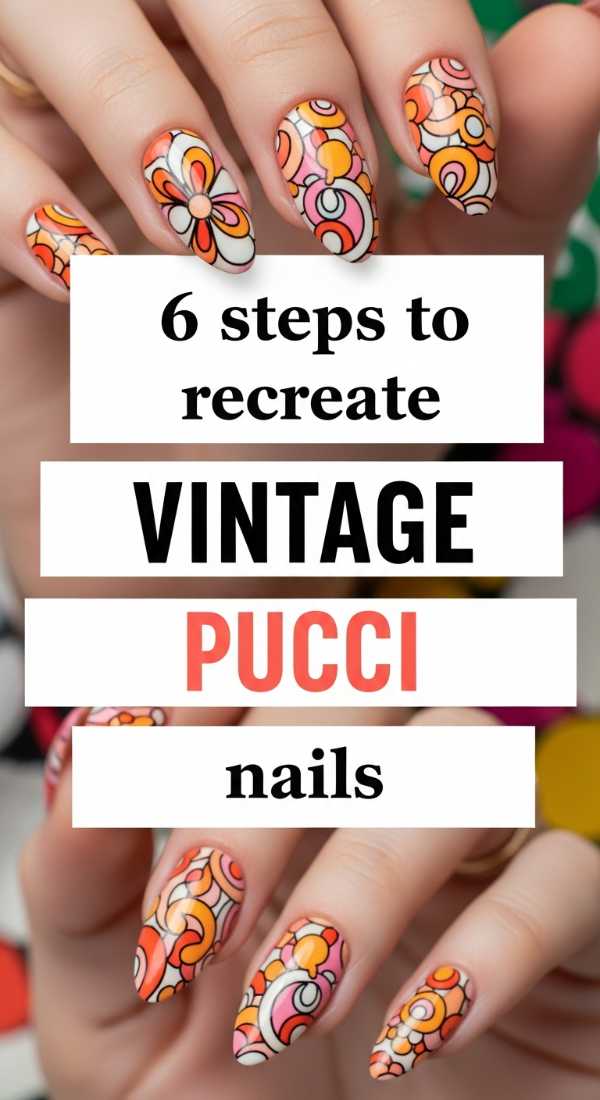
Sixties Soul: 6 Steps to Recreate Vintage Pucci Nails
Why to love this Design:
Inspired by the iconic Emilio Pucci prints, these nails are a psychedelic dream. They feature swirling geometric patterns in vibrant oranges, pinks, and purples. It’s high-fashion, vintage-inspired, and feels like a vacation in Capri.
Essential Elements:
- Bright Pink, Orange, and White Polishes
- Black Liner Polish
- Long Striper Brush
How to Prepare:
- Apply a white base coat to make the vibrant colors ‘pop.’
- Paint random, organic ‘puddle’ shapes in pink and orange.
- Use a black liner brush to outline these shapes with very thin lines.
- Add small white dots or swirls inside the larger shapes.
- Connect the shapes with curved lines to mimic the iconic fabric print.
- Finish with a high-gloss coat to make the colors saturate.
Budget Range
- Holo Taco ‘Pink Fizz’ ($14)
- China Glaze ‘Flip Flop Fantasy’ ($8)
- Art Deco Nail Art Pen ($6)
A Note from My Heart to Yours
As you take these ideas and make them your own, remember that the beauty of ‘Blooming Art’ isn’t in perfection—it’s in the joy of the process. Whether you’re painting a tiny blueberry or just enjoying a simple coat of butter yellow, I hope these trends make you feel inspired and ready to embrace the beautiful season ahead. You are your own greatest masterpiece, my loves. Happy painting!