

Hello, my loves! There is something so incredibly soothing about scrolling through those beautiful food reels late at night, wrapped in a soft blanket with the world asleep around us. I know I’m not the only one who finds a sense of peace in the rhythmic chopping, the sizzle of a pan, and the golden glow of a perfectly finished dish under kitchen lights. But sometimes, those viral clips move so fast that we miss the soul of the recipe, the little touches that turn a trend into a memory.
Today, I wanted to open up my personal kitchen diary and share the real, slow-lived secrets behind those cravings that have been living rent-free in our feeds. This isn’t just about making food that looks good for a camera; it is about the warmth of a home-cooked meal that nourishes your spirit as much as your body. Let’s take these viral sensations beyond the screen and into our real lives, filling our homes with the scents of garlic, fresh strawberries, and simmering spices. Together, we’re going to elevate the everyday into something truly gourmet.
The Secret Way to Make Juicy Keto Garlic Butter Steak

Why we love this
There is nothing quite as indulgent as a steak that cuts like butter, and this keto-friendly version focuses on the luxury of high-quality fats and aromatics. We love it because it proves that nourishing your body with a low-carb lifestyle doesn’t mean sacrificing the deep, savory satisfaction of a gourmet dinner. The way the garlic-infused butter pools around the seared edges creates a sensory experience that feels like a warm hug at the end of a long day. It is simple, elegant, and perfectly balanced for a cozy night in.
Ingredients
- 2 thick-cut ribeye or New York strip steaks
- 4 tablespoons unsalted grass-fed butter
- 4 cloves garlic, smashed
- Fresh rosemary and thyme sprigs
- Coarse sea salt and cracked black pepper
- 1 tablespoon avocado oil
How to make it
- Pat the steaks completely dry with paper towels to ensure a perfect crust, then season generously with salt and pepper on all sides.
- Heat a heavy cast-iron skillet over high heat until it is smoking slightly, then add the avocado oil.
- Place the steaks in the pan and sear for 3-4 minutes without moving them until a deep brown crust forms.
- Flip the steaks and immediately add the butter, smashed garlic, and fresh herbs to the pan.
- Tilt the pan slightly and use a large spoon to continuously baste the steaks with the bubbling herb butter for the remaining 3 minutes of cooking.
- Remove the steaks from the pan and let them rest for at least 10 minutes to allow the juices to redistribute before slicing.
Authentic New Orleans Style Slow Simmered Jumbalia

Why we love this
Jumbalia is more than just a meal; it is a storied tradition that brings the vibrant energy and soulful heartbeat of New Orleans right to your dining table. This slow-simmered version captures the complex layers of the ‘holy trinity’ of vegetables, building a depth of flavor that a quick recipe simply cannot replicate. We love how the rice absorbs every drop of the spicy, savory broth, making each bite a celebration of heritage and heat. It is a hearty, comforting pot of love that is meant to be shared with those you hold most dear.
Ingredients
- 1 lb andouille sausage, sliced
- 1 lb chicken thighs, diced
- 1 lb large shrimp, peeled and deveined
- 2 cups long-grain white rice
- 1 onion, 1 bell pepper, and 3 stalks celery (the Holy Trinity), chopped
- 4 cups chicken stock
- 1 can crushed tomatoes
- 3 tablespoons Cajun seasoning, 2 bay leaves, and a dash of hot sauce
How to make it
- In a large Dutch oven, brown the andouille sausage until crispy, then remove and set aside.
- Season the chicken with Cajun spices and brown it in the same pot using the sausage fat, then remove and set aside.
- Sauté the onion, bell pepper, and celery in the pot until softened, scraping up the flavorful browned bits from the bottom.
- Stir in the rice and let it toast for 2 minutes before adding the tomatoes, chicken stock, bay leaves, and cooked meats.
- Bring the mixture to a boil, then reduce the heat to low, cover tightly, and simmer for 25-30 minutes until the rice is tender.
- Gently fold in the raw shrimp during the last 5 minutes of cooking, letting them steam until pink and opaque.
Creamy Homemade Strawberry Scones with Fresh Fruit
Why we love this
These scones are like biting into a soft, sun-drenched morning in a hidden English garden, where the air is sweet and the pace of life is slow. Unlike dry, crumbly versions, these are incredibly moist and tender, bursting with the brightness of real strawberries and a hint of creamy vanilla. We love how they turn a simple tea time into a special occasion, offering a delicate sweetness that isn’t overwhelming. They are the perfect companion for a quiet moment of reflection or a joyful brunch with your closest friends.
Ingredients
- 2 cups all-purpose flour
- 1/2 cup granulated sugar
- 1 tablespoon baking powder
- 1/2 cup cold salted butter, grated
- 1/2 cup heavy cream (plus more for brushing)
- 1 large egg
- 1 cup fresh strawberries, finely diced
- 1 teaspoon vanilla bean paste
How to make it
- Whisk together the flour, sugar, and baking powder in a large bowl, then gently fold in the cold, grated butter until the mixture looks like coarse crumbs.
- In a separate small bowl, whisk the heavy cream, egg, and vanilla bean paste until well combined.
- Make a well in the center of the dry ingredients, pour in the liquid, and add the diced strawberries.
- Fold the mixture very gently by hand just until a shaggy dough forms, being careful not to overwork it or crush the berries.
- Turn the dough onto a floured surface, pat into a circle about 1 inch thick, and cut into 8 wedges.
- Brush the tops with extra cream, sprinkle with a little sugar, and bake at 400°F (200°C) for 15-18 minutes until golden brown.
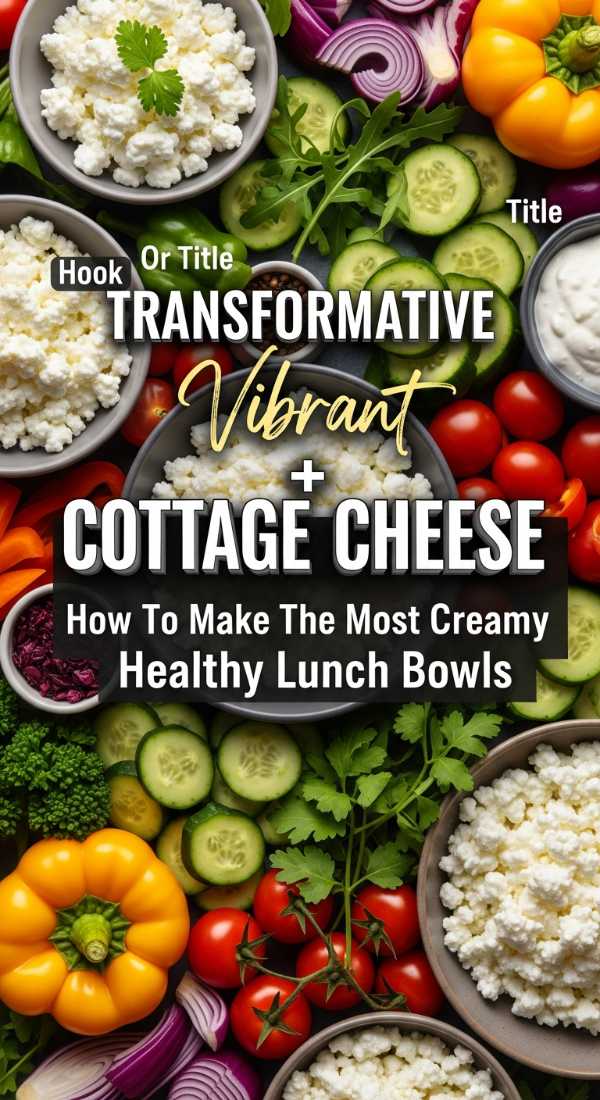
The Ultimate Healthy Cottage Cheese Lunch Bowl Hack

Why we love this
It is so rare to find a lunch that feels both light and incredibly filling, but this cottage cheese bowl is a total game-changer for your midday routine. We love it because it transforms a humble refrigerator staple into a high-protein, gourmet masterpiece through the magic of fresh textures and savory toppings. The creaminess of the cheese acts as a perfect canvas for crunchy vegetables and zesty seasonings, keeping you energized without the afternoon slump. It is the ultimate act of self-care for the busy woman who still wants to nourish her body beautifully.
Ingredients
- 1 cup full-fat cottage cheese
- 1/2 English cucumber, diced
- 1/2 cup cherry tomatoes, halved
- 1/4 red onion, finely minced
- 1 tablespoon Everything Bagel seasoning
- A drizzle of balsamic glaze or extra virgin olive oil
- Fresh basil leaves for garnish
How to make it
- Spoon the cold cottage cheese into a wide, shallow bowl, smoothing it out with the back of a spoon to create a base.
- Layer the diced cucumbers, tomatoes, and red onions neatly over one half of the cheese for a beautiful presentation.
- Sprinkle the Everything Bagel seasoning generously over the entire bowl to add salt, garlic notes, and a satisfying crunch.
- Drizzle the balsamic glaze or high-quality olive oil in a slow ribbon over the vegetables and cheese.
- Tear fresh basil leaves by hand and scatter them on top for a burst of herbal aroma.
- Serve immediately with a few whole-grain crackers or a slice of toasted sourdough for the perfect crunch.
Innovative Fusion Cheesy Dumpling Lasagna Recipe
Why we love this
This recipe is a whimsical bridge between two worlds, combining the comfort of Italian soul food with the savory delight of traditional dumplings. We love this fusion because it challenges the rules of cooking in the most delicious way possible, creating a dish that is surprising and deeply satisfying. The way the soft dumpling skins mimic lasagna noodles while holding a flavorful filling creates a texture that is absolutely addictive. It is a conversation starter that brings a sense of playfulness and creative joy back into the family kitchen.
Ingredients
- 1 pack of frozen pork or vegetable dumplings (potstickers)
- 2 cups marinara sauce
- 1 cup ricotta cheese
- 2 cups shredded mozzarella cheese
- 1/2 cup grated Parmesan
- Fresh parsley and red pepper flakes
How to make it
- Preheat your oven to 375°F (190°C) and spread a thin layer of marinara sauce on the bottom of a rectangular baking dish.
- Arrange a single layer of frozen dumplings over the sauce, packing them closely together like soldiers.
- Dollop small spoonfuls of ricotta cheese over the dumplings and spread half of the remaining marinara on top.
- Sprinkle with a generous layer of mozzarella and Parmesan cheese.
- Repeat the layers one more time, finishing with a thick blanket of mozzarella on the very top.
- Cover with foil and bake for 20 minutes, then remove the foil and bake for another 15 minutes until the cheese is bubbly and golden.
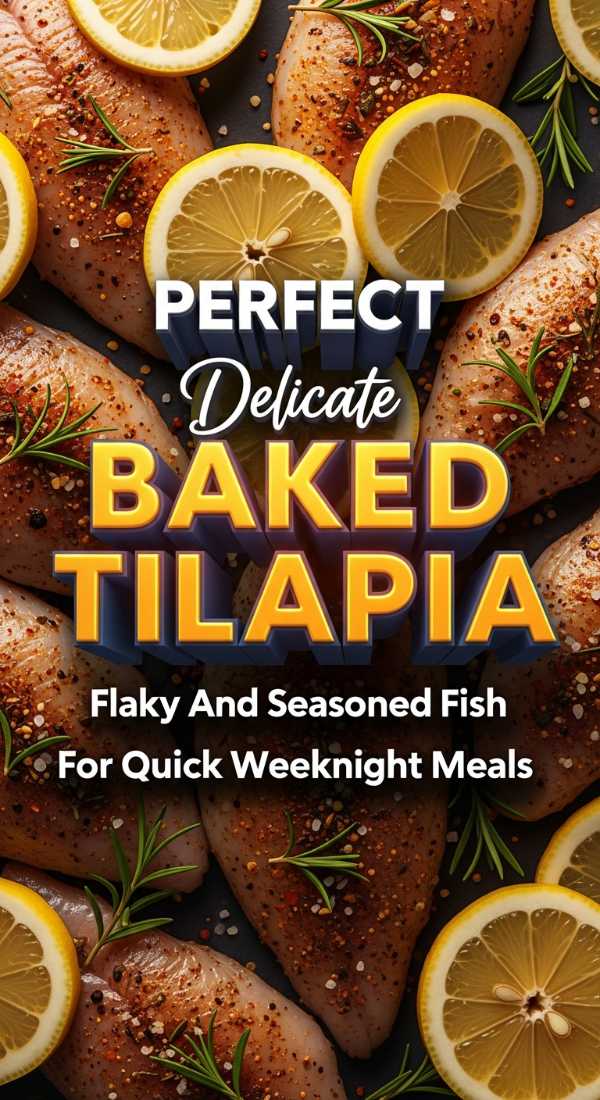
How to Make Perfect Flaky Baked Tilapia at Home
Why we love this
Tilapia is often overlooked, but when treated with a little bit of gourmet love, it becomes a light and elegant protein that melts in your mouth. We love this preparation because it is fast enough for a Tuesday but refined enough for a candlelit dinner, proving that healthy eating can be truly exquisite. The lemon and garlic infuse the delicate white fish with a brightness that feels like a breath of fresh air on your plate. It is the perfect way to master seafood cooking without any of the stress or complicated techniques.
Ingredients
- 4 tilapia fillets
- 4 tablespoons melted butter
- 3 cloves garlic, minced
- 1 lemon, sliced into rounds (plus juice of half a lemon)
- 1 teaspoon paprika
- Fresh parsley, chopped
- Salt and pepper to taste
How to make it
- Preheat your oven to 400°F (200°C) and line a baking sheet with parchment paper or lightly grease a glass baking dish.
- In a small bowl, whisk together the melted butter, minced garlic, lemon juice, paprika, salt, and pepper.
- Place the tilapia fillets on the prepared pan and brush both sides generously with the garlic butter mixture.
- Top each fillet with two thin lemon slices to infuse the fish with citrus oils as it bakes.
- Bake for 12-15 minutes, depending on the thickness of the fillets, until the fish is opaque and flakes easily with a fork.
- Garnish with a shower of fresh parsley and serve immediately with a side of steamed greens or fluffy quinoa.
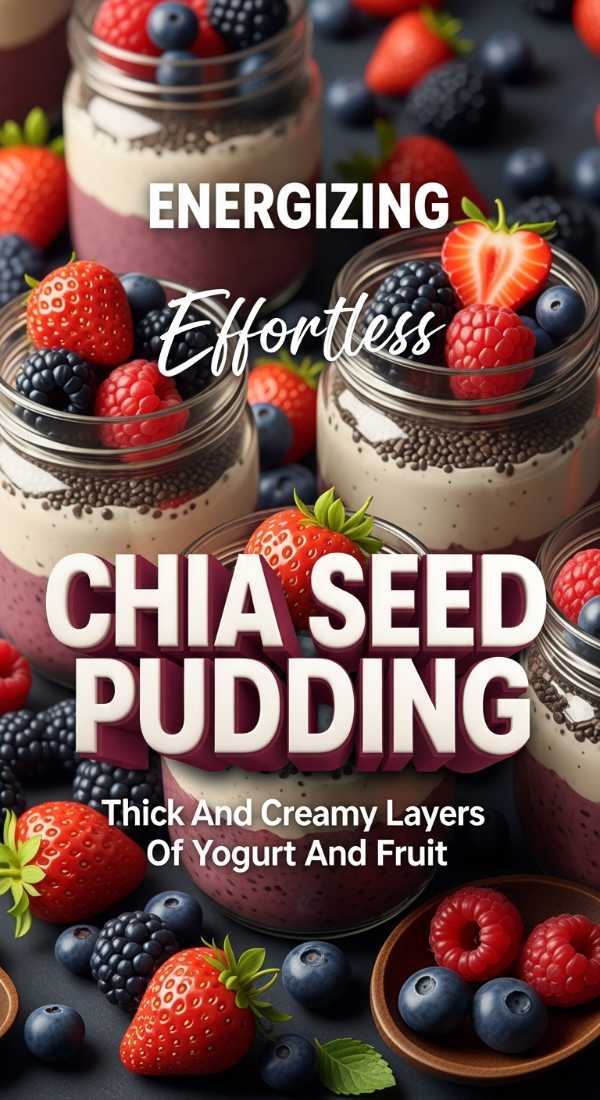
Overnight Chia Seed Pudding with Thick Greek Yogurt

Why we love this
There is a special kind of magic in waking up to a breakfast that is already waiting for you, looking like a little jar of pure sunshine. We love this chia pudding because the addition of thick Greek yogurt turns a simple fiber-rich base into a decadent, mousse-like treat that feels like dessert. It is a quiet, nourishing start to the day that supports your digestive health while making you feel like you’ve pampered yourself. The versatility of the toppings means you can change the mood of your morning with just a handful of berries or a drizzle of honey.
Ingredients
- 1/4 cup black chia seeds
- 1 cup unsweetened almond or oat milk
- 1/2 cup plain Greek yogurt
- 1 tablespoon maple syrup or honey
- 1/2 teaspoon vanilla extract
- Toppings: Fresh berries, granola, or almond butter
How to make it
- In a mason jar or glass container, combine the chia seeds, milk, maple syrup, and vanilla extract.
- Stir the mixture vigorously for about 2 minutes to ensure the seeds are well-distributed and don’t clump at the bottom.
- Let the mixture sit for 5 minutes, then give it one more thorough stir before covering and placing it in the fridge.
- Let it set overnight (or at least 4 hours) until it reaches a thick, pudding-like consistency.
- In the morning, stir in the Greek yogurt to add creaminess and a boost of protein.
- Layer with your favorite fruit and granola right before eating to maintain that perfect contrast of textures.
Breathtaking Wildflower Cupcakes for Bridal Showers

Why we love this
These cupcakes are a love letter to the beauty of nature, turning a simple sweet treat into a piece of edible art that captivates every guest. We love them because they capture the ethereal, romantic spirit of a wildflower meadow, making them the perfect centerpiece for a celebration of love. The delicate floral designs, created with soft buttercream, offer a touch of whimsical elegance that feels both vintage and modern at once. They remind us that even the simplest cake can be a canvas for something truly breathtaking and deeply personal.
Ingredients
- 12 pre-baked vanilla cupcakes (cooled completely)
- 1 cup unsalted butter, softened
- 3 cups powdered sugar
- 2 tablespoons heavy cream
- Natural food coloring (pink, lavender, yellow, and green)
- Small piping tips (petal tip and small round tip)
How to make it
- Beat the softened butter until extremely pale and fluffy, then gradually add powdered sugar and cream to create a stiff but smooth buttercream.
- Divide the frosting into small bowls and tint them with your chosen wildflower colors using just a drop of natural dye.
- Fit a piping bag with a petal tip and pipe small, overlapping curves around the edge of the cupcake to create ranunculus or rose shapes.
- Use a small round tip to add tiny yellow dots in the centers of your flowers for a realistic botanical look.
- Pipe small green leaves or stems in the gaps between the flowers to give the appearance of a full, lush bouquet.
- Chill the cupcakes for 15 minutes to set the delicate petals before displaying them on a vintage tiered stand.
The Ultimate Homemade Sushi Rolls Guide

Why we love this
Making sushi at home is an act of mindfulness, a beautiful process of assembly that connects you to the ingredients and the craft of Japanese cuisine. We love this guide because it demystifies the art of the roll, proving that anyone can create a fresh, restaurant-quality meal with a little patience and love. There is a profound satisfaction in slicing through a perfectly tight roll to reveal the vibrant colors of avocado, cucumber, and fish hidden inside. It turns dinner into an interactive experience that celebrates precision, freshness, and the joy of creating something with your own two hands.
Ingredients
- 2 cups sushi rice (seasoned with rice vinegar, sugar, and salt)
- Nori sheets (seaweed)
- Filling: Sushi-grade salmon or tuna, avocado, and cucumber
- Soy sauce, pickled ginger, and wasabi for serving
- Optional: Spicy mayo and toasted sesame seeds
How to make it
- Place a sheet of nori, shiny side down, on a bamboo rolling mat covered with plastic wrap to prevent sticking.
- Wet your hands with water and spread a thin, even layer of seasoned sushi rice over the nori, leaving a 1-inch border at the top.
- Arrange your thinly sliced fillings in a horizontal line across the lower third of the rice-covered nori.
- Using the mat, lift the bottom edge of the nori and roll it tightly over the fillings, tucking them in as you go.
- Apply gentle pressure with the mat to shape the roll into a cylinder, then wet the top border of the nori to seal the edge.
- Use a very sharp, slightly damp knife to slice the roll into 6-8 even pieces, wiping the blade between each cut for a clean look.
Refreshing Lemonade Bar Ideas for Summer Parties
[IMAGE_10]
Why we love this
A lemonade bar is the ultimate expression of summer hospitality, offering a cool, zesty sanctuary from the golden afternoon heat. We love this idea because it allows each guest to become a mixologist, customizing their drink with fresh herbs, fruits, and artisanal syrups. It creates a focal point for your gathering that is as visually stunning as it is delicious, with jars of colorful garnishes catching the light. It is about more than just quenching thirst; it is about the clinking of ice cubes and the shared laughter that happens while creating the perfect summer sip.
Ingredients
- Large batch of homemade lemonade (fresh lemon juice, water, and simple syrup)
- Fresh fruit purees (strawberry, peach, or raspberry)
- Fresh herbs: Mint, basil, and rosemary sprigs
- Sliced garnishes: Lemons, limes, and cucumbers
- Sparkling water for a fizzy option
- Plenty of crushed ice
How to make it
- Prepare a large glass dispenser with your base lemonade and keep it chilled with large ice blocks to prevent dilution.
- Set out a row of smaller glass carafes containing various fruit purees so guests can add a swirl of color and flavor.
- Place small bowls of fresh, slapped herbs nearby—slapping the herbs between your hands releases the aromatic oils before they hit the glass.
- Provide a selection of fresh fruit slices and berries in pretty dishes for guests to drop into their drinks as functional garnishes.
- Offer a secondary pitcher of chilled sparkling water for those who prefer a lighter, effervescent lemonade spritzer.
- Supply colorful paper straws and plenty of extra ice to keep the energy high and the temperatures low all afternoon.
A Note from My Heart to Yours
I hope these recipes bring a little bit of that viral magic into your kitchen, but more importantly, I hope they bring you a sense of calm and accomplishment. Cooking isn’t just about the final plate; it’s about the process of creation and the love we pour into the things we make for ourselves and our families. Take your time, enjoy the scents and the textures, and remember that you deserve the gourmet life every single day. I can’t wait to see what you create, my loves. Stay cozy!
Frequently Asked Questions
Q: Can I make the scones ahead of time?
A: Absolutely! You can freeze the unbaked scone wedges and bake them directly from the freezer—just add 2-3 minutes to the baking time for a fresh-from-the-oven breakfast.
Q: What if I can’t find sushi-grade fish?
A: No worries at all! You can make delicious ‘California’ style rolls using cooked crab meat, smoked salmon, or even just crisp veggies and tempura shrimp.
Q: Is cottage cheese really a good lunch substitute?
A: It is fantastic! It is incredibly high in protein, which helps keep you full, and it’s a much more affordable and versatile option than many other protein sources.