
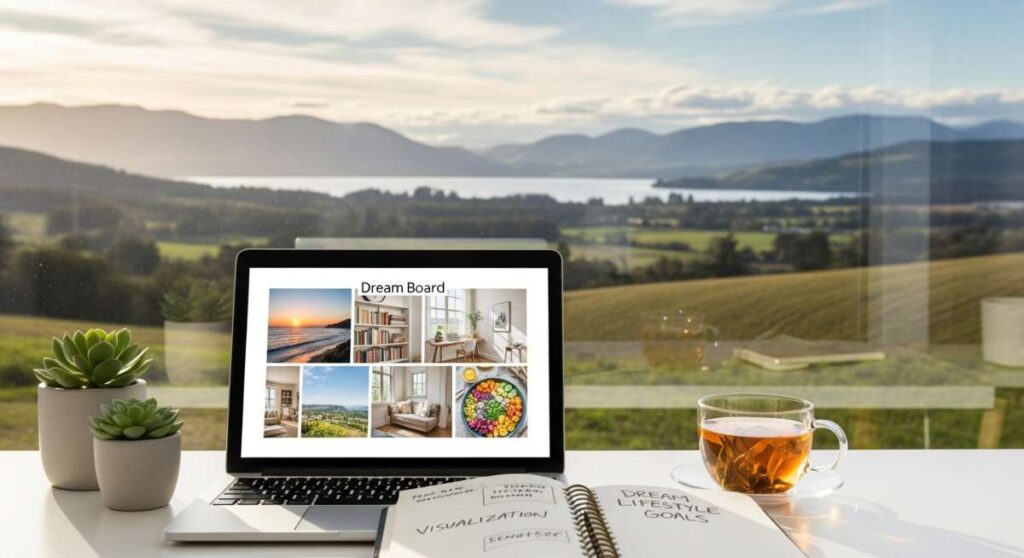
Ever scrolled through Pinterest at 2 AM, feeling like your life is a series of ‘maybe one day’ pins? We’ve all been there—trapped in the digital clutter of dream homes and ideal routines that feel just out of reach. But manifestation isn’t just about wishing on a star; it’s about the tangible, intentional steps we take to turn our immediate surroundings into a reflection of our inner peace and highest self.
Today, we are moving beyond the mood board. We’re taking those glossy images and turning them into reality with projects that range from the soil in your front yard to the digital interface of your favorite tech. It’s about Lifestyle Design—the art of curating every corner of your existence to inspire productivity, relaxation, and joy. Let’s dive into how you can manifest your dream lifestyle, one project at a time.
How to Achieve Simple Landscaping Front Yard for Maximum Curb Appeal
Why we love this
There is something deeply grounding about the scent of freshly turned earth and the vibrant, sun-drenched purple of lavender swaying in a light breeze. A well-designed front yard is more than just grass; it’s the first handshake your home gives to the world, offering a soft, tactile transition from the chaos of the street to the sanctuary of your living room. We love this approach because it uses hardy, textured perennials and clean lines to create a sophisticated look that feels expensive but is incredibly low-maintenance to sustain year-round.
Essential Elements:
- Flagstone or brick pavers for crisp edging.
- Black or dark brown hardwood mulch for contrast.
- A mix of height: Ornamental grasses, lavender, and boxwood shrubs.
- Solar-powered warm LED path lights.
- River rocks for drainage and texture.
How to make it
- Begin by defining your beds. Use a garden hose to layout curved, organic shapes on your lawn, then use a sharp spade to cut a clean 4-inch deep edge. This prevents grass from creeping in and creates a professional, ‘pro-landscaped’ look.
- Remove all weeds and grass within the marked area. Level the soil using a garden rake, ensuring the ground slopes slightly away from your home’s foundation to prevent water pooling.
- Lay down a heavy-duty landscape fabric to suppress future weed growth. Secure it with U-shaped garden staples every 12 inches.
- Position your largest plants (like boxwoods) at the back of the bed. Space them according to their ‘mature size’ instructions—usually 2-3 feet apart—to ensure they don’t crowd each other in two years.
- Fill in the middle layer with flowering perennials like Lavender or Salvia. For a ‘lush’ look, group them in odd numbers (3s or 5s), which is more pleasing to the eye than even rows.
- Apply a 3-inch thick layer of mulch. Pro-tip: Do not pile mulch against the stems or trunks of the plants (the ‘mulch volcano’ mistake); keep a 2-inch gap to allow the plants to breathe and prevent rot.
- Install your solar lights at 4-foot intervals along the path. Position them so the light overlaps slightly, creating a warm, continuous glow rather than isolated spots of light.
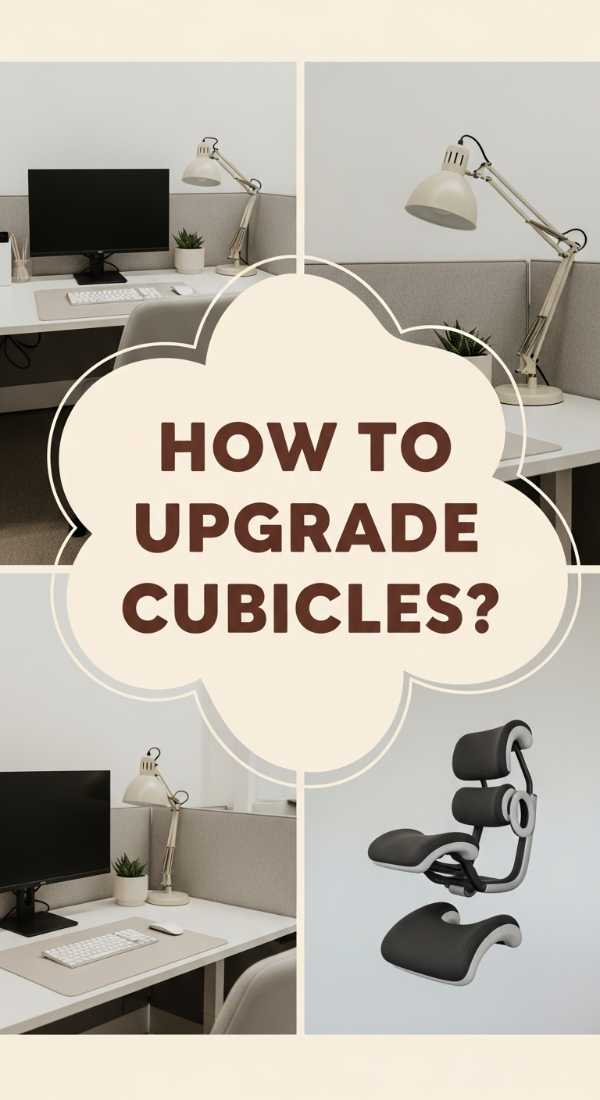
How to Elevate Office Desk Setup Ideas for a Productive Work Cubicle

Why we love this
Stepping into a cubicle often feels like entering a grey void, but with the right design, it becomes a cockpit for your creativity. Imagine the tactile satisfaction of a felt desk mat beneath your wrists, the soft hum of a desktop fountain, and the invigorating aroma of a lemon-grass essential oil diffuser. We love this setup because it prioritizes ergonomics without sacrificing the ‘dark academia’ or ‘minimalist chic’ aesthetic, making the 9-to-5 grind feel like an inspired session in a private library.
Essential Elements:
- Large felt or vegan leather desk mat.
- Monitor riser with built-in storage.
- Adjustable warm-toned task lamp.
- Small potted snake plant or ZZ plant (low light tolerant).
- Cable management clips and sleeves.
- A framed piece of motivational line art.
How to make it
- Clear everything off your desk. Wipe the surface with a microfiber cloth and a mild cleaner to start with a literal clean slate.
- Place your monitor riser in the center. Adjust the height so the top third of your screen is at eye level; this prevents neck strain and immediately makes the cubicle feel more ‘built-in’ and architectural.
- Lay down your desk mat. This defines your ‘work zone’ and provides a soft texture that dampens the sound of your mouse and keyboard.
- Group your tech. Use cable sleeves to bundle the messy wires behind your monitor, and use adhesive clips to guide your charging cables to the edge of the desk so they don’t slip away.
- Incorporate your ‘life’ elements. Place your plant on the right side (the ‘growth’ corner in Feng Shui) and your task lamp on the left to reduce shadows while writing.
- Add a personal touch that isn’t clutter. Choose one high-quality frame for a photo or art piece rather than five small items; this keeps the visual field clean and high-end.
How to Personalize JBL Speakers Wallpapers for a Custom Tech Vibe

Why we love this
Your tech should be as much a statement piece as your furniture. When you customize the visual interface or light patterns of your JBL devices, you’re bridging the gap between hardware and personality. There’s a specific joy in watching the pulse of a speaker match the sunset hues of your room or seeing a custom-curated wallpaper on your connected device that matches your ‘vibe’ for the day. It transforms a cold piece of plastic into a warm, rhythmic companion for your morning coffee.
Essential Elements:
- JBL Portable App (latest version).
- High-resolution digital aesthetic wallpapers (1080×1920 or higher).
- JBL Pulse or Link View device.
- Stable Wi-Fi connection.
How to make it
- Open the JBL Portable App on your smartphone and ensure your device is paired via Bluetooth. For the JBL Pulse series, look for the ‘Light Show’ menu.
- Select the ‘Custom’ light show option. Here, you can use your phone’s camera to ‘pick’ a color from your environment (like your favorite rug or a painting) to set as the speaker’s primary glow color.
- For devices with a screen, like the Link View, go to the Google Home app. Navigate to ‘Device Settings’ and select ‘Photo Frame.’
- Choose ‘Google Photos’ and create a specific album titled ‘Speaker Aesthetic.’ Upload high-quality, moody images—think rainy windows, neon streets, or beige linen textures.
- Set the slideshow speed to ‘Slow’ (approx. 1 minute per photo). This prevents the tech from being a distraction and allows it to function as a rotating piece of digital art.
- Sync the brightness to the room’s ambient light settings so the ‘wallpaper’ glows softly in the evening rather than blinding you.
How to Construct Cheap Pool Deck Ideas for Budget Backyard Luxury

Why we love this
Nothing says ‘manifested lifestyle’ quite like a private oasis. The feeling of sun-warmed wood beneath your bare feet and the shimmering reflection of blue water against a clean deck is the pinnacle of summer bliss. We love this DIY approach because it uses affordable materials like pressure-treated lumber or even upcycled pallets to create a high-end, wrap-around feel that makes an above-ground pool look like a permanent, luxurious feature of the landscape.
Essential Elements:
- Pressure-treated 2x4s and 4×4 posts.
- Standard deck boards or interlocking deck tiles.
- Concrete deck blocks (floating foundation).
- Galvanized deck screws (rust-resistant).
- Outdoor wood stain in ‘Cedar’ or ‘Driftwood Grey’.
How to make it
- Measure the height of your pool. Your deck should sit just below the top rim. Mark the perimeter with stakes and string, ensuring a 1-inch gap between the pool wall and the deck frame to allow for liner movement.
- Level the ground where the deck will sit. Dig shallow holes for your concrete deck blocks, spaced 4 feet apart in a grid. Fill the bottom of the holes with an inch of gravel for drainage.
- Place your 4×4 posts into the blocks. Use a level to ensure every post is perfectly vertical. Cut the posts to the desired height using a circular saw.
- Build the outer frame using 2×6 pressure-treated joists. Attach them to the posts using heavy-duty lag bolts. Ensure the frame is perfectly level; this is the most critical step for structural integrity.
- Install interior joists every 16 inches ‘on center’. This prevents the deck boards from sagging when you walk on them.
- Lay your deck boards perpendicular to the joists. Use spacers (a 16d nail works great) to keep consistent gaps for water drainage. Screw them down using two screws per joist.
- Sanding and Sealing: Sand any rough edges to prevent splinters. Apply two coats of high-quality outdoor stain. Wait for a clear 48-hour weather window so the stain can cure without rain.
How to Utilize Vinyl Lattice Panels for a Private Garden Sanctuary

Why we love this
Privacy is the ultimate luxury. There is a profound sense of peace found behind the intricate, diamond-patterned shadows of a lattice screen, where the world feels a thousand miles away. We love vinyl lattice because it offers that classic English garden aesthetic with zero risk of rot or peeling paint. When draped with climbing jasmine or ivy, it becomes a living wall that filters light beautifully and fills your sanctuary with the intoxicating scent of greenery and blossoms.
Essential Elements:
- 4×8 Vinyl lattice panels (thick grade for durability).
- Vinyl U-channel molding (for the edges).
- Pressure-treated 4×4 posts.
- Stainless steel screws with color-matched caps.
- Climbing plants (Clematis, Honeysuckle, or Ivy).
How to make it
- Determine your boundary. Dig post holes 24 inches deep and 4 feet apart. Set your 4×4 posts in quick-set concrete, ensuring they are perfectly plumb. Allow the concrete to cure for 24 hours.
- Slide the vinyl U-channel molding onto the edges of your lattice panel. This gives the panel a finished, high-end look and hides the raw cut edges.
- Important Tip: Vinyl expands and contracts with the heat. When you pre-drill your holes through the lattice into the posts, make the holes slightly larger than the screw. This prevents the lattice from warping or cracking in the summer sun.
- Attach the panels to the posts starting 2 inches above the ground. This allows for easy weed-eating and prevents debris from getting trapped at the bottom.
- Install ‘eye hooks’ in a diamond pattern across the lattice to give your climbing plants a ‘ladder’ to grab onto.
- Plant your climbers at the base, roughly 6 inches away from the panel. Gently weave the primary stems into the lattice holes to ‘train’ them to grow upward rather than outward.
How to Arrange Summer Table Centerpieces for an Elegant Outdoor Brunch
Why we love this
An elegant brunch is a multi-sensory experience: the clinking of ice in a glass pitcher, the rough texture of a linen runner, and the bright, citrusy scent of sliced lemons mingling with fresh eucalyptus. We love a summer centerpiece that feels ‘undone’ yet intentional—as if you gathered the elements from a Mediterranean garden just moments before the guests arrived. It turns a simple meal into a celebrated occasion, manifesting a life of hospitality and leisure.
Essential Elements:
- A neutral linen or cheesecloth table runner.
- Glass hurricane vases of varying heights.
- Fresh citrus (lemons, limes, or oranges).
- Seeded eucalyptus or olive branches.
- Unscented pillar candles.
- Small bowls of fresh berries.
How to make it
- Lay your runner down the center of the table, bunching it slightly rather than laying it flat. This ‘organic ripple’ adds movement and a relaxed, breezy texture.
- Place your largest hurricane vases in the center. Fill the bottom third of the vases with whole lemons or sliced citrus rounds pressed against the glass.
- Insert your pillar candles into the center of the vases, resting them on the fruit (or on a small glass plate inside for stability). The heat from the candle will gently warm the citrus, releasing a faint, fresh aroma.
- Tuck your eucalyptus or olive branches under the edges of the vases, snaking them down the length of the runner. Let the leaves spill over the sides of the table naturally.
- Interspersed between the greenery, place small white ceramic bowls filled with blueberries or strawberries. These act as ‘edible decor’ and add pops of deep color.
- Check the ‘sight lines.’ Sit down in one of the chairs to ensure the centerpiece isn’t too tall; you want your guests to be able to see each other easily for conversation.
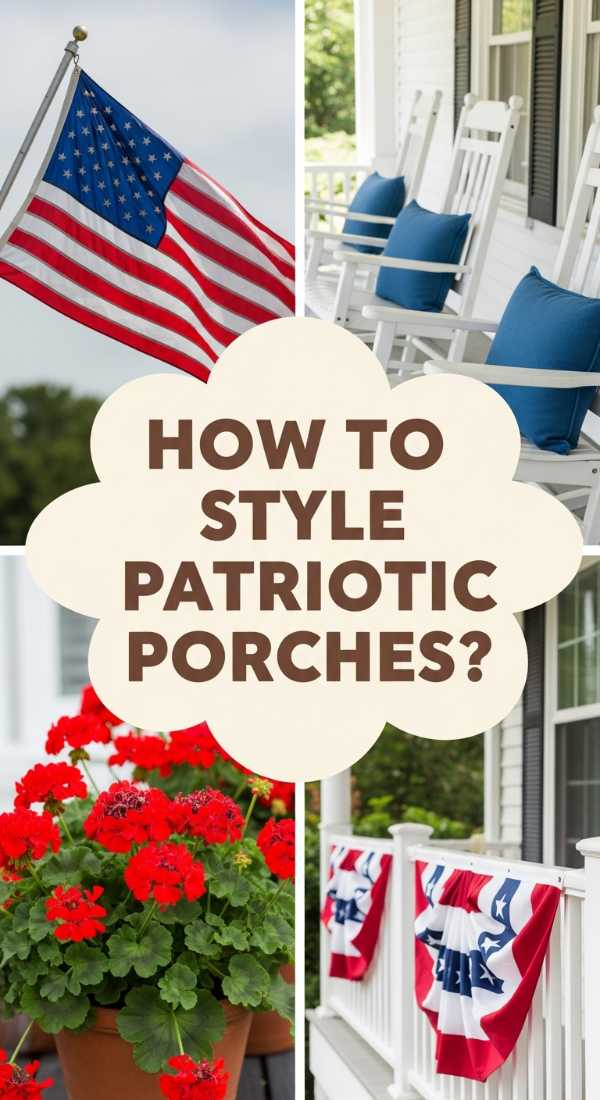
How to Design a Patriotic Front Porch for a Classic Americana Welcome

Why we love this
There’s a timeless, nostalgic comfort in a porch that honors heritage with style. Think of the rhythmic creak of a white rocking chair and the crisp snap of a heavy cotton flag against a blue sky. We love this aesthetic because it relies on a classic palette—navy, cream, and cherry red—which provides an instant, high-contrast boost to your home’s exterior. It feels like a warm hug for every neighbor who walks by, manifesting a lifestyle rooted in community and tradition.
Essential Elements:
- Tea-stained or vintage-style American flag.
- Pleated fan bunting for railings.
- Classic white wooden rocking chairs.
- Navy blue outdoor throw pillows.
- Red geraniums in galvanized metal buckets.
- A coir doormat with a simple ‘Home’ or star motif.
How to make it
- Start with the ‘anchor.’ Hang your flag at a 45-degree angle near the front door. Ensure it is high enough that it doesn’t touch the floor or any bushes, which is proper flag etiquette.
- Attach pleated bunting to your porch railings using zip ties hidden behind the pleats. Space them evenly—usually one fan every 3-4 feet—to create a symmetrical, rhythmic visual flow.
- Symmetry is key for the ‘Americana’ look. Place two white rockers on either side of the door. If space is tight, use two matching planters instead.
- Fill your galvanized buckets with high-quality potting soil and bright red geraniums. Pro-tip: Pinch off the dead blooms (deadheading) weekly to keep the red color vibrant and the plant producing new flowers all summer.
- Layer your doormats. Place a larger navy-and-white striped outdoor rug underneath your standard coir mat. This ‘stacking’ technique is a designer secret that makes an entryway look much more expensive and finished.
How to Curate a Whimsical Apartment Aesthetic for a Dreamy Home Atmosphere

Why we love this
Whimsical design is about embracing the ‘inner child’ within the sophisticated adult. It’s the soft glow of fairy lights hidden in sheer curtains, the plush velvet of a shell-shaped chair, and the playful shimmer of a disco ball catching the afternoon sun. We love this because it breaks all the ‘rules’ of boring minimalism. It allows your apartment to be a dreamscape where every object has a story, manifesting a life filled with wonder, soft textures, and lighthearted magic.
Essential Elements:
- Sheer voile curtains in soft pastels.
- Battery-operated ‘warm white’ fairy lights.
- A large disco ball (placed near a window).
- Velvet floor cushions and mismatched throw pillows.
- Vintage gold frames and botanical prints.
- Iridescent or colored glassware.
How to make it
- Layer your lighting. Avoid using the ‘big light’ (overhead lighting). Instead, drape fairy lights behind your sheer curtains. The fabric will diffuse the tiny bulbs, creating a soft, ethereal glow that blurs the edges of the room.
- Position your disco ball. Place it on a plant stand or hang it in a corner that receives direct sunlight for at least two hours a day. The ‘glitter’ effect on the walls will instantly lift the mood of the space.
- Curate a ‘gallery wall’ with no straight lines. Mix vintage gold frames with modern art. Use command hooks to stagger the heights, creating a sense of movement and ‘curated chaos.’
- Add sensory layers. Use a high-pile faux fur rug over your standard carpet and throw a chunky knit blanket over the sofa. The goal is to have multiple textures within arm’s reach at all times.
- Incorporate ‘living’ whimsy. Hang air plants from the ceiling using clear fishing line so they look like they are floating in mid-air.
How to Plan Aquarium Setup Ideas for a Tranquil Underwater Oasis
Why we love this
An aquarium is a living piece of art—a window into a silent, slow-motion world that lowers your heart rate just by looking at it. The soft gurgle of the filter and the rhythmic sway of neon-green plants create a meditative focal point in any room. We love this because it brings the ‘Blue Mind’ effect into your home, manifesting a lifestyle of tranquility and mindfulness. There is a deep, tactile satisfaction in scaping the sand and watching a tiny ecosystem flourish under your care.
Essential Elements:
- Rimless glass tank (for a modern, ‘floating’ look).
- Active substrate (special soil for plants).
- Driftwood and Dragon stone (hardscape).
- Live plants: Anubias, Java Fern, and Amazon Sword.
- LED lighting with a ‘sunset’ timer mode.
- Quiet canister filter.
How to make it
- Slope your substrate. Pour your sand or soil so it is 2 inches thick at the front and 5 inches thick at the back. This creates an ‘infinite’ perspective and makes the tank look much deeper than it actually is.
- The ‘Rule of Thirds’: Place your largest piece of driftwood at the 1/3rd mark of the tank, rather than in the dead center. Lean your stones against the base of the wood to make it look like a natural fallen tree in a river.
- Planting: Use long tweezers to tuck the roots of your plants into the substrate. Tip: Glue Anubias or Mosses directly to the wood using a tiny drop of cyanoacrylate gel (super glue); they don’t need to be in the soil to grow.
- Fill the tank slowly. Place a dinner plate on top of the sand and pour the water onto the plate. This prevents the water force from ruining your careful landscaping.
- Cycle the tank. Before adding fish, run the filter for 2-4 weeks. Use a water testing kit to ensure ammonia and nitrites are at zero. This ‘patience phase’ is what separates a professional oasis from a beginner mistake.
- Set your LED light to an 8-hour cycle. Any longer and you will encourage algae growth; any shorter and the plants won’t thrive.
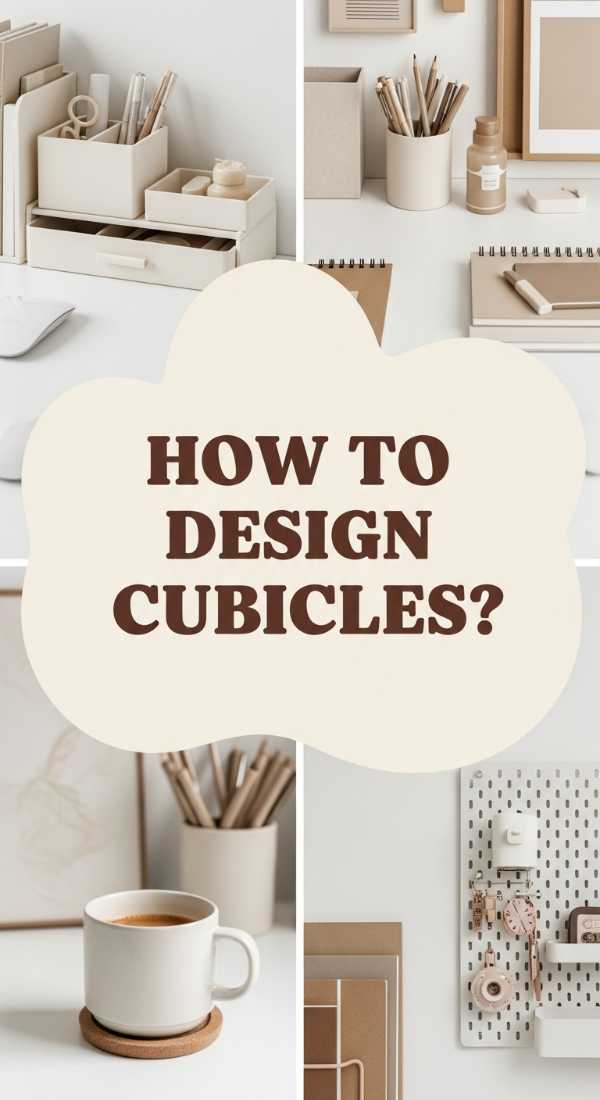
How to Organize Work Cubicle Essentials for a Stress-Free Office Life
[IMAGE_10]
Why we love this
Clutter is the enemy of clarity. When your cubicle is organized, your brain is freed from the ‘visual noise’ that causes low-level anxiety throughout the day. We love this because it’s about more than just file folders; it’s about creating ‘zones’ for different types of energy. Having a designated spot for your ‘deep work’ headphones and a ‘refresh’ drawer for your favorite tea and mist spray manifests a lifestyle where you are the master of your time and your environment, even in a corporate setting.
Essential Elements:
- Vertical file sorter (to clear desk space).
- A dedicated ‘tech drawer’ with labeled dividers.
- A small ‘refreshment’ tray with a carafe.
- Noise-canceling headphones with a dedicated stand.
- A magnetic whiteboard for ‘top 3’ daily goals.
How to make it
- The ‘Prime Real Estate’ Rule: Only items you touch every single hour (mouse, keyboard, water bottle) should be on your desk surface. Everything else goes into drawers or vertical storage.
- Categorize your drawers. Use clear acrylic dividers to separate ‘Office Supplies’ (staplers, clips) from ‘Personal Care’ (hand cream, snacks, tea bags). Seeing everything in its own ‘home’ immediately lowers cortisol levels.
- Go vertical. Use the fabric walls of your cubicle to pin up your calendar or a ‘Priority Matrix’ chart. This keeps your goals at eye level without taking up precious desk space.
- Establish a ‘Charging Station.’ Use a multi-port USB hub tucked into a corner so your phone, watch, and headphones charge in one neat spot rather than having cables snaking across your workspace.
- The 5-Minute Reset: At the end of every day, spend exactly five minutes putting everything back in its designated spot. This ensures that when you arrive the next morning, you are greeted by a space that invites focus rather than a mess that demands labor.
Conclusion: Your Life, Designed
Manifesting your dream lifestyle isn’t a one-time event; it’s a series of small, beautiful choices. Whether you are planting a single row of lavender or reimagining the way you sit at your desk, you are taking control of your narrative. Your surroundings have the power to influence your mood, your productivity, and your peace. So, stop pinning and start building. The lifestyle you’ve been dreaming of is already within your reach—it’s just waiting for you to bring it to life.