
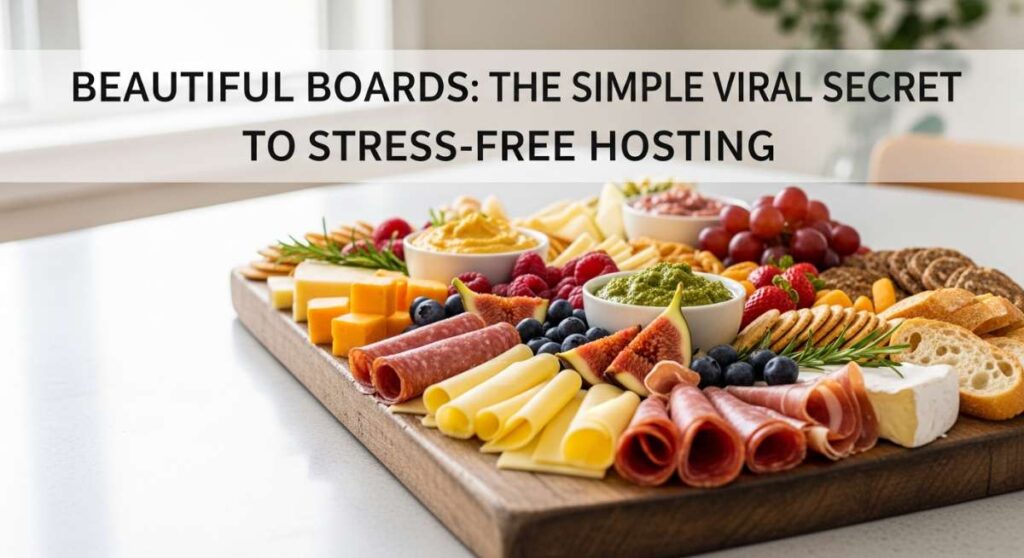
Beautiful Boards: The Simple Viral Secret to Stress-Free Hosting
We’ve all been there: the frantic kitchen cleanup, the stress of timing three different dishes to come out of the oven at once, and that nagging feeling that you’re spending more time at the stove than with your guests. Hosting used to feel like a performance, a high-stakes balancing act where one burnt crust could ruin the evening. But then, everything changed. I discovered the magic of ‘the board’—a viral, simple, and utterly beautiful way to serve food that prioritizes connection over complexity.
The secret to a viral-worthy board isn’t about spending hours on intricate garnishes; it’s about the art of the assembly. It’s about taking the things we love—creamy dips, warm pastries, vibrant veggies—and laying them out in a way that feels abundant and approachable. When you put a board in the center of the table, the energy in the room shifts. People lean in, they share, they laugh, and the barriers of a formal dinner melt away into a shared experience of textures and flavors.
In this guide, I’m taking you through my favorite ‘board-style’ essentials and cozy recipes that make hosting feel like a breeze. From the morning glow of a matcha ritual to the nostalgic scent of fresh-baked cookies, these are the secrets to a home that feels warm, welcoming, and effortlessly stylish. Let’s dive into the simple secrets of beautiful hosting.
How to Master Matcha Lattes for Glowing Skin
Why we love this
There is something deeply meditative about the vibrant, emerald-green hue of a perfectly whisked matcha latte. As you sip, the earthy, umami notes dance across your palate, softened by the creamy, velvety texture of frothed oat milk. It’s not just a drink; it’s a moment of mindful serenity that leaves you feeling energized without the coffee jitters. The gentle aroma of steamed milk and pulverized tea leaves creates an olfactory oasis in your kitchen, making it the perfect beverage to serve as a refreshing ‘welcome drink’ for a morning gathering.
Essential Elements:
- 1-2 tsp Ceremonial Grade Matcha powder
- 2 oz Hot water (not boiling, approx 175°F)
- 8 oz Plant-based milk (Oat or Almond works best)
- 1 tsp Maple syrup or honey (optional)
- Traditional bamboo whisk (Chasen) or handheld frother
How to make it
- Sift the matcha powder through a fine-mesh strainer into a wide-bottomed bowl. This is a critical step to ensure there are no clumps, resulting in a silkier texture.
- Add the hot water to the bowl. Ensure the water is around 175°F (80°C); boiling water will scorch the delicate tea leaves and create a bitter taste.
- Using your bamboo whisk, move your wrist in a vigorous ‘W’ or ‘M’ motion for about 30-60 seconds. You are looking for a thick, frothy layer of tiny bubbles to form on the surface.
- In a separate small saucepan or milk frother, heat your milk until it is steaming but not boiling. If using a frother, aim for a micro-foam consistency that looks like wet paint.
- Pour the whisked matcha into your favorite glass, add your sweetener if desired, and then slowly pour the frothed milk over the top, allowing the green and white layers to marble beautifully.
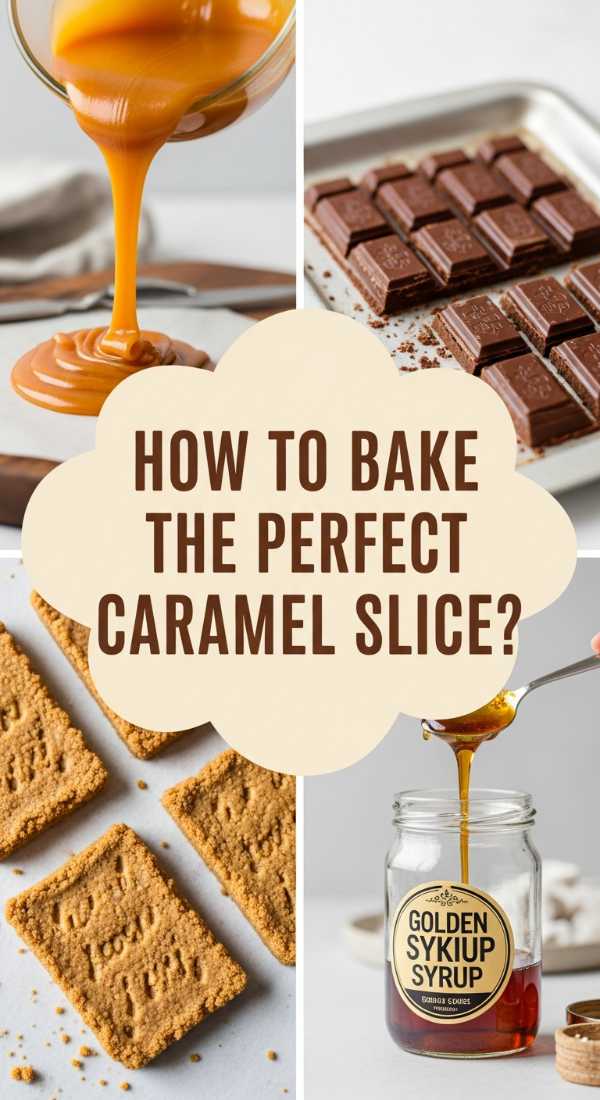
How to Bake Caramel Slices for the Ultimate Sweet Craving
Why we love this
The caramel slice is the triple-threat of the dessert board: a buttery, crumbly shortbread base, a thick layer of gooey, molten gold caramel, and a crisp snap of dark chocolate on top. When you bite into it, the textures play a symphony of crunch and silkiness, while the salt-kissed caramel balances the rich sweetness perfectly. The scent of browning butter and toasted sugar fills the house, creating a cozy atmosphere that draws guests toward the kitchen like a magnet. It is the ultimate indulgent treat that looks as professional as a boutique bakery find.
Essential Elements:
- For the Base: 1/2 cup butter (melted), 1/2 cup sugar, 1.5 cups flour, pinch of salt.
- For the Caramel: 1 can sweetened condensed milk, 1/2 cup brown sugar, 1/4 cup butter, 2 tbsp golden syrup.
- For the Topping: 7 oz Dark chocolate, 1 tbsp coconut oil.
How to make it
- Preheat your oven to 350°F (175°C) and line a square baking tin with parchment paper, leaving an overhang for easy removal.
- Mix the melted butter, sugar, flour, and salt until it forms a sandy dough. Press this firmly into the bottom of the tin and bake for 15 minutes or until the edges are just starting to turn a pale golden brown.
- While the base cools slightly, combine the condensed milk, brown sugar, butter, and golden syrup in a heavy-bottomed saucepan over medium-low heat.
- Stir the caramel constantly for about 8-10 minutes. This is the most important part: you must keep it moving to prevent the sugar from burning. The caramel is ready when it has thickened significantly and turned a deep amber color.
- Pour the caramel over the baked base and return to the oven for 10-12 minutes until the caramel is bubbling. Remove and let it cool completely until set.
- Melt the chocolate and coconut oil together in the microwave in 30-second bursts. Pour over the set caramel, smooth the top, and refrigerate for at least 4 hours before slicing with a hot knife.
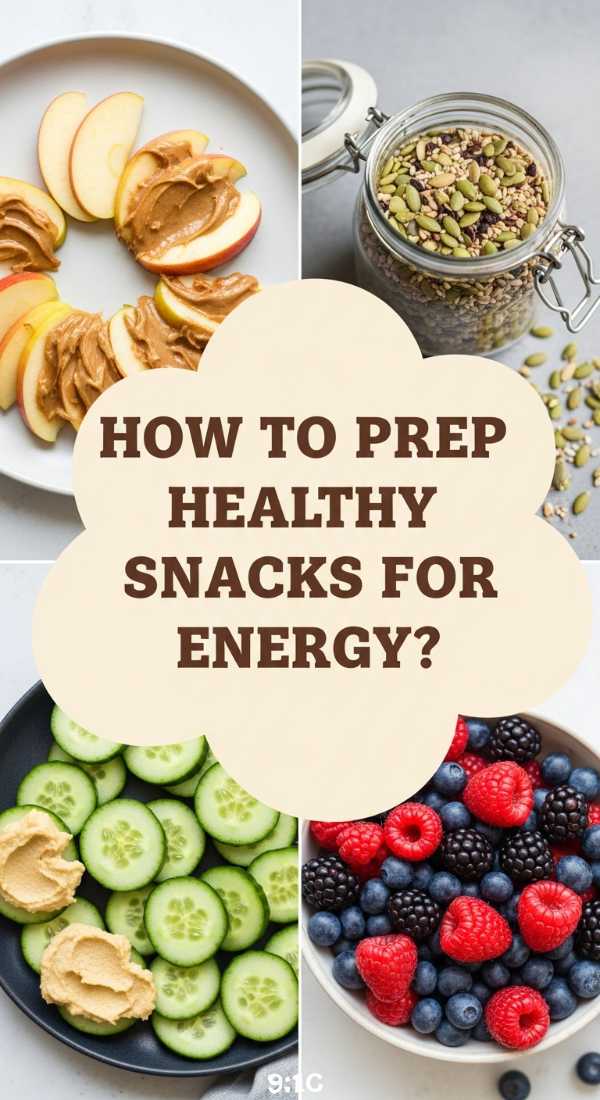
How to Prep Healthy Snacks for Endless Daily Energy

Why we love this
A snack board filled with vibrant, nutrient-dense ingredients is like a kaleidoscope of health and vitality sitting right on your counter. Imagine the satisfying crunch of crisp cucumber spears, the creamy richness of homemade hummus, and the sweet burst of seasonal berries all artfully arranged. This approach to snacking turns ‘eating on the go’ into a mindful ritual that fuels your body without the afternoon crash. The combination of bright colors and fresh, herbaceous aromas makes healthy eating feel like a celebration rather than a chore.
Essential Elements:
- Rainbow Carrots and Cucumber sticks
- Blanched snap peas
- Creamy Hummus or Tzatziki
- Raw almonds and walnuts
- Hard-boiled eggs with a sprinkle of sea salt
- Fresh berries and sliced apple
How to make it
- Start by washing and peeling all your vegetables. For the carrots and cucumbers, cut them into uniform ‘batons’ about 3 inches long; this makes them perfect for dipping and creates a clean visual line on your board.
- Boil your eggs by placing them in cold water, bringing to a boil, then immediately turning off the heat and covering for 9 minutes. Shock them in ice water to ensure easy peeling and a perfect, creamy yellow yolk.
- Prepare your dips. If making hummus from scratch, process chickpeas with tahini, lemon juice, and a clove of garlic until ultra-smooth. For a professional touch, create a well in the dip and fill it with high-quality olive oil and a dash of paprika.
- Arrange the items on a large wooden board or in glass meal-prep containers. Group the colors together—put the greens next to the oranges for maximum visual impact.
- Store the prepped items in the fridge with a damp paper towel over the vegetables to keep them crisp for up to 3 days, allowing you to ‘host’ yourself or your family with zero effort.
How to Roast Pumpkin Soup for Cozy Autumn Vibes

Why we love this
There is nothing that says ‘home’ quite like the scent of pumpkin, garlic, and onions roasting together in a hot oven on a chilly afternoon. This soup is liquid gold—velvety, rich, and deeply savory with a hint of natural sweetness that warms you from the inside out. The texture is incredibly smooth, especially when swirled with a touch of heavy cream or coconut milk, making it the ultimate comfort food. Serving this in a big tureen at the center of a bread-heavy board is the secret to a successful, low-stress autumn lunch.
Essential Elements:
- 1 medium Sugar Pumpkin (or Butternut Squash)
- 1 head of Garlic
- 2 Onions, quartered
- 4 cups Vegetable or Chicken stock
- 1 tsp Nutmeg and 1 tsp Cinnamon
- Heavy cream and pumpkin seeds for garnish
How to make it
- Preheat your oven to 400°F (200°C). Slice your pumpkin in half, scoop out the seeds, and place it cut-side down on a baking sheet. Add the quartered onions and the whole head of garlic (with the top sliced off to expose the cloves).
- Drizzle everything generously with olive oil and salt. Roast for 45-55 minutes. You’ll know it’s done when the pumpkin skin is blistered and the flesh is completely tender when pierced with a fork.
- Once cool enough to handle, scoop the pumpkin flesh into a large pot and squeeze the roasted garlic cloves out of their skins directly into the mix. Add the onions.
- Add the spices and the stock. Use an immersion blender to blitz the mixture until it is completely smooth and aerated. If the soup is too thick, add a little more stock until you reach your desired silkiness.
- Simmer on low heat for 10 minutes to allow the flavors to marry. Serve with a swirl of cream and a handful of toasted seeds for a crunchy contrast.
How to Host Brunch Parties for the Perfect Weekend Social
Why we love this
Brunch boards are the crown jewel of stress-free hosting because they encourage a ‘choose your own adventure’ style of dining that everyone loves. Picture a massive platter overflowing with flaky croissants, glistening smoked salmon, ripe avocado slices, and piles of fresh arugula. The atmosphere is inherently relaxed—guests can pick and graze while enjoying mimosas, and the host isn’t stuck flipping pancakes one by one. The mix of salty, savory, and fresh elements creates a vibrant table setting that looks like a curated work of art.
Essential Elements:
- Miniature croissants and sourdough slices
- Smoked salmon and capers
- Smashed avocado with chili flakes
- Soft-boiled eggs
- Fresh fruit (grapes, strawberries, passionfruit)
- A variety of cheeses (Brie or Goat cheese)
How to make it
- Plan your layout by placing your largest items first—usually the bowls of avocado and containers of smoked salmon—to act as ‘anchors’ for the board.
- Toast your sourdough slices and keep them warm in a basket lined with a clean tea towel. This ensures the bread stays soft on the inside while maintaining its crust.
- Slice your avocado just before serving to prevent browning, drizzling it with a little lemon juice and a generous sprinkle of flaky sea salt and red pepper flakes.
- Assemble ‘stations’ on the board: put the cream cheese and capers next to the salmon, and the honey next to the Brie. This intuitive placement helps guests navigate the flavors.
- Fill in every single gap. Use small clusters of grapes, nuts, or edible flowers to make the board look lush and abundant. A ‘viral’ board has no empty space!
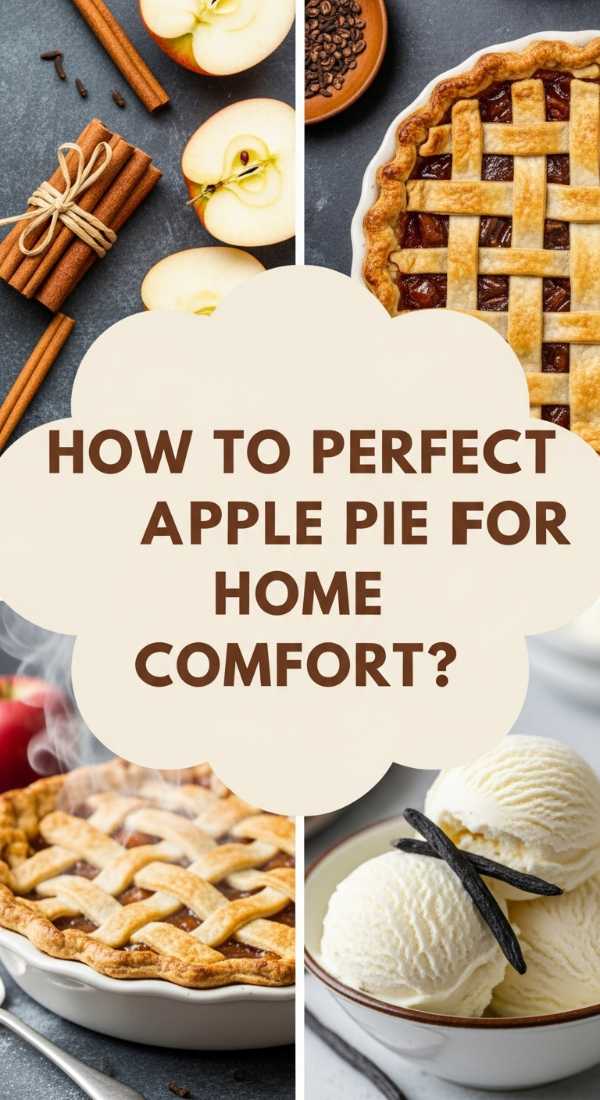
How to Perfect Apple Pie for a Warm Home Feeling

Why we love this
The aroma of an apple pie baking in the oven is the universal scent of comfort and nostalgia. As the cinnamon-spiced apples soften into a jammy, sweet filling, the flaky, buttery crust turns a perfect golden brown, creating a contrast that is simply irresistible. Serving a slice of warm pie with a scoop of melting vanilla bean ice cream is the ultimate way to end a board-based dinner. It feels traditional, heartfelt, and deeply grounding, reminding everyone of the simple joys of a home-cooked meal.
Essential Elements:
- 6-8 Granny Smith apples (peeled and sliced)
- 3/4 cup Sugar and 2 tbsp Cinnamon
- Double pie crust (homemade or high-quality store-bought)
- 1 tbsp Lemon juice
- 1 Egg (for egg wash)
- Coarse sugar for sprinkling
How to make it
- In a large bowl, toss your sliced apples with the sugar, cinnamon, and lemon juice. Let them sit for 20 minutes; this allows the juices to release, which prevents the crust from becoming soggy.
- Roll out your bottom crust and fit it into a 9-inch pie plate. Drain the excess liquid from the apples and pile them high into the crust.
- Roll out the second piece of dough. For a viral ‘look,’ cut it into strips and create a lattice weave over the top. Press the edges together firmly to seal the juices in.
- Brush the entire top of the crust with a beaten egg wash. This is the secret to that professional, shiny, deep-golden finish. Sprinkle generously with coarse sparkling sugar.
- Bake at 425°F (220°C) for the first 15 minutes to set the crust, then reduce the heat to 375°F (190°C) and bake for another 40-45 minutes. If the edges brown too quickly, cover them with foil.
How to Fold Dumplings for a Delicious Homemade Feast
Why we love this
There is a unique joy in the tactile process of folding dumplings, making it the perfect activity for a ‘participatory’ board night. Each little parcel is a burst of savory flavor, with ginger, garlic, and scallions mingling in a juicy filling wrapped in a thin, chewy dough. When they hit the pan, the sound of the sizzle and the scent of toasted sesame oil immediately whet the appetite. Serving a mountain of these with various dipping sauces creates a fun, interactive dining experience that feels both exotic and cozy.
Essential Elements:
- Dumpling wrappers (round)
- Ground pork or finely chopped mushrooms
- Grated Ginger, Garlic, and Cabbage
- Soy sauce and Sesame oil
- A bowl of water (for sealing)
How to make it
- Mix your filling ingredients in a large bowl. Ensure the cabbage is very finely shredded and squeezed of any excess moisture to keep the filling firm.
- Hold a wrapper in your palm and place a small teaspoon of filling in the center. Do not overfill, or the dumpling will burst during cooking.
- Dip your finger in the water and run it along the edge of the wrapper. Fold it in half and pinch the center. From the center, make small pleats toward the outer edges. This ‘crescent’ shape is classic and helps the dumpling sit flat in the pan.
- Heat a tablespoon of oil in a non-stick skillet over medium-high heat. Place the dumplings in the pan and fry for 2-3 minutes until the bottoms are dark golden and crispy.
- Pour in 1/4 cup of water and immediately cover with a lid. Let them steam for 5-6 minutes until the water has evaporated and the wrappers are translucent and cooked through.
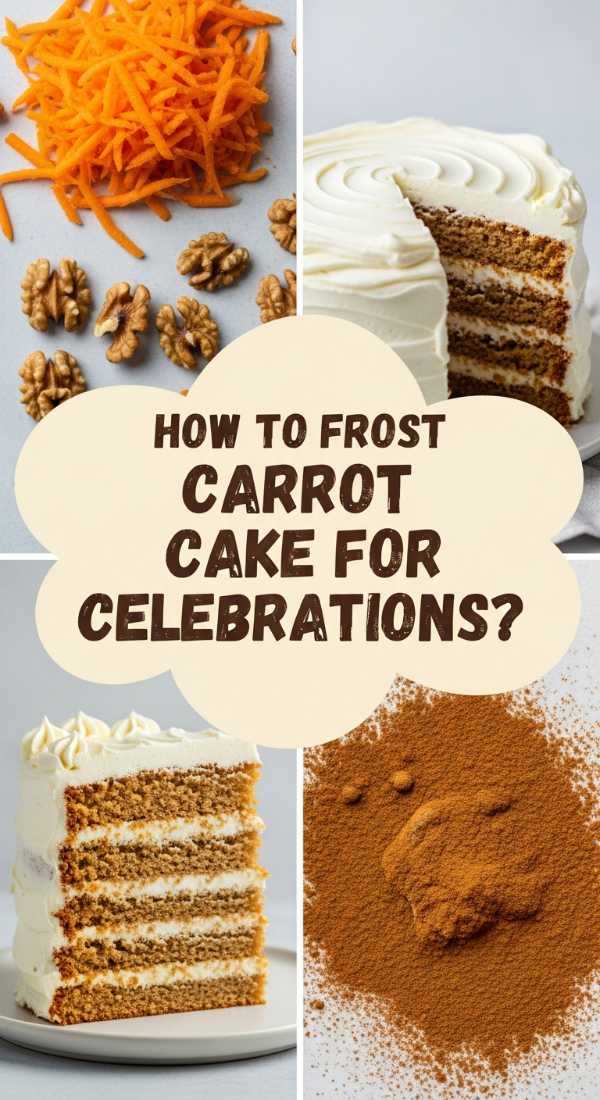
How to Frost Carrot Cake for a Showstopping Celebration

Why we love this
Carrot cake is the ultimate celebration dessert, offering a dense, moist crumb packed with warming spices like nutmeg and cloves. But the real star is the cream cheese frosting—thick, tangy, and decadently sweet, it provides the perfect foil to the earthy cake. Watching the offset spatula glide through the frosting to create rustic, beautiful swirls is incredibly satisfying. It’s a cake that doesn’t need to be perfect to be beautiful; its charm lies in its homemade, textured appearance, making it a centerpiece that demands a second slice.
Essential Elements:
- Baked Carrot Cake layers (cooled completely)
- 16 oz Cream Cheese (room temperature)
- 1/2 cup Butter (softened)
- 4 cups Powdered sugar
- 1 tsp Vanilla extract
- Crushed walnuts for decoration
How to make it
- The golden rule of frosting: ensure your cake is stone-cold. If it’s even slightly warm, the cream cheese frosting will melt and slide right off.
- Beat the softened butter and cream cheese together for at least 5 minutes. You want the mixture to be pale, fluffy, and completely free of lumps before you even think about adding the sugar.
- Add the powdered sugar one cup at a time, mixing on low speed to avoid a ‘sugar cloud.’ Add the vanilla at the end and whip on high for another minute until it looks like clouds.
- Apply a ‘crumb coat’—a very thin layer of frosting over the whole cake to trap any loose crumbs. Chill the cake for 20 minutes to set this layer.
- Apply the remaining frosting generously. Use the back of a spoon to create ‘swooshes’ and ‘swirls’ rather than trying to get it perfectly smooth. This rustic look is much more viral-friendly and inviting.
How to Build Tacos for a Vibrant Family Dinner

Why we love this
A taco board is a celebration of color, zest, and customization. The sight of charred corn tortillas, bright pink pickled onions, emerald-green cilantro, and sizzling, spiced protein is an instant mood-lifter. There’s a sensory delight in the assembly—the squeeze of a lime, the cool dollop of sour cream, and the crunch of fresh radish. It turns dinner into a communal event where everyone builds their own masterpiece, ensuring even the pickiest eaters find something they love among the vibrant spread.
Essential Elements:
- Small corn or flour tortillas
- Spiced protein (Ground beef, shredded chicken, or black beans)
- Pickled red onions
- Fresh salsa and Guacamole
- Crumbling cheese (Cotija or Feta)
- Lime wedges and fresh cilantro
How to make it
- Warm your tortillas properly! Do not microwave them. Instead, char them directly over a gas flame for 10 seconds per side or in a dry cast-iron skillet until they have small black toasted spots. Wrap them in a clean towel to stay pliable.
- Season your protein with a blend of cumin, smoked paprika, and chili powder. Cook over high heat to get ‘crispy bits’ on the edges, which add a professional depth of flavor.
- Prepare your garnishes with care. Slice the radishes paper-thin and keep the cilantro leaves whole for a more elevated look on the board.
- Arrange the components by color. Place the bright green guacamole next to the pink onions and the white cheese to make the board ‘pop.’
- Serve with several small bowls of different hot sauces so guests can control their own heat levels.
How to Bake Choc Chip Cookies for a Gooey Childhood Memory
[IMAGE_10]
Why we love this
A warm chocolate chip cookie is a hug in edible form. The scent of vanilla and caramelized brown sugar wafting from the oven creates an instant sense of safety and joy. When done right, these cookies have a crisp, buttery edge that gives way to a center that is soft, chewy, and filled with pools of molten dark chocolate. Sprinkled with a few flakes of sea salt, they become a sophisticated treat that appeals to the child in everyone. Placing a pile of these on a board with some cold milk is the ultimate hosting ‘mic drop.’
Essential Elements:
- 1 cup Butter (browned for extra flavor)
- 1 cup Brown sugar, 1/2 cup White sugar
- 2 cups Flour
- 1 tsp Baking soda
- 1.5 cups Dark chocolate chunks
- Flaky sea salt
How to make it
- For a ‘viral’ flavor depth, brown your butter in a saucepan until it smells nutty and has little brown specks. Let it cool slightly before mixing with the sugars.
- Cream the butter and sugars together until the mixture looks like wet sand. Add one egg and a generous splash of high-quality vanilla extract.
- Fold in the dry ingredients just until no streaks of flour remain. Over-mixing will lead to a tough cookie, so be gentle!
- Fold in the chocolate chunks. Pro tip: Use chopped chocolate bars instead of chips for those iconic ‘pools’ of chocolate that look so good in photos.
- Scoop into large balls and chill the dough in the fridge for at least 2 hours (or overnight). This prevents the cookies from spreading too thin and deepens the flavor.
- Bake at 350°F (175°C) for 10-12 minutes. The edges should be set but the centers should still look slightly underbaked—they will firm up as they cool on the tray.
Conclusion: The Heart of the Board
Hosting doesn’t have to be a chore; it should be a celebration of the people you love. By embracing the ‘board’ philosophy, you’re not just serving food; you’re creating an environment that is visual, tactile, and deeply welcoming. Whether it’s a simple morning matcha or a full-blown taco night, the secret lies in the assembly and the intention. So, clear off your biggest wooden board, gather your favorite ingredients, and get ready to host the most stress-free, beautiful gathering you’ve ever had. Your guests—and your peace of mind—will thank you.