

There’s something truly magical about the way a simple meal can transform a chaotic weekday evening into a memory you’ll want to save forever. I remember sitting at my kitchen island last Tuesday, the golden hour light spilling across the counter, and realizing that the most beautiful moments aren’t found in five-course galas, but in the shared laughter over a rustic, delicious board of food. We live in a world that moves so fast, yet the simple act of gathering around a wooden platter filled with golden, succulent chicken and vibrant sides feels like hitting the pause button on the universe.
The secret to that ‘viral’ lifestyle isn’t about perfection; it’s about the soul you put into the preparation. This Viral Simple Food Board is my love letter to easy entertaining, designed to take the stress out of hosting while making you look like a culinary genius. It’s about the tactile joy of picking up a crispy piece of chicken, the aroma of rosemary and garlic wafting through your home, and the satisfying crunch that follows. Let’s dive into the techniques that will make your kitchen the heart of the home and your food the talk of the town.
How to bake crispy chicken thighs

Why we love this
There is nothing quite as satisfying as the sound of a knife edge scraping against perfectly rendered, crackling chicken skin. When you bake thighs to this level of crispness, the skin becomes a salty, golden wafer that protects the incredibly juicy meat underneath. The aroma of schmaltz—that liquid gold—filling your kitchen creates an immediate sense of comfort and home. It’s a sensory masterpiece where the contrast between the brittle, savory exterior and the tender, melting interior creates a bite that is nothing short of addictive, making it the undisputed star of any food board.
Ingredients
- 4-6 bone-in, skin-on chicken thighs
- 2 tablespoons extra virgin olive oil
- 1 teaspoon sea salt
- 1/2 teaspoon cracked black pepper
- 1/2 teaspoon garlic powder
- Fresh thyme sprigs
How to make it
- Begin by removing your chicken thighs from the refrigerator at least 20 minutes before cooking to bring them to room temperature; this ensures even cooking throughout.
- Preheat your oven to 425°F (218°C). A high temperature is absolutely critical for rendering the fat quickly and achieving that desired crunch without overcooking the meat.
- Use paper towels to pat the chicken thighs extremely dry. Any moisture left on the skin will create steam, which is the enemy of crispiness. Spend extra time on this step.
- Drizzle the olive oil over the skin and rub it in thoroughly. In a small bowl, mix your salt, pepper, and garlic powder, then sprinkle it evenly over the skin, ensuring full coverage.
- Place a wire rack over a rimmed baking sheet. This allows hot air to circulate under the chicken, crisping the bottom as well as the top.
- Arrange the thighs on the rack skin-side up and bake for 35-40 minutes. Look for the skin to turn a deep mahogany brown and for the internal temperature to reach 175°F for the best texture.
How to make crispy chicken

Why we love this
The quest for the ultimate crispy chicken is a culinary journey that rewards you with the most incredible textures imaginable. This method focuses on a light, airy crunch that feels professional yet is achieved with a few simple pantry staples. The sight of that bubbly, textured surface is enough to make anyone’s mouth water, and the way it holds onto seasonings makes every mouthful a flavor explosion. It’s the kind of food that makes people lean in, eyes wide, asking for your ‘secret ingredient’ before they’ve even finished their first piece.
Ingredients
- 1 lb chicken breast or thighs, cut into bite-sized pieces
- 1/2 cup cornstarch
- 1 teaspoon baking powder
- 1 teaspoon paprika
- 1 teaspoon onion powder
- Neutral oil for frying (like avocado or canola)
How to make it
- In a large mixing bowl, whisk together the cornstarch, baking powder, paprika, and onion powder. The baking powder is the secret weapon here; it creates tiny air bubbles that make the coating extra light and crispy.
- Toss your chicken pieces into the dry mixture, pressing the coating onto the meat to ensure every nook and cranny is covered. Let it sit for 5 minutes so the coating adheres.
- Fill a heavy-bottomed skillet or Dutch oven with about 1 inch of oil. Heat it over medium-high until it reaches 350°F (175°C). Test it by dropping a small bit of coating in; it should sizzle immediately.
- Carefully lower the chicken into the oil using tongs, being careful not to crowd the pan. Crowding lowers the oil temperature and leads to soggy chicken.
- Fry for about 3-5 minutes per side. You are looking for a vibrant golden-orange color and a firm, hard shell when tapped with a fork.
- Drain the pieces on a paper-towel-lined plate and sprinkle with a final pinch of salt while they are still hot to ensure the seasoning sticks.
How to season chicken thighs

Why we love this
Seasoning is where the personality of your dish truly shines, turning a blank canvas into a vibrant work of art. The way spices bloom in the heat, releasing oils and aromas that fill the room with hints of smoke, earth, and zest, is a ritual that marks the beginning of a great meal. A well-seasoned thigh offers a complex profile where the heat of pepper, the sweetness of paprika, and the savory depth of herbs dance together on your palate. It transforms the humble chicken into a gourmet experience that feels curated and thoughtful.
Ingredients
- 6 chicken thighs
- 1 tablespoon smoked paprika
- 1 teaspoon dried oregano
- 1/2 teaspoon cumin
- 1/2 teaspoon chili powder
- 1 teaspoon kosher salt
- 1 tablespoon brown sugar (optional for caramelization)
How to make it
- Start by blending all your dry spices in a small ramekin. Mixing them beforehand ensures that every inch of the chicken gets the same balance of flavors.
- Apply a very thin layer of oil or mustard to the chicken. This acts as a ‘binder,’ helping the spices stick to the skin and meat rather than falling off in the pan.
- Generously sprinkle the rub from about 6 inches above the chicken. This ‘high-pour’ technique ensures an even distribution without clumps.
- Rub the spices into the meat, including under the skin if possible, to flavor the meat directly.
- Let the seasoned chicken sit for at least 15 minutes. This allows the salt to penetrate the fibers, seasoning the chicken from the inside out and helping retain moisture.
- Cook according to your preferred method, watching as the spices darken and form a beautiful, fragrant crust.
How to roast chicken legs
Why we love this
Roasting chicken legs is a classic technique that brings a sense of nostalgia and rustic charm to your dinner table. There is something so visually appealing about a platter piled high with glistening, roasted legs, their meat pulling slightly away from the bone to reveal the tender, succulent interior. The slow-roasting process allows the connective tissue to break down, resulting in a buttery texture that practically melts. It’s the ultimate finger food for a board, encouraging guests to get stuck in and enjoy the primal, earthy satisfaction of meat on the bone.
Ingredients
- 8 chicken drumsticks
- 3 tablespoons melted butter
- 4 cloves garlic, smashed
- 2 lemons, sliced into rounds
- Fresh rosemary and sage
- Salt and pepper to taste
How to make it
- Preheat your oven to 400°F (200°C). Roasting at this temperature allows for a balance of skin browning and deep internal cooking.
- In a large roasting pan, toss the chicken legs with melted butter, salt, and pepper. Ensure each leg is thoroughly coated for a rich, glossy finish.
- Scatter the lemon slices, smashed garlic cloves, and fresh herbs around the pan. These aromatics will infuse the rendered fat with incredible flavor that bastes the chicken as it roasts.
- Arrange the legs so they are not touching; this ensures the skin roasts rather than steams.
- Roast for 35-45 minutes. Halfway through, use a spoon to baste the legs with the juices collecting at the bottom of the pan.
- The legs are done when the juices run clear and the skin is golden-brown. Let them rest for 5 minutes before serving to allow the juices to redistribute.
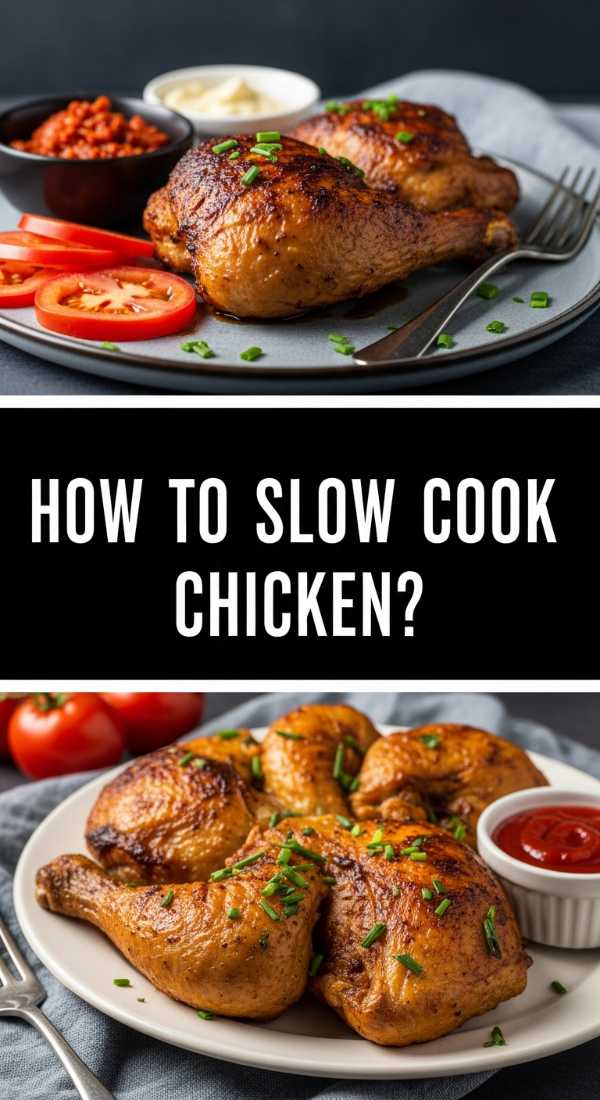
How to slow cook chicken

Why we love this
The slow cooker is the ultimate tool for creating chicken that is so tender it literally falls apart at the mere suggestion of a fork. As the meat simmers in its own juices over several hours, the flavors deepen and intensify, creating a rich, savory profile that is impossible to achieve with high-heat methods. The aroma that fills your home throughout the day is a constant, mouth-watering promise of the feast to come. It’s the epitome of ‘set it and forget it’ luxury, providing a luscious, shreddable texture that pairs perfectly with soft breads or creamy dips on your board.
Ingredients
- 2 lbs boneless, skinless chicken thighs
- 1 cup chicken bone broth
- 1 onion, diced
- 2 carrots, chopped
- 2 bay leaves
- 1 teaspoon poultry seasoning
How to make it
- Layer the diced onions and chopped carrots at the bottom of your slow cooker. This creates a flavor base and prevents the chicken from sitting directly on the heating element.
- Place the chicken thighs on top of the vegetables in a single layer if possible.
- Pour over the chicken bone broth and sprinkle with the poultry seasoning and a pinch of salt. Add the bay leaves for a subtle, herbal depth.
- Cover and set the slow cooker to ‘Low’ for 6-7 hours or ‘High’ for 3-4 hours. Slow and low is always better for the most tender results.
- Check the chicken periodically; it is done when it registers 165°F and pulls apart easily with two forks.
- Remove the chicken and shred it in a separate bowl, adding a splash of the cooking liquid back in to keep it moist before serving on your food board.
How to marinate chicken thighs

Why we love this
Marinating is the secret to infusing chicken with layers of flavor that go far beyond the surface. By letting the meat bathe in a mixture of acids, fats, and aromatics, you are essentially pre-seasoning every fiber, ensuring that every bite is as flavorful as the last. The zing of citrus or vinegar cuts through the richness of the chicken, while oils carry the essence of herbs deep into the meat. It’s a transformative process that results in a finished product that is exceptionally juicy, vibrant, and bursting with bright, complex notes.
Ingredients
- 6 chicken thighs
- 1/4 cup olive oil
- 1/4 cup soy sauce
- 2 tablespoons honey
- 2 limes, juiced
- 3 cloves garlic, minced
- 1 tablespoon fresh ginger, grated
How to make it
- In a large resealable bag or a shallow glass dish, whisk together the olive oil, soy sauce, honey, lime juice, garlic, and ginger until well combined.
- Place the chicken thighs into the marinade, ensuring every piece is completely submerged or coated. If using a bag, squeeze out as much air as possible before sealing.
- Refrigerate for at least 2 hours, though overnight is ideal for maximum flavor penetration and tenderizing.
- Do not marinate for more than 24 hours, as the acid in the lime juice can begin to break down the proteins too much, leading to a mushy texture.
- When ready to cook, remove the chicken from the marinade and let the excess drip off. Do not rinse the chicken; those bits of garlic and ginger on the surface will caramelize beautifully.
- Cook the chicken on a grill or in a hot pan, turning frequently to prevent the honey in the marinade from burning while still achieving a nice char.
How to sear chicken thighs

Why we love this
Searing is an essential skill that unlocks the Maillard reaction—that magical chemical process that creates a savory, browned crust and deepens the flavor of the meat. There is a primal joy in the hiss of the pan as the chicken hits the hot surface, and the resulting color is a beautiful, deep bronze that looks stunning on a serving board. Searing locks in the juices, creating a contrast between the slightly caramelized, firm exterior and the soft, succulent meat within. It’s the foundation of professional-tasting chicken that you can easily master at home.
Ingredients
- 4 skin-on chicken thighs
- 2 tablespoons high-smoke-point oil (like grapeseed)
- Kosher salt
- Black pepper
- 2 tablespoons butter
- 2 sprigs rosemary
How to make it
- Pat the chicken thighs dry and season both sides generously with salt and pepper.
- Heat a heavy cast-iron skillet over medium-high heat. Add the oil and wait until it begins to shimmer and just slightly smoke.
- Place the thighs in the pan, skin-side down. You should hear a loud, consistent sizzle. Press down lightly with a spatula to ensure the skin has full contact with the pan.
- Leave the chicken alone for 5-7 minutes. Do not peek! Moving it too early will prevent the crust from forming and cause the skin to tear.
- Flip the chicken once the skin is golden-brown and releases easily from the pan. Add the butter and rosemary to the skillet.
- Tilt the pan and use a spoon to baste the chicken with the foaming, herb-infused butter for another 3-4 minutes until cooked through.
How to prep chicken thighs

Why we love this
Proper preparation is the unsung hero of a successful meal, setting the stage for everything that follows. Taking the time to handle your ingredients with care—trimming away excess fat, ensuring uniform size, and letting the meat temper—is a meditative process that connects you to the food you are preparing. This stage is where you ensure safety, consistency, and quality. When you start with perfectly prepped chicken, the actual cooking becomes a breeze, and the final result is a polished, professional-looking dish that shows you care about the details.
Ingredients
- Fresh chicken thighs
- Cutting board (plastic or glass for safety)
- Sharp chef’s knife or kitchen shears
- Paper towels
How to make it
- Clear your workspace and ensure your cutting board is stable. If it slides, place a damp paper towel underneath it.
- Remove the chicken from the packaging and immediately pat it dry on all sides with paper towels. This is the most important step for both safety (preventing splashes) and browning.
- Use your knife or shears to trim any large, hanging pieces of yellow fat or excess skin. You want a neat, tidy piece of meat that will cook evenly.
- If using bone-in thighs, check for any small bone fragments near the joints and remove them carefully.
- Lay the chicken out on a clean plate and let it sit at room temperature for 15-20 minutes. This ‘tempering’ ensures the center isn’t cold when the outside starts cooking.
- Clean your workspace immediately with hot soapy water or a disinfectant to prevent cross-contamination before moving on to seasonings.
How to glaze chicken thighs

Why we love this
A glaze is like the finishing touch on a masterpiece, adding a glossy, jewel-like sheen and a final layer of intense flavor. The way a thick, sweet, and tangy sauce clings to the curves of the chicken, bubbling and caramelizing under the heat, is visually stunning and incredibly appetizing. It provides a sticky, finger-licking quality that makes the food board experience interactive and fun. Whether it’s a spicy honey or a balsamic reduction, a glaze adds a sophisticated edge and a punch of flavor that lingers on the tongue long after the meal is over.
Ingredients
- 6 cooked chicken thighs
- 1/2 cup apricot preserves or honey
- 2 tablespoons apple cider vinegar
- 1 tablespoon dijon mustard
- 1/4 teaspoon cayenne pepper
How to make it
- In a small saucepan over medium heat, combine the preserves, vinegar, mustard, and cayenne. Whisk until the mixture is smooth and begins to simmer.
- Let the glaze reduce for 5-8 minutes until it is thick enough to coat the back of a spoon. It should have a syrupy consistency.
- Wait until your chicken is almost fully cooked (about 5 minutes before pulling it from the heat) before applying the glaze. Applying it too early can cause the sugars to burn.
- Use a pastry brush to coat the top of each thigh generously with the glaze.
- If baking, turn the oven to ‘Broil’ for 2-3 minutes to let the glaze bubble and char slightly. Watch it like a hawk, as it can go from perfect to burnt in seconds.
- Apply one final thin layer of glaze just before serving to give the chicken a beautiful, fresh shine on the board.
How to cook tender chicken
[IMAGE_10]
Why we love this
Tenderness is the ultimate hallmark of a well-cooked piece of poultry. There is a deep, comforting pleasure in biting into chicken that offers no resistance, releasing its savory juices and melting away with ease. Achieving this level of tenderness requires a gentle touch and an understanding of temperature, turning a simple protein into something that feels luxurious and high-end. It’s the difference between a meal that is ‘fine’ and one that is unforgettable, ensuring that your food board is not just beautiful to look at, but a joy to eat.
Ingredients
- 4-6 boneless chicken thighs
- 1 cup buttermilk (for brining)
- 1 teaspoon salt
- 2 tablespoons olive oil
- Fresh parsley for garnish
How to make it
- For the most tender results, soak your chicken thighs in buttermilk and salt for at least 30 minutes before cooking. The lactic acid in the buttermilk gently breaks down lean muscle fibers.
- Drain the buttermilk and pat the chicken lightly—you want some moisture to remain.
- Cook the chicken over medium heat. Cooking too fast over high heat can cause the proteins to seize and become tough.
- Use a meat thermometer to check the internal temperature. For thighs, 170°F-175°F is the sweet spot where the fat has rendered but the meat is still incredibly moist.
- The most critical step: let the chicken rest! Transfer it to a cutting board and tent it loosely with foil for 8-10 minutes.
- Resting allows the muscle fibers to relax and reabsorb the juices. If you cut it too soon, all that moisture will run out, leaving the chicken dry.
Conclusion: Bringing the Board Together
Now that you’ve mastered the art of the perfect chicken thigh, it’s time to assemble your viral food board! Arrange your golden, crispy chicken as the centerpiece, surrounding it with bowls of tangy dipping sauces, roasted vegetables, and crusty bread to soak up all those incredible juices. This isn’t just a meal; it’s an invitation for your loved ones to gather, share, and enjoy the simple pleasures of life. Remember, the best ingredient you can add to any dish is the joy of making it. Happy cooking!