
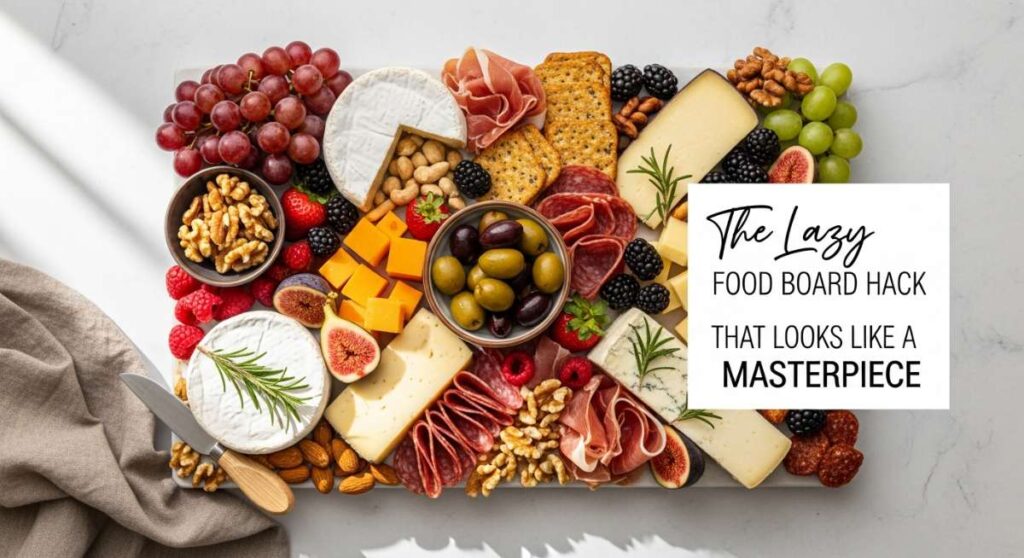
The Lazy Food Board Hack That Looks Like a Masterpiece
We’ve all been there—the guests are arriving in thirty minutes, the house is a semi-controlled disaster, and the pressure to produce a Pinterest-worthy spread is mounting. I used to stress over individual plates and complex garnishes until I discovered the ultimate hosting secret: the Viral Simple Food Board. There is something almost magical about the way a large wooden plank piled high with golden, succulent chicken and vibrant sides brings people together, turning a casual dinner into an interactive event.
The beauty of this hack lies in its effortless elegance. You don’t need to be a Michelin-starred chef to create a masterpiece; you just need a few reliable techniques and a little bit of styling. By focusing on various cuts of chicken prepared in different, mouth-watering ways, you create a rustic, bountiful aesthetic that feels both cozy and sophisticated. It’s about the clinking of glasses, the sharing of stories, and the collective ‘ooh’ when you set that board in the center of the table.
How to bake crispy chicken

Why we love this
There is nothing quite like the audible crunch of perfectly baked chicken skin breaking away to reveal the tender, steaming meat beneath. This method fills your kitchen with a nostalgic, savory aroma that reminds you of Sunday dinners at grandma’s house. The texture is a delightful contrast of salty, shattered-glass crispness and a melt-in-your-mouth interior that feels like a warm hug for your taste buds, making it the undeniable star of any food board.
Ingredients
- 4 large chicken breasts or pieces
- 2 cups panko breadcrumbs
- 1/2 cup grated parmesan cheese
- 1 teaspoon smoked paprika
- 1/2 teaspoon garlic powder
- 2 eggs, beaten
- Salt and cracked black pepper to taste
How to make it
- Preheat your oven to 425°F (220°C). This high temperature is crucial for achieving that golden-brown crust without overcooking the meat.
- Prepare your breading station: in one shallow bowl, whisk the eggs with a splash of water; in another, combine panko, parmesan, paprika, garlic powder, salt, and pepper.
- Pat the chicken completely dry with paper towels. Any moisture on the surface will create steam, which prevents the coating from becoming truly crispy.
- Dip each piece into the egg wash, allowing the excess to drip off, then press firmly into the panko mixture until every nook and cranny is coated.
- Place a wire rack over a baking sheet and lightly spray with oil. Elevating the chicken allows hot air to circulate underneath, ensuring the bottom is just as crunchy as the top.
- Bake for 18-22 minutes. You are looking for a deep golden hue and an internal temperature of 165°F. Let it rest for 5 minutes before slicing to lock in the juices.
How to cook juicy thighs

Why we love this
Chicken thighs are the unsung heroes of the poultry world, offering a depth of flavor and a silky, succulent texture that breasts simply cannot match. When cooked correctly, the fat renders down into a natural sauce that coats every bite in richness. The aroma is deeply savory, with hints of caramelization that promise a luxurious dining experience. They provide a robust, hearty element to your board that feels indulgent yet incredibly approachable.
Ingredients
- 6 bone-in, skin-on chicken thighs
- 2 tablespoons olive oil
- 1 tablespoon fresh rosemary, minced
- 1 teaspoon onion powder
- Sea salt and black pepper
- Lemon wedges for serving
How to make it
- Bring the chicken to room temperature for about 20 minutes before cooking. This ensures even heat distribution throughout the meat.
- Preheat a heavy-bottomed cast-iron skillet over medium-high heat. You want the pan to be hot enough that a drop of water sizzles and evaporates instantly.
- Season the thighs generously on both sides. Place them skin-side down in the hot skillet. You should hear a vigorous sear immediately.
- Do not move the chicken for at least 6-8 minutes. This patience allows the skin to render its fat and become incredibly thin and crisp. Look for the edges to turn opaque and golden.
- Flip the thighs over and reduce the heat to medium. Continue cooking for another 10-12 minutes. The meat should feel firm but give slightly when pressed.
- Use a meat thermometer to ensure they reach 175°F; thighs benefit from a slightly higher temp than breasts to break down connective tissue. Garnish with a squeeze of fresh lemon to cut through the richness.
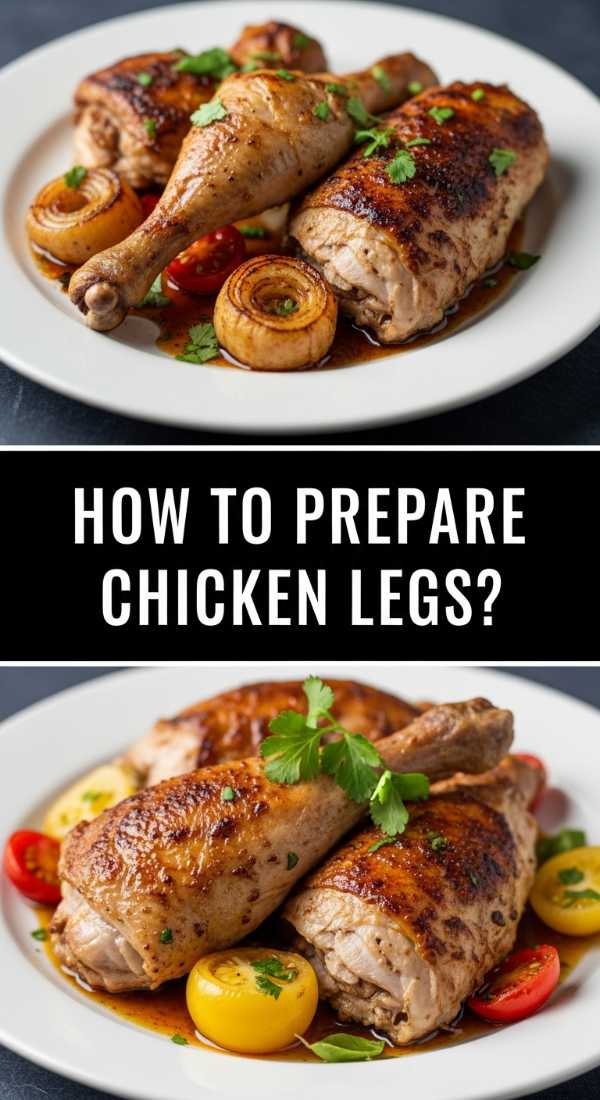
How to prepare chicken legs
Why we love this
Chicken legs bring a playful, rustic energy to a food board that encourages guests to dig in with their hands. There is something deeply satisfying about the smoky, charred exterior and the way the meat pulls effortlessly away from the bone. The scent of roasted poultry mixed with savory herbs creates an atmosphere of abundance and comfort, perfect for a casual gathering where the food is meant to be enjoyed without formality.
Ingredients
- 8 chicken drumsticks
- 3 tablespoons melted butter
- 1 tablespoon dried oregano
- 1 teaspoon chili powder
- 2 cloves garlic, minced
- Kosher salt
How to make it
- Preheat your oven to 400°F (200°C). Prepare a baking sheet by lining it with parchment paper for easy cleanup.
- In a small bowl, whisk together the melted butter, garlic, oregano, chili powder, and salt. The butter helps the skin crisp up while the spices provide a vibrant color.
- Toss the drumsticks in a large bowl with the butter mixture, using your hands to ensure every inch of the skin is seasoned and slick.
- Arrange the legs on the baking sheet, leaving space between them so they roast rather than steam.
- Roast for 35-40 minutes. Halfway through, use tongs to rotate each drumstick to ensure the underside gets that same beautiful golden color.
- Check for doneness by piercing the thickest part; the juices should run clear. Let them rest for 10 minutes so the moisture redistributes, keeping the meat incredibly tender.
How to use your crockpot

Why we love this
The crockpot is the ultimate tool for the ‘lazy’ masterpiece, transforming simple ingredients into a tender, pull-apart delight while you go about your day. The slow-simmered aroma of garlic and broth infusing into the meat creates an anticipation that is almost better than the meal itself. The texture is incredibly soft and succulent, providing a wonderful contrast to the crispier items on your board and making it easy for guests to scoop onto crackers or bread.
Ingredients
- 2 lbs chicken thighs or breasts
- 1 cup low-sodium chicken broth
- 1 onion, sliced
- 3 cloves garlic, smashed
- 1 tablespoon Italian seasoning
- 1/2 teaspoon red pepper flakes
How to make it
- Place the sliced onions and smashed garlic at the bottom of the slow cooker to create a ‘rack’ for the chicken to sit on, which infuses the meat with flavor from the bottom up.
- Lay the chicken pieces over the onions in a single layer if possible. Sprinkle the Italian seasoning, red pepper flakes, and salt evenly over the top.
- Pour the chicken broth around the sides of the meat, not directly over it, to avoid washing off the spices you just applied.
- Cover and set to ‘Low’ for 6-7 hours or ‘High’ for 3-4 hours. Cooking on low is highly recommended as it yields a much more tender, delicate fiber in the meat.
- Once finished, the chicken should easily shred with two forks. If you want a more rustic look for your board, leave them in large, tender chunks.
- Strain the leftover juices and drizzle a tablespoon or two back over the meat before serving to keep it glistening and moist on the board.
How to season boneless chicken

Why we love this
Boneless chicken is a blank canvas that allows your favorite spice blends to truly shine, creating a vibrant pop of color and flavor on your display. We love this method because it’s quick, lean, and incredibly versatile, offering a clean, herb-forward taste that refreshes the palate. The sight of perfectly sliced, herb-crusted chicken arranged in a fan shape adds a professional, structured look to your otherwise rustic board.
Ingredients
- 1 lb boneless, skinless chicken breasts
- 2 tablespoons olive oil
- 1 tablespoon dried thyme
- 1 tablespoon dried parsley
- 1 teaspoon onion powder
- 1/2 teaspoon lemon zest
- Salt and pepper
How to make it
- Place the chicken breasts between two sheets of plastic wrap and use a meat mallet or heavy pan to pound them to an even 1/2-inch thickness. This ensures they cook at exactly the same rate.
- Pat the meat dry and rub both sides with olive oil, which acts as the ‘glue’ for your seasoning and helps conduct heat.
- Mix your herbs, onion powder, and lemon zest in a small bowl. Press the seasoning firmly into the meat on both sides, creating a thick crust of flavor.
- Heat a skillet over medium heat. Do not go too hot, or the dried herbs will burn and turn bitter before the chicken is cooked through.
- Sear the chicken for about 5-6 minutes per side. You are looking for a light golden color and a firm texture.
- Allow the chicken to rest for a full 8 minutes before slicing against the grain into thin strips. This technique ensures the moisture stays inside the meat rather than running off onto your board.
How to make sticky chicken

Why we love this
Sticky chicken is the ‘candy’ of the food board world—glossy, sweet, and utterly addictive. The way the honey-based glaze caramelizes under the heat creates a deep, dark shine that looks stunning against wooden serving platters. The flavor is a complex dance of sweet and savory that keeps people coming back for ‘just one more piece,’ while the tacky texture provides a fun, finger-licking experience that feels celebratory.
Ingredients
- 1.5 lbs chicken wings or bite-sized thighs
- 1/2 cup honey
- 1/4 cup soy sauce
- 1 tablespoon grated ginger
- 2 tablespoons Sriracha (optional)
- Sesame seeds for garnish
How to make it
- Preheat your oven to 400°F (200°C). Line a tray with foil and a well-greased wire rack to ensure the sticky glaze doesn’t glue the chicken to the pan.
- In a small saucepan over medium heat, combine honey, soy sauce, ginger, and Sriracha. Simmer for 5 minutes until the mixture thickens into a syrupy consistency.
- Toss your chicken pieces in a bowl with half of the glaze until they are thoroughly coated.
- Arrange the chicken on the wire rack and bake for 20 minutes. The high heat will begin to set the first layer of glaze.
- Remove from the oven and brush the remaining glaze generously over the chicken. Return to the oven for another 10-15 minutes, or until the edges are slightly charred and the sauce is bubbling.
- Garnish immediately with sesame seeds while the glaze is still tacky so they stick perfectly. Let cool slightly so the glaze thickens into a beautiful, sticky lacquer.
How to roast perfect thighs

Why we love this
Roasting thighs at high heat is the gold standard for achieving that elusive combination of ‘crackling’ skin and buttery, tender meat. The aroma of roasting fat and herbs is intoxicating, signaling to your guests that a feast is imminent. This preparation feels sophisticated and classic, providing a substantial, centerpiece-worthy element to your board that pairs beautifully with roasted vegetables and crusty breads.
Ingredients
- 4-6 skin-on, bone-in chicken thighs
- 1 tablespoon olive oil
- 1 tablespoon fresh thyme leaves
- 4 cloves garlic, whole and unpeeled
- Flaky sea salt
- Coarse black pepper
How to make it
- Preheat your oven to 425°F (220°C). A very hot oven is the secret to rendering the fat quickly while keeping the meat moist.
- Dry the chicken skins thoroughly. Rub them with a tiny amount of olive oil—just enough to help the salt stick, but not so much that they become greasy.
- Season aggressively with flaky sea salt and pepper. The salt helps draw out moisture from the skin, making it extra crisp.
- Place the chicken in a roasting pan or large oven-safe skillet, scattering the whole garlic cloves around the meat to perfume the rendered fat.
- Roast for 25-30 minutes. Use a spoon to baste the skins with the hot pan drippings once or twice during the cooking process for extra flavor and shine.
- Switch the oven to ‘broil’ for the final 2 minutes, watching closely. This provides that final burst of heat to make the skin literally shatter when bitten. Rest for 10 minutes before serving.
How to grill tender chicken

Why we love this
Grilling introduces a primordial, smoky element to your food board that is impossible to replicate in an oven. Those iconic charred grill marks aren’t just for show; they represent layers of caramelized flavor and a hint of summer nostalgia. The meat remains incredibly juicy with a light, outdoor freshness that balances the heavier, roasted elements of the spread, making it a favorite for warm-weather entertaining.
Ingredients
- 1 lb chicken tenders or thin-cut breasts
- 1/4 cup olive oil
- Juice of 1 lime
- 1 teaspoon cumin
- 1/2 teaspoon smoked paprika
- Fresh cilantro for garnish
How to make it
- Whisk the olive oil, lime juice, cumin, and paprika in a bowl. Marinate the chicken for at least 30 minutes, but no more than 2 hours (the citrus will start to ‘cook’ the meat if left too long).
- Preheat your grill to medium-high heat (about 400°F). Clean the grates thoroughly and oil them lightly using a paper towel held with tongs.
- Place the chicken on the grill at a 45-degree angle to the grates. Leave it undisturbed for 3-4 minutes to develop those deep, professional grill marks.
- Flip the chicken. It should release easily from the grate; if it sticks, it’s not ready to be flipped yet.
- Cook for another 3-4 minutes until the internal temperature reaches 165°F. Tenders cook very quickly, so stay close to the grill.
- Remove to a plate and cover loosely with foil for 5 minutes. This ‘rest’ allows the heat to even out, ensuring every bite is uniformly tender.
How to braise chicken legs

Why we love this
Braising is the art of slow-cooking in liquid, resulting in chicken legs so tender they literally fall off the bone at the slightest touch. The sauce created during this process is liquid gold—rich, deeply flavored, and perfect for dipping crusty bread into right off the board. This method offers a sophisticated, European feel to your meal, with aromas of wine and herbs that make your home smell like a cozy bistro.
Ingredients
- 6 chicken legs (drumstick and thigh attached)
- 1 cup dry white wine or chicken broth
- 1 cup halved cherry tomatoes
- 1 tablespoon tomato paste
- 2 bay leaves
- Fresh basil for garnish
How to make it
- In a large, deep skillet or Dutch oven, sear the chicken legs in a bit of oil over medium-high heat until the skin is golden brown. Remove and set aside.
- Reduce the heat to medium and add the tomato paste, cooking for 1 minute until it turns a deep brick red.
- Deglaze the pan by pouring in the wine or broth, scraping up all the brown bits (the fond) from the bottom of the pan—this is where the flavor lives!
- Add the tomatoes and bay leaves, then return the chicken to the pan, skin-side up. The liquid should come about halfway up the sides of the meat.
- Cover with a tight-fitting lid and simmer on low for 45 minutes. The gentle bubbles will slowly break down the meat while the tomatoes burst and create a thick sauce.
- Remove the lid for the final 10 minutes to allow the sauce to reduce and thicken. Garnish with fresh basil just before placing the whole legs onto your board.
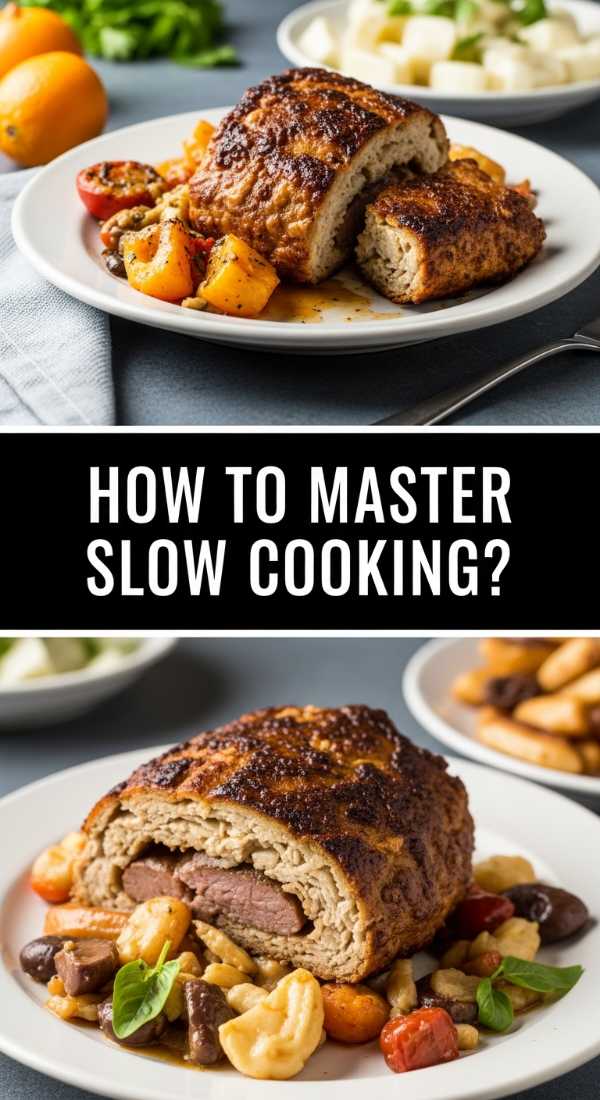
How to master slow cooking
Why we love this
Mastering the slow cooker is about more than just convenience; it’s about the transformation of simple textures into something sublime. We love the way slow-cooked chicken absorbs the essence of every herb and spice, resulting in a flavor profile that is deeply integrated rather than just surface-level. It allows you to be a guest at your own party, providing a warm, reliable anchor for your food board that feels both generous and expertly prepared.
Ingredients
- 2 lbs boneless chicken thighs
- 1/2 cup balsamic vinegar
- 2 tablespoons brown sugar
- 3 cloves garlic, minced
- 1 teaspoon dried thyme
- Salt and pepper
How to make it
- Season your chicken thighs generously with salt and pepper. For extra flavor, you can quickly sear them in a pan first, though this is optional for a ‘lazy’ hack.
- In the slow cooker, whisk together the balsamic vinegar, brown sugar, garlic, and thyme until the sugar is mostly dissolved.
- Submerge the chicken in the liquid, ensuring each piece is well-coated.
- Set the slow cooker to ‘Low’ for 5-6 hours. This slow pace allows the vinegar to mellow and the sugar to create a deep, dark glaze.
- Once the time is up, remove the chicken carefully. If the sauce is too thin, pour it into a small saucepan and boil for 5 minutes until it reduces to a thick glaze.
- Brush the thickened sauce back over the chicken before arranging it on the board. The result is a sophisticated, tangy-sweet dish that looks like it took all day to prepare.
Conclusion
Creating a viral-worthy food board isn’t about perfection; it’s about the joy of sharing good food in a beautiful way. Whether you choose the crunch of baked chicken or the richness of braised legs, the secret is in the variety and the love you put into the preparation. So, grab your largest platter, pick a few of these methods, and get ready to be the host of the season!