

Picture this: it’s a golden Saturday evening, the sun is dipping below the horizon, and your favorite playlist is humming in the background. There is something truly magical about gathering friends around a table filled with food that looks as incredible as it tastes, yet doesn’t require a culinary degree to master. We’ve all seen those viral food boards—those effortlessly chic, sprawling platters of perfectly cooked proteins and vibrant garnishes—and today, I am showing you how to reclaim that aesthetic for your own kitchen.
The secret to a viral food board isn’t about spending hundreds on exotic ingredients; it’s about mastering the humblest, most flavorful cut of meat: the chicken thigh. Whether you’re looking for that shattering crunch or a melt-in-your-mouth slow-braise, the chicken thigh is the versatile canvas we need. In this guide, I’m breaking down ten ways to transform this simple protein into a show-stopping centerpiece that will have your followers hitting ‘save’ faster than you can say ‘dinner is served.’
How to bake crispy chicken thighs?

Why we love this
There is nothing quite as satisfying as the sound of a knife scraping across perfectly rendered, shatteringly crisp chicken skin. When you bake thighs at a high temperature, the fat underneath the skin melts away, essentially frying the skin in its own juices while keeping the meat underneath impossibly succulent. It is the ultimate comfort food that feels sophisticated enough for a weekend board, filling the house with a savory, roasted aroma that promises a truly decadent bite.
Ingredients
- 4-6 bone-in, skin-on chicken thighs
- 2 tablespoons avocado oil or melted ghee
- 1 tablespoon kosher salt
- 1 teaspoon cracked black pepper
- 1 teaspoon garlic powder
- Fresh thyme sprigs for garnish
How to make it
- Preheat your oven to 425°F (218°C). High heat is crucial for achieving that signature crunch without overcooking the interior meat.
- Pat the chicken thighs extremely dry using paper towels. Moisture is the enemy of crispiness; any dampness will cause the chicken to steam rather than sear.
- Place the thighs on a wire rack set over a rimmed baking sheet. This allows hot air to circulate around the entire piece of meat, ensuring the bottom doesn’t get soggy.
- Rub the oil or ghee over every inch of the skin, then season generously with salt, pepper, and garlic powder from a height to ensure even coverage.
- Bake for 35 to 40 minutes. You are looking for an internal temperature of 175°F for thighs (they handle higher heat better than breasts) and skin that is deep golden brown and firm to the touch.
- Let the meat rest for 5 minutes before serving to allow the juices to redistribute, ensuring every bite is moist.
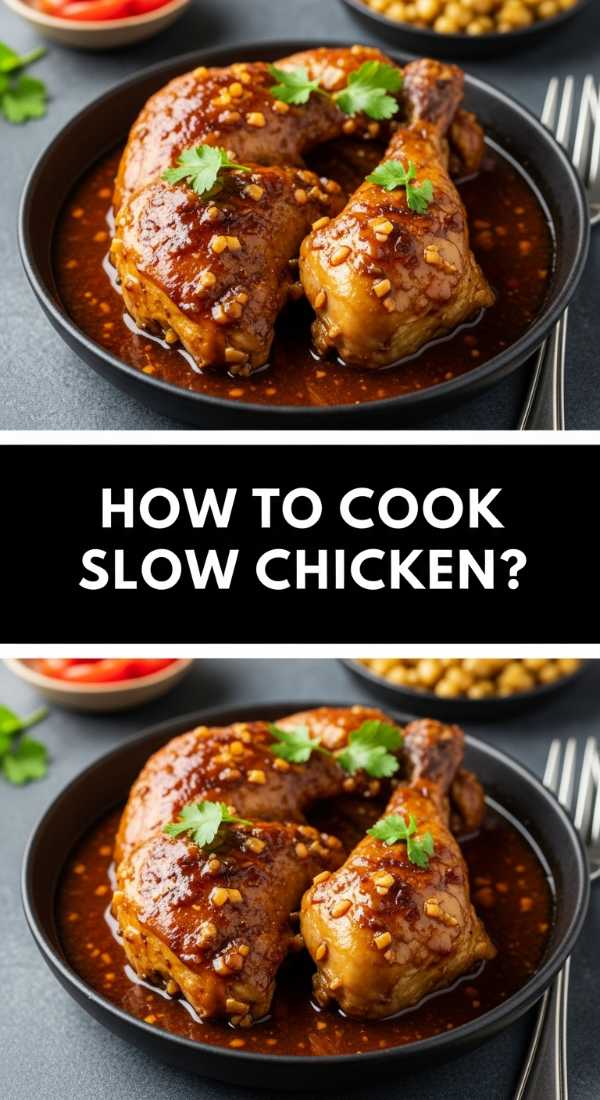
How to cook slow chicken thighs?
Why we love this
Slow-cooked chicken thighs are the epitome of “set it and forget it” luxury, turning a tough cut into a velvety masterpiece that pulls apart with the mere suggestion of a fork. As the meat simmers in a flavorful liquid, the collagen breaks down into a rich, silky sauce that coats every fiber. The aroma is deep and earthy, reminiscent of a French bistro, making it the perfect centerpiece for a rustic food board served alongside crusty bread and a glass of red wine.
Ingredients
- 6 boneless or bone-in chicken thighs
- 1 cup chicken bone broth
- 1/2 cup dry white wine (like Sauvignon Blanc)
- 3 cloves smashed garlic
- 2 carrots, sliced
- 1 sprig of rosemary
How to make it
- Start by searing the chicken thighs in a heavy-bottomed pot or Dutch oven over medium-high heat for 3 minutes per side. This develops a “fond” (browned bits) on the bottom of the pan which adds massive depth to the slow-cooking process.
- Remove the chicken and deglaze the pan by pouring in the white wine, scraping the bottom with a wooden spoon to release those flavorful bits.
- Add the carrots, garlic, and rosemary, then return the chicken to the pot.
- Pour in the chicken broth until the thighs are half-submerged. Do not cover them completely, as we want to braise, not boil.
- Lower the heat to the absolute minimum, cover with a tight-fitting lid, and let simmer for 1.5 to 2 hours.
- Check for doneness by lifting a thigh; it should practically fall off the bone or shred effortlessly. If using a slow cooker, set it to ‘Low’ for 6 hours for the same result.
How to grill juicy chicken thighs?

Why we love this
Grilling brings an elemental, smoky char that you simply cannot replicate in an oven, creating a beautiful contrast between the caramelized exterior and the tender, juice-filled center. The scent of woodsmoke and searing meat is the universal call for a backyard gathering, making these thighs the star of any outdoor food board. Each bite offers a complex profile of fire-kissed edges and rich, savory fat that feels like the very essence of summer entertaining.
Ingredients
- 6 boneless, skin-on chicken thighs
- 3 tablespoons olive oil
- 2 tablespoons lemon juice
- 1 tablespoon smoked paprika
- 1 teaspoon onion powder
- Salt and pepper to taste
How to make it
- Clean your grill grates thoroughly and preheat the grill to a medium-high temperature (around 400°F). Lightly oil the grates to prevent sticking.
- In a small bowl, whisk the olive oil, lemon juice, paprika, and onion powder, then brush this mixture over the chicken.
- Place the chicken on the grill skin-side down first. This allows the fat to render and prevents the meat from drying out.
- Grill for 5-7 minutes on the skin side without moving them; this creates those professional-looking char marks and ensures the skin releases naturally from the grate.
- Flip the thighs and grill for another 5-6 minutes on the flesh side. Use a meat thermometer to ensure the thickest part reaches 165°F.
- Move the chicken to a cooler part of the grill (indirect heat) if the outside is browning too fast while the inside is still raw.
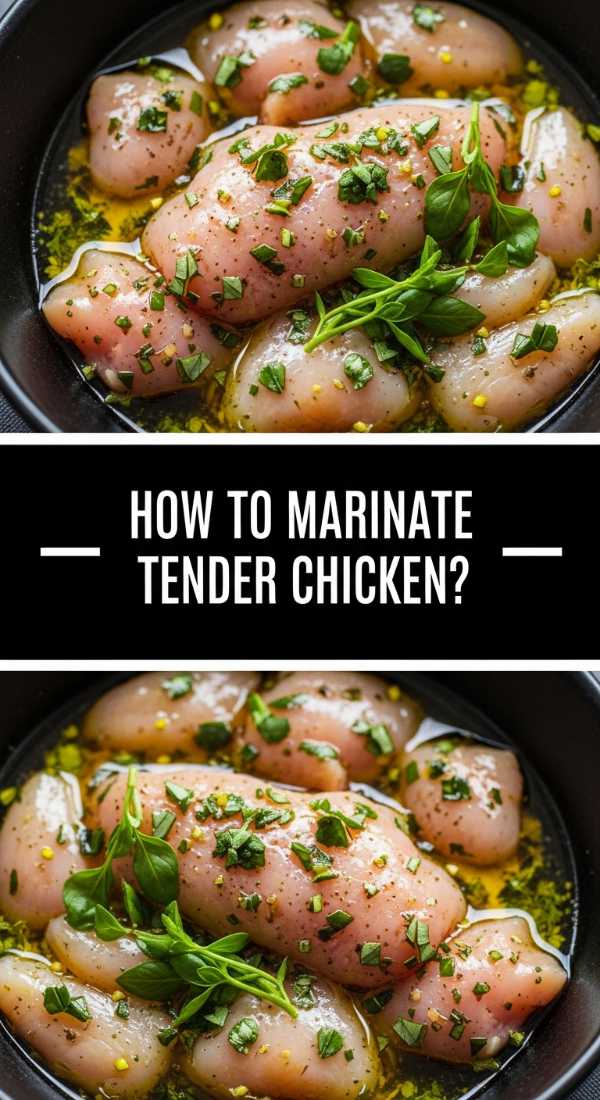
How to marinate tender chicken?
Why we love this
The art of the marinade is all about transformation, using acidity and aromatics to penetrate the meat and create a flavor profile that is vibrant, zesty, and deeply infused. A well-marinated chicken thigh doesn’t just taste like chicken; it tastes like an intentional explosion of herbs and citrus that cleanses the palate while remaining incredibly hearty. It’s the secret weapon for a viral food board because the moisture retained during cooking ensures every slice looks glossy and appetizing for the camera.
Ingredients
- 1.5 lbs chicken thighs
- 1/4 cup extra virgin olive oil
- 1/4 cup balsamic vinegar or soy sauce
- 2 tablespoons honey
- 1 tablespoon Dijon mustard
- 3 cloves minced garlic
- Fresh parsley, chopped
How to make it
- In a large glass bowl or a heavy-duty gallon freezer bag, combine all the liquid ingredients, garlic, and herbs. Whisk until the honey and mustard are fully emulsified into the oil and acid.
- Place the chicken thighs into the container, ensuring every piece is completely coated. Squeeze out as much air as possible if using a bag.
- Refrigerate for at least 30 minutes, but for the best results and deepest flavor penetration, aim for 4 to 6 hours. Do not exceed 24 hours, as the acid can start to break down the proteins too much, resulting in a mushy texture.
- Before cooking, remove the chicken from the fridge for 15 minutes to take the chill off; this ensures more even cooking.
- Discard the excess marinade and cook the chicken using your preferred method (grilling or searing works best for marinated meat).
How to air fry chicken?

Why we love this
The air fryer is the modern kitchen’s best friend for creating that “fried” experience with a fraction of the oil and none of the mess. These thighs come out unbelievably light and airy, with a localized crispness that feels modern and fresh. It’s the perfect solution for a quick weekday food board where you want maximum impact with minimum cleanup, providing a golden, crackling exterior that rivals any traditional deep-fryer while keeping the interior steaming and tender.
Ingredients
- 4 boneless chicken thighs
- 1 tablespoon cornstarch (the secret for extra crunch)
- 1 teaspoon paprika
- 1/2 teaspoon cayenne pepper (optional)
- Spray olive oil
- Salt to taste
How to make it
- Preheat your air fryer to 400°F (200°C) for about 3 minutes. A hot starting environment is key for immediate searing.
- In a small bowl, toss the chicken thighs with the cornstarch, paprika, and spices until they have a very thin, even dusting.
- Place the thighs in the air fryer basket in a single layer. Do not overlap or stack them, as the circulating air needs to touch all surfaces to create the crunch.
- Spray the tops of the chicken lightly with olive oil spray to help the cornstarch hydrate and crisp up.
- Cook for 12 minutes, then flip the thighs and cook for an additional 8-10 minutes.
- Check for a deep golden-orange color and a firm exterior before removing.
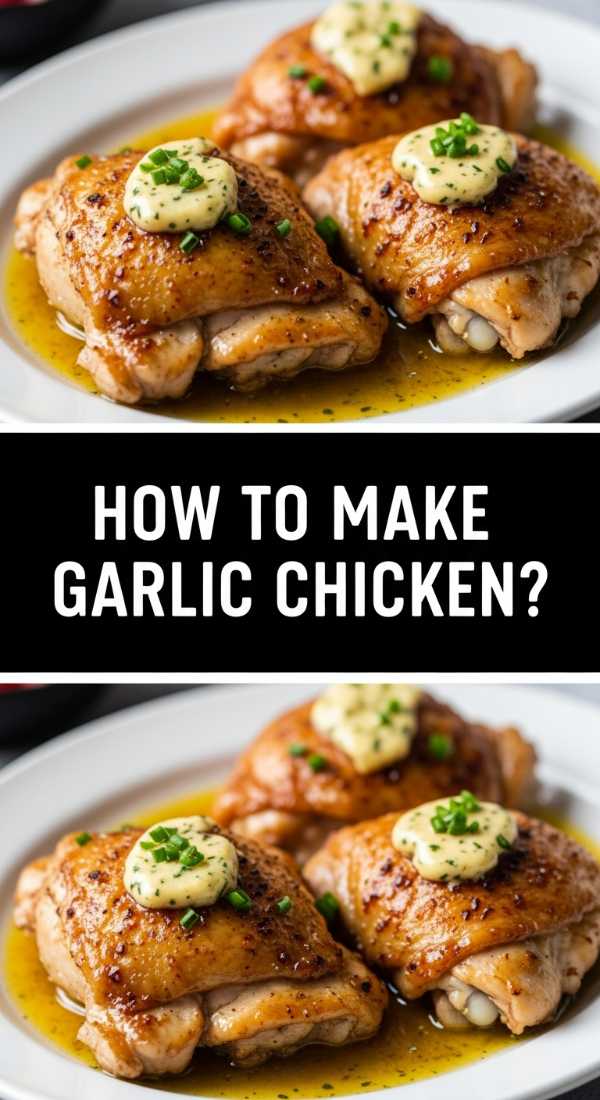
How to make garlic chicken?
Why we love this
Garlic chicken is a sensory journey, filling your kitchen with a buttery, pungent, and sweet aroma that is practically impossible to resist. The garlic mellows as it cooks, losing its sharp bite and transforming into a nutty, caramelized topping that clings to the juicy chicken. This is the dish that people will be talking about long after the board is empty; it’s rustic, bold, and incredibly photogenic when garnished with a sprinkle of bright green herbs.
Ingredients
- 6 chicken thighs
- 6-8 cloves of garlic, thinly sliced
- 4 tablespoons unsalted butter
- 1 tablespoon olive oil
- Fresh parsley and lemon wedges for serving
How to make it
- Season your chicken thighs with salt and pepper. Heat the olive oil in a large skillet over medium heat.
- Place the chicken skin-side down and cook for 8-10 minutes until the skin is crispy and brown. Flip and cook for another 5 minutes.
- Lower the heat to medium-low. This is the most important step; if the heat is too high, the garlic will burn and turn bitter.
- Add the butter to the pan. Once it melts and starts to foam, toss in the sliced garlic.
- Use a spoon to continuously baste the chicken with the garlic butter for about 3-4 minutes. The garlic should turn a light golden blonde.
- Once the chicken reaches 165°F and the garlic is fragrant and soft, remove from heat immediately.
How to roast sheetpan chicken?

Why we love this
Sheetpan roasting is the ultimate hack for an aesthetic food board because it allows you to cook your protein and your vibrant side dishes all at once, creating a cohesive color palette. The chicken juices run off and season the vegetables, creating a unified flavor profile that is earthy and wholesome. It’s a beautiful, messy, “family-style” way of eating that looks stunning on camera and feels incredibly grounding to share with loved ones.
Ingredients
- 4 bone-in chicken thighs
- 1 lb baby potatoes, halved
- 1 bunch of asparagus or broccoli florets
- 3 tablespoons olive oil
- 1 tablespoon dried oregano
- 1 teaspoon lemon zest
How to make it
- Preheat your oven to 400°F (200°C). Large rimmed baking sheets are best for this.
- Toss the potatoes in a bowl with 1 tablespoon of oil and salt, then spread them on the pan first. Roast for 10 minutes alone, as they take longer than the chicken.
- Move the potatoes to the edges and place the chicken thighs in the center of the pan. Drizzle with more oil and season with oregano and lemon zest.
- Roast for another 15 minutes, then add the green vegetables (asparagus or broccoli) to the remaining open spaces on the pan.
- Roast everything together for a final 15-20 minutes. The chicken should be golden and the vegetables should have charred, crispy edges.
- Serve everything directly from the pan or transfer to a wooden board for that viral aesthetic.
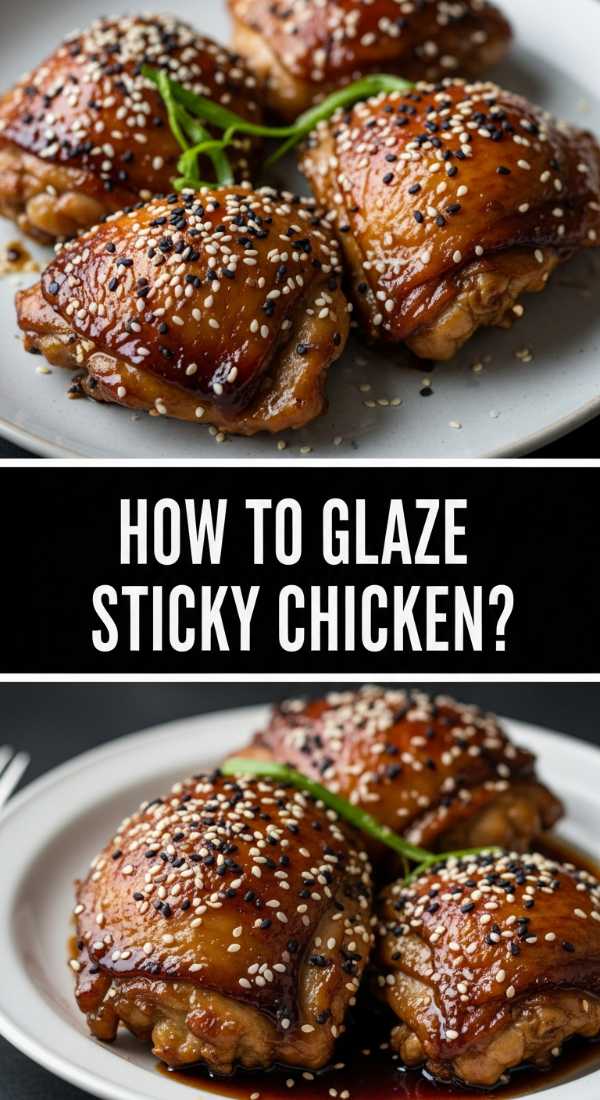
How to glaze sticky chicken?
Why we love this
A sticky glaze turns a standard chicken dish into a finger-licking experience that balances sweet, salty, and umami flavors perfectly. The way the light catches the glossy, lacquered surface of the meat makes it the undisputed king of food photography. As the sugars in the glaze caramelize, they create a tacky, rich coating that feels indulgent and complex, offering a deep mahogany color that pops beautifully against a light-colored serving board.
Ingredients
- 6 boneless chicken thighs
- 1/2 cup honey or brown sugar
- 1/4 cup soy sauce
- 1 tablespoon grated ginger
- 1 tablespoon sriracha or chili paste
- Sesame seeds for garnish
How to make it
- In a small saucepan, combine the honey, soy sauce, ginger, and sriracha. Simmer over low heat for 5-8 minutes until the mixture reduces and thickens into a syrup-like consistency.
- Sear your chicken thighs in a skillet over medium heat until they are 90% cooked through (about 5-6 minutes per side).
- Pour the thickened glaze over the chicken in the skillet.
- Turn the heat up to medium-high and use tongs to flip the chicken constantly for 2-3 minutes. This “lacquering” process ensures the glaze sticks to the meat without burning.
- Watch for the glaze to start bubbling and becoming very dark and sticky. Remove from heat just before it looks like it might smoke.
- Garnish immediately with sesame seeds while the glaze is still tacky.
How to season fresh chicken?
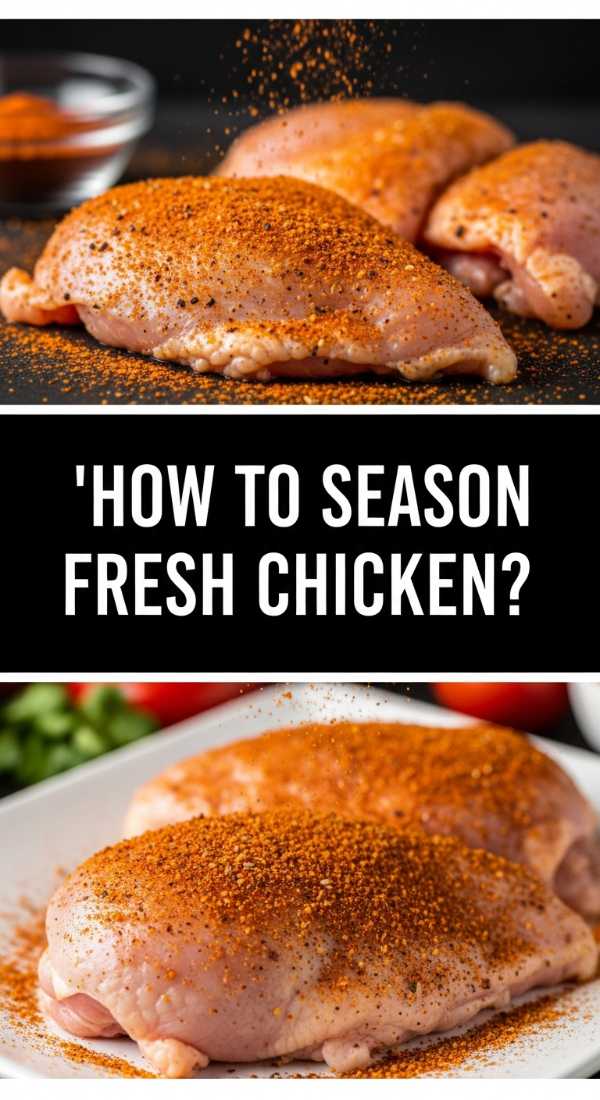
Why we love this
Sometimes, the most viral dishes are the ones that celebrate simplicity and the purity of high-quality ingredients. Proper seasoning is about more than just salt; it’s about layering flavors to enhance the natural richness of the chicken thigh. When you get the seasoning right, the meat doesn’t need heavy sauces to shine. The result is a clean, herbaceous, and perfectly balanced bite that feels light yet satisfying, making it an ideal base for a Mediterranean-inspired food board.
Ingredients
- 4-6 chicken thighs
- 2 teaspoons Maldon sea salt (flaky salt)
- 1 teaspoon cracked black pepper
- 1 tablespoon dried herbs de Provence
- 1/2 teaspoon smoked paprika
- Zest of one lime
How to make it
- Start with chicken that has been sitting at room temperature for 20 minutes; this allows the seasoning to adhere better and the meat to cook more evenly.
- Pat the chicken dry. Sprinkle the flaky salt from about 10 inches above the meat to ensure every crack and crevice is seasoned.
- Combine the pepper, herbs de Provence, and paprika in a small bowl, then press the mixture firmly into the flesh and skin of the chicken. Don’t just sprinkle; press it in.
- Let the seasoned chicken sit for 10 minutes before cooking. This acts as a “dry brine,” drawing moisture out and then reabsorbing the seasoned liquid back into the fibers.
- Just before cooking, finish with a fresh grating of lime zest for a bright, aromatic lift that cuts through the fat.
How to sear golden chicken?

Why we love this
The golden sear is the hallmark of a professional chef, and achieving it at home is incredibly rewarding. It creates a thin, savory crust that seals in all the moisture, resulting in a chicken thigh that is springy and succulent. The visual of a perfectly browned, uniform golden-orange thigh is the centerpiece of any high-end food board, offering a texture that is both firm and tender. It’s the ultimate technique to master for anyone looking to elevate their home cooking to viral status.
Ingredients
- 4 boneless, skinless chicken thighs
- 2 tablespoons high-smoke point oil (like grapeseed or canola)
- 1 tablespoon cold butter
- Salt and pepper
How to make it
- Heat a stainless steel or cast-iron skillet over medium-high heat until it is nearly smoking. You want the pan to be extremely hot before the meat touches it.
- Add the oil and swirl to coat. Season the chicken liberally with salt and pepper right before placing it in the pan.
- Lay the chicken thighs away from you to avoid oil splatters. Once they are in the pan, do not touch them! Moving the meat prevents the Maillard reaction (browning) from occurring.
- Wait 5-6 minutes until the edges of the chicken look cooked and the bottom releases naturally from the pan. If it sticks, it isn’t ready to flip.
- Flip the chicken and add the cold knob of butter to the pan. As it melts, tilt the pan and baste the chicken with the browned butter for the final 3 minutes of cooking.
- Remove the chicken once it hits 165°F and let it rest on a warm plate for 3 minutes.
The Final Touch: Assembling Your Viral Board
Now that you have mastered the art of the chicken thigh, it’s time to bring it all together. To create that viral food board look, start by placing your chicken in the center or in diagonal clusters. Fill the gaps with vibrant, contrasting textures: think pickled red onions, charred lemon halves, sprigs of fresh parsley, and a small bowl of creamy aioli or spicy honey. Remember, the beauty of a simple food board is the abundance. Don’t be afraid to let things overlap and look a little “perfectly messy.” Your guests (and your followers) will absolutely love it!
Frequently Asked Questions
Q: Can I use chicken breasts instead of thighs for these methods?
A: While you can, chicken thighs are much more forgiving. Breasts dry out quickly at high heat, whereas thighs stay juicy due to their higher fat content. If using breasts, reduce cooking times by 20-30%.
Q: How do I know for sure the chicken is cooked without a thermometer?
A: You can pierce the thickest part with a knife; if the juices run clear (not pink), it’s usually done. However, for the best results, a digital meat thermometer is a small investment that makes a huge difference!
Q: Can I prep the chicken ahead of time?
A: Absolutely! Marinating or seasoning your chicken 12-24 hours in advance actually improves the flavor and texture significantly.