

We have all been there: the doorbell rings in fifteen minutes, the house is a whirlwind of half-folded laundry, and you realize you haven’t even thought about the snacks. There is a special kind of magic in hosting, but the stress of a complicated menu can quickly drain the joy out of the evening. That is exactly why I became obsessed with the viral food board trend—it’s about creating a stunning, communal experience that looks like a million bucks but takes surprisingly little effort to pull together.
Today, I am sharing my absolute favorite 5-minute secrets for creating viral food boards that will have your guests reaching for their phones before they even grab a fork. These are the tried-and-true staples that balance comfort and elegance, ensuring you spend more time laughing with your friends and less time trapped in the kitchen. Let’s dive into these effortless showstoppers that prove you don’t need a culinary degree to be the host of the year!
How to make crispy wings?
Why we love this
There is nothing quite like the sound of a perfectly crispy wing shattering between your teeth to signal that the party has officially started. These wings are the ultimate crowd-pleaser, offering a succulent, juicy interior encased in a golden, seasoned skin that glistens under the kitchen lights. The aroma of roasted poultry mingled with a hint of garlic and smoky paprika fills the air, creating an irresistible invitation to the snack board. Whether you prefer them spicy or savory, the textural contrast of the crunch and the tender meat is pure comfort food bliss.
Ingredients
- 2 lbs Chicken wings (split into flats and drums)
- 1 tablespoon Baking powder (aluminum-free)
- 1 teaspoon Kosher salt
- 1/2 teaspoon Black pepper
- 1 teaspoon Garlic powder
- 1/2 teaspoon Smoked paprika
How to make it
- Start by thoroughly patting your wings dry with paper towels; moisture is the enemy of crispiness, so take your time to ensure the skin is completely matte.
- In a large mixing bowl, whisk together the baking powder, salt, pepper, garlic powder, and smoked paprika until the mixture is uniform.
- Toss the dry wings in the spice mixture, ensuring every nook and cranny is lightly coated; the baking powder helps break down the protein in the skin for that signature crunch.
- Arrange the wings on a wire rack set over a baking sheet, which allows hot air to circulate around the entire wing, preventing a soggy bottom.
- Place them in a preheated oven at 425°F (220°C) and bake for 45 to 50 minutes, or until the skin is a deep golden brown and sounds hollow when tapped with a fork.
- Let them rest for 5 minutes after removing from the heat to allow the internal juices to redistribute, ensuring every bite is moist and flavorful.
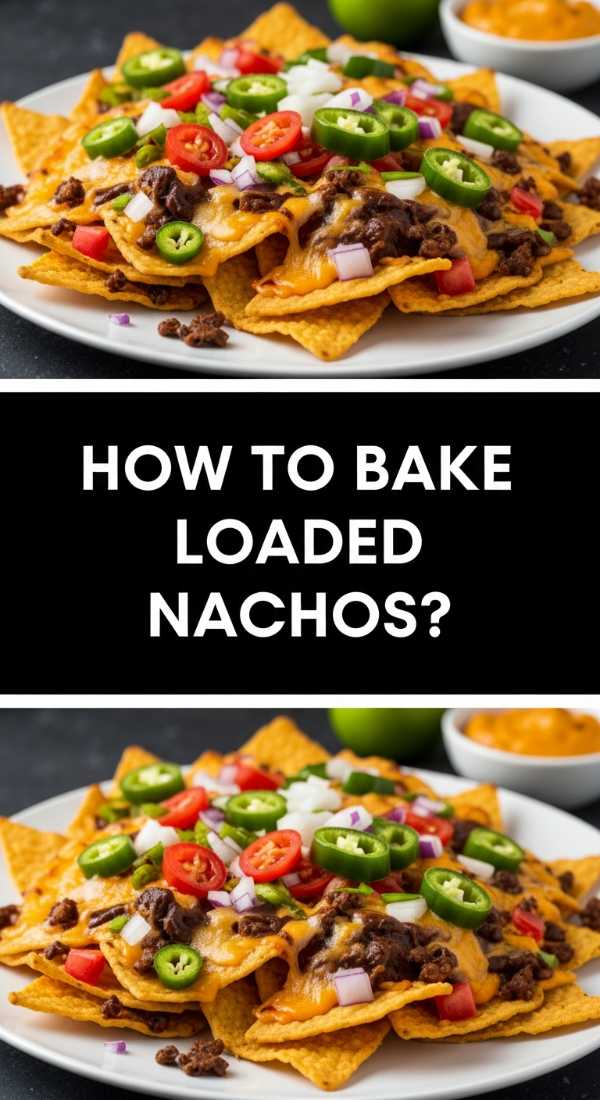
How to bake loaded nachos?

Why we love this
Loaded nachos are the centerpiece of any viral board, a mountain of colors and textures that practically scream celebration. Imagine thick, salty tortilla chips buried under a molten blanket of sharp cheddar and Monterey Jack, topped with the bright pop of fresh jalapeños and the creamy richness of hand-mashed avocado. Every bite offers a different experience—sometimes a spicy kick, sometimes a cool dollop of sour cream—making it a dynamic dish that keeps everyone coming back for more. The way the cheese stretches as you pull a chip from the pile is the kind of food theater that makes memories.
Ingredients
- 1 bag Thick-cut tortilla chips
- 2 cups Shredded sharp cheddar cheese
- 1 cup Shredded Monterey Jack
- 1/2 cup Black beans (rinsed)
- 1/4 cup Sliced jalapeños
- 1/2 cup Diced tomatoes
- 1/4 cup Red onion, finely minced
- Fresh cilantro and sour cream for garnish
How to make it
- Preheat your oven to 400°F (200°C) and line a large sheet pan with parchment paper to prevent sticking and make cleanup a breeze.
- Spread half of the chips in an even layer across the pan, then sprinkle with half of both cheeses and half of the black beans; layering is key to ensuring no chip is left dry.
- Add the remaining chips on top and repeat with the rest of the cheese and beans, creating a sturdy mound of goodness.
- Bake for 8 to 10 minutes, watching closely for the cheese to bubble and just begin to turn golden at the edges; you want a gooey melt, not a hard crust.
- Immediately after removing from the oven, scatter the fresh diced tomatoes, red onion, and jalapeños over the top to maintain their crisp texture against the warm cheese.
- Finish with generous dollops of sour cream and a sprinkle of fresh cilantro before sliding the entire parchment sheet onto your serving board for an impressive presentation.
How to cook mozzarella sticks?
Why we love this
The humble mozzarella stick is a nostalgic masterpiece, offering a gooey, stretchy heart wrapped in a seasoned, herb-flecked crust. When prepared correctly, the cheese should pull apart in long, elastic ribbons that defy gravity, while the exterior provides a satisfying, buttery snap. The scent of Italian herbs and melting dairy is warm and inviting, evoking memories of childhood treats and late-night snacks. They are the perfect finger food—warm, salty, and incredibly satisfying when dipped into a vibrant, tangy marinara sauce.
Ingredients
- 12 Mozzarella cheese sticks (string cheese)
- 1/2 cup All-purpose flour
- 2 Large eggs, beaten
- 1 cup Italian seasoned breadcrumbs
- 1/4 cup Grated Parmesan cheese
- Vegetable oil for frying
How to make it
- Before cooking, freeze your mozzarella sticks for at least 2 hours; this ensures the cheese doesn’t leak out before the crust has finished browning.
- Set up a dredging station: one bowl with flour, one with the beaten eggs, and a third with a mixture of breadcrumbs and Parmesan cheese.
- Coat each frozen cheese stick in flour (shaking off excess), dip thoroughly in the egg wash, and then roll firmly in the breadcrumb mixture until fully sealed.
- For an extra-thick crust, dip the breaded sticks back into the egg and once more into the breadcrumbs, ensuring no cheese is visible.
- Heat about 2 inches of vegetable oil in a heavy skillet to 350°F (175°C); use a thermometer or test with a crumb to ensure it sizzles immediately.
- Fry the sticks in small batches for 1 to 2 minutes, turning once, until they are golden brown and crisp, then drain on a wire rack to keep the bottoms from getting greasy.
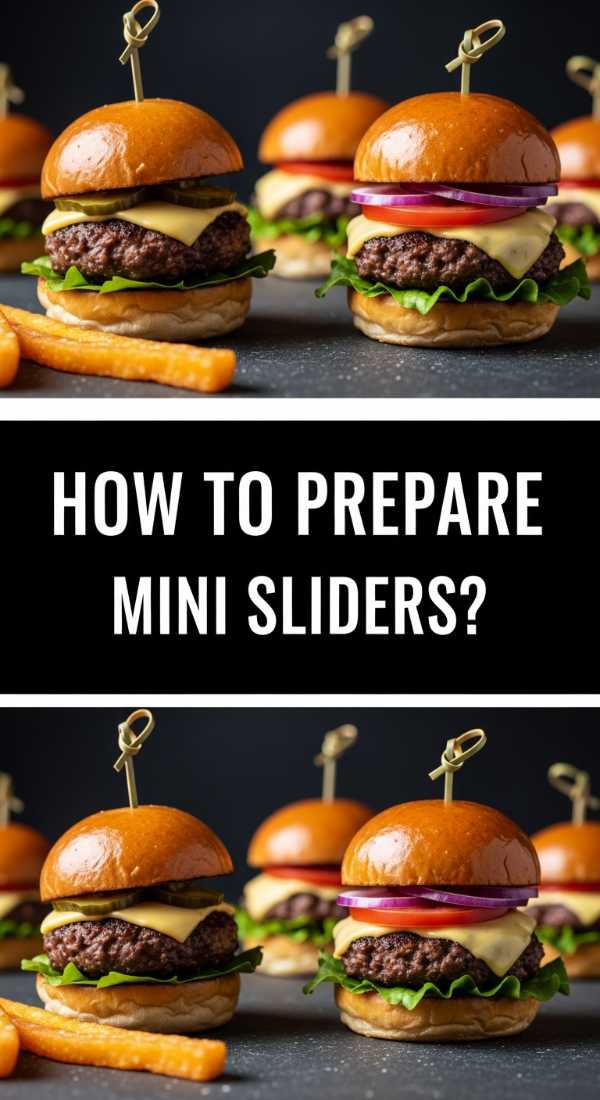
How to prepare mini sliders?
Why we love this
Mini sliders are the quintessential party food, packing all the savory satisfaction of a full-sized burger into a cute, manageable bite. There is something so charming about a row of perfectly glazed buns, topped with a sprinkle of sesame seeds, hiding a layer of seasoned beef and melted cheese. The aroma of toasted brioche and grilled meat is an instant crowd-magnet, and the fluffy texture of the bread against the juicy patty is pure harmony. They add a sophisticated yet approachable touch to any food board, making them a hit for both kids and adults alike.
Ingredients
- 1 pack Sweet Hawaiian rolls (12 count)
- 1 lb Lean ground beef
- 1/2 teaspoon Garlic powder and onion powder
- 6 slices Cheddar cheese
- 2 tablespoons Melted butter
- 1 tablespoon Everything bagel seasoning
- Pickle chips for topping
How to make it
- Do not pull the rolls apart; instead, use a long serrated knife to slice the entire slab of rolls in half horizontally, creating one large top and one large bottom.
- Press the ground beef into a flat rectangle on a parchment-lined baking sheet, seasoning generously with garlic powder, onion powder, salt, and pepper.
- Bake the beef patty at 400°F (200°C) for about 10-12 minutes until cooked through, then drain the excess fat and place the patty onto the bottom half of the rolls.
- Layer the cheese slices over the hot meat so they begin to melt, then place the top half of the rolls back on.
- Brush the tops of the buns with melted butter and sprinkle with everything bagel seasoning for a professional, glossy finish.
- Return the assembled sliders to the oven for 5 minutes to toast the buns and finish melting the cheese, then slice into individual sliders and top each with a pickle chip.
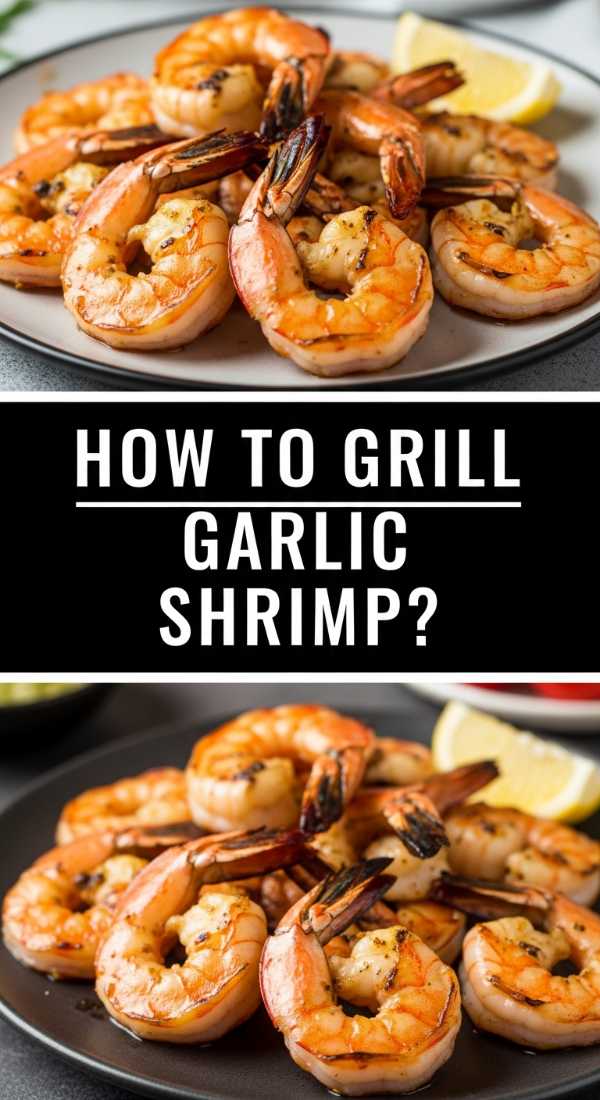
How to grill garlic shrimp?

Why we love this
Garlic shrimp brings an elegant, coastal flair to your board, featuring plump, pink gems that snap with freshness in every bite. The combination of sizzling butter, charred garlic, and a bright squeeze of lemon creates a fragrance that is nothing short of intoxicating. The shrimp absorb the savory fats and the slight smokiness from the heat, resulting in a dish that feels luxurious yet light. They are visually stunning, with their curled shapes and flecks of green parsley, making them a sophisticated addition to any viral spread.
Ingredients
- 1 lb Large shrimp (peeled and deveined, tails on)
- 3 tablespoons Olive oil
- 4 cloves Garlic, minced
- 1 teaspoon Red pepper flakes
- 1 Lemon (half juiced, half sliced)
- 2 tablespoons Fresh parsley, chopped
How to make it
- In a bowl, toss the shrimp with olive oil, minced garlic, red pepper flakes, and a pinch of salt, letting them marinate for 10 minutes to soak up the flavors.
- Preheat your grill pan or outdoor grill to medium-high heat; you want it hot enough to sear the shrimp quickly without overcooking the center.
- Thread the shrimp onto skewers for easy turning, or place them directly onto the grates if they are large enough not to fall through.
- Grill for 2 to 3 minutes per side; watch for the flesh to turn from translucent to an opaque pearly white and for the edges to take on a slight char.
- Remove immediately from the heat to prevent them from becoming rubbery; the residual heat will finish the cooking process.
- Drizzle with fresh lemon juice and scatter the chopped parsley over the top while they are still hot to release the herb’s essential oils.
How to fry potato wedges?

Why we love this
A well-made potato wedge is a study in contrasts: a thick, rustically seasoned skin that crunches under pressure, yielding to a fluffy, cloud-like interior that melts on the tongue. These are far more substantial than standard fries, offering a hearty, earthy flavor that pairs beautifully with any dip on your board. The warm, starchy aroma of frying potatoes is the ultimate siren song for guests. When seasoned with a blend of herbs, they become a savory masterpiece that looks as good as it tastes, adding height and texture to your presentation.
Ingredients
- 3 Large Russet potatoes
- 1/4 cup Vegetable oil
- 1 teaspoon Smoked paprika
- 1 teaspoon Dried oregano
- 1/2 teaspoon Onion powder
- Salt and pepper to taste
How to make it
- Wash the potatoes thoroughly and slice them into even wedges; keeping them uniform ensures they all cook at the same rate.
- Soak the wedges in a bowl of cold water for 30 minutes to remove excess starch; this is the secret step to getting a truly crispy exterior.
- Drain the potatoes and pat them completely dry with a clean kitchen towel; any remaining water will steam the potato instead of frying it.
- Toss the wedges in a mixture of oil, paprika, oregano, onion powder, salt, and pepper until they are darkly coated and fragrant.
- Heat a thin layer of oil in a large heavy skillet over medium-high heat and lay the wedges in a single layer, ensuring they aren’t crowded.
- Fry for about 5-7 minutes per side until the edges are dark golden and the centers are tender when pierced with a knife, then drain on paper towels.
How to assemble party tacos?

Why we love this
Party tacos are the life of the board, offering a vibrant explosion of colors from purple cabbage, green cilantro, and bright red salsa. They are the ultimate interactive food, encouraging guests to customize their bites with various toppings and textures. The smell of toasted corn tortillas and seasoned protein is instantly energizing, promising a meal that is as fresh as it is filling. Each taco is a miniature canvas of flavor, balancing the richness of meat or beans with the acidic bite of lime and the cool crunch of fresh vegetables.
Ingredients
- 12 Small corn or flour tortillas
- 1 lb Seasoned taco meat (beef, chicken, or lentils)
- 1 cup Shredded cabbage or lettuce
- 1/2 cup Pico de gallo
- 1/4 cup Crumbled cotija cheese
- 2 Limes, cut into wedges
How to make it
- Warm each tortilla directly over a low gas flame for 10 seconds per side using tongs; this gives them a slight char and makes them pliable and fragrant.
- Keep the tortillas warm by stacking them inside a clean kitchen towel while you prepare the remaining components.
- Place a generous spoonful of your chosen protein in the center of each tortilla, keeping the filling narrow to allow for easy folding.
- Top with a pinch of shredded cabbage for crunch, a spoonful of pico de gallo for brightness, and a dusting of cotija cheese for a salty finish.
- Arrange the tacos in a tight row on your board using taco holders or by leaning them against one another to maintain their shape.
- Serve with lime wedges scattered around the tacos, instructing guests to squeeze the juice over the top right before eating for maximum flavor impact.
How to glaze chicken bites?
Why we love this
Glazed chicken bites are the “candy” of the food board—sticky, sweet, and intensely savory jewels that are impossible to eat just one of. The glaze should be thick and glossy, coating each piece of tender chicken in a shimmering layer of flavor that caramelizes slightly under the heat. As you bite through the sticky exterior, you’re met with juicy, seasoned meat that provides a satisfying chew. The aroma of honey, soy, and ginger wafting from these bites is enough to make anyone’s mouth water, adding a beautiful, dark mahogany hue to your board’s color palette.
Ingredients
- 1 lb Chicken breast, cut into 1-inch cubes
- 1/2 cup Honey
- 1/4 cup Soy sauce
- 1 tablespoon Sriracha (optional)
- 1 tablespoon Fresh ginger, grated
- 2 tablespoons Sesame seeds and sliced scallions for garnish
How to make it
- Season the chicken cubes with salt and pepper, then sauté them in a hot skillet with a splash of oil until they are golden brown on all sides and cooked through.
- While the chicken is cooking, whisk together the honey, soy sauce, Sriracha, and ginger in a small bowl to create the glaze.
- Once the chicken is done, pour the sauce into the skillet over medium-high heat; the sauce should begin to bubble and foam almost immediately.
- Toss the chicken continuously as the sauce reduces; you are looking for it to thicken into a syrupy consistency that clings to the meat rather than pooling in the pan.
- As soon as the sauce looks shiny and the chicken is fully coated, remove from the heat to prevent the sugars in the honey from burning.
- Transfer to your board and immediately sprinkle with sesame seeds and scallions while the glaze is still tacky so the garnishes stick perfectly.
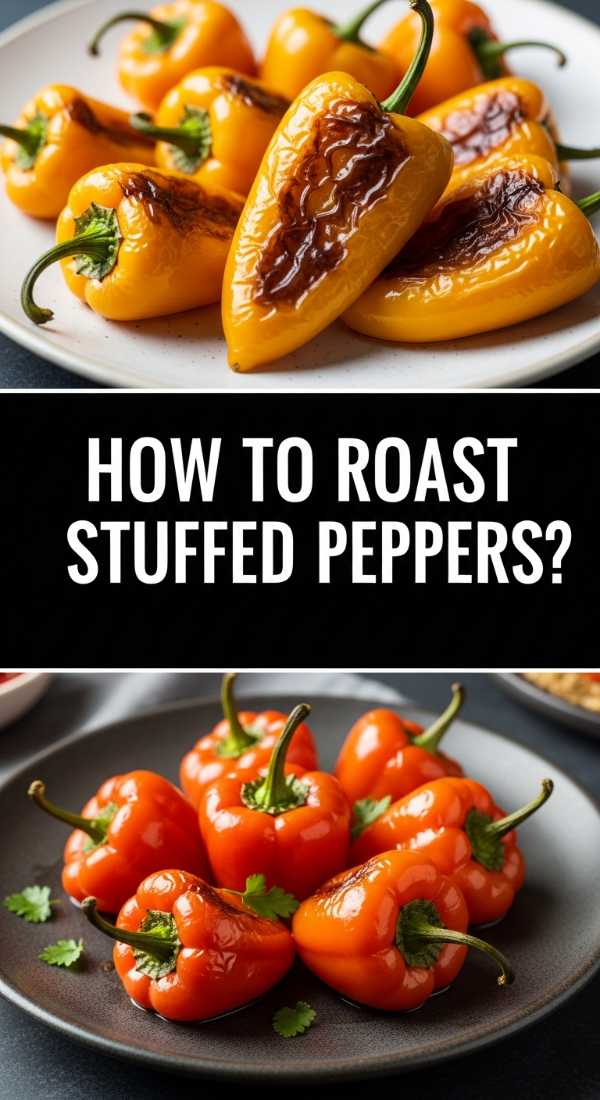
How to roast stuffed peppers?

Why we love this
Stuffed peppers are like little edible bowls of joy, offering a sophisticated and hearty addition to your viral board. These mini bell peppers come in a rainbow of oranges, yellows, and reds, which soften and sweeten as they roast, creating a tender vessel for savory fillings. The aroma of melting cheese and roasted vegetables is earthy and comforting. When you bite into one, you get the snap of the pepper skin followed by the rich, warm center, making them a fantastic vegetarian-friendly option that doesn’t compromise on flavor or presentation.
Ingredients
- 10-12 Mini sweet peppers
- 1/2 cup Cream cheese, softened
- 1/4 cup Shredded parmesan
- 1/4 cup Bacon bits or sun-dried tomatoes
- 1 tablespoon Fresh chives, minced
How to make it
- Slice the mini peppers in half lengthwise and carefully remove the seeds and ribs, leaving the stems intact for a beautiful rustic look and easy grabbing.
- In a small bowl, combine the cream cheese, parmesan, chives, and your choice of bacon or sun-dried tomatoes until the mixture is smooth and well-incorporated.
- Using a small spoon or a piping bag, fill each pepper cavity with the cheese mixture, smoothing the top so it is flush with the edges of the pepper.
- Place the stuffed peppers on a baking sheet lined with parchment paper and roast at 400°F (200°C) for 10 to 12 minutes.
- Look for the peppers to become slightly blistered and the cheese filling to puff up and turn golden brown on top.
- Allow them to cool for 3-5 minutes before placing them on the board; this sets the cheese so it doesn’t run when guests pick them up.
How to make spring rolls?
[IMAGE_10]
Why we love this
Spring rolls add a wonderful lightness and a satisfying, shatteringly crisp texture to your spread. These delicate golden cylinders are filled with a medley of fresh, thinly sliced vegetables that maintain a hint of bite even after frying. The scent of toasted sesame and light oil is clean and appetizing. They provide a beautiful geometric element to the board, and when paired with a bright sweet chili dipping sauce, they offer a perfect balance of heat, sweet, and crunch that cleanses the palate between heavier bites.
Ingredients
- 10 Spring roll wrappers
- 1 cup Shredded cabbage and carrot mix
- 1/2 cup Bean sprouts
- 1 tablespoon Soy sauce
- 1 teaspoon Sesame oil
- Oil for shallow frying
How to make it
- Sauté the vegetable mix with soy sauce and sesame oil for just 2 minutes until slightly wilted, then let the mixture cool completely; a hot filling will tear the delicate wrappers.
- Lay a spring roll wrapper in a diamond shape and place two tablespoons of filling in the lower third, being careful not to overfill.
- Fold the bottom corner over the filling, tuck in the sides tightly, and roll upward, sealing the final edge with a dab of water or cornstarch slurry.
- Heat 1 inch of oil in a skillet to 365°F (185°C); the oil must be hot so the wrappers crisp instantly rather than absorbing grease.
- Fry the rolls in batches for 2 to 3 minutes, turning them frequently to ensure an even, pale golden color all the way around.
- Drain the rolls vertically on a wire rack or paper towels to ensure any excess oil drips away, keeping the pastry exceptionally crisp for the board.
Conclusion
Creating a viral food board isn’t about spending hours in the kitchen; it’s about choosing high-impact, delicious staples and presenting them with love. Whether you’re piling up crispy wings or neatly lining up mini sliders, the goal is to create a space where everyone feels welcome to dig in. I hope these recipes inspire you to host your next get-together with confidence and a little bit of flair. Remember, the best ingredient in any dish is the laughter shared around the table!