
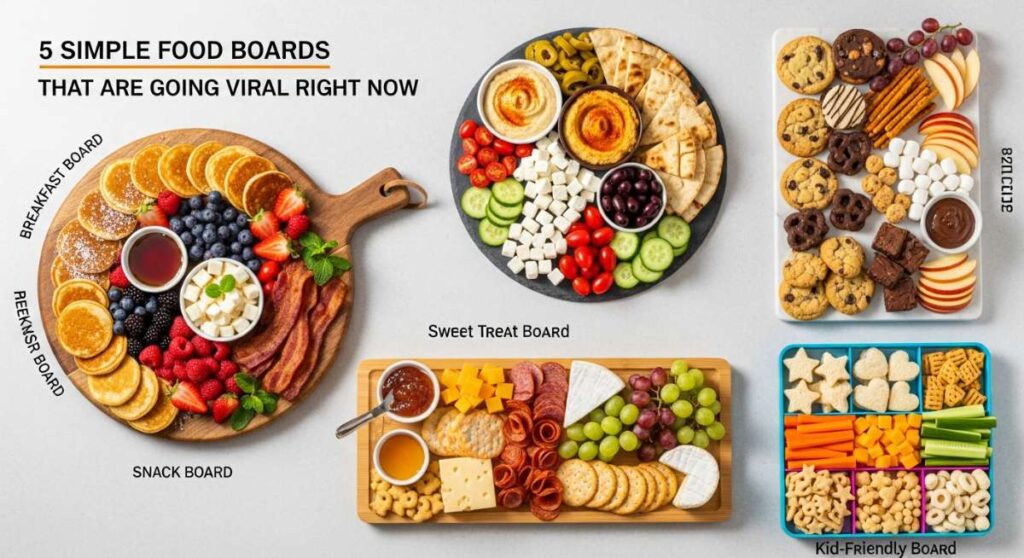
5 Simple Food Boards That Are Going Viral Right Now
There is something so incredibly magical about the way food brings us together, isn’t there? Lately, my social media feed has been exploding with these ‘board’ trends, and honestly, I am here for it. It’s not just about the cheese and crackers anymore; it’s about creating an experience that feels like a big, warm hug on a platter. Whether you are hosting a cozy Sunday lunch or just want to treat your family to something special, these viral simple food board ideas are the perfect way to elevate everyday comfort food into a visual masterpiece.
I’ve spent the last few weeks testing these recipes to make sure they are not only beautiful to look at but also absolutely delicious. From savory stews to sweet treats, turning these classics into a board-style presentation makes them feel modern, approachable, and so shareable. I hope these inspire you to get into the kitchen and create something that smells as good as it looks!
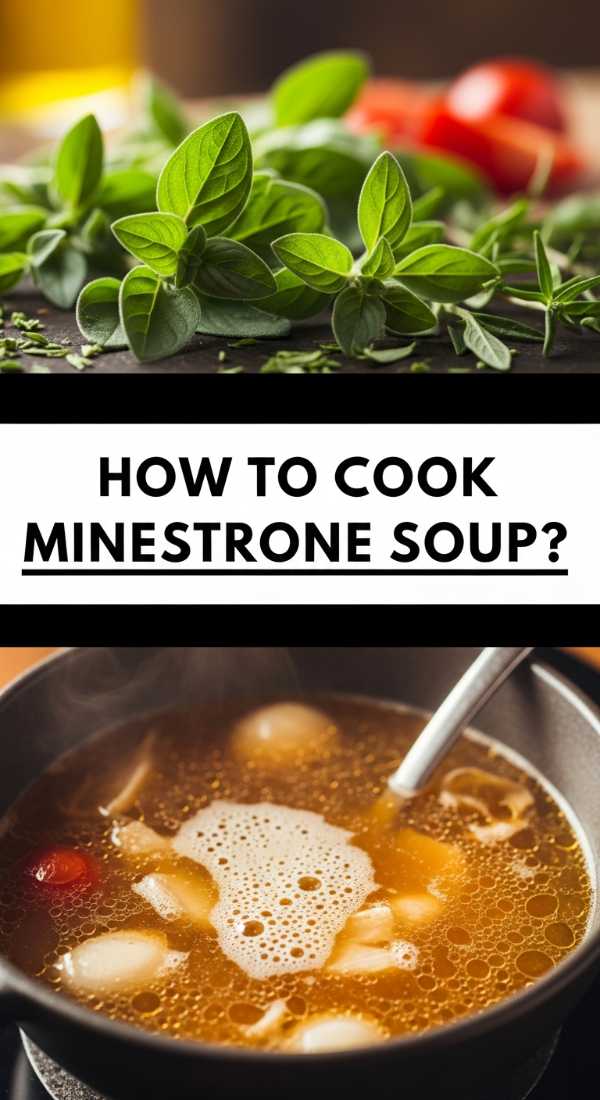
How to cook minestrone soup?
Why we love this
Minestrone is the ultimate rustic comfort in a bowl, offering a tapestry of colors and textures that make any dinner table feel like a farmhouse in Tuscany. We love it for its heartiness—every spoonful is a discovery of tender beans, earthy greens, and perfectly al dente pasta floating in a rich, herb-infused tomato broth. The aroma of sautéed garlic and oregano filling the kitchen is enough to soothe any soul after a long day, making it a viral favorite for cozy nights.
Ingredients
- 2 tbsp olive oil
- 1 large onion, diced
- 2 carrots, sliced
- 2 celery stalks, chopped
- 1 zucchini, diced
- 3 cloves garlic, minced
- 1 can diced tomatoes
- 1 can cannellini beans, drained
- 4 cups vegetable broth
- 1 cup small pasta (ditalini or shells)
- 1 tsp dried oregano
- Fresh basil and parmesan for serving
How to make it
- Set a large heavy-bottomed pot over medium heat and add the olive oil. Once shimmering, add the onion, carrots, and celery. Sauté for about 8-10 minutes until the vegetables soften and the onions become translucent and slightly sweet.
- Add the minced garlic and zucchini, stirring constantly for 1 minute to release the garlic’s fragrance without burning it.
- Pour in the diced tomatoes and vegetable broth, then stir in the dried oregano. Increase the heat to medium-high until the liquid reaches a gentle boil.
- Reduce the heat to low and let it simmer for 20 minutes, allowing the flavors to meld.
- Add the pasta and the drained beans. Cook for an additional 10 minutes or until the pasta is al dente (tender with a slight bite).
- Ladle into bowls and garnish with freshly torn basil and a generous dusting of parmesan cheese for that viral-worthy finish.
How to make chicken curry?

Why we love this
This chicken curry is a sensory explosion, balancing the creamy sweetness of coconut milk with the vibrant, warming heat of toasted spices. The texture of the chicken is buttery and tender, having been simmered slowly until it practically melts in your mouth. It’s the kind of dish that fills your home with a golden, aromatic steam that promises a meal that is both deeply satisfying and incredibly complex in flavor.
Ingredients
- 500g chicken thighs, bite-sized pieces
- 2 tbsp vegetable oil
- 1 large onion, finely chopped
- 3 tbsp curry paste (mild or spicy)
- 1 can (400ml) coconut milk
- 1 tbsp ginger-garlic paste
- 1 red bell pepper, sliced
- Fresh cilantro for garnish
How to make it
- Heat the vegetable oil in a wide skillet or wok over high heat. Sear the chicken pieces in batches until they are golden brown on all sides; this should take about 5-6 minutes. Remove the chicken and set aside.
- Lower the heat to medium and add the onions to the same pan. Sauté for 5 minutes until soft and golden, scraping up any browned bits from the chicken.
- Stir in the ginger-garlic paste and the curry paste. Cook for 2 minutes, stirring frequently, to ‘bloom’ the spices and release their essential oils.
- Pour in the coconut milk and stir until the paste is fully incorporated. Add the seared chicken and the sliced bell peppers back into the pan.
- Simmer gently on low-medium heat for 15-20 minutes. You’ll know it’s ready when the sauce has thickened slightly and the chicken is fully cooked through.
- Serve on a board with fluffy rice and warm naan bread, garnished with fresh cilantro.
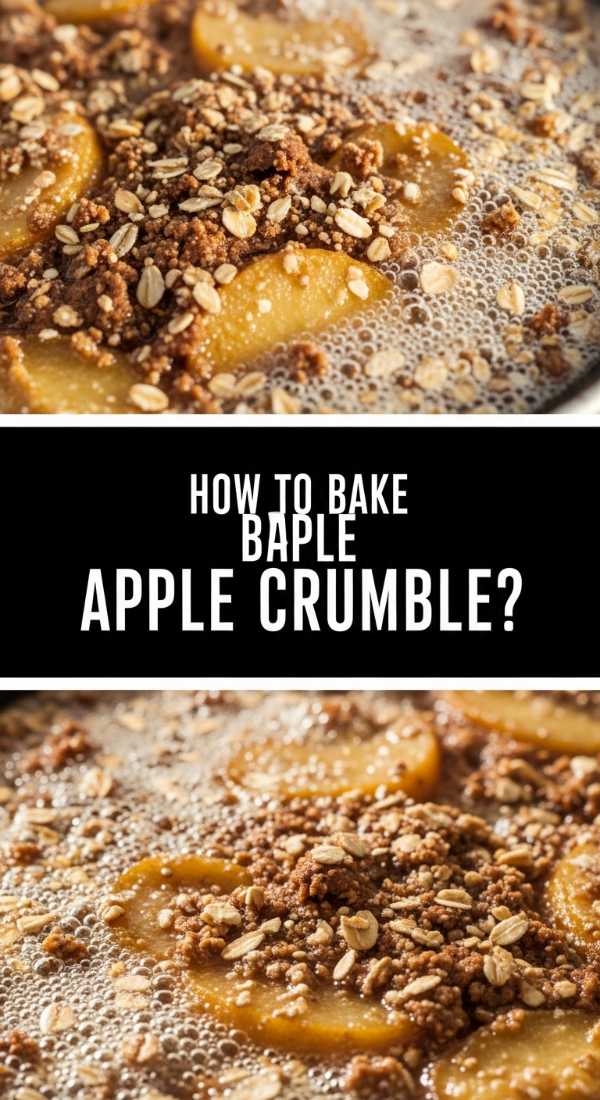
How to bake apple crumble?
Why we love this
There is nothing quite like the contrast of a viral apple crumble: the hot, bubbling tartness of stewed apples tucked beneath a golden, buttery, and incredibly crunchy oat topping. The scent of cinnamon and nutmeg wafting from the oven creates an instant atmosphere of warmth and nostalgia. It’s a dessert that feels humble yet sophisticated, especially when served family-style on a large board with a side of cold vanilla bean ice cream.
Ingredients
- 6 large Granny Smith apples, peeled and sliced
- 1/2 cup granulated sugar
- 1 tsp ground cinnamon
- 1 cup all-purpose flour
- 1/2 cup rolled oats
- 1/2 cup brown sugar
- 100g cold unsalted butter, cubed
How to make it
- Preheat your oven to 180°C (350°F). In a large bowl, toss the sliced apples with the granulated sugar and cinnamon until every slice is evenly coated.
- Transfer the apple mixture into a baking dish, pressing them down slightly to ensure an even layer.
- In a separate bowl, combine the flour, rolled oats, and brown sugar. Add the cold, cubed butter.
- Using your fingertips, rub the butter into the flour mixture. Work quickly so the butter doesn’t melt; you want a texture that resembles coarse breadcrumbs with some pea-sized lumps of butter remaining for extra crunch.
- Sprinkle the crumble mixture evenly over the apples, making sure not to pack it down too tightly.
- Bake for 40-45 minutes. The topping should be a deep golden brown, and you should see the apple juices bubbling up around the edges.
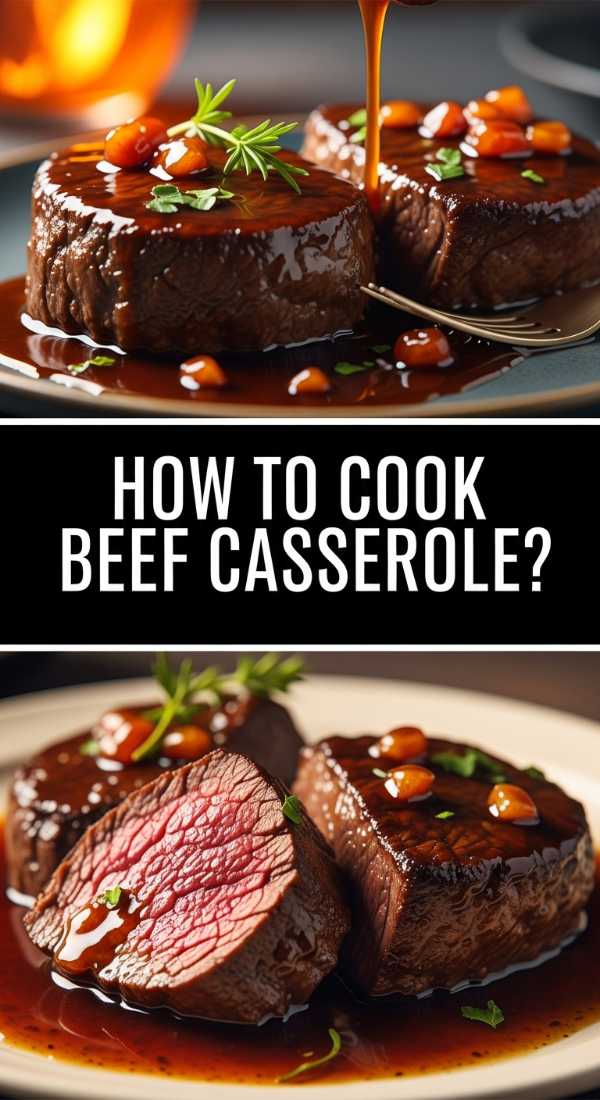
How to cook beef casserole?
Why we love this
This beef casserole is the definition of ‘slow and low’ perfection, resulting in chunks of beef so tender they fall apart at the mere suggestion of a fork. The rich, velvety gravy is packed with deep umami flavors from red wine and fresh herbs, coating every vegetable in a savory glaze. It’s a rustic, farmhouse-style dish that feels substantial and grounding, making it the perfect centerpiece for a winter-themed food board.
Ingredients
- 800g beef chuck steak, cut into large cubes
- 2 tbsp flour (for dusting)
- 2 tbsp olive oil
- 2 onions, quartered
- 3 carrots, cut into thick chunks
- 2 cups beef stock
- 1 cup red wine (optional)
- 2 sprigs fresh rosemary
- 2 cloves garlic, crushed
How to make it
- Preheat your oven to 160°C (320°F). Toss the beef cubes in flour until lightly coated, shaking off any excess.
- Heat olive oil in a heavy, oven-proof Dutch oven over high heat. Sear the beef in batches until a dark, caramelized crust forms on all sides. This ‘Maillard reaction’ is crucial for a deep flavor.
- Remove the beef and add onions, carrots, and garlic to the pot. Sauté for 3-4 minutes until the onions start to brown.
- Deglaze the pot by pouring in the red wine (or a splash of stock), scraping the bottom with a wooden spoon to release all the flavor-packed brown bits.
- Add the beef back in, along with the beef stock and rosemary sprigs. Ensure the meat is mostly submerged.
- Cover with a tight lid and transfer to the oven. Cook for 2.5 to 3 hours. Check at the 2-hour mark; the beef should be exceptionally tender when pressed with a spoon.
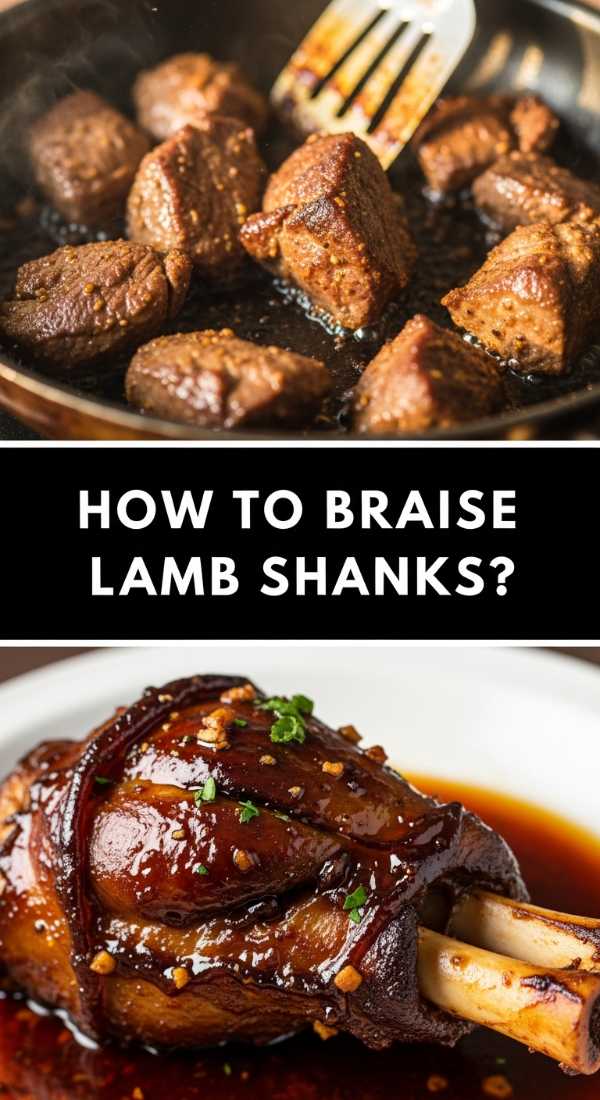
How to braise lamb shanks?
Why we love this
Braised lamb shanks are the pinnacle of elegant comfort food, offering a theatrical presentation where the meat literally pulls away from the bone with zero effort. The long cooking process transforms the tough connective tissues into a luscious, silky sauce that is incredibly rich and savory. We love the way the rosemary and garlic infuse the meat, creating a sophisticated flavor profile that feels like a high-end restaurant meal served in the comfort of your home.
Ingredients
- 4 lamb shanks
- 2 tbsp olive oil
- 1 large onion, diced
- 2 carrots, diced
- 3 cloves garlic, smashed
- 2 cups red wine (Cabernet or Merlot)
- 2 cups beef or lamb stock
- 3 sprigs fresh rosemary
- 1 tbsp tomato paste
How to make it
- Season the lamb shanks generously with salt and pepper. Heat olive oil in a large heavy pot over medium-high heat and sear the shanks until browned deeply on all sides (about 10 minutes). Remove and set aside.
- In the same pot, reduce heat to medium and sauté the onions and carrots for 5 minutes. Stir in the tomato paste and garlic, cooking for another 2 minutes until the paste darkens.
- Pour in the red wine and bring to a simmer for 3 minutes to allow the alcohol to cook off.
- Return the shanks to the pot and pour in the stock until the shanks are halfway submerged. Add the rosemary sprigs.
- Cover tightly and cook in a 150°C (300°F) oven for 3.5 to 4 hours.
- The shanks are done when the meat has retracted significantly from the bone and is ‘fork-tender.’ Serve on a board over a bed of creamy mashed potatoes.
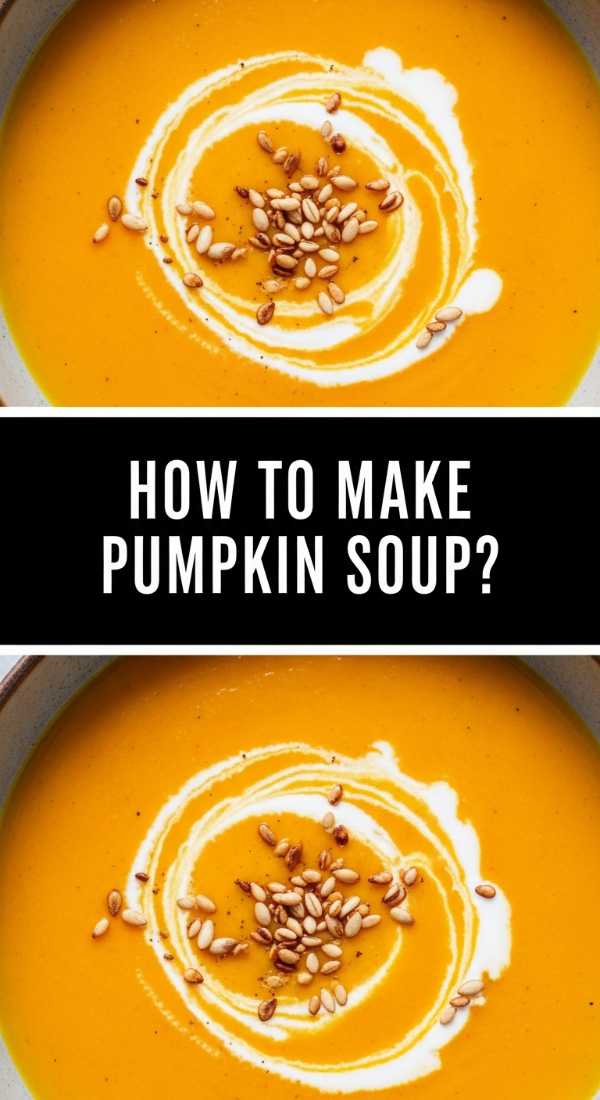
How to make pumpkin soup?
Why we love this
There is a velvety, almost ethereal quality to a perfectly made pumpkin soup that makes it a perennial viral hit. The natural sweetness of the roasted pumpkin is balanced by the sharp warmth of ginger and the creamy finish of a swirl of coconut or heavy cream. It’s a vibrant, glowing orange dish that looks stunning on a board surrounded by toasted sourdough soldiers and crunchy roasted pepitas.
Ingredients
- 1kg pumpkin (Peeled and cubed)
- 1 large onion, chopped
- 2 cloves garlic
- 1 tsp grated fresh ginger
- 4 cups vegetable stock
- 1/2 cup heavy cream or coconut milk
- Salt and pepper to taste
- Roasted pumpkin seeds for topping
How to make it
- For the best flavor, toss the pumpkin cubes in a little oil and roast at 200°C (400°F) for 25 minutes until caramelized and soft.
- In a large pot, sauté the onion and ginger in a teaspoon of oil over medium heat until soft and fragrant (about 5 minutes). Add the garlic and cook for another minute.
- Add the roasted pumpkin and vegetable stock to the pot. Bring to a boil, then reduce heat and simmer for 10 minutes.
- Use an immersion blender to puree the soup until it is completely smooth and silky. If it’s too thick, add a little more stock.
- Stir in the cream or coconut milk and season generously with salt and pepper.
- Ladle into small bowls and place them on a large wooden board, garnishing with pumpkin seeds and a drizzle of cream for that perfect aesthetic touch.
How to make caramel slice?

Why we love this
The caramel slice is the ultimate ‘triple threat’ dessert: a buttery shortbread base, a thick, gooey center of golden caramel, and a crisp layer of dark chocolate on top. We love the satisfying ‘snap’ of the chocolate followed by the chewiness of the caramel. It’s an indulgent treat that looks incredibly professional when sliced into clean, sharp rectangles and arranged on a dessert board with fresh berries.
Ingredients
- Base: 1 cup flour, 1/2 cup brown sugar, 1/2 cup desiccated coconut, 125g melted butter
- Caramel: 1 can sweetened condensed milk, 2 tbsp golden syrup, 60g butter
- Topping: 200g dark chocolate, 1 tbsp vegetable oil
How to make it
- Preheat oven to 180°C (350°F) and line a square tin. Mix the base ingredients until combined, press firmly into the tin, and bake for 15 minutes until light golden. Let it cool.
- For the caramel, combine the condensed milk, golden syrup, and butter in a small saucepan over medium-low heat.
- Whisk constantly for about 5-8 minutes. You must keep it moving so it doesn’t burn. The caramel is ready when it has thickened and turned a light fudge color.
- Pour the caramel over the baked base and return to the oven for 10 minutes to set. Let it cool completely in the fridge.
- Melt the chocolate and oil together (microwave in 30-second bursts). Pour over the cold caramel and smooth with a spatula.
- Refrigerate until the chocolate is firm. Use a hot knife to cut into squares for perfect, clean edges.
How to roast chicken drumsticks?

Why we love this
Chicken drumsticks are the unsung heroes of the roast world, offering juicy, flavorful dark meat wrapped in a skin that becomes impossibly crispy and salty when roasted correctly. We love the ease of these—they are the perfect finger food for a board, especially when glazed with honey or herbs. The sight of a pile of glistening, golden-brown drumsticks is enough to make anyone’s mouth water instantly.
Ingredients
- 8-10 chicken drumsticks
- 2 tbsp olive oil
- 1 tbsp smoked paprika
- 1 tsp garlic powder
- 1 tsp dried thyme
- Salt and cracked black pepper
How to make it
- Preheat your oven to 200°C (400°F). It’s important to have a hot oven to ensure the skin gets crispy.
- Pat the drumsticks dry with paper towels. Removing moisture from the skin is the secret to maximum crunch.
- In a large bowl, whisk together the olive oil, paprika, garlic powder, thyme, salt, and pepper. Add the chicken and toss until every inch is coated.
- Arrange the drumsticks on a wire rack set over a baking tray. This allows hot air to circulate under the chicken, crisping it all the way around.
- Roast for 35-40 minutes. Use a meat thermometer to check the internal temperature; it should reach 75°C (165°F).
- For an extra viral glow, turn the broiler on for the last 2 minutes to really bubble that skin, then serve on a board with your favorite dipping sauces.
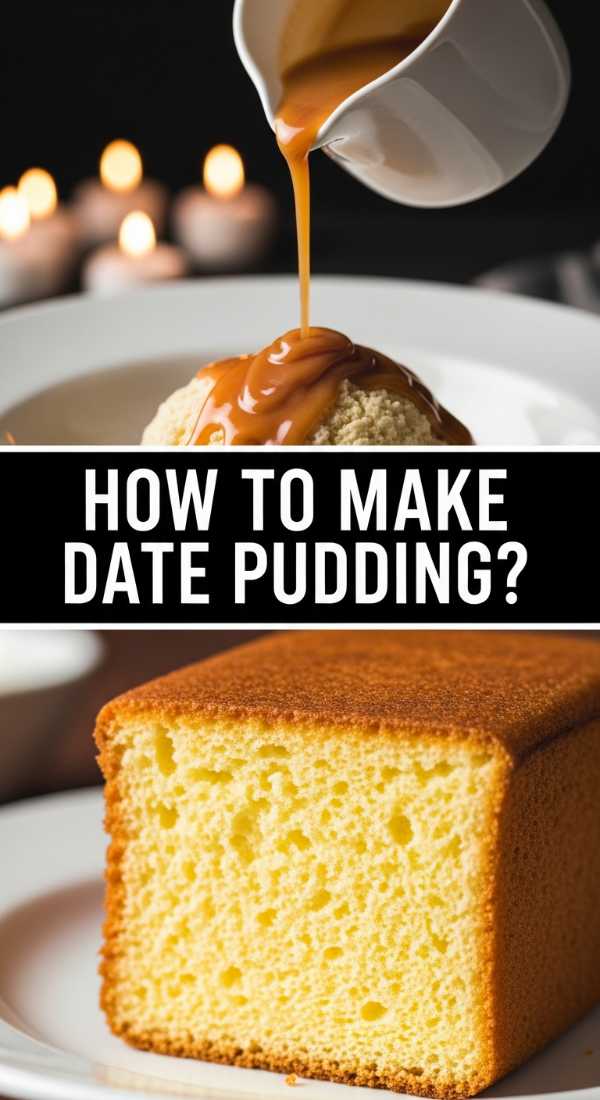
How to make date pudding?
Why we love this
Date pudding, or sticky toffee pudding, is a warm, spongey delight that feels like a hug for your tastebuds. The dates dissolve into the batter, creating a naturally sweet, moist crumb that pairs perfectly with a decadent, buttery toffee sauce. It’s the ultimate winter dessert, especially when served warm so the sauce soaks deep into the pudding, making every bite a rich, gooey experience.
Ingredients
- 200g dried dates, chopped
- 1 tsp baking soda
- 1 cup boiling water
- 50g butter, softened
- 3/4 cup brown sugar
- 2 eggs
- 1.5 cups self-raising flour
- Sauce: 1 cup brown sugar, 150g butter, 1 cup heavy cream
How to make it
- Place the chopped dates and baking soda in a bowl. Pour over the boiling water and let stand for 10 minutes until the dates are soft.
- Preheat oven to 180°C (350°F). Cream the butter and brown sugar together in a large bowl until light and fluffy.
- Add the eggs one at a time, beating well after each addition. Gently fold in the flour and the date mixture (including the liquid).
- Pour the batter into a greased baking dish and bake for 30-35 minutes until a skewer comes out clean.
- While baking, make the sauce: combine sugar, butter, and cream in a saucepan. Bring to a simmer over medium heat for 5 minutes until thickened.
- Pour half the hot sauce over the pudding as soon as it comes out of the oven. Serve the rest on the side on your dessert board.
How to bake fluffy scones?

Why we love this
There is a classic, timeless joy in a fresh, fluffy scone that has just been pulled from the oven. The texture should be light and airy, almost cloud-like, with a slightly crusty exterior that gives way to a soft, steaming center. Arranged on a board with thick clotted cream and vibrant strawberry jam, they are the centerpiece of any viral brunch or afternoon tea spread.
Ingredients
- 3 cups self-raising flour
- 80g cold unsalted butter, cubed
- 1 cup milk (plus extra for brushing)
- 1 tbsp sugar
- A pinch of salt
How to make it
- Preheat your oven to 220°C (425°F). High heat is essential for the scones to rise quickly and stay fluffy.
- Sift the flour into a large bowl. Add the cold butter cubes. Using your fingertips, rub the butter into the flour until it resembles fine breadcrumbs.
- Stir in the sugar and salt. Make a well in the center and pour in the milk.
- Use a flat-bladed knife to mix the dough using a cutting motion. Stop as soon as the dough comes together—overworking it will make the scones tough.
- Turn onto a lightly floured surface and gently pat the dough down to a 2cm thickness. Use a round cutter to press out shapes (don’t twist the cutter, just press straight down!).
- Place the scones close together on a baking tray so they help each other rise. Brush the tops with milk and bake for 12-15 minutes until golden brown and hollow-sounding when tapped.
Wrapping Up Your Food Board Adventure
Creating these boards is all about embracing the beauty of shared meals. Whether you’re dipping a fluffy scone into cream or ladling a rich beef casserole onto a platter, the goal is to make food that feels personal and generous. I hope these viral ideas find a place at your table soon!