
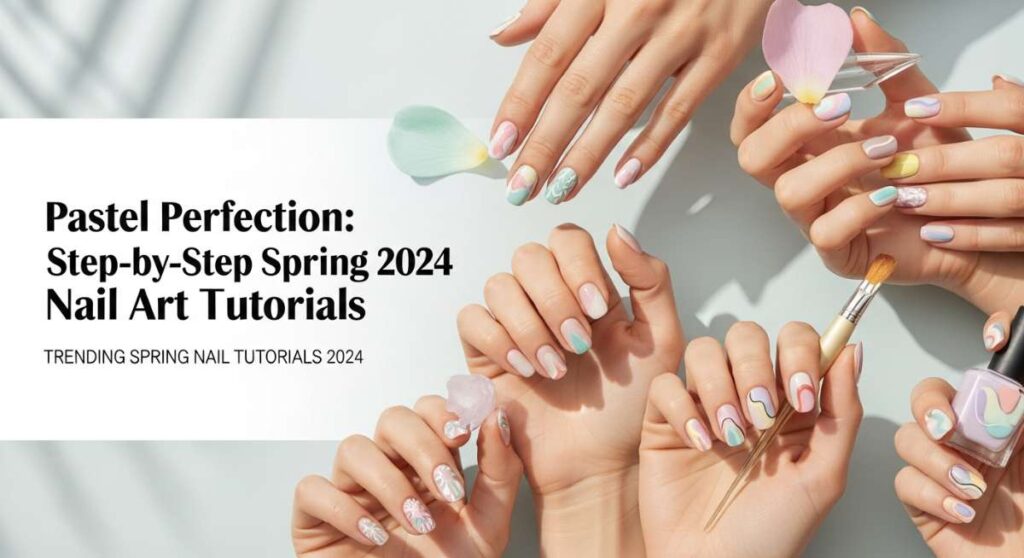
Pastel Perfection: Step-by-Step Spring 2024 Nail Art Tutorials
Hello, my loves! Can you feel it? That soft, honeyed sunlight finally filtering through the window and the first whispers of cherry blossoms dancing on the breeze. There is something so restorative about this time of year—it’s like the world is finally taking a deep, floral-scented breath. For me, spring isn’t just a season; it’s a mood, a gentle shift into lightness that starts right at our fingertips.
I’ve spent the last few mornings tucked away in my sun-drenched corner, surrounded by bottles of polish that look like a handful of crushed candy. I wanted to create something special for you—a guide to help you bring that ‘cloud-soft’ embrace into your own self-care routine. These designs aren’t just about looking pretty; they’re about that quiet moment of joy you feel every time you look down at your hands while sipping a lavender latte.
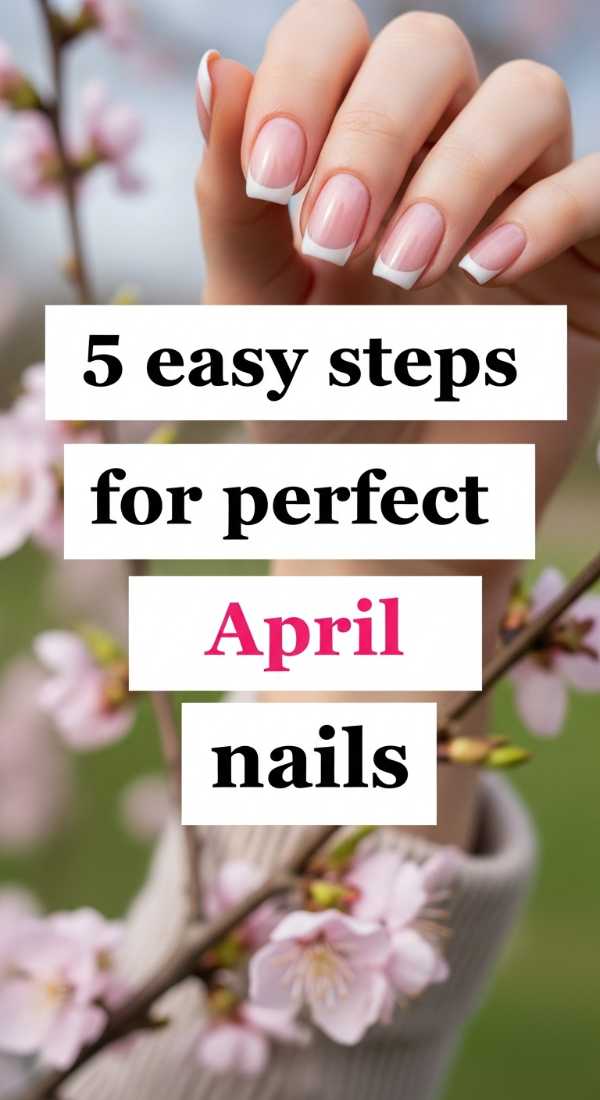
5 Easy Steps for Perfect April Nails
Why to love this Design:
April is all about the transition from the frost of winter to the bloom of spring. This design captures that ‘wildflower’ essence—soft, dreamy, and incredibly approachable for beginners who want a touch of whimsy.
Essential Elements:
- Lavender crème polish
- Daisy-yellow dotting tool
- Glossy top coat
- Nail primer
How to Prepare:
- Cleanse nails with alcohol to remove oils.
- Apply a thin base coat for a smooth canvas.
- Paint two thin layers of lavender polish.
- Use a dotting tool to create five small white petals with a yellow center.
- Seal with a high-shine top coat once dry.
Budget Range
- Essie ‘Play Date’ ($10)
- Dotting Tool Set ($5)
- OPI Top Coat ($11)
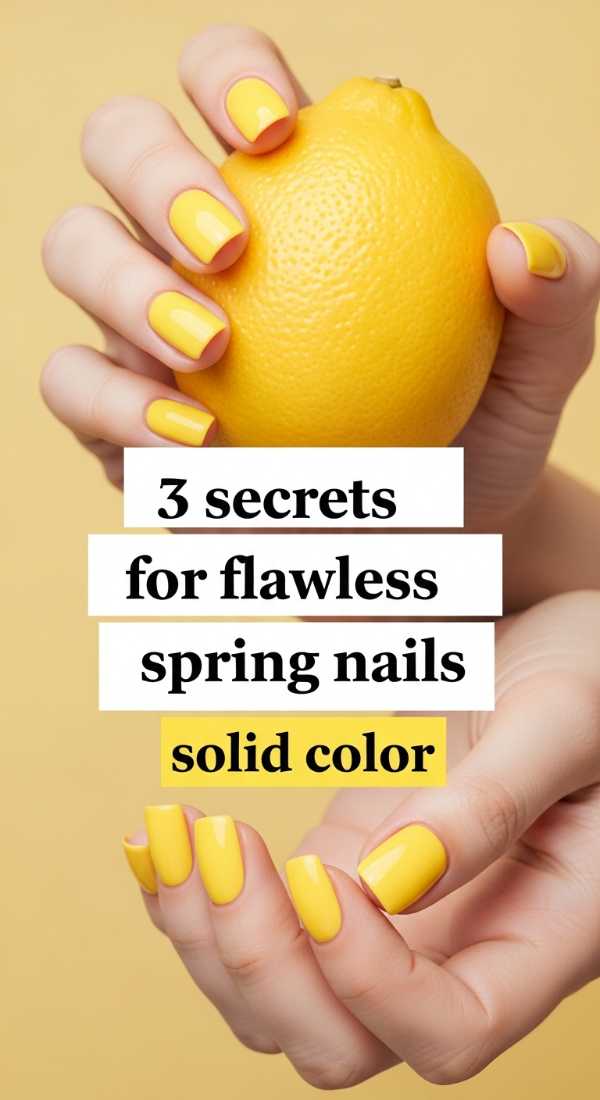
3 Secrets for Flawless Spring Nails Solid Color
Why to love this Design:
Sometimes, the most sophisticated look is a single, perfectly applied shade. These secrets will turn a simple mani into a professional-looking ‘salon’ finish that glows under the spring sun.
Essential Elements:
- Soft Mint or Peach polish
- Cuticle oil
- Clean-up brush
- Acetone
How to Prepare:
- Gently push back cuticles to maximize nail real estate.
- Apply polish in three strokes: middle, side, side.
- Use a tiny brush dipped in acetone to clean the edges for a crisp line.
Budget Range
- Zoya ‘Tiana’ ($12)
- Sally Hansen Cuticle Oil ($7)
- Detail Clean-up Brush ($4)
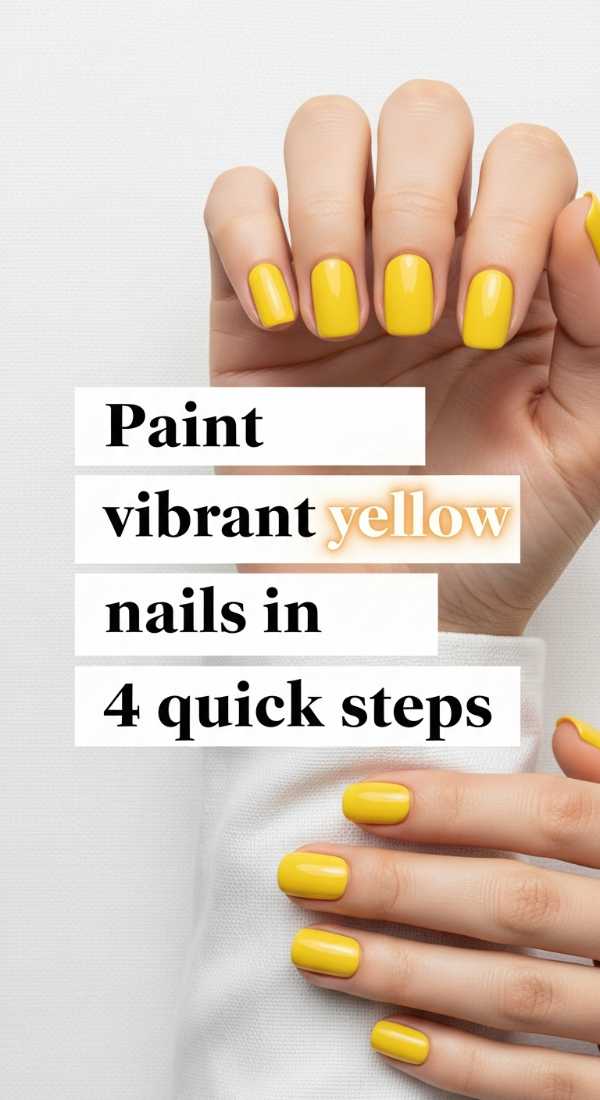
Paint Vibrant Yellow Nails in 4 Quick Steps
Why to love this Design:
Yellow is the color of pure optimism! This vibrant look is like wearing sunshine on your fingers, perfect for those first patio brunches with your best friends.
Essential Elements:
- Butter-yellow polish
- Ridge-filling base coat
- Quick-dry drops
How to Prepare:
- Apply a ridge-filler to ensure the yellow doesn’t look streaky.
- Swipe on your first layer of yellow very thinly.
- Add a second, slightly thicker layer for full opacity.
- Apply quick-dry drops to prevent smudging.
Budget Range
- Holo Taco ‘Lemon Sucker’ ($13)
- Seche Vite Dry Fast Top Coat ($9)
- Orly Bonder Base ($11)
6 Minutes to Trendy Spring Checkered Nails
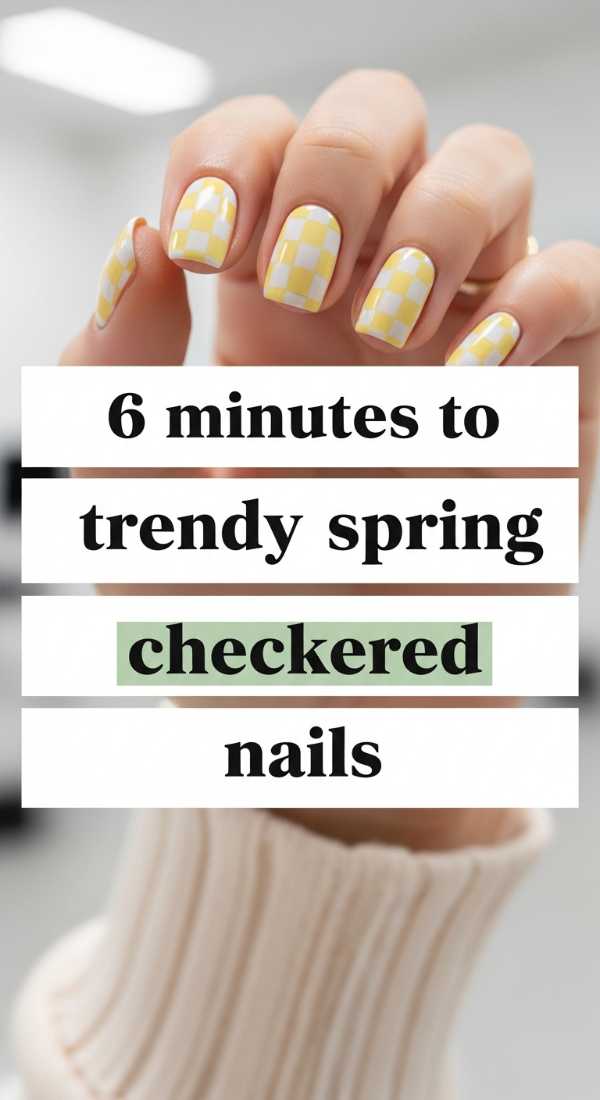
Why to love this Design:
The checkered trend is still going strong, my loves! This version uses soft pastels to make it feel light and airy rather than heavy and graphic. It’s the ultimate ‘cool girl’ spring vibe.
Essential Elements:
- Pastel pink polish
- White nail art liner
- Steady hand or striping tape
How to Prepare:
- Paint nails a soft pink base.
- Draw two vertical white lines.
- Draw two horizontal white lines to create a grid.
- Fill in alternating squares like a chessboard.
- Allow to dry completely before top-coating to avoid dragging.
Budget Range
- Olive & June ‘SCT’ ($9)
- Beetles Nail Art Liner ($6)
- Nail Striping Tape ($4)
4 Simple Ways to Chic Neutral Spring Nails
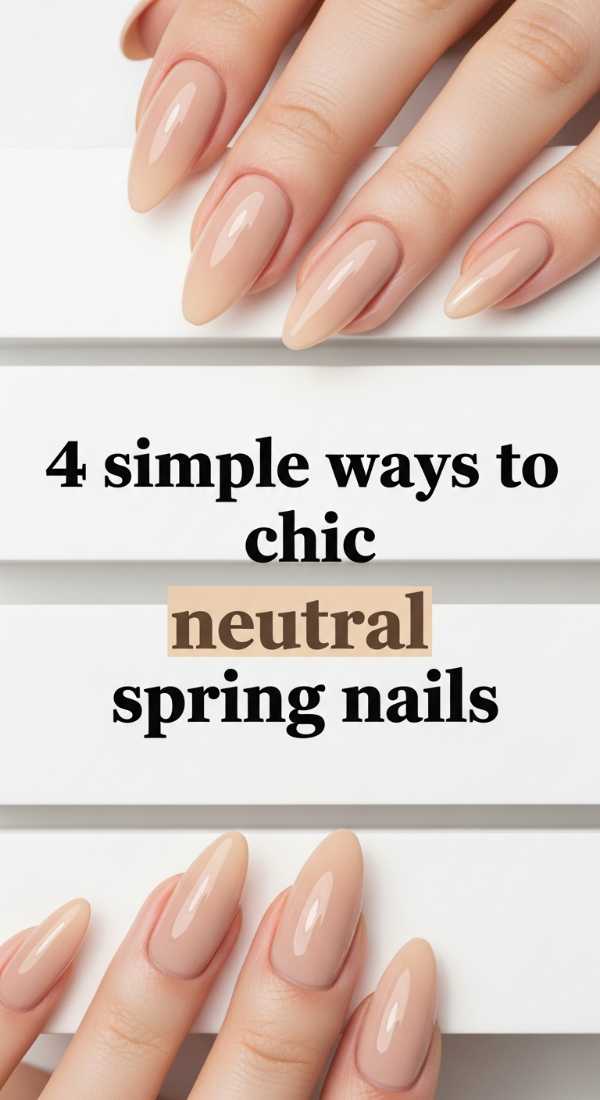
Why to love this Design:
For my loves who prefer a ‘quiet luxury’ aesthetic, these neutral ways are perfection. It’s clean, it’s polished, and it goes with every single floral dress in your closet.
Essential Elements:
- Milky white or sheer nude polish
- Pearl powder (optional)
- Buffer block
How to Prepare:
- Buff the nail surface for a mirror-like smoothness.
- Apply one coat of sheer nude for a ‘your nails but better’ look.
- Add a tiny swipe of pearl powder for a glazed finish.
- Finish with a matte or glossy top coat depending on your mood.
Budget Range
- DND ‘Sheer’ ($12)
- Chrome Pearl Powder ($8)
- Buffer Blocks ($3)
5 Steps to Design Yellow Blueberry Nails
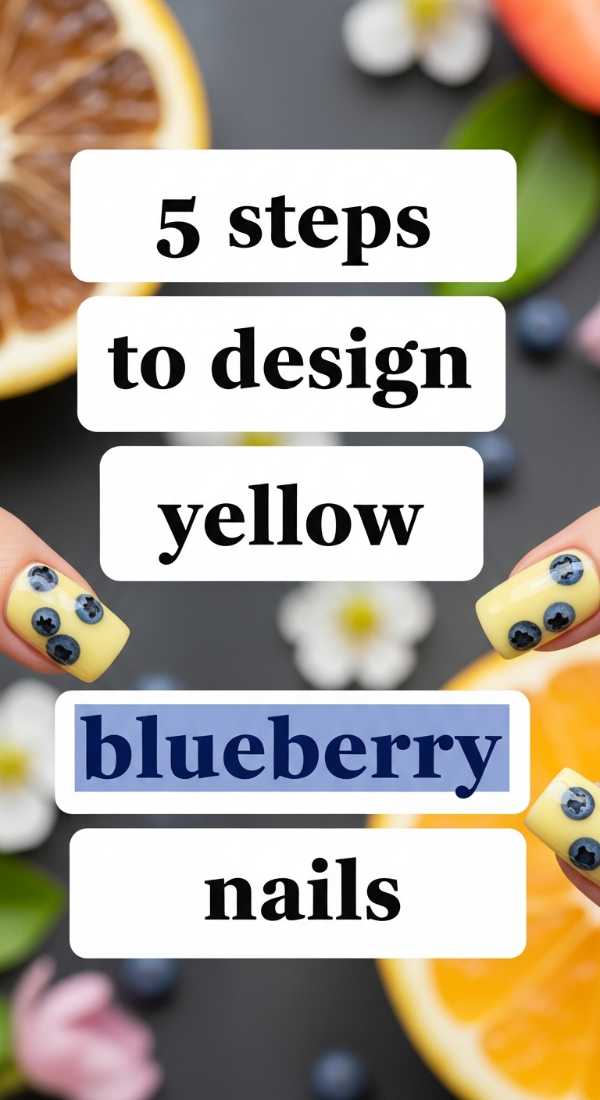
Why to love this Design:
This is the most adorable trend of 2024! Combining sunny yellow with tiny blueberry accents creates a picnic-ready look that is just so incredibly sweet and unique.
Essential Elements:
- Lemon yellow polish
- Deep blue polish
- Green detail brush
How to Prepare:
- Paint your base in a soft lemon yellow.
- Place two small blue dots close together near the tip.
- Draw a tiny green leaf connecting the blue ‘berries’.
- Add a small white highlight on the berries for depth.
- Lock it in with a plush top coat.
Budget Range
- Essie ‘Check Your Baggage’ ($10)
- OPI ‘Mi Casa Es Blue Casa’ ($11)
- Nail Art Detail Brush ($5)
Finish Your April Nails in 7 Easy Steps
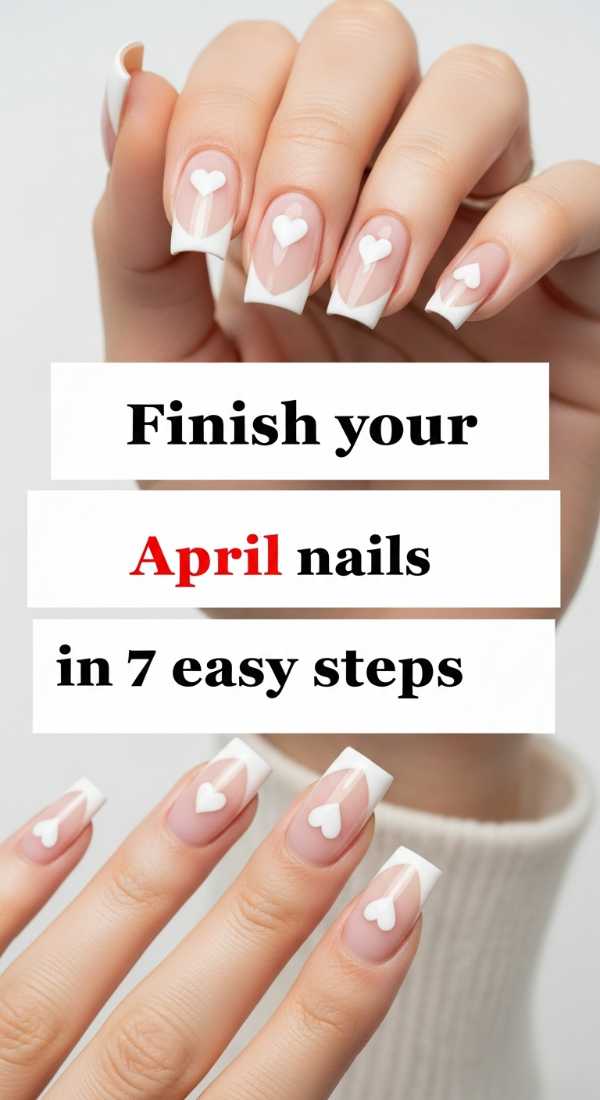
Why to love this Design:
Sometimes we get so excited about the color that we forget the finish! These seven steps ensure your April manicure lasts through all your spring gardening and cleaning sessions.
Essential Elements:
- Dehydrator
- Base coat
- Color
- Top coat
- Capping technique
How to Prepare:
- Dehydrate the nail plate.
- Apply base coat.
- First thin color layer.
- Second thin color layer.
- Apply top coat.
- ‘Cap’ the free edge (the tip) with polish to prevent chipping.
- Apply oil to the skin surrounding the nail.
Budget Range
- Modelones Dehydrator ($8)
- CND Vinylux Top Coat ($10)
- Solar Oil ($9)
Master Bold Yellow Nails in 3 Thin Layers
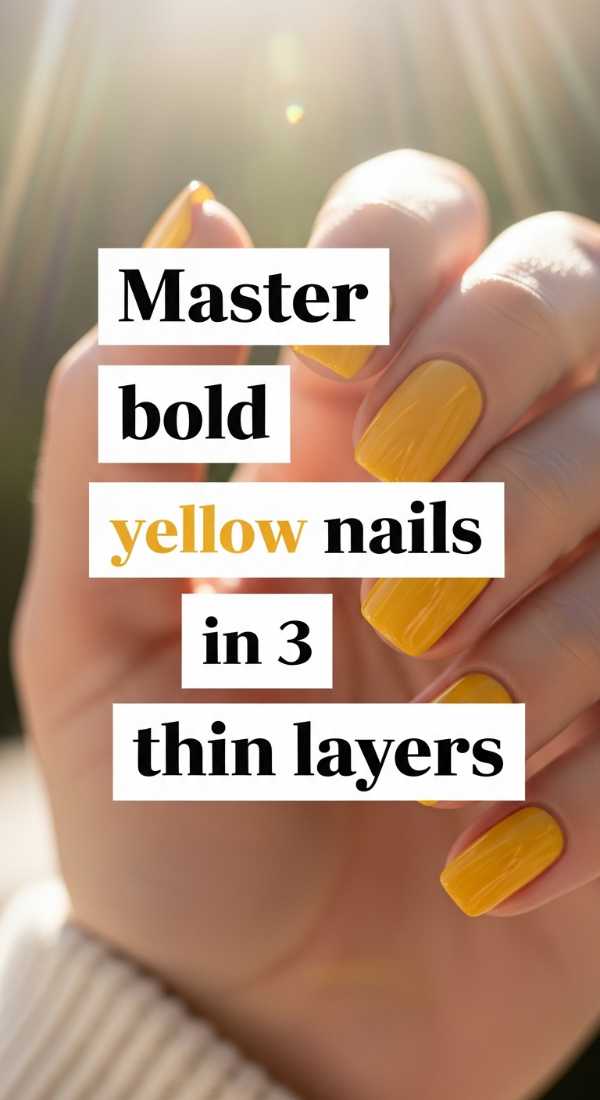
Why to love this Design:
The secret to high-pigment yellow without the ‘chalky’ look is the layering. This technique ensures a bold, professional saturation that looks like liquid gold.
Essential Elements:
- Opaque yellow cream polish
- White base coat (secret weapon!)
- Flat-edged brush
How to Prepare:
- Apply one coat of white polish first—this makes the yellow pop!
- Apply the yellow in three very thin, patient layers.
- Ensure each layer is dry before adding the next to avoid bubbles.
Budget Range
- OPI ‘Exotic Birds Do Not Tweet’ ($11)
- Sinful Colors ‘Snow Me White’ ($3)
- Smoothing Base Coat ($8)
Draw Perfect Spring Checkered Nails in 5 Steps
Why to love this Design:
This is for when you want to level up your grid game! Using a specific drawing technique makes those squares look crisp and uniform every single time.
Essential Elements:
- Sky blue polish
- White gel or acrylic paint
- Ultra-fine liner brush
How to Prepare:
- Base color in sky blue.
- Mark the center point of the nail with a tiny dot.
- Draw a crosshair through that center point.
- Expand the grid from the center outward to the edges.
- Fill the squares and seal with a thick gel-effect top coat.
Budget Range
- Lights Lacquer ‘Paper Snow’ ($13)
- Makartt Nail Art Liner Brush ($7)
- Sally Hansen Miracle Gel Top Coat ($10)
Get Elegant Neutral Spring Nails in 4 Steps
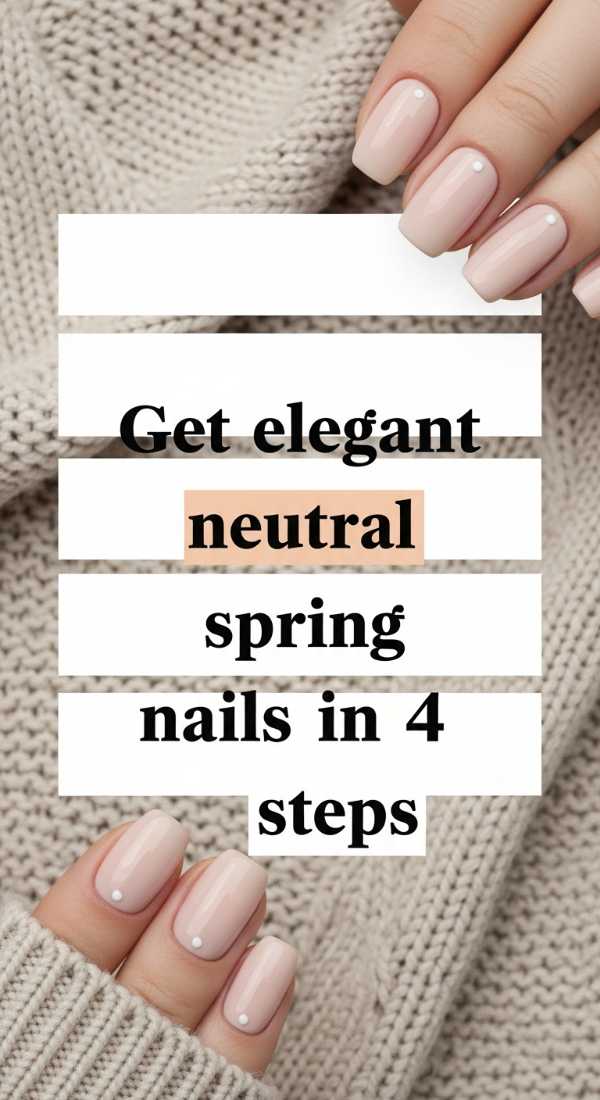
Why to love this Design:
Soft, sandy tones with a hint of shimmer are the epitome of spring elegance. It’s the kind of manicure that makes you feel expensive and put-together with zero effort.
Essential Elements:
- Taupe or Sand polish
- Fine gold glitter
- Softening cuticle cream
How to Prepare:
- Apply a sand-colored base.
- While wet, sprinkle a tiny bit of gold glitter at the base of the nail.
- Fade the glitter upward for an ‘ombre’ effect.
- Finish with a high-gloss top coat to smooth the texture.
Budget Range
- Essie ‘Sand Tropez’ ($10)
- Fine Loose Glitter ($4)
- Burt’s Bees Lemon Butter Cuticle Cream ($6)
Embrace the Bloom
There you have it, my loves! Whether you’re feeling the vibrant energy of a sunny yellow or the quiet grace of a neutral nude, I hope these tutorials bring a little bit of that spring magic into your home. Remember, your nails are just a small canvas for your beautiful soul—don’t worry about being ‘perfect.’ The joy is in the process and the little sparkle it adds to your day. Go ahead, treat yourself to a little DIY mani-session this weekend. You deserve it! Sending you so much love and pastel vibes.