

Budget-Friendly Bliss: The Viral Simple Board Trend for Busy Hostesses
We’ve all been there: the doorbell is about to ring, your heart is racing, and you’re looking at a kitchen that looks more like a disaster zone than a Pinterest-worthy sanctuary. For years, I thought hosting meant five-course meals and expensive caterers, but lately, I’ve discovered the magic of the ‘Simple Board.’ It is more than just a platter; it is an invitation to slow down, share a laugh, and enjoy high-quality, delicious food without the soul-crushing stress of traditional entertaining.
This viral trend is taking over my feed for a reason: it’s budget-friendly, infinitely customizable, and surprisingly healthy. By focusing on a few stellar components—from perfectly seared proteins to vibrant veggies—you can create a spread that looks like a million bucks but costs less than a takeout order. Today, I’m sharing the ultimate guide to the ‘Simple Board’ components that will make you the hostess with the mostest, even on your busiest Tuesday night.
HOW TO COOK JUICY CHICKEN?
Why we love this
There is nothing quite like the sight of a perfectly golden-brown chicken breast resting on a wooden board, its surface glistening with herb-infused juices. When you slice into it, the meat should be incredibly tender and succulent, releasing a savory aroma of garlic and thyme that fills the room. It’s the ultimate versatile protein that provides a hearty, satisfying foundation for any board, offering a rich, savory contrast to fresh vegetables and tangy dips that your guests will absolutely rave about.
Ingredients
- 2 large boneless, skinless chicken breasts
- 2 tablespoons extra virgin olive oil
- 1 teaspoon smoked paprika
- 1 teaspoon garlic powder
- Salt and freshly cracked black pepper to taste
- 2 sprigs of fresh rosemary or thyme
How to make it
- Begin by removing the chicken from the refrigerator at least 20 minutes before cooking to bring it to room temperature; this ensures even cooking throughout the breast.
- Pat the chicken completely dry with paper towels; any moisture on the surface will create steam and prevent that beautiful golden crust from forming.
- Season generously on both sides with salt, pepper, garlic powder, and smoked paprika, pressing the spices into the meat so they adhere during the searing process.
- Heat a heavy-bottomed skillet or cast iron pan over medium-high heat and add the olive oil; wait until the oil is shimmering and just starting to smoke before adding the chicken.
- Place the chicken in the pan and sear undisturbed for 5 to 6 minutes; you want to see a deep, caramelized brown color before you even think about flipping it.
- Flip the chicken, add the fresh herbs to the pan, and reduce the heat to medium; cook for another 5 to 8 minutes, or until the internal temperature reaches exactly 165°F (74°C).
- Crucially, remove the chicken from the pan and let it rest on a cutting board for at least 10 minutes before slicing; this allows the juices to redistribute so they don’t run out when you cut into it.
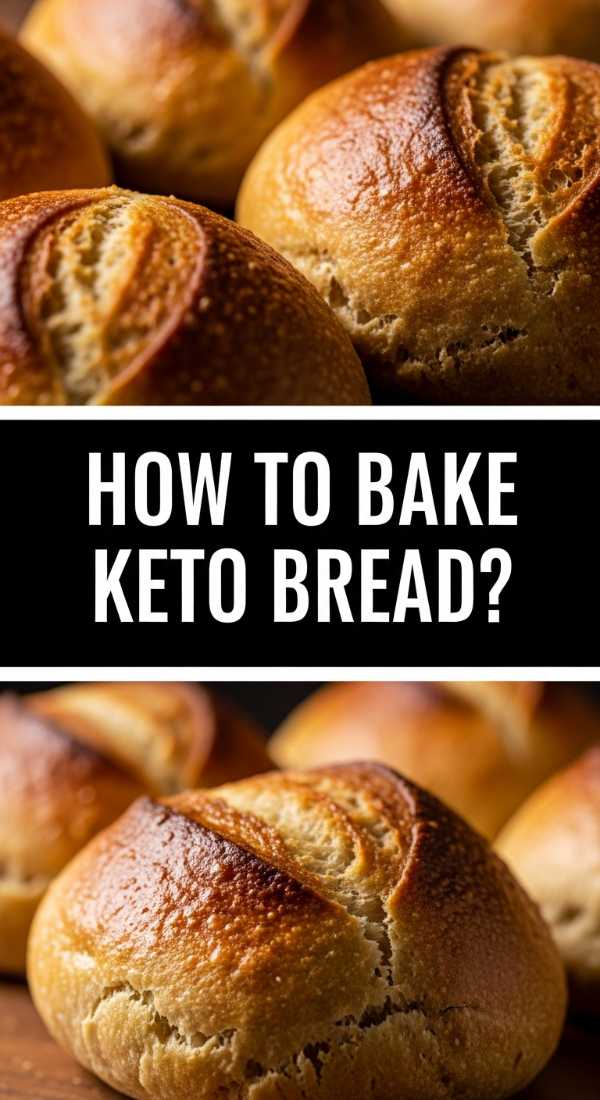
HOW TO BAKE KETO BREAD?

Why we love this
Imagine the warm, nutty scent of freshly baked bread wafting through your home without any of the carb-heavy guilt. This keto bread has a surprisingly airy crumb and a sturdy, golden crust that provides the perfect vessel for creamy cheeses or salty butter. It’s a game-changer for a board because it offers that comforting, bready texture we all crave, but it keeps the meal light and inclusive for friends with different dietary needs, making everyone feel pampered and considered.
Ingredients
- 1.5 cups almond flour (fine blanched)
- 3 tablespoons psyllium husk powder
- 2 teaspoons baking powder
- 1 teaspoon sea salt
- 3 large egg whites
- 1 cup boiling water
- 2 teaspoons apple cider vinegar
How to make it
- Preheat your oven to 350°F (175°C) and line a small loaf pan with parchment paper, leaving a bit of overhang to easily lift the bread out later.
- In a large mixing bowl, whisk together the almond flour, psyllium husk powder, baking powder, and salt until there are no clumps left; psyllium husk is the key to that ‘real bread’ chewiness.
- Add the egg whites and apple cider vinegar to the dry ingredients, then use a hand mixer to combine them into a thick, slightly sticky paste.
- Carefully pour the boiling water into the bowl; the mixture will start to expand and become dough-like as the psyllium husk hydrates—beat on high for about 30 seconds.
- Shape the dough into a smooth loaf or rolls and place into the prepared pan, being careful not to overwork it, which could make the bread too dense.
- Bake for 50 to 60 minutes; look for the loaf to be firm to the touch and sound slightly hollow when tapped on the bottom.
- Allow the bread to cool completely on a wire rack before slicing; if you cut it while it’s hot, the inside can remain gummy and won’t have the proper texture.
HOW TO MAKE VEGAN TACOS?
Why we love this
These tacos are a riot of color and texture that immediately draw the eye and excite the palate. The combination of smoky, spiced plant-based ‘meat’ paired with crunchy slaw and creamy avocado creates a flavor explosion that is both light and deeply satisfying. There’s something so communal and fun about taco-style components on a board; it invites guests to build their own masterpieces, layering heat, lime-spritzed freshness, and savory richness in every single bite.
Ingredients
- 1 can (15 oz) lentils or 2 cups walnut ‘meat’
- 1 tablespoon taco seasoning (cumin, chili powder, onion powder)
- 1 tablespoon soy sauce or tamari
- Small corn tortillas
- 1 cup shredded purple cabbage
- 1 ripe avocado, sliced
- Fresh cilantro and lime wedges for garnish
How to make it
- If using lentils, rinse them thoroughly and drain; if using walnuts, pulse them in a food processor until they reach a crumbly, meat-like consistency.
- Heat a non-stick skillet over medium heat with a splash of oil and add your ‘meat’ base along with the taco seasoning and soy sauce.
- Sauté the mixture for 7 to 10 minutes, stirring frequently; you want the edges to get slightly crispy and caramelized to mimic the texture of seasoned ground beef.
- While the filling is cooking, toss your shredded cabbage with a squeeze of lime and a pinch of salt to create a quick, bright slaw.
- Warm your corn tortillas directly over a low gas flame for 10 seconds per side until they have slight char marks and are pliable, or use a dry skillet over medium-high heat.
- To assemble for the board, place the filling in a central bowl and surround it with the warm tortillas, slaw, avocado slices, and plenty of lime.
- Encourage guests to finish their tacos with a sprinkle of fresh cilantro and a heavy squeeze of lime to brighten all those deep, smoky flavors.
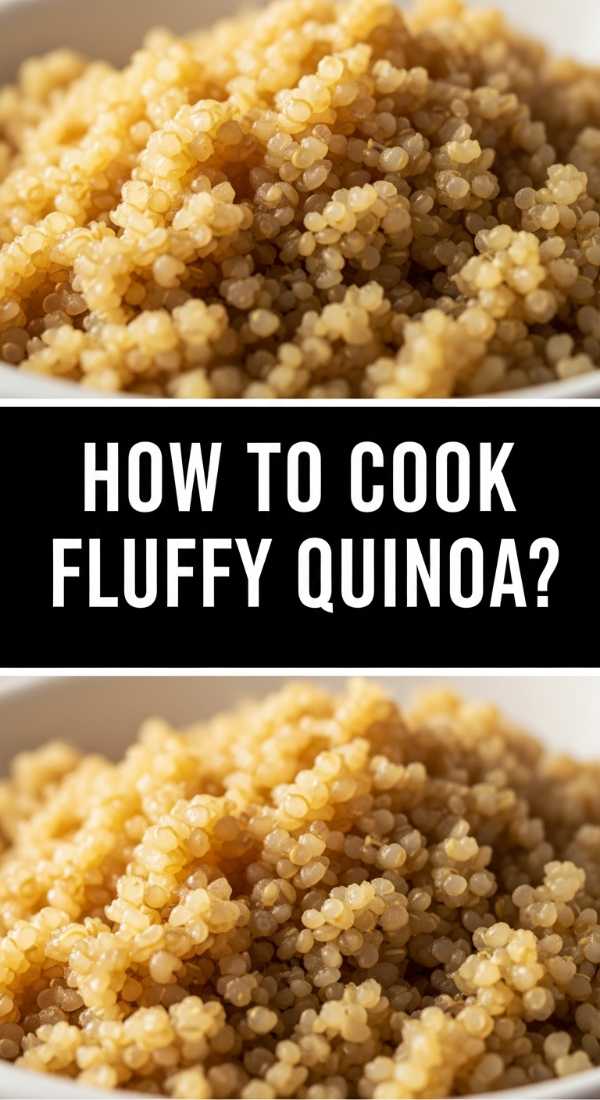
HOW TO COOK FLUFFY QUINOA?
Why we love this
Quinoa is the unsung hero of the board, acting as a delicate, nutty base that absorbs flavors beautifully while adding a sophisticated texture. When cooked correctly, each grain is separate and light, with a tiny, satisfying ‘pop’ as you eat it. It’s an earthy, protein-packed addition that feels both grounding and elegant, especially when drizzled with a bit of lemon oil and tossed with fresh parsley, making it a crowd-favorite for health-conscious foodies.
Ingredients
- 1 cup white or tri-color quinoa
- 2 cups water or vegetable broth
- 1/2 teaspoon salt
- 1 teaspoon olive oil
- Optional: Fresh herbs or lemon zest
How to make it
- The most important step is to rinse your quinoa in a fine-mesh strainer under cold running water for at least 30 seconds; this removes the bitter saponin coating.
- Add the rinsed quinoa to a medium saucepan with the water or broth and salt, and bring the mixture to a full, rolling boil over high heat.
- Once boiling, turn the heat down to the lowest possible setting and cover the pot with a tight-fitting lid to trap the steam.
- Simmer undisturbed for exactly 15 minutes; do not peek or stir, as this will release the steam needed to make the grains fluffy.
- Remove the pan from the heat and let it sit, still covered, for another 5 minutes; this final rest is what ensures the liquid is fully absorbed and the grains separate easily.
- Gently fluff the quinoa with a fork—never a spoon, which can mash the delicate grains—to incorporate air and make it light.
- Stir in a drizzle of olive oil and any fresh herbs or citrus zest to elevate the earthy flavor before serving it as a beautiful mound on your board.
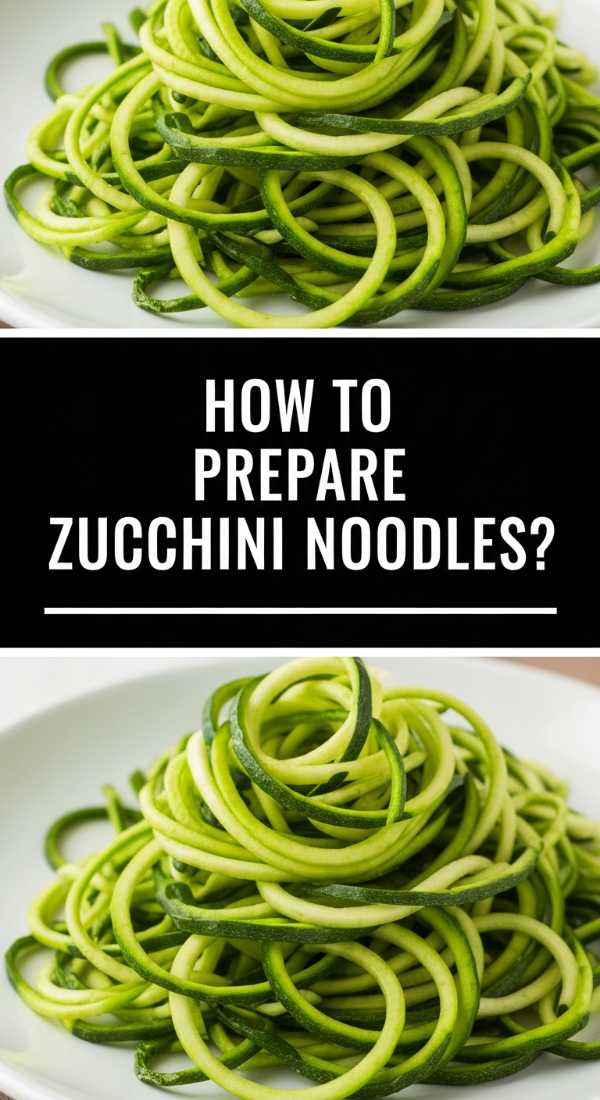
HOW TO PREPARE ZUCCHINI NOODLES?

Why we love this
Zucchini noodles, or ‘zoodles,’ bring a vibrant, garden-fresh energy to any spread with their bright green hue and crisp-tender texture. They are incredibly light and refreshing, acting as a perfect palate cleanser between richer board elements like cheese or cured meats. When prepared with just a hint of garlic and lemon, they offer a delicate crunch and a mild sweetness that makes eating your vegetables feel like a total indulgence rather than a chore.
Ingredients
- 3 medium zucchinis
- 1 tablespoon olive oil
- 2 cloves garlic, minced
- Salt and pepper
- Red pepper flakes (optional)
- Fresh lemon juice
How to make it
- Wash and dry your zucchinis, then use a spiralizer or a julienne peeler to create long, uniform strands; if the zucchinis are very large, avoid the seedy core as it can become mushy.
- Place the zoodles in a colander and sprinkle them with a pinch of salt; let them sit for 10 minutes to draw out excess moisture, then gently pat them dry with a towel.
- Heat the olive oil in a large skillet over medium-high heat until it shimmers, then add the minced garlic and red pepper flakes.
- Sauté the garlic for just 30 seconds until fragrant, being careful not to let it brown or turn bitter.
- Add the zoodles to the pan and toss them quickly using tongs; you only want to cook them for 2 to 3 minutes max.
- Watch for the noodles to turn a slightly brighter green and become just flexible; if you cook them longer, they will release too much water and turn into a puddle.
- Immediately remove from the heat, finish with a squeeze of fresh lemon juice, and serve them warm or at room temperature on your board.
HOW TO MAKE PROTEIN PANCAKES?

Why we love this
Who says boards are just for dinner? These protein pancakes are the star of any brunch board, boasting a fluffy, cake-like texture and a sweet, comforting aroma that reminds you of cozy weekend mornings. They are satisfyingly dense without being heavy, and when stacked high and drizzled with a bit of maple or honey, they feel like a total luxury. They provide a wonderful sweet element to a board, pairing perfectly with fresh berries and Greek yogurt.
Ingredients
- 1 cup oat flour (or blended rolled oats)
- 1 scoop vanilla protein powder
- 1 teaspoon baking powder
- 1/2 cup mashed ripe banana or Greek yogurt
- 2 large eggs
- 1/4 cup almond milk (adjust for consistency)
How to make it
- In a large bowl, whisk together the dry ingredients—oat flour, protein powder, and baking powder—ensuring the protein powder is well-distributed.
- In a separate bowl, mash the banana until smooth (or whisk the yogurt) and combine it with the eggs and milk until you have a wet, uniform mixture.
- Pour the wet ingredients into the dry and stir gently with a spatula until just combined; the batter should be thick but pourable—add a splash more milk if it’s too stiff.
- Let the batter rest for 5 minutes; this allows the oats to hydrate, resulting in a much fluffier pancake texture.
- Heat a non-stick griddle or pan over medium-low heat and lightly coat with coconut oil or butter; protein powder burns easily, so keep the heat moderate.
- Pour 1/4 cup of batter for each pancake and cook until bubbles form on the surface and the edges look set and matte, about 3 minutes.
- Flip carefully and cook for another 2 minutes until golden brown; serve them warm in a beautiful overlapping row on your board for a stunning presentation.
HOW TO ROAST CRISPY CHICKPEAS?
Why we love this
Crispy chickpeas are the ultimate ‘craveable’ board addition, offering a loud, satisfying crunch and a savory, spicy punch that keeps people coming back for more. They have a deep, toasted flavor that reminds you of nuts but with a lighter, earthier finish. These little golden nuggets are perfect for filling in the gaps on a board, providing a protein-packed alternative to crackers or chips that feels intentional and artisanal.
Ingredients
- 1 can (15 oz) chickpeas, rinsed and drained
- 1.5 tablespoons olive oil
- 1 teaspoon ground cumin
- 1/2 teaspoon garlic powder
- 1/2 teaspoon smoked paprika
- 1/2 teaspoon sea salt
How to make it
- Preheat your oven to 400°F (200°C) and line a large baking sheet with parchment paper for easy cleanup and non-stick roasting.
- The secret to crunch is dryness: after rinsing the chickpeas, roll them between two clean kitchen towels to remove all water and as many loose skins as possible.
- Place the dried chickpeas on the baking sheet and toss them with olive oil first—do not add the spices yet, as they can burn during the long roasting time.
- Spread them out so they aren’t touching; they need space for the hot air to circulate and crisp them up effectively.
- Roast for 20 to 30 minutes, shaking the pan halfway through; you’ll know they’re done when they are golden brown and sound like little pebbles when you shake the tray.
- While they are still piping hot from the oven, toss them in a bowl with the cumin, garlic powder, paprika, and salt so the spices adhere to the oil.
- Let them cool completely on the tray; as they cool, they will continue to firm up and reach their maximum level of crunchiness.
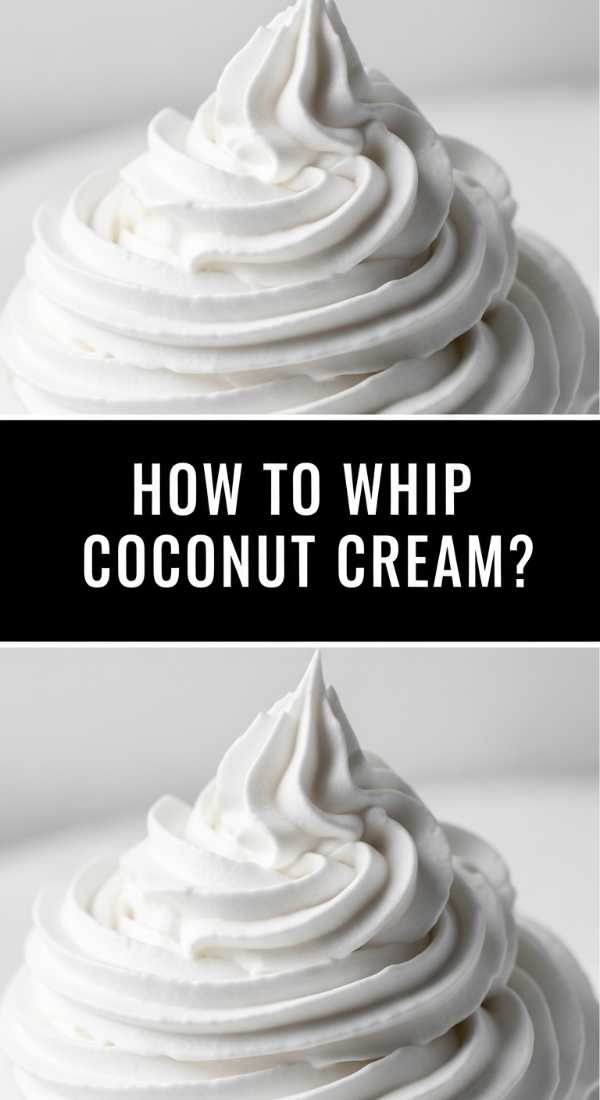
HOW TO WHIP COCONUT CREAM?

Why we love this
This whipped coconut cream is a cloud-like dream, offering a velvety, rich mouthfeel and a subtle tropical sweetness that elevates any fruit or dessert board. It’s thick, luscious, and holds its shape beautifully, making it a sophisticated dairy-free alternative to traditional whipped cream. There’s something so elegant about a dollop of this ivory cream paired with dark chocolate or bright red strawberries—it’s pure, unadulterated bliss in a bowl.
Ingredients
- 1 can (14 oz) full-fat coconut milk or coconut cream
- 1-2 tablespoons maple syrup or powdered sugar
- 1/2 teaspoon pure vanilla extract
How to make it
- Place the can of coconut milk in the refrigerator for at least 24 hours (or up to 48); this is non-negotiable as it allows the fat to separate and harden at the top.
- Chill a large mixing bowl (preferably metal or glass) in the freezer for 10 minutes before you start whipping.
- Carefully remove the can from the fridge without shaking it, open the top, and scoop out only the thick, hardened white cream into your chilled bowl.
- Save the leftover clear coconut water for smoothies—do not add it to the bowl or your cream will be runny and won’t whip.
- Using a hand mixer or stand mixer with a whisk attachment, beat the cream on medium-high speed for 2 to 3 minutes until it becomes smooth and starts to form soft peaks.
- Add the maple syrup and vanilla extract, then continue to whip for another minute until the cream is fluffy and holds its shape when you lift the whisk.
- Serve immediately for the best texture, or store in the fridge where it will firm up even more, making it perfect for dipping.
HOW TO MAKE EGG MUFFINS?
Why we love this
Egg muffins are the ultimate savory ‘bite’ for a board, offering a warm, protein-packed morsel that’s bursting with the flavors of sautéed vegetables and melted cheese. They have a soft, custardy center and slightly browned edges that provide a wonderful textural contrast. Because they are individual servings, they look incredibly neat and organized on a board, making them a practical yet charming choice for hostesses who want a mess-free finger food.
Ingredients
- 6 large eggs
- 1/4 cup milk or heavy cream
- 1/2 cup chopped spinach
- 1/4 cup diced bell peppers
- 1/4 cup crumbled feta or shredded cheddar
- Salt and pepper to taste
How to make it
- Preheat your oven to 350°F (175°C) and generously grease a standard muffin tin or use silicone liners, which are much easier for removal.
- In a large bowl, whisk the eggs and milk together vigorously until the mixture is pale yellow and slightly frothy; this incorporates air for a lighter muffin.
- Stir in your chopped spinach, peppers, cheese, salt, and pepper until the inclusions are evenly distributed through the egg wash.
- Carefully pour the egg mixture into the muffin cups, filling each one about 3/4 of the way to allow room for the eggs to puff up as they bake.
- Bake for 18 to 22 minutes; look for the centers to be set (not jiggly) and the tops to be slightly golden and domed.
- Let the muffins cool in the pan for about 5 minutes; they will deflate slightly, which is perfectly normal and creates a denser, easier-to-handle bite.
- Run a butter knife around the edges to pop them out and arrange them in a circular pattern on your board for a professional look.
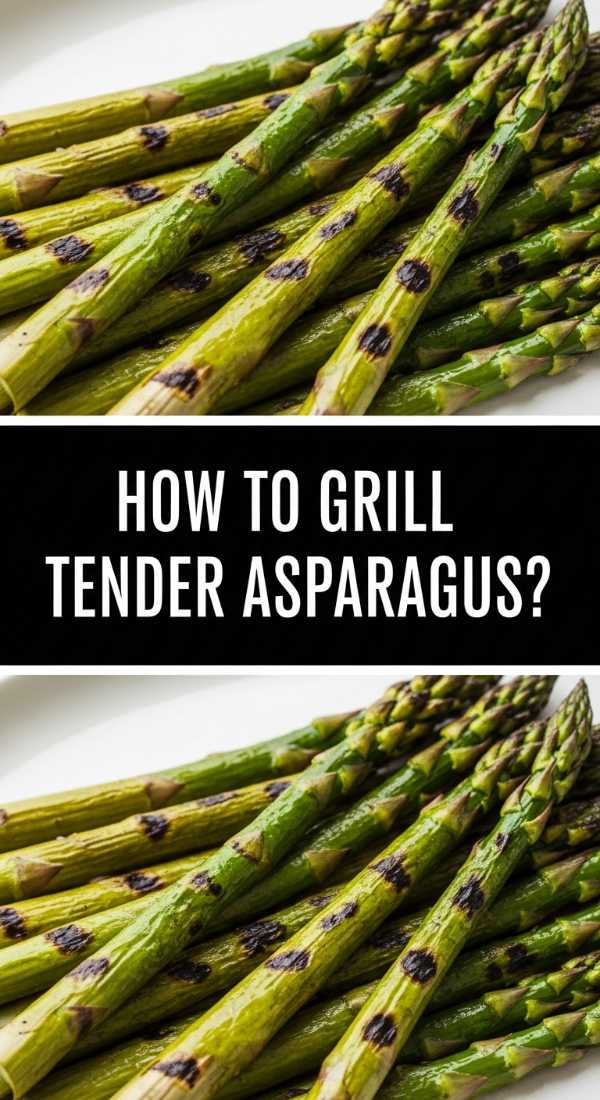
HOW TO GRILL TENDER ASPARAGUS?
[IMAGE_10]
Why we love this
Grilled asparagus adds a sophisticated, smoky edge to a board, with its charred, crispy tips and tender, juicy stalks. The high heat of the grill caramelizes the natural sugars in the vegetable, creating a sweet and savory profile that is simply irresistible. Drizzled with a bit of high-quality olive oil and finished with flaky sea salt, these elegant green spears look like edible art and provide a healthy, high-fiber crunch that balances out the board perfectly.
Ingredients
- 1 bunch of fresh asparagus (medium thickness)
- 1 tablespoon olive oil
- 1/2 teaspoon garlic powder
- Flaky sea salt and cracked black pepper
- Lemon wedges for serving
How to make it
- Start by prepping your asparagus: hold a spear at both ends and bend it until it snaps naturally—this removes the woody, fibrous bottom.
- Repeat with the rest of the bunch or use the first snapped spear as a guide to trim the others with a sharp knife for a more uniform look.
- Place the spears on a tray and drizzle with olive oil, tossing them with your hands to ensure every inch is lightly coated; sprinkle with salt, pepper, and garlic powder.
- Preheat your grill or a cast-iron grill pan to medium-high heat; you want it hot enough to sear quickly but not burn the delicate tips instantly.
- Place the asparagus spears across the grates (perpendicularly so they don’t fall through) in a single layer.
- Grill for 3 to 5 minutes, turning them occasionally with tongs; look for distinct char marks and a vibrant green color that has softened slightly.
- Remove from the grill while they still have a bit of a ‘snap’ to them; they will continue to soften slightly as they rest—finish with a final squeeze of lemon to cut through the char.
The Final Flourish
Creating a ‘Simple Board’ isn’t about perfection; it’s about the joy of assembly and the beauty of shared ingredients. By mastering these ten essential components, you’ve built a toolkit that allows you to pivot from a casual movie night snack to an elegant dinner party spread in no time. Remember to play with heights, colors, and textures, and most importantly, don’t forget to enjoy the process as much as the meal itself. Happy hosting!
Frequently Asked Questions
Q: Can I prepare these components ahead of time?
A: Absolutely! Most items like the roasted chickpeas, egg muffins, and keto bread can be made a day in advance. Just reheat the proteins slightly before serving for the best experience.
Q: How do I choose the right size board?
A: For a group of 4, a standard 12×18 inch cutting board works perfectly. If you’re feeding a crowd, don’t be afraid to use multiple smaller boards or even parchment paper laid directly on the table.
Q: What if I don’t have a grill for the asparagus?
A: You can easily roast it in a 425°F oven for 10-12 minutes or use a hot skillet to achieve a similar seared effect.