
10 Home Hacks That Will Make Your Neighbors Jealous
We’ve all had that feeling—driving through the neighborhood and slowing down just a little bit more when passing that house. You know the one. It’s the home where the flowers always seem to be in perfect bloom, the porch looks like a page from a high-end magazine, and there’s a sense of whimsical life happening right in the backyard. It’s not about having the biggest budget; it’s about those intentional, creative touches that turn a standard house into a living, breathing sanctuary. Today, I’m pulling back the curtain on the secrets that make a home truly stand out.
Creating a home that sparks joy for you and a little healthy envy from the neighbors is all about the details. Whether it’s the way you layer your perennials or the unexpected charm of a backyard duck pond, these hacks are designed to elevate your lifestyle. I’ve spent months testing these ideas, and I can tell you there is nothing quite like the satisfaction of a DIY project that looks like it cost a fortune. Let’s dive into these ten transformations that will have everyone on your block asking, ‘How did they do that?’
How to Style Patriotic Wreaths for a Festive Front Door
Why we love this
There is something so deeply nostalgic and grounding about a well-crafted patriotic wreath. As you run your fingers over the crisp, star-spangled ribbons and feel the rough, rustic texture of the burlap base, you can almost smell the scent of backyard barbecues and summer sparklers in the air. This isn’t just a decoration; it’s a warm, proud greeting that catches the golden hour light perfectly, making your front door the focal point of the entire street. It evokes a sense of community and celebration that feels both classic and effortlessly chic.
Essential Elements:
- 18-inch grapevine or straw wreath form
- Wide burlap ribbon in navy blue and crimson red
- White wooden or felt stars
- Floral wire and hot glue gun
- Eucalyptus sprigs for a touch of natural green
How to make it
- Begin by securing the end of your navy burlap ribbon to the back of the wreath form using floral wire, then wrap it tightly around one-third of the circle to create a solid ‘blue field’ foundation.
- In the remaining two-thirds of the wreath, alternate loops of red and white ribbon, creating a pleated effect that mimics stripes; ensure each loop is tucked tightly to avoid sagging over time.
- Apply a generous bead of hot glue to your white stars and press them firmly onto the navy section, spacing them evenly to create a balanced, celestial look that mimics the flag.
- Incorporate small sprigs of eucalyptus or dried baby’s breath between the ribbon layers to add a modern, organic texture that softens the bold colors.
- Finish by creating a large multi-loop bow at the bottom or top center, securing it with wire, and fluffing the loops until they have a full, high-end designer volume.
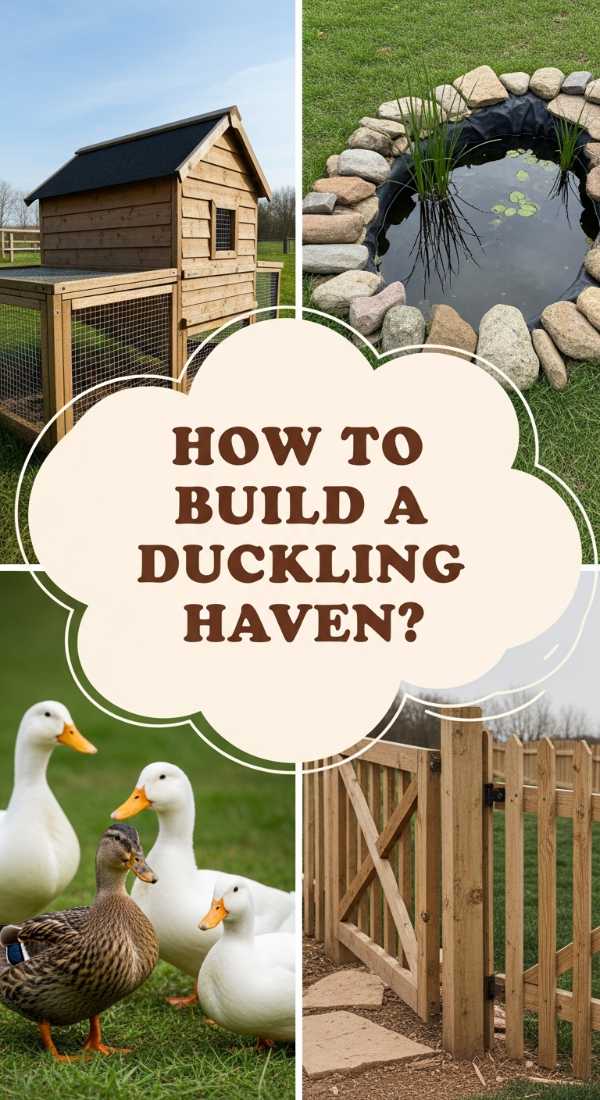
How to Build a DIY Duck Enclosure for a Happy Backyard Haven

Why we love this
The gentle, rhythmic quacking of happy ducks provides a soundtrack to your garden that is more relaxing than any white noise machine. Stepping into a clean, well-built enclosure feels like entering a miniature sanctuary, filled with the earthy aroma of fresh pine shavings and the sturdy, tactile warmth of weather-treated cedar. It’s a project that brings a sense of rural charm to any backyard, providing a safe, cozy home for your feathered friends while serving as a stunning architectural feature in your landscape.
Essential Elements:
- Pressure-treated 2×4 lumber for the frame
- Hardware cloth (1/2 inch gauge) for predator protection
- Corrugated roofing panels
- Heavy-duty door latches and hinges
- Natural pine shavings for bedding
How to make it
- Construct a rectangular base frame using your 2x4s, ensuring the corners are perfectly square by measuring diagonally from corner to corner before securing with 3-inch outdoor screws.
- Erect the vertical wall studs every 24 inches, leaving a specific opening for a large clean-out door and a smaller ‘duck-sized’ ramp entrance for easy daily access.
- Wrap the entire exterior in hardware cloth, burying the bottom 6 inches into the ground to prevent burrowing predators from gaining entry; use a heavy-duty staple gun every 2 inches for a secure hold.
- Install the slanted roof using corrugated panels, ensuring a 4-inch overhang on all sides to direct rainwater away from the foundation and keep the interior dry and rot-free.
- Finish the interior with a thick, 4-inch layer of pine shavings and install a secure nesting box in the darkest corner to encourage a sense of safety and frequent egg-laying.
How to Create Mud Kitchen Rock Food for Endless Sensory Play

Why we love this
Watch a child’s imagination catch fire as they handle smooth, river-worn stones transformed into vibrant ‘pizzas’ or ‘strawberries.’ There is a tactile joy in the weight of the rocks and the cool, slick feeling of the cured paint against your palms. These little pieces of art bring a pop of permanent color to the mud kitchen area, standing up to the elements while inviting hours of tactile, messy play. The clinking sound of stone against wooden spoons is the melody of childhood creativity at its finest.
Essential Elements:
- Smooth river rocks of various shapes and sizes
- Acrylic multi-surface paints (bright colors)
- Outdoor-grade waterproof sealant
- Fine-tipped brushes for detailing
- A sunny spot for drying
How to make it
- Thoroughly scrub your river rocks with warm soapy water to remove any dirt or oils, as a clean surface is critical for the paint to bond permanently to the stone.
- Apply a base coat of white acrylic paint to your chosen shapes; this acts as a primer, making the subsequent colors of your ‘fruits’ and ‘veggies’ pop with vibrant intensity.
- Use a fine-tipped brush to add realistic details, such as tiny black seeds on a strawberry-red rock or green leaf veins on a spinach-shaped stone, allowing each color to dry completely before layering the next.
- Once the paint is dry to the touch (usually 2 hours), apply two coats of high-gloss outdoor sealant to protect the ‘food’ from rain, sun, and heavy mud-kitchen use.
- Arrange the finished rocks in wooden crates or bowls near the mud kitchen, creating an inviting ‘market’ display that encourages immediate sensory exploration.
How to Plan Flower Beds for a Stunning Front Yard View

Why we love this
A perfectly planned flower bed is a living painting that changes with the seasons, offering a visual feast of textures and heights. Walking past a well-curated bed, you’re greeted by the sweet, honeyed scent of alyssum and the soft, velvety touch of lamb’s ear leaves. It creates a sense of order and abundance that instantly boosts curb appeal, making the front of your home feel intentional, lush, and incredibly welcoming to every passerby who stops to admire the view.
Essential Elements:
- Graph paper or landscape design software
- Edging material (stone, brick, or plastic)
- High-quality garden soil and organic compost
- A mix of perennials (foundation) and annuals (color)
- Hardwood mulch
How to make it
- Sketch your yard to scale on graph paper, marking the sunlight patterns throughout the day to ensure you choose ‘Full Sun’ or ‘Shade’ plants for the appropriate zones.
- Define the bed’s edge using a garden hose to create soft, flowing curves; avoid straight lines for a more natural, professional-looking landscape aesthetic.
- Excavate the grass within your border and till in 3 inches of organic compost to provide a nutrient-dense environment that encourages deep root growth and vibrant blooms.
- Place your potted plants in the bed before digging, checking for spacing and height—place taller specimens at the back and ‘creepers’ at the front to ensure every plant is visible.
- Once planted, apply a 2-inch layer of hardwood mulch to retain moisture, suppress weeds, and provide that dark, clean ‘finished’ look that characterizes professional gardens.
How to Arrange a Summer Door Hanger for Instant Curb Appeal
Why we love this
Summer door hangers are the airy, whimsical cousins of the traditional wreath, often featuring bright citrus motifs or sun-drenched florals. The sight of a lemon-themed hanger swaying gently in a warm breeze brings an immediate sense of refreshment, much like a cold glass of lemonade on a humid afternoon. The textures of raffia, lightweight wood, and silk greens create a layered, dimensional look that signals to the world that your home is a place of joy and seasonal celebration.
Essential Elements:
- A flat wooden cutout (lemon, sun, or flower shape)
- Weatherproof outdoor paint or stains
- Artificial greenery and silk flowers
- Strong jute twine for hanging
- A large, decorative burlap bow
How to make it
- Sand the edges of your wooden cutout to ensure a smooth finish, then apply two coats of bright, sun-resistant paint, allowing for full drying time between coats to prevent bubbling.
- Using a hot glue gun, layer silk greenery (like ferns or ivy) around the top of the hanger to create a lush, ‘spilling’ effect that frames the main design.
- Attach focal flowers—like sunflowers or daisies—in odd numbers (3 or 5) to the base of the greenery, which creates a more natural and visually pleasing composition for the eye.
- Drill two small holes at the top of the wood and thread thick jute twine through, knotting it securely to ensure the hanger can withstand windy summer thunderstorms.
- Position a large, wired burlap bow over the twine connection point to hide the mechanics of the hanger and add a touch of rustic sophistication.
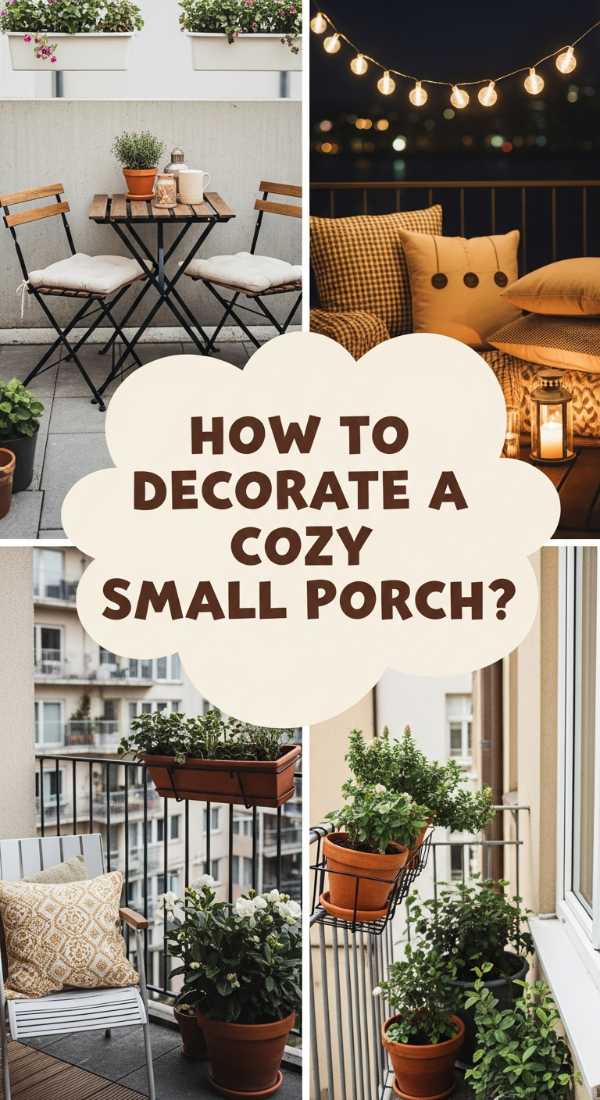
How to Decorate a Cute Small Porch for the Ultimate Cozy Vibe
Why we love this
A small porch shouldn’t be a storage spot; it should be a miniature outdoor living room. There is a specific kind of magic in a tiny space filled with the soft glow of fairy lights and the plush comfort of weather-resistant cushions. The scent of a nearby potted jasmine or lavender creates an aromatic bubble of peace, turning your entryway into a cozy nook where you can enjoy your morning coffee while feeling tucked away from the rest of the world.
Essential Elements:
- A slim-profile outdoor bench or bistro set
- Outdoor rug with a bold pattern
- Layered lighting (lanterns and string lights)
- Vertical planters or hanging baskets
- Soft outdoor throw pillows
How to make it
- Anchor the space with an outdoor rug that covers at least 70% of the floor area; this defines the ‘room’ and adds an immediate layer of softness and color to the concrete or wood.
- Choose furniture that fits the scale—opt for a narrow folding table and two chairs to maintain a clear walking path to the front door while providing a spot to sit.
- Utilize vertical space by hanging ferns or installing wall-mounted planters, which adds greenery without taking up precious floor real estate.
- Layer your lighting by placing tall lanterns on the floor and weaving warm-white LED string lights around the porch railing or ceiling to create an inviting evening ambiance.
- Swap out pillows seasonally—use textured, heavy fabrics in the fall and light, breathable linens in the summer to keep the ‘cozy’ factor relevant all year round.
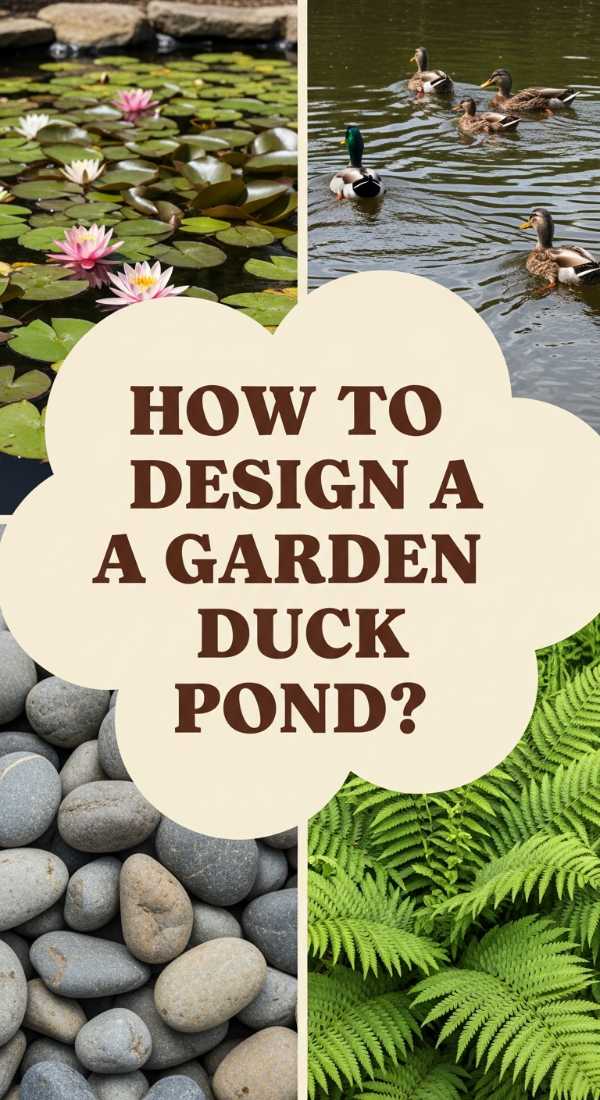
How to Design a DIY Duck Pond for a Serene Garden Landscape
Why we love this
The sound of trickling water is the ultimate garden luxury, and a DIY duck pond brings that serenity right to your back door. Feeling the cool splash of water while watching your ducks glide across the surface is incredibly grounding. It adds a dynamic element to your yard, reflecting the sky and surrounding greenery while providing a vital ecosystem for your birds. The mix of smooth river stones and water-loving plants creates a lush, oasis-like atmosphere that feels like a hidden getaway.
Essential Elements:
- Preformed pond liner or 45-mil EPDM rubber liner
- Submersible pump and filter system
- Large flat stones for the coping (edge)
- Dechlorinated water source
- Aquatic plants (like water lilies or rushes)
How to make it
- Dig a hole that is slightly wider and deeper than your liner, ensuring the bottom is perfectly level and free of sharp rocks that could puncture the material over time.
- Line the hole with 2 inches of damp sand before placing the liner; this provides a protective cushion and allows for minor adjustments as the pond fills with heavy water.
- Install the pump and filter at the deepest point to ensure proper oxygenation, which is crucial for keeping duck water from becoming stagnant and smelly.
- Place large, flat ‘coping stones’ around the entire perimeter, overlapping the edge of the liner by 2 inches to hide the plastic and create a natural, professional-looking stone border.
- Fill with water and add aquatic plants in submerged pots to provide natural filtration and a beautiful, lush green contrast to the sparkling blue water.
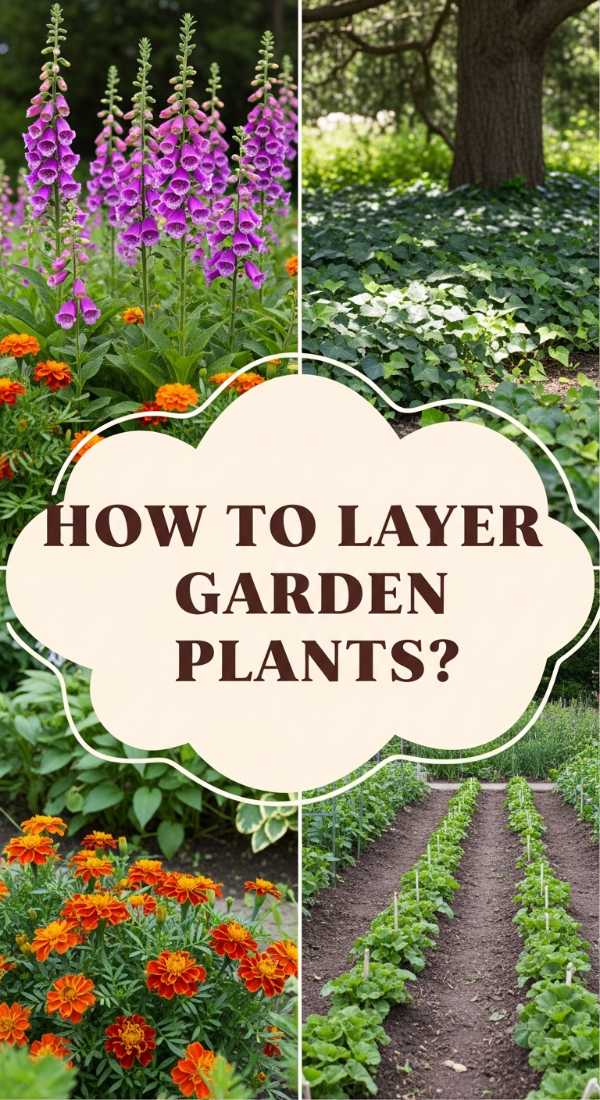
How to Layer Flower Bed Plants for a Professional Garden Finish
Why we love this
Layering is the secret weapon of professional landscapers that creates a sense of depth and ‘fullness’ even in new gardens. When you see a bed with varying heights—from the towering foxgloves in the back to the tiny, delicate lobelia at the edge—it feels like a lush, natural forest floor. The combination of different leaf textures, from glossy hostas to feathery ferns, creates a tactile rich environment that catches the light and dew in a way that flat gardens simply can’t replicate.
Essential Elements:
- Tall ‘thriller’ plants (Delphiniums, Ornamental Grasses)
- Mid-size ‘filler’ plants (Salvia, Echinacea)
- Low-growing ‘spiller’ plants (Creeping Phlox, Alyssum)
- Consistent color palette (3-4 complementary colors)
- Sturdy garden stakes for taller varieties
How to make it
- Divide your garden bed into three distinct zones: the back (closest to the house/fence), the middle, and the front (bordering the lawn or path).
- Plant your ‘Thrillers’ in the back row, spacing them according to their mature width to ensure they create a solid wall of color without overcrowding each other’s root systems.
- Stagger the ‘Fillers’ in the middle zone in a zigzag pattern rather than a straight line; this creates a more natural, abundant look that fills in gaps more effectively.
- Place ‘Spillers’ at the very edge, tilting them slightly toward the walkway so they ‘crawl’ over the border, softening the hard lines of the garden edging.
- Apply a slow-release fertilizer at the base of each layer and water deeply at the soil level to encourage the plants to knit together into one cohesive, lush carpet of color.
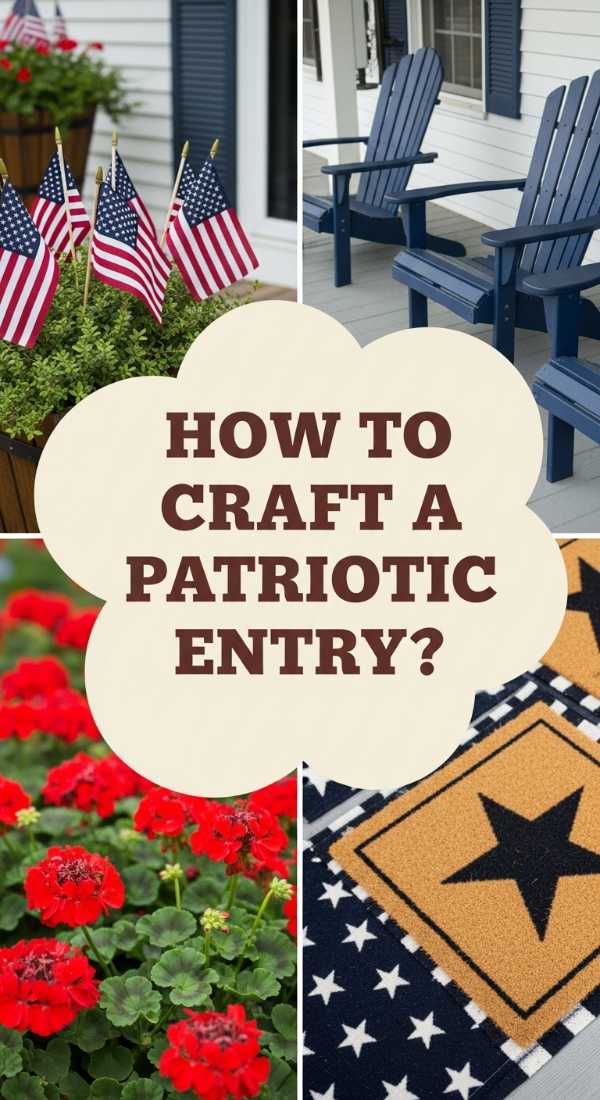
How to Craft a Patriotic Entryway for a Proud Seasonal Greeting
Why we love this
A patriotic entryway is more than just a flag; it’s a curated experience that starts at the sidewalk and ends at your door. The crisp contrast of bright whites against deep navys, paired with the rustic charm of wooden crates and galvanized metal buckets, creates a sense of heritage and pride. It feels like a homecoming every time you walk up the steps, surrounded by the symbolic colors that represent community and history, all presented with a modern, stylish flair.
Essential Elements:
- Two large galvanized metal planters
- A full-sized American flag and pole
- Bunting or fabric swags for the railing
- Red and white geraniums
- Navy blue outdoor doormat
How to make it
- Flank your front door with the galvanized planters, filling them with red and white geraniums and blue lobelia to create a living ‘Stars and Stripes’ floral arrangement.
- Secure the flag pole at a 45-degree angle near the door frame, ensuring it is high enough that the flag doesn’t touch the ground or obstruct the walkway.
- Drape pleated fabric bunting along the porch railing, using zip ties to keep the ‘swags’ even and taut, which provides a classic, parade-like aesthetic.
- Layer a navy blue patterned rug under a natural coir doormat to add dimension and a high-end designer look to the floor of your entryway.
- Add a final touch by placing a small wooden bench to the side with a red-striped outdoor pillow, tying the whole color story together into a cohesive, welcoming scene.
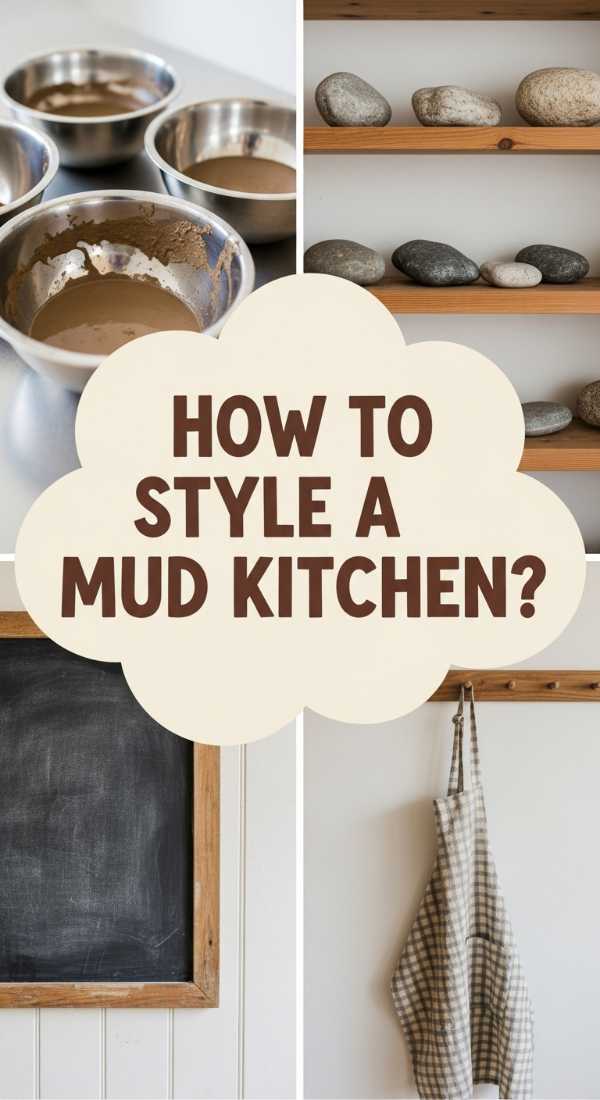
How to Style Mud Kitchen Accessories for Creative Outdoor Play
[IMAGE_10]
Why we love this
The beauty of a mud kitchen lies in the mix of rustic, ‘real-world’ accessories and the messy, uninhibited joy of nature. There is something incredibly satisfying about the clink of stainless steel pots and the sight of wooden spoons stained with the ‘stews’ of childhood. This space becomes an outdoor laboratory where the scent of damp earth and crushed mint leaves fills the air. Styling it with intentional, beautiful accessories makes it a feature of the yard rather than an eyesore, blending play with aesthetic charm.
Essential Elements:
- Stainless steel bowls and measuring cups
- Old wooden spoons and whisks
- Chalkboard for the ‘Daily Menu’
- Small terracotta pots for sorting ‘ingredients’
- A rack or hooks for organized hanging
How to make it
- Install a simple pegboard or a row of vintage brass hooks above the mud kitchen counter to hang pots and utensils; this keeps the workspace clear and looks organized and professional.
- Dedicate a corner for ‘ingredient’ storage, using small terracotta pots to hold pebbles, pinecones, and dried petals, which encourages children to categorize their natural finds.
- Mount a small chalkboard at eye level and use chalk markers to write out a ‘Seasonal Menu,’ adding a literacy element to the sensory play while giving the kitchen a cafe-like feel.
- Include a functional water source, like a small beverage dispenser with a spigot, so kids can ‘wash’ their dishes or add ‘broth’ to their mud pies independently.
- Periodically refresh the accessories by adding seasonal natural items, like acorns in the fall or seashells in the summer, to keep the sensory experience new and exciting.
Conclusion: Your Home, Your Sanctuary
Transforming your home into a space that makes the neighbors do a double-take isn’t about perfection—it’s about passion. When you put care into your flower beds, your porch, and even your kids’ play areas, that energy radiates outward. These ten hacks are just the beginning of what’s possible when you view your home as a canvas for your creativity. So, pick one project this weekend, get your hands a little dirty, and enjoy the beautiful, envious results!