
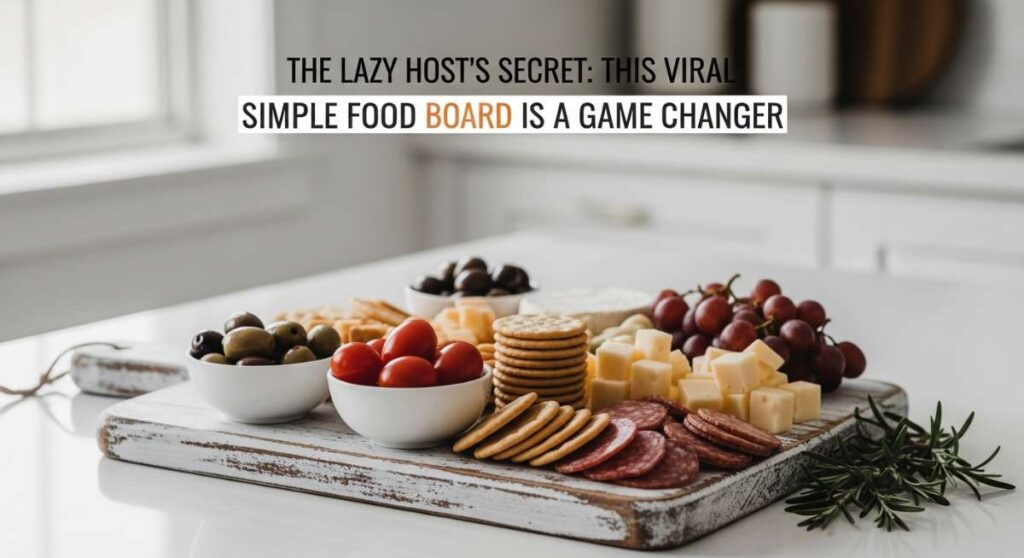
The Lazy Host’s Secret: This Viral Simple Food Board is a Game Changer
We’ve all been there: the group chat is buzzing, friends are coming over in an hour, and the panic of ‘what to serve’ starts to set in. In a world of over-the-top grazing tables that cost a fortune, I stumbled upon a secret that changed my hosting game forever. It’s not about the complexity; it’s about the curation. This viral food board concept takes the most comforting, soul-warming dishes and presents them in a way that feels like a celebration rather than just a meal.
The beauty of this approach is that it transforms your favorite comfort foods into a shared experience. There is something deeply intimate about breaking bread—or sharing a steak—right off a communal board. It removes the stiffness of formal plating and replaces it with laughter, reaching hands, and the wonderful chaos of a home filled with good energy. Whether you are hosting a brunch, a late-night dinner, or a cozy weekend hangout, these recipes are the building blocks of a night your friends will be texting you about for weeks.
Today, I’m pulling back the curtain on the ten essential components that make this food board a viral sensation. We are talking about textures that range from the crunch of perfectly fried chicken to the pillowy softness of ricotta-stuffed shells. Each element is designed to stand alone but works in perfect harmony when nestled together on a giant wooden platter. Let’s dive into the recipes that will turn you into the ultimate effortless host.
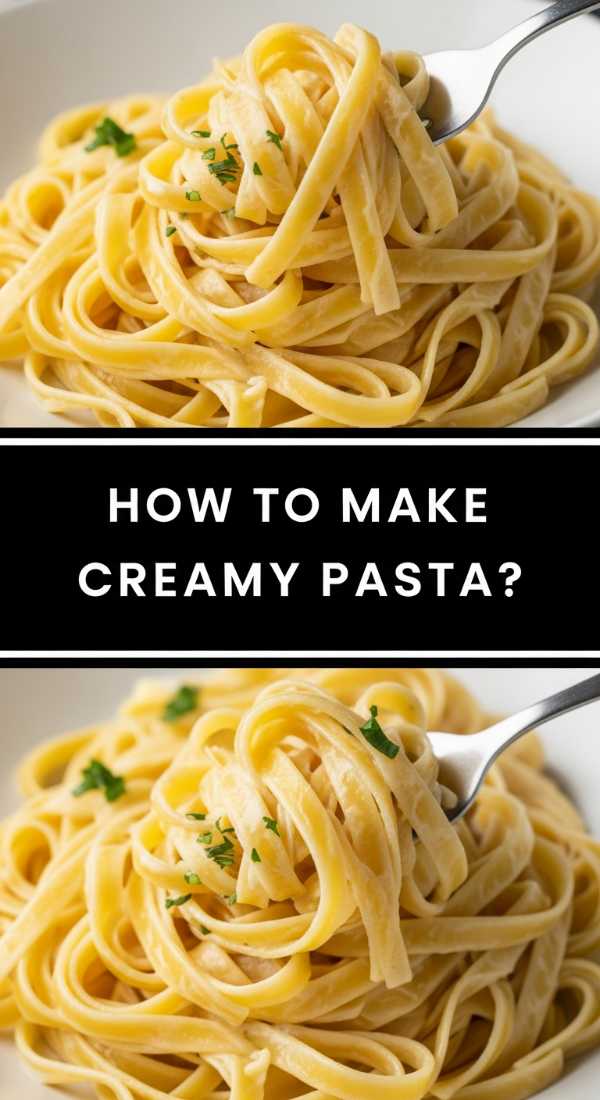
How to make creamy pasta?
Why we love this
There is nothing quite as comforting as a forkful of pasta swirled in a sauce so velvety it feels like a warm hug. The aroma of simmering heavy cream infused with freshly grated parmesan and a hint of nutmeg creates an intoxicating scent that fills the entire kitchen. As you take a bite, the sauce coats your palate with a rich, buttery smoothness, while the perfectly al dente pasta provides a satisfying chew that makes you want to close your eyes and savor every second.
Ingredients
- 1 lb fettuccine or penne pasta
- 2 cups heavy cream
- 1/2 cup unsalted butter
- 1.5 cups freshly grated Parmesan cheese
- 3 cloves garlic, minced
- Salt and cracked black pepper to taste
- Fresh parsley for garnish
How to make it
- Bring a large pot of heavily salted water to a rolling boil. Use about one tablespoon of salt per gallon of water to ensure the pasta is seasoned from the inside out. Add the pasta and cook according to package directions, but aim for 1 minute less than the ‘al dente’ time to allow for finishing in the sauce.
- While the pasta cooks, place a large skillet over medium-low heat and melt the butter slowly to avoid browning. Once melted, add the minced garlic and sauté for about 1-2 minutes until fragrant and translucent, being careful not to let it turn golden or bitter.
- Pour in the heavy cream and increase the heat to medium. Bring the mixture to a gentle simmer, stirring constantly. Let it reduce slightly for about 3-5 minutes until it begins to thicken and can coat the back of a spoon.
- Reduce the heat to the lowest setting and whisk in the grated Parmesan cheese one handful at a time. Whisking continuously is vital here to prevent the cheese from clumping or the fats from separating; you want a completely emulsified, glossy sauce.
- Using tongs, transfer the cooked pasta directly from the water into the skillet. The small amount of starchy pasta water clinging to the noodles will help the sauce adhere beautifully. Toss everything together for 60 seconds over low heat until the sauce is thick and luxurious. Season with pepper and garnish with parsley before serving.
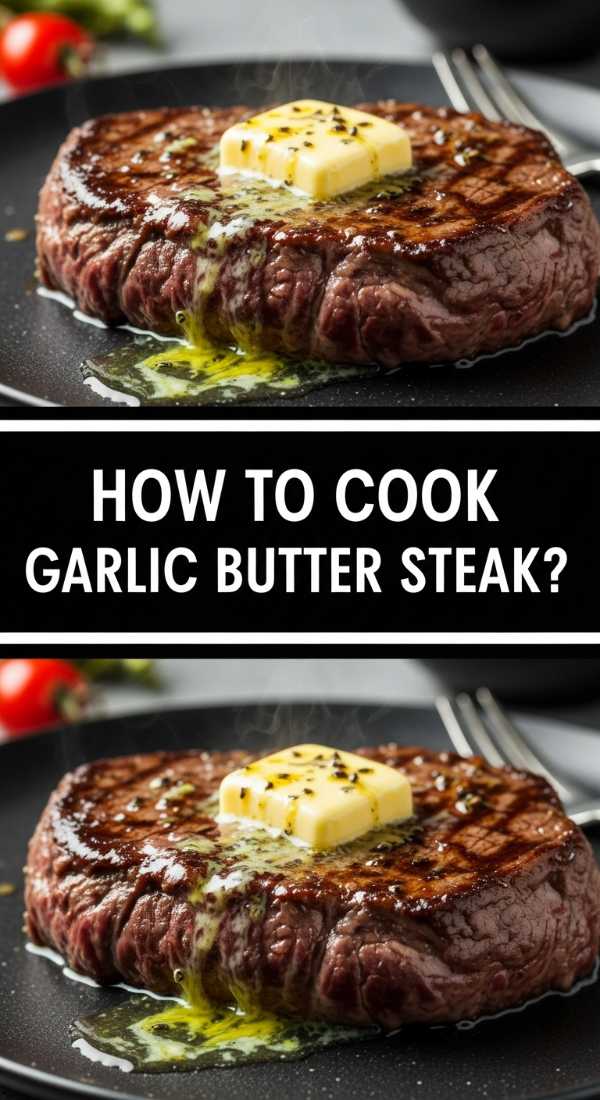
How to cook garlic butter steak?
Why we love this
The sound of a steak hitting a scorching hot cast-iron skillet is the ultimate dinner bell. As the edges of the meat sear into a deep, mahogany crust, the smell of toasted garlic and earthy rosemary begins to drift through the air. Each slice is a masterclass in contrast: a salty, crispy exterior giving way to a tender, pink, and incredibly juicy center that melts in your mouth, enhanced by the richness of a basting butter that has been infused with aromatics.
Ingredients
- 2 thick-cut Ribeye or New York Strip steaks
- 4 tbsp unsalted butter
- 4 cloves garlic, smashed
- 3 sprigs fresh rosemary or thyme
- 2 tbsp high-smoke point oil (avocado or grapeseed)
- Coarse sea salt and freshly cracked black pepper
How to make it
- Remove the steaks from the refrigerator at least 45 minutes before cooking. This allows the internal temperature to rise, ensuring the meat cooks evenly throughout. Pat the steaks completely dry with paper towels; any moisture on the surface will create steam instead of a crust.
- Generously season all sides of the steak, including the fatty edges, with coarse sea salt and cracked black pepper. Press the seasoning into the meat so it adheres firmly.
- Heat a heavy cast-iron skillet over high heat until it is wisps of smoke begin to rise. Add the oil and swirl to coat. Carefully lay the steaks away from you in the pan. Sear undisturbed for 3-4 minutes until a thick, dark brown crust has formed on the bottom.
- Flip the steaks using tongs. Immediately add the butter, smashed garlic cloves, and herbs to the pan. As the butter melts and foams, tilt the pan slightly so the butter pools at the bottom with the aromatics.
- Using a large spoon, continuously scoop the hot, flavored butter over the steaks (this is called ‘basting’). Do this for the remaining 3-4 minutes of cook time. Use a meat thermometer to pull the steaks at 130°F (54°C) for medium-rare. Let the steaks rest on a cutting board for at least 8 minutes before slicing against the grain to preserve the juices.
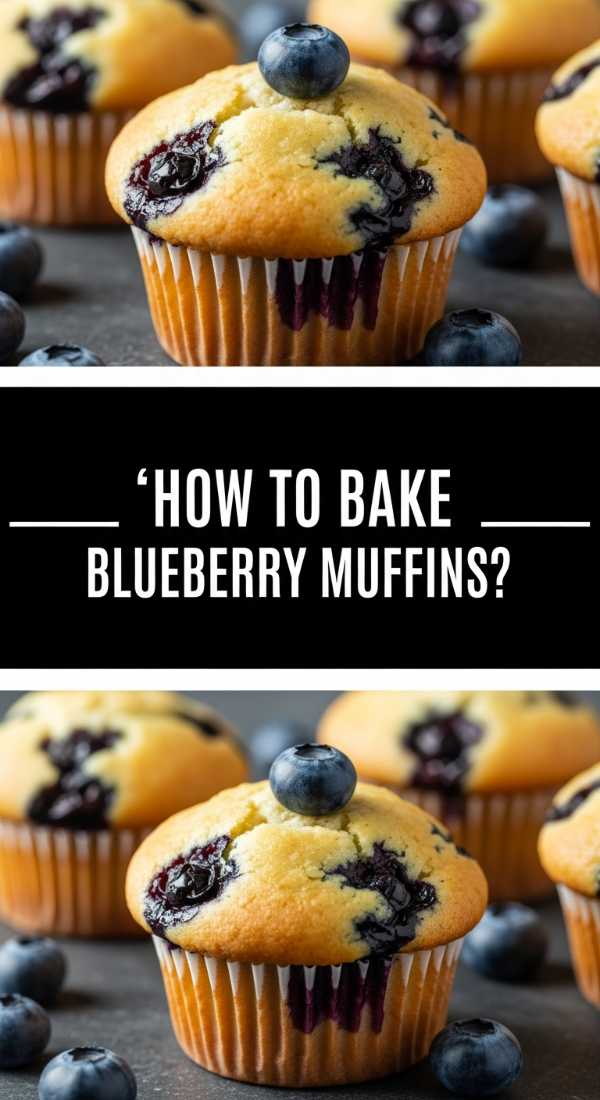
How to bake blueberry muffins?
Why we love this
Baking these muffins feels like a morning ritual of the best kind, as the scent of sweet vanilla and tart fruit wafts from the oven. The tops grow into high, golden-brown domes that boast a slight crunch from a dusting of sugar, while the interior remains incredibly moist and fluffy. When you pull one apart, the vibrant purple juice of the bursting blueberries stains the crumb, offering a bright, zesty pop of flavor that balances the rich, buttery cake perfectly.
Ingredients
- 1.5 cups all-purpose flour
- 3/4 cup granulated sugar
- 1/2 tsp salt
- 2 tsp baking powder
- 1/3 cup vegetable oil
- 1 large egg
- 1/2 cup whole milk
- 1.5 cups fresh or frozen blueberries
- 1 tsp vanilla extract
How to make it
- Preheat your oven to 400°F (200°C) and line a muffin tin with paper liners. Preheating to a high temperature is a baker’s secret for getting those tall, bakery-style muffin tops.
- In a large bowl, whisk together the flour, sugar, baking powder, and salt. If using fresh blueberries, toss them with a teaspoon of the flour mixture; this prevents them from sinking to the bottom of the muffins during the bake.
- In a separate measuring cup or bowl, whisk together the vegetable oil, egg, milk, and vanilla extract until fully combined. Pour the wet ingredients into the dry ingredients.
- Fold the mixture together using a spatula until just combined. It is crucial not to overmix here; a few lumps are fine. Overmixing develops gluten, which will make the muffins tough and dense rather than light and airy. Gently fold in the blueberries.
- Fill the muffin cups to the very top. Bake for 20-25 minutes. To check for doneness, insert a toothpick into the center of a muffin; it should come out clean or with a few moist crumbs. Let them cool in the pan for 5 minutes before transferring to a wire rack.
How to fry crispy chicken?
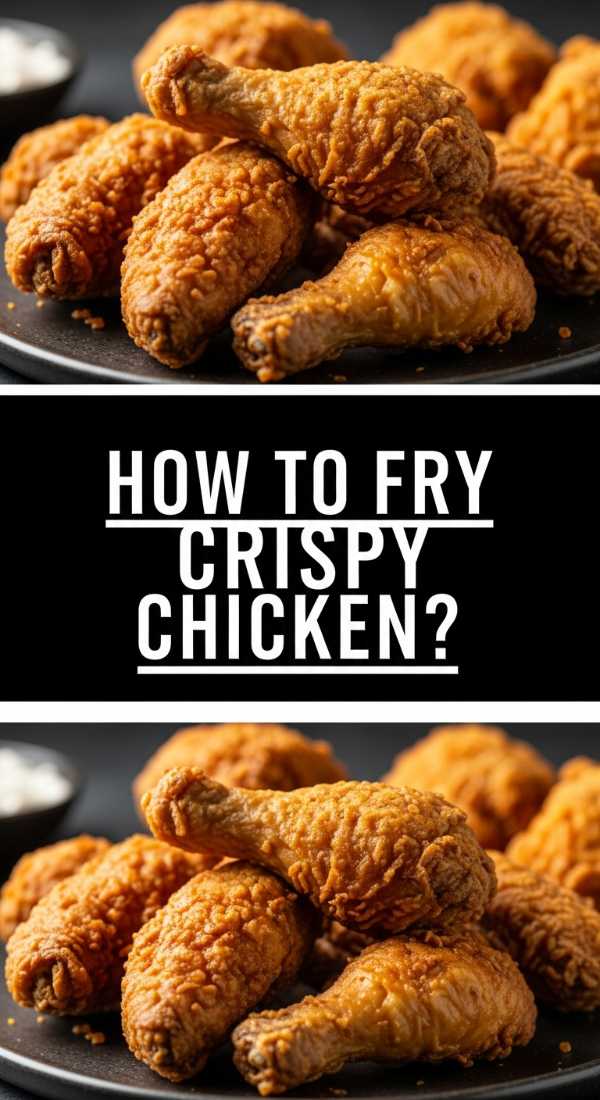
Why we love this
There is a primal satisfaction in the deafening crunch of perfectly fried chicken. The skin is transformed into a craggy, golden landscape of spice-flecked batter that shatters upon impact, revealing meat that is so succulent and steaming hot that it practically falls off the bone. The aroma is a savory blend of paprika, garlic, and hot oil, creating a sensory experience that is the gold standard of soul food and the undisputed star of any food board.
Ingredients
- 2 lbs chicken thighs or drumsticks
- 2 cups buttermilk
- 2 cups all-purpose flour
- 1 tbsp paprika
- 1 tsp cayenne pepper
- 1 tbsp garlic powder
- 1 tbsp onion powder
- Salt and pepper
- 1 quart peanut or vegetable oil for frying
How to make it
- Place the chicken pieces in a large bowl and cover with buttermilk and a pinch of salt. Let this marinate in the fridge for at least 4 hours, or ideally overnight. The lactic acid in the buttermilk tenderizes the protein and helps the flour coating stick.
- In a shallow dish or large heavy-duty plastic bag, whisk together the flour, paprika, cayenne, garlic powder, onion powder, salt, and pepper. This is your ‘dredge.’
- Drip a few tablespoons of the buttermilk marinade into the flour mixture and stir with a fork to create small clumps. These clumps are the secret to the extra-craggy, crispy bits on the finished chicken.
- Remove a piece of chicken from the buttermilk, let the excess drip off, and coat it thoroughly in the flour mixture. Press the flour into the meat firmly. Place the coated chicken on a wire rack for 10 minutes before frying; this helps the coating set so it doesn’t fall off in the oil.
- Heat the oil in a large Dutch oven or deep skillet to exactly 350°F (175°C). Fry the chicken in batches to avoid crowding the pan, which drops the oil temperature and leads to greasy chicken. Cook for 12-15 minutes, turning occasionally, until the internal temperature reaches 165°F and the crust is a deep golden brown. Drain on a clean wire rack.
How to make avocado toast?
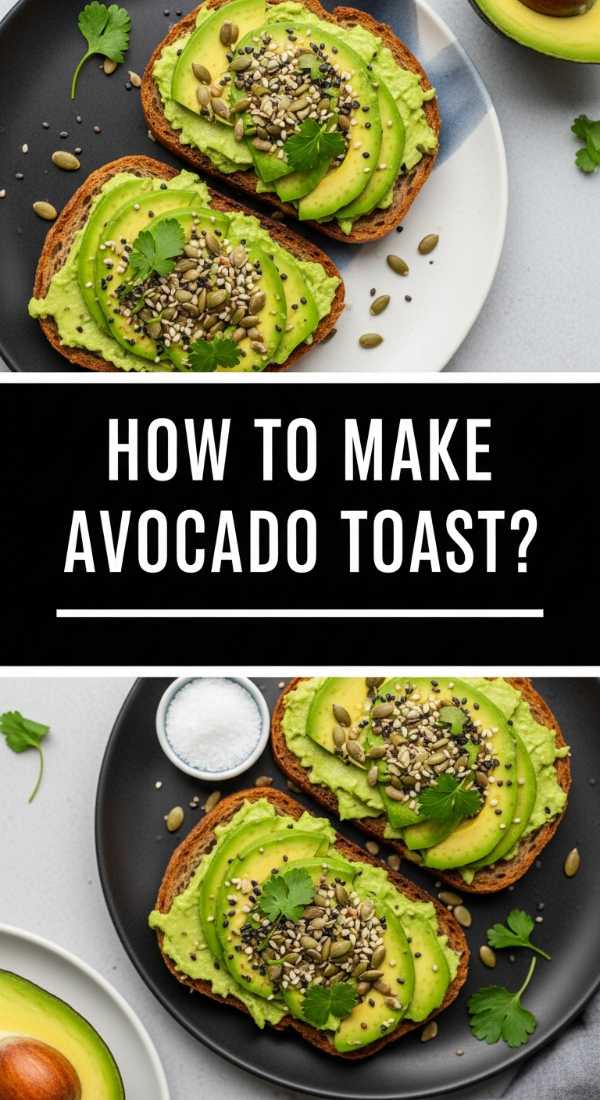
Why we love this
This dish is the ultimate example of how simple ingredients can create something truly sophisticated. The base is a thick, toasted slice of artisanal sourdough that provides a robust, tangy crunch, topped with a generous layer of mashed avocado that is as smooth as silk. The addition of bright lemon juice, a sprinkle of red pepper flakes, and a drizzle of premium olive oil adds layers of zing and heat that wake up the palate and make every bite feel fresh and vibrant.
Ingredients
- 2 thick slices of sourdough bread
- 1 large ripe avocado
- 1/2 lemon (for juice)
- 1 tbsp extra virgin olive oil
- 1/2 tsp red pepper flakes
- Flaky sea salt
- Optional: Microgreens or a poached egg
How to make it
- Toast the sourdough slices until they are a deep golden brown. You want a firm, sturdy base that won’t get soggy under the weight of the avocado. For extra flavor, brush the bread lightly with olive oil before toasting in a pan or toaster oven.
- Cut the avocado in half, remove the pit, and scoop the flesh into a small bowl. Use a fork to mash the avocado. Aim for a ‘chunky-smooth’ consistency rather than a complete puree; the variations in texture make the toast more interesting to eat.
- Stir in half of the lemon juice and a pinch of salt directly into the mash. The acid from the lemon not only adds flavor but also prevents the avocado from oxidizing and turning brown while it sits on your food board.
- Spread the avocado mixture generously over the toasted bread, reaching all the way to the edges. Use the back of a spoon to create ‘swirls’ and ‘valleys’ in the mash.
- Drizzle with the remaining olive oil, then sprinkle with the red pepper flakes and a generous pinch of flaky sea salt. The salt provides a crunch that elevates the creaminess of the fruit. Add your optional toppings like microgreens or a jammy egg right before serving.
How to roast seasoned potatoes?
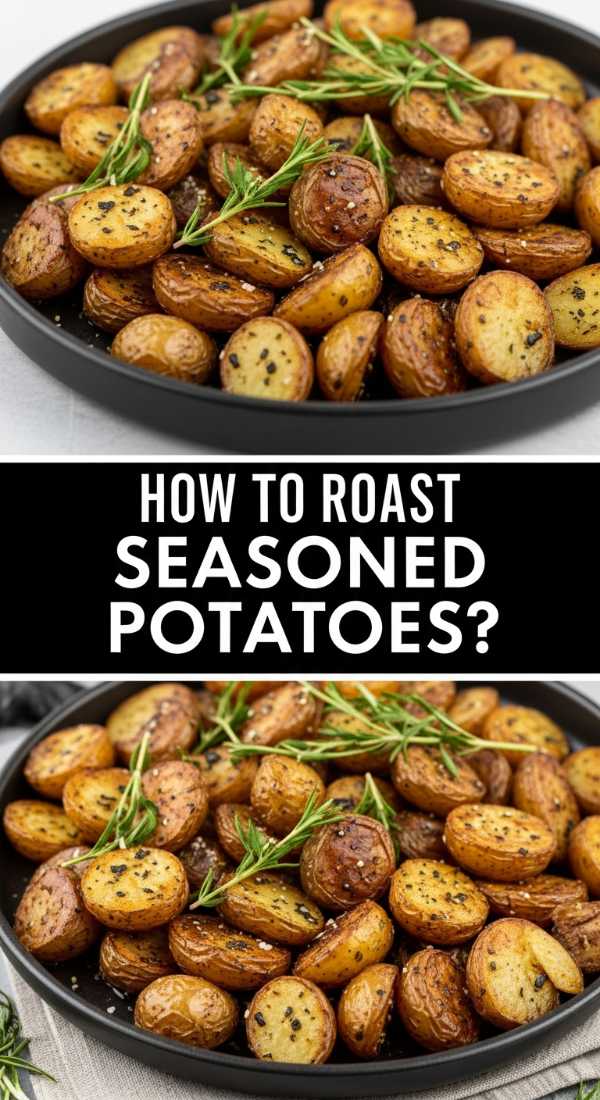
Why we love this
Roasted potatoes are the unsung hero of the food board, offering a deeply satisfying savory base that everyone loves. When done right, they have an audible crunch on the outside that gives way to an interior as soft and fluffy as mashed potatoes. The scent of roasted rosemary and caramelized garlic cloves creates a rustic, earthy aroma that makes your kitchen feel like a Mediterranean villa, while the golden-brown edges provide a toasted flavor that is simply addictive.
Ingredients
- 2 lbs Yukon Gold or Russet potatoes
- 1/4 cup extra virgin olive oil
- 1 tsp dried oregano
- 1 tsp garlic powder
- 1 tsp smoked paprika
- 2 sprigs fresh rosemary, chopped
- 1 tsp salt and 1/2 tsp black pepper
How to make it
- Preheat your oven to 425°F (220°C). A high heat is necessary to achieve that distinct crispiness. Scrub the potatoes and cut them into uniform 1-inch cubes. Uniformity is key so that every piece cooks at exactly the same rate.
- Place the potato cubes in a large bowl and toss with the olive oil, oregano, garlic powder, paprika, rosemary, salt, and pepper. Ensure every single cube is glistening and well-coated with the spice mixture.
- Spread the potatoes out on a large, rimmed baking sheet. CRITICAL STEP: Do not crowd the pan. If the potatoes are touching, they will steam instead of roast. Use two pans if necessary to ensure there is space around each cube.
- Roast for 20 minutes, then remove the pan and use a metal spatula to flip and toss the potatoes. This ensures that multiple sides get that direct contact with the hot metal for maximum crunch.
- Return to the oven for another 15-20 minutes. Look for a deep golden-brown color and edges that look slightly shriveled and crisp. Taste one to ensure the middle is buttery and soft. Serve immediately while the exterior is at peak crunch.
How to cook stuffed shells?
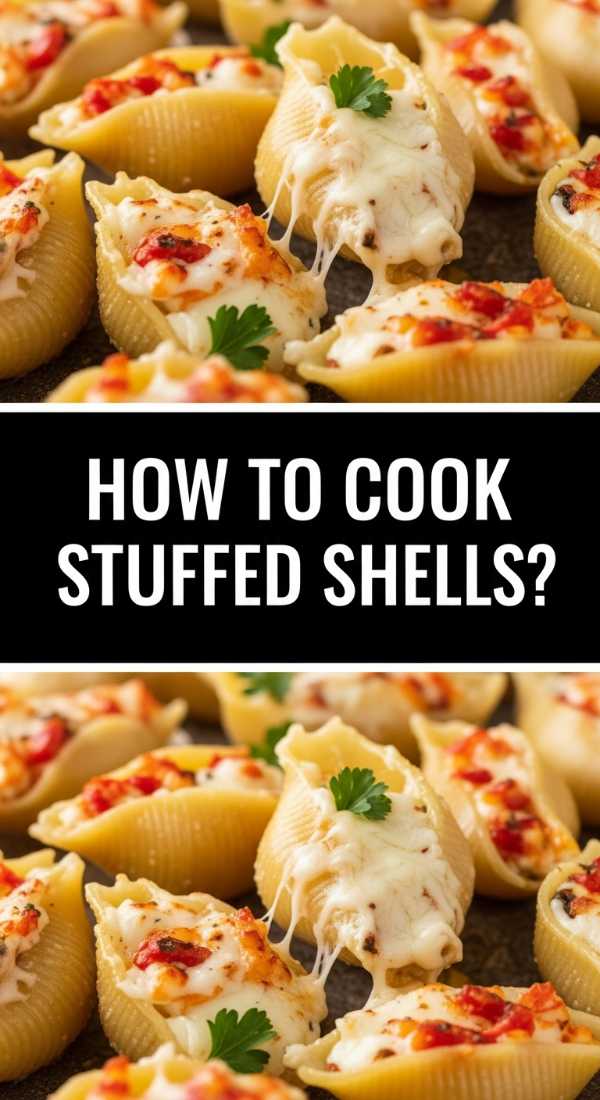
Why we love this
Stuffed shells are a visual and textural masterpiece, looking like little overflowing treasure chests of cheese nested in a pool of vibrant red sauce. The pasta shells provide a perfect vessel for a rich blend of ricotta, mozzarella, and parmesan that becomes incredibly gooey and molten when baked. The aroma of bubbling marinara and toasted cheese is a classic Italian-American scent that promises a meal that is both hearty and elegantly presented, making them a standout star on any communal board.
Ingredients
- 1 box (12 oz) Jumbo pasta shells
- 15 oz whole milk ricotta cheese
- 2 cups shredded mozzarella cheese
- 1/2 cup grated Parmesan cheese
- 1 large egg (lightly beaten)
- 2 cups marinara sauce
- 2 cloves garlic, minced
- 1 tbsp fresh basil, chopped
How to make it
- Preheat your oven to 375°F (190°C). Boil the jumbo shells in a large pot of salted water according to the package directions, but pull them out 2 minutes early. They need to be flexible enough to stuff but firm enough to hold their shape; they will finish cooking in the oven. Drain and rinse with cool water to stop the cooking process and prevent sticking.
- In a medium mixing bowl, combine the ricotta, 1.5 cups of the mozzarella, the Parmesan, the egg, minced garlic, and chopped basil. The egg acts as a binder that keeps the cheese filling from running out of the shells when heated.
- Spread 1 cup of the marinara sauce across the bottom of a 9×13 inch baking dish. This prevents the shells from sticking to the bottom and provides moisture for the pasta to finish softening.
- Using a small spoon or a piping bag, fill each cooked shell generously with the cheese mixture. Arrange the shells in the baking dish in neat rows, nestled closely together.
- Top the shells with the remaining marinara sauce and the final half-cup of mozzarella. Cover the dish with foil (tented so it doesn’t touch the cheese) and bake for 20 minutes. Remove the foil and bake for another 10-15 minutes until the cheese is bubbly and beginning to brown in spots.
How to make fluffy pancakes?

Why we love this
There is a whimsical joy in a stack of pancakes that are so thick and airy they seem to defy gravity. As they cook on the griddle, tiny bubbles form on the surface, a sign of the lightness to come. The smell of sweet batter and melting butter is the universal language of a slow, beautiful morning. When topped with a glug of real maple syrup, the pancakes soak up the amber liquid like a sponge, creating a bite that is warm, sweet, and incredibly soft.
Ingredients
- 1.5 cups all-purpose flour
- 3.5 tsp baking powder
- 1 tbsp granulated sugar
- 1/2 tsp salt
- 1.25 cups whole milk
- 1 egg
- 3 tbsp unsalted butter, melted and slightly cooled
- 1 tsp vanilla extract
How to make it
- In a large bowl, sift together the flour, baking powder, sugar, and salt. Sifting is an extra step that ensures there are no lumps and aerates the flour for maximum fluffiness.
- Make a well in the center of the dry ingredients and pour in the milk, egg, melted butter, and vanilla. Use a whisk to gently combine the ingredients. PRO TIP: Stop as soon as the streaks of flour disappear. A few lumps are essential; if the batter is perfectly smooth, you have overmixed it, and the pancakes will be chewy instead of fluffy.
- Let the batter rest for 5-10 minutes. This allows the baking powder to activate and the flour to fully hydrate, resulting in a better rise.
- Heat a non-stick griddle or large skillet over medium-low heat. Lightly coat with butter or cooking spray. Pour approximately 1/4 cup of batter onto the griddle for each pancake.
- Wait for bubbles to form on the surface and the edges to look dry and set (about 2-3 minutes). Carefully flip with a spatula. The second side only needs about 1-2 minutes to turn a beautiful golden brown. Serve in a stack to trap the heat and keep them tender.
How to grill juicy burgers?
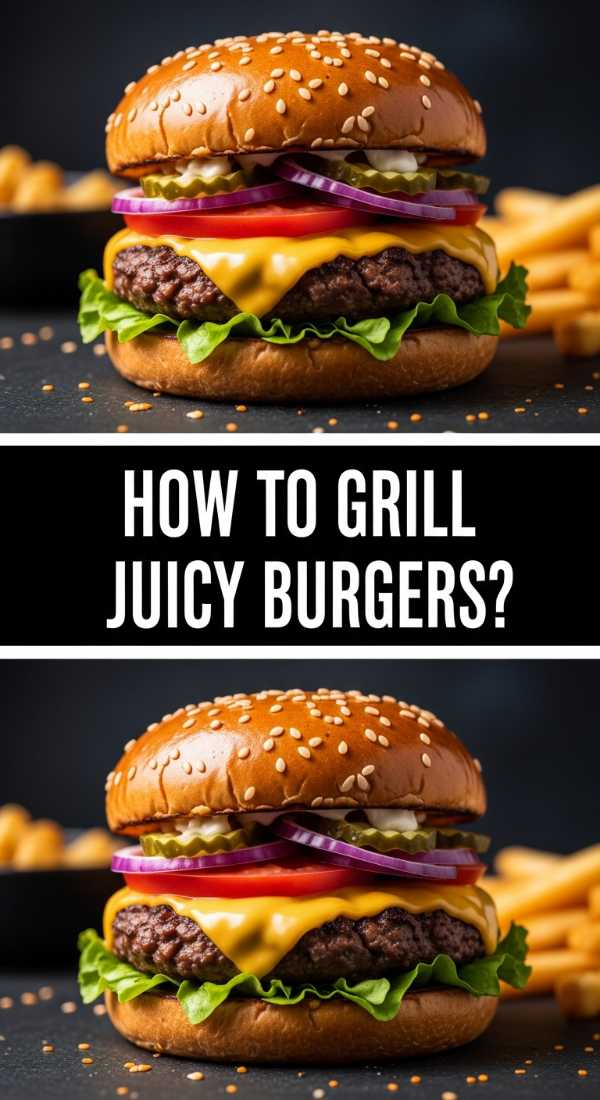
Why we love this
The experience of a grilled burger is all about the layers: the smoky char of the grill, the richness of the beef, and the sharp tang of melted cheddar. As the fat renders over the flames, it creates a savory aroma that is the hallmark of outdoor hosting. Each bite offers a satisfying heft, with juices that run down your hand (the sign of a truly great burger) and a soft, toasted brioche bun that holds everything together in a perfect, messy harmony.
Ingredients
- 1.5 lbs ground beef (80/20 fat ratio is essential)
- 4 brioche buns
- 4 slices sharp cheddar cheese
- 1 tbsp Worcestershire sauce
- 1 tsp garlic powder
- Salt and black pepper
- Butter for the buns
How to make it
- In a bowl, gently mix the ground beef with the Worcestershire sauce and garlic powder. Do not overwork the meat; handling it too much will lead to a dense, tough burger. Form into 4 even patties, about 3/4 inch thick.
- Using your thumb, make a shallow indentation in the center of each patty. This prevents the burger from ‘puffing up’ in the middle and ensures a flat surface for toppings.
- Preheat your grill to high heat (about 450°F). Season the outside of the patties generously with salt and pepper right before they hit the grates. Salt draws out moisture, so seasoning too early can dry the meat out.
- Place the patties on the grill and close the lid. Sear for 3-4 minutes without moving them to develop a deep crust. Flip once. Do not press down on the patties with a spatula, as this squeezes out the flavorful juices.
- During the last minute of cooking, place a slice of cheese on each patty and put the buttered buns on the cooler part of the grill to toast. Remove the burgers when the internal temperature hits 145°F for medium. Let them rest for 5 minutes so the juices redistribute before assembling.
How to whip garlic shrimp?
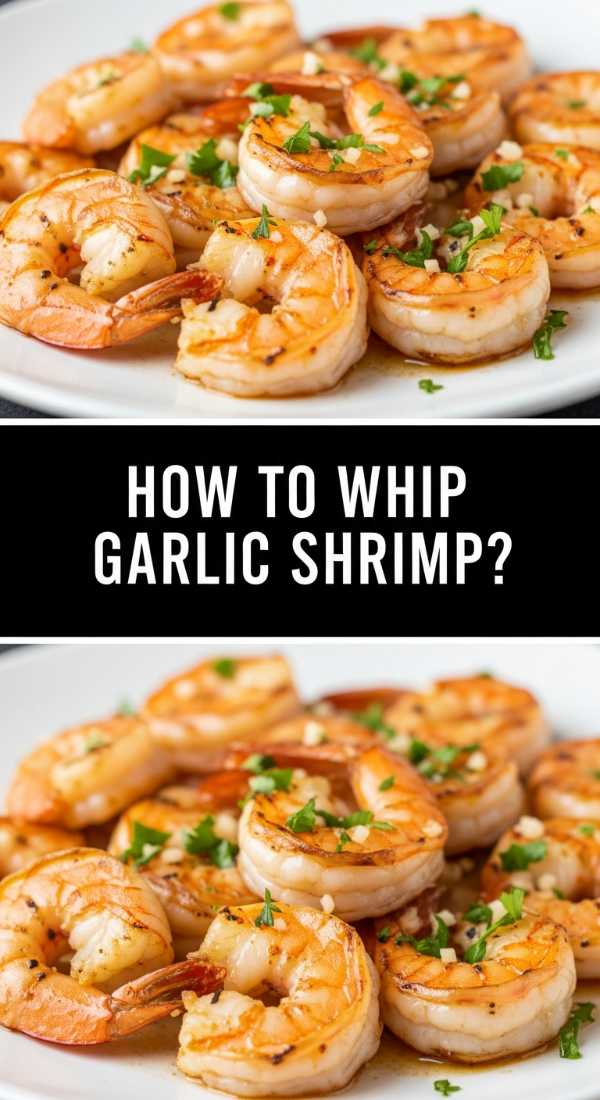
Why we love this
Garlic shrimp is a vibrant, fast-paced dish that brings a burst of coastal flavor to your board. The shrimp cook in minutes, turning from translucent grey to a bright, festive pink, while the garlic sizzles in a pool of golden butter and lemon juice. The smell is sharp, citrusy, and deeply savory, offering a light yet indulgent protein option that balances out the heavier elements of the food board. It’s a dish meant to be eaten with your fingers, dipping crusty bread into the leftover garlic butter at the bottom.
Ingredients
- 1 lb large shrimp (peeled and deveined, tail-on for presentation)
- 4 tbsp unsalted butter
- 1 tbsp olive oil
- 5 cloves garlic, minced
- 1/4 tsp red pepper flakes
- Juice of 1/2 lemon
- 2 tbsp fresh parsley, chopped
- Salt to taste
How to make it
- Pat the shrimp completely dry with paper towels. If they are wet, they will steam in the pan and won’t get that beautiful golden sear. Season lightly with salt and red pepper flakes.
- In a large skillet, heat the olive oil and 1 tablespoon of the butter over medium-high heat. The oil prevents the butter from burning at higher temperatures.
- Add the shrimp in a single layer. Cook for 1-2 minutes per side until they just turn pink and opaque. Do not overcook, or they will become rubbery and lose their sweetness. Remove the shrimp from the pan and set aside on a plate.
- Lower the heat to medium. Add the remaining 3 tablespoons of butter to the same pan. Once melted, add the minced garlic and sauté for 1 minute until fragrant. Watch closely so the garlic doesn’t turn brown.
- Pour in the lemon juice and stir to combine with the garlic butter. Return the shrimp to the pan and toss for 30 seconds to coat them thoroughly in the sauce. Garnish with fresh parsley and serve immediately while the butter is hot and glossy.
Conclusion
Creating a viral food board isn’t about being a professional chef; it’s about the joy of sharing. These ten recipes provide a roadmap to a meal that is visually stunning, incredibly delicious, and deceptively simple to pull off. By focusing on high-quality ingredients and a few key techniques, you can host a gathering that feels both luxurious and completely relaxed. So, clear off your biggest wooden board, pour some wine, and get ready to see your guests’ faces light up when you bring this masterpiece to the table.