
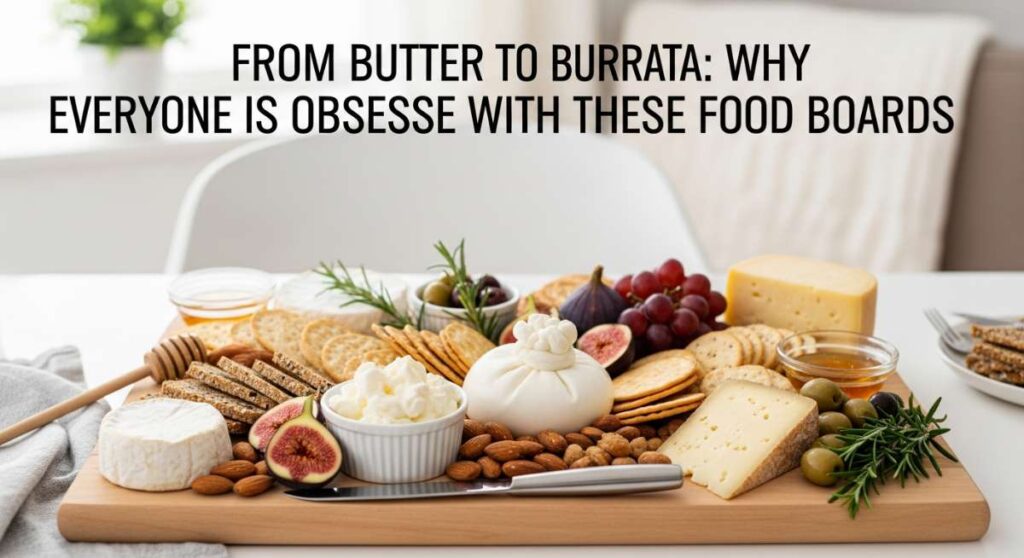
From Butter to Burrata: Why Everyone is Obsessed with These Food Boards
There is something inherently magical about a wooden board overflowing with vibrant colors, textures, and aromas that instantly turns a simple meal into a shared experience. It’s more than just food; it’s a tactile, visual celebration of the ingredients we love, stripped of the formality of traditional plating. Whether it is the viral butter boards that took our feeds by storm or a decadent pile of creamy burrata surrounded by sun-drenched tomatoes, these boards represent a return to communal eating and the joy of ‘grazing’ through a lazy afternoon.
I remember the first time I set out a massive board for my friends—it wasn’t anything fancy, just some torn bread, a few dips, and seasonal fruit—but the atmosphere in the room shifted immediately. People weren’t just eating; they were leaning in, sharing stories, and laughing as they dipped and dolloped. In this post, we’re diving deep into the art of the board and how you can transform simple summer ingredients into viral-worthy masterpieces that taste even better than they look.
How to make creamy dip?
Why we love this
A truly exceptional creamy dip is the soul of any food board, providing a luscious, velvety base that invites you to dive in with a piece of crusty bread or a crisp veggie. Imagine the cooling sensation of whipped feta or ricotta hitting your tongue, accented by the sharp tang of lemon zest and the floral notes of high-quality olive oil. The texture should be airy and cloud-like, thick enough to hold its shape but soft enough to yield to the slightest pressure, creating a sensory experience that is both comforting and sophisticated.
Ingredients
- 16 oz Whole milk ricotta or feta cheese
- 2 tbsp Extra virgin olive oil
- 1 tsp Lemon zest
- 1 tbsp Local honey
- 1/2 tsp Flaky sea salt
- Fresh thyme sprigs for garnish
How to make it
- Begin by ensuring your cheese is at room temperature; this is crucial for achieving that ultra-smooth, non-grainy texture. Place the cheese into a high-speed food processor or a heavy-duty blender.
- Add the olive oil and lemon zest. Start pulsing the mixture on a low setting to break up the large chunks, then gradually increase to high speed.
- Process the mixture continuously for at least 3 to 4 minutes. You are looking for the cheese to aerate and double slightly in volume, turning into a silky, pale cream. If it looks gritty, keep going.
- Once smooth, use a silicone spatula to swirl the dip onto a wooden board or shallow bowl, creating deep ‘valleys’ and ‘peaks’ with the back of a spoon.
- Drizzle the honey into the valleys you created and sprinkle the flaky sea salt and fresh thyme over the top. Serve immediately for the best texture.
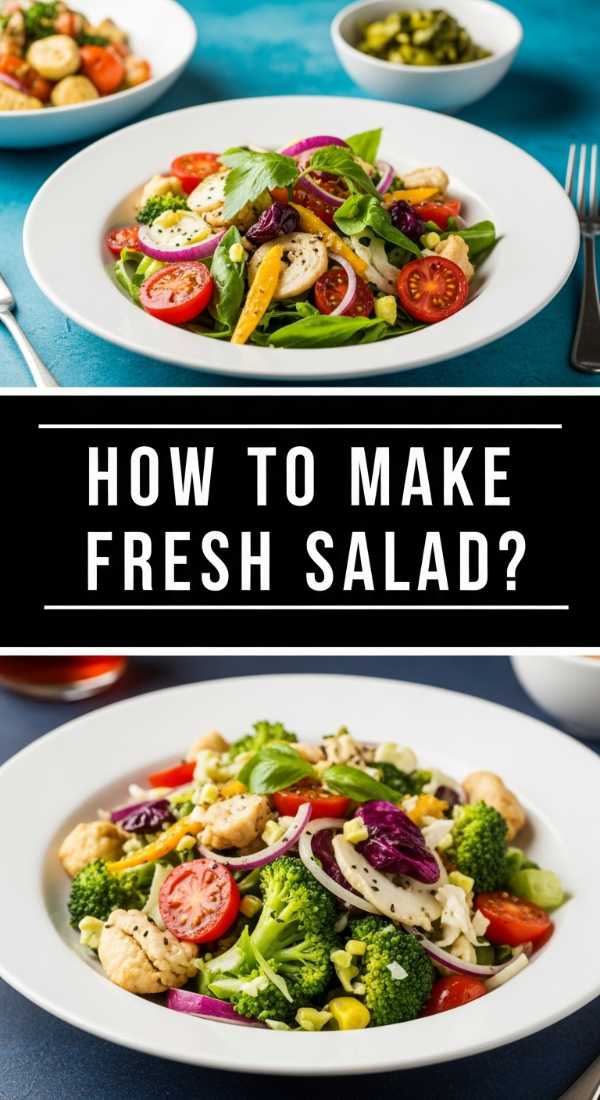
How to make fresh salad?
Why we love this
There is nothing quite like the crunch of peak-season produce to wake up your palate and bring a burst of sunshine to your board. A fresh summer salad should be a riot of textures: the snap of cucumber, the juicy explosion of heirloom tomatoes, and the buttery softness of avocado all mingling in a bright, herbaceous dressing. The aroma of freshly torn basil and mint leaves creates an olfactory bridge to the garden, making every bite feel like a celebration of the earth’s bounty.
Ingredients
- 3 Large heirloom tomatoes (multi-colored)
- 2 Persian cucumbers, thinly sliced
- 1 Ripe avocado, cubed
- 1/4 Cup red onion, paper-thin slivers
- 1/2 Cup fresh basil and mint leaves
- 3 tbsp Balsamic glaze
How to make it
- Start by slicing your heirloom tomatoes into various shapes—some wedges, some thick rounds—to add visual interest to the board. Place them on a paper towel for 2 minutes to absorb excess moisture so the board doesn’t get soggy.
- Whisk together your dressing in a small jar using 3 parts olive oil to 1 part white balsamic vinegar, a pinch of salt, and cracked black pepper. Shake vigorously until emulsified.
- Arrange the tomatoes and sliced cucumbers in a cascading pattern across the center of your board, tucking the avocado cubes into the crevices.
- Scatter the paper-thin red onion slivers over the top; the thinness ensures they provide a sharp bite without overpowering the delicate fruit.
- Just before serving, tear the basil and mint leaves by hand rather than chopping them with a knife to prevent bruising and preserve their vibrant green color. Scatter them generously and finish with a heavy drizzle of balsamic glaze.
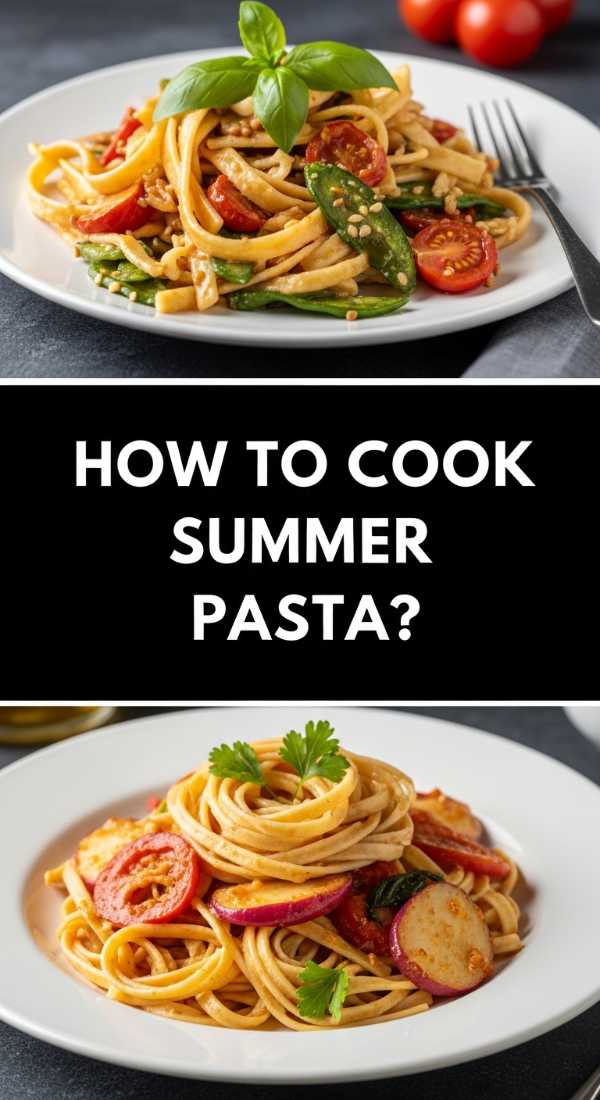
How to cook summer pasta?

Why we love this
Summer pasta is all about lightness and the perfect ‘al dente’ bite that stands up to the heat of the season. When cooked correctly, the pasta acts as a canvas for a silken sauce made of butter, lemon, and the natural juices of blistered tomatoes that pop in your mouth like little savory candies. The smell of garlic sautéing in golden butter combined with the scent of toasted pine nuts creates an intoxicating kitchen atmosphere that signals a meal worth lingering over.
Ingredients
- 1 lb Linguine or Tagliatell
- 2 cups Cherry tomatoes
- 4 cloves Garlic, thinly sliced
- 4 tbsp Unsalted butter
- 1/2 cup Freshly grated Parmesan
- 1/2 cup Reserved pasta water
How to make it
- Bring a large pot of heavily salted water (it should taste like the sea) to a rolling boil. Add your pasta and cook for exactly 2 minutes less than the package instructions; it will finish cooking in the sauce.
- While the pasta boils, place a large skillet over medium heat and melt the butter until it begins to foam. Add the cherry tomatoes and cook undisturbed for 3 minutes until the skins begin to char and burst.
- Add the sliced garlic to the skillet. Stir constantly for about 1 minute until the garlic is golden and fragrant, being careful not to let it burn, which would turn the sauce bitter.
- Using tongs, transfer the pasta directly from the water into the skillet. The small amount of water clinging to the noodles is essential for the sauce.
- Pour in 1/2 cup of the starchy pasta water and the Parmesan cheese. Toss vigorously over medium-high heat for 2 minutes. The water and cheese will emulsify with the butter to create a glossy, cream-like coating on every strand. Serve piled high on a platter.
How to grill juicy kabobs?

Why we love this
Grilling kabobs is a masterclass in contrasting textures—the smoky, charred exterior of the meat meeting the tender, succulent interior that gushes with savory juices. There is a primal satisfaction in the scent of woodsmoke and searing protein wafting through the air as the sugars in the marinade caramelize into a sticky, dark glaze. Each bite is a perfectly portioned harmony of protein and charred vegetables, making it the ultimate finger food for a high-end social board.
Ingredients
- 1.5 lbs Sirloin steak or Chicken breast, cubed
- 1 Red bell pepper, cut into 1-inch squares
- 1 Red onion, cut into wedges
- 1/2 cup Soy sauce or Balsamic marinade
- 2 tbsp Smoked paprika
- Metal or soaked wooden skewers
How to make it
- Marinate your protein for at least 4 hours (ideally overnight) in a mixture of oil, acid (like vinegar or citrus), and spices. This breaks down the fibers, ensuring the meat stays juicy under high heat.
- Thread the skewers, alternating between meat and vegetables. Leave a tiny bit of space between each piece; if they are packed too tightly, the heat can’t circulate, and the meat will steam rather than sear.
- Preheat your grill to high (about 450°F). Clean the grates thoroughly and oil them using a folded paper towel dipped in vegetable oil held by tongs.
- Place the skewers on the grill. Let them sear undisturbed for 4-5 minutes until a dark crust forms and they release easily from the grate. If they stick, they aren’t ready to turn yet.
- Flip and cook for another 3-4 minutes. Use a meat thermometer to ensure chicken reaches 165°F or steak reaches your desired doneness (135°F for medium-rare). Rest for 5 minutes before placing on your serving board to allow juices to redistribute.
How to bake summer desserts?

Why we love this
A summer dessert board is defined by the rustic charm of stone fruits and berries that have been softened by heat until they are jammy and concentrated in flavor. The contrast between a flaky, buttery crust that shatters upon impact and the warm, bubbling fruit filling is nothing short of heavenly. When these desserts emerge from the oven, they fill the home with the scent of toasted sugar and vanilla, offering a sweet, tactile end to a shared meal that guests can simply pull apart with their hands.
Ingredients
- 2 cups Fresh berries or sliced peaches
- 1/2 cup Granulated sugar
- 1 tbsp Cornstarch
- 1 sheet Refrigerated pie crust or puff pastry
- 1 Egg (for egg wash)
- Coarse sanding sugar
How to make it
- Preheat your oven to 400°F (200°C). In a medium bowl, toss your fruit with the sugar and cornstarch. The cornstarch is vital as it thickens the fruit juices, preventing a ‘soggy bottom’ on your pastry.
- Roll out your pastry onto a piece of parchment paper. Pile the fruit into the center, leaving a 2-inch border all the way around.
- Fold the edges of the pastry over the fruit, pleating it as you go to create a rustic ‘galette’ look. The center should remain open so the steam can escape and the fruit can reduce.
- Beat the egg with a splash of water and brush the pastry edges generously. This creates that deep golden-brown, professional shine. Sprinkle the coarse sugar over the wet egg wash for a delightful crunch.
- Bake for 25-30 minutes until the crust is a deep mahogany gold and the fruit is bubbling vigorously in the center. Allow to cool for 15 minutes before sliding the whole galette onto your dessert board.
How to make chilled soup?

Why we love this
Chilled soup, like a classic gazpacho, is the ultimate refresher for a mid-summer board, acting as a vibrant, drinkable salad that cools the palate. The texture should be a sophisticated balance of completely smooth liquid accented by a fine dice of crunchy vegetables for contrast. Its bright, acidic profile, heightened by high-quality vinegar and raw garlic, provides a sharp, clean counterpoint to the richer, fattier elements of a charcuterie spread.
Ingredients
- 2 lbs Ripe red tomatoes
- 1 Red bell pepper, deseeded
- 1 Cucumber, peeled
- 2 cloves Garlic
- 2 tbsp Sherry vinegar
- 1/3 cup Extra virgin olive oil
How to make it
- Roughly chop all the vegetables and place them in a large bowl. Sprinkle with a teaspoon of salt and let them sit for 30 minutes. This ‘macerating’ process draws out the juices and intensifies the flavor before blending.
- Transfer the vegetables and all their accumulated juices into a blender. Add the garlic and sherry vinegar.
- Blend on high speed until completely liquified. While the blender is running on a lower speed, slowly stream in the olive oil. This creates a stable emulsion, giving the soup a creamy, orange-tinted hue and a silky mouthfeel.
- Pass the liquid through a fine-mesh sieve into a clean bowl, using the back of a spoon to push through all the pulp. Discard the remaining solids for a professional, smooth finish.
- Chill in the refrigerator for at least 4 hours—gazpacho is best served ice-cold. Serve in small glass votives or shooters placed directly on your food board for easy grabbing.
How to prep summer meals?

Why we love this
Prepping for a board-style meal is an exercise in organization that rewards you with a stress-free hosting experience. By preparing various components—pickled onions, roasted nuts, and marinated cheeses—in advance, you allow flavors to meld and deepen over time. There is a quiet satisfaction in opening a fridge full of prepped containers, knowing that the only thing left to do is the ‘artistic assembly’ of the board itself, allowing you to actually spend time with your guests.
Ingredients
- Assorted hard and soft cheeses
- Cured meats (Prosciutto, Salami)
- Marinated olives
- Pickled red onions
- Toasted nuts and dried fruits
How to make it
- Create a ‘prep timeline’ starting 24 hours in advance. Begin by marinating items like olives or feta in oil and herbs; the longer they sit, the more the flavors penetrate.
- Pickle your vegetables (onions, radishes, or carrots) the night before. Simmer equal parts vinegar and water with sugar and salt, pour over the veggies, and refrigerate. This gives them a bright pink hue and a sharp tang.
- Toast your nuts in a dry skillet over medium heat for 3-5 minutes until they smell nutty and turn golden. Let them cool completely before storing in an airtight container to maintain crunch.
- Wash and dry all greens and fruits thoroughly. Any moisture left on them will cause other items on the board (like crackers or bread) to lose their texture. Wrap them in dry paper towels and store in zip-top bags.
- Two hours before serving, take your cheeses out of the fridge. Cheese served at room temperature has a significantly better flavor profile and texture than cold cheese. Assemble the board 20 minutes before guests arrive.
How to make picnic sides?

Why we love this
Picnic sides are the unsung heroes of the food board, offering portable, sturdy bites that hold up beautifully even after an hour in the sun. We love them for their versatility—think of a charred corn salad with lime and cotija cheese that brings a smoky, salty, and zesty punch to the mix. These sides provide the essential ‘bulk’ to a board, ensuring that it feels like a full, satisfying meal rather than just a collection of snacks.
Ingredients
- 4 ears of Fresh corn
- 1/4 cup Crumbled Cotija cheese
- 2 tbsp Mayonnaise or Greek yogurt
- 1 tsp Chili powder
- Fresh cilantro, chopped
- Lime wedges
How to make it
- Shuck the corn and remove all the silk. Place the cobs directly over a medium-high gas flame or on a hot grill. Rotate every 2 minutes until the kernels are charred and blackened in spots all the way around.
- Let the corn cool slightly, then stand each cob upright in a large bowl. Use a sharp knife to saw downward, stripping the kernels from the cob. The bowl will catch the kernels and prevent them from flying across the counter.
- Add the mayonnaise (or yogurt), chili powder, and half of the cilantro. Toss while the corn is still warm so the flavors meld together into a creamy, slightly smoky dressing.
- Fold in the Cotija cheese gently so it doesn’t completely melt. The cheese adds a necessary salty, dry texture that balances the sweet corn.
- Transfer to a small bowl and place on the corner of your board. Garnish with the remaining cilantro and serve with lime wedges for an extra hit of acidity.
How to mix summer drinks?

Why we love this
No food board is complete without a signature summer drink that mirrors the seasonal flavors on the platter. A perfectly mixed drink, like a peach and basil smash, is a symphony of muddled fruit, aromatic herbs, and sparkling effervescence. The visual of condensation dripping down a glass filled with ice and colorful garnishes is the ultimate cooling cue, while the scent of bruised basil provides a sophisticated, savory edge to a sweet fruit base.
Ingredients
- 1 Ripe peach, sliced
- 5-6 Fresh basil leaves
- 1 oz Simple syrup
- 2 oz White rum or Gin (optional)
- Club soda or Sparkling water
- Plenty of crushed ice
How to make it
- Place 3 peach slices and the basil leaves into a sturdy glass or a cocktail shaker. Add the simple syrup.
- Use a muddler (or the back of a wooden spoon) to firmly press down and twist. You want to pulverize the peach to release its juices and bruise the basil to release its essential oils without shredding the leaves into tiny bits.
- If using alcohol, add the rum or gin now. Fill the shaker with ice and shake vigorously for 15 seconds until the outside of the metal feels frosty.
- Strain the mixture into a glass filled with fresh crushed ice. Using fresh ice for serving (rather than the ice used for shaking) prevents the drink from becoming watered down too quickly.
- Top with club soda and stir gently with a long spoon to integrate the flavors. Garnish with a fresh sprig of basil and a thin peach slice, and place the drinks alongside your board for a cohesive look.
How to make party sandwiches?
[IMAGE_10]
Why we love this
Party sandwiches—specifically mini focaccia slabs or sliders—are the perfect vessel for taking the board’s flavors and turning them into a cohesive, hand-held bite. The feeling of a soft, oil-rich focaccia yielding to layers of salty prosciutto, creamy mozzarella, and sweet fig jam is pure indulgence. These sandwiches are designed to be beautiful enough to sit center-stage, often topped with microgreens or a drizzle of honey, making them the ‘main event’ of any viral-style food spread.
Ingredients
- 1 loaf Fresh Focaccia bread
- 1/4 lb Thinly sliced Prosciutto di Parma
- 8 oz Fresh Mozzarella, sliced
- 1/4 cup Fig jam or balsamic onion jam
- Handful of Arugula
- Extra virgin olive oil for drizzling
How to make it
- Slice the entire loaf of focaccia horizontally to create one large top and bottom piece. This method ensures even distribution of fillings and makes it easier to cut into uniform squares later.
- Spread a generous, even layer of fig jam across the bottom half of the bread. The jam acts as a ‘glue’ and provides a sweet counterpoint to the salty meat.
- Layer the fresh mozzarella slices over the jam, followed by the prosciutto. When adding the prosciutto, ‘ribbon’ the meat by folding it loosely rather than laying it flat; this adds height and creates a lighter, airier texture.
- Top with a handful of peppery arugula and a light drizzle of olive oil and a pinch of salt. Place the top half of the focaccia back on.
- Use a long, serrated bread knife to cut the large sandwich into small 2-inch squares. Use a gentle sawing motion rather than pressing down, which would squish the bread. Secure each square with a bamboo pick and arrange them in a neat row or a circular pattern on your board.
Conclusion
Creating a viral-worthy food board isn’t about perfection; it’s about the soul of the ingredients and the love of the process. From the creamy swirls of a hand-whipped dip to the smoky char of perfectly grilled kabobs, every element adds a chapter to a delicious story you’re sharing with your favorite people. So, grab your largest wooden board, head to the farmer’s market, and let your creativity run wild. After all, the best meals aren’t just eaten—they are experienced. Happy grazing!