

There is something undeniably magical about the moment you set a beautifully prepared board down in the center of a table. It’s not just about the food; it’s about that collective ‘ooh’ from your friends, the way the room instantly feels warmer, and the immediate sense of connection that happens when everyone starts reaching for their favorite bite. For years, I struggled with the pressure of hosting, trying to time three different courses perfectly, only to end up exhausted in the kitchen while my guests laughed in the other room. Everything changed when I embraced the ‘viral food board’ philosophy—a relaxed, stunning way to serve delicious staples that look like a million bucks but feel like home.
The secret to a truly viral food board isn’t about expensive ingredients; it’s about the variety of textures and the stories each dish tells. Whether it’s the nostalgic scent of a bubbling cheese dip or the vibrant, zesty crunch of a fresh salad, these boards represent a lifestyle of abundance and ease. In this guide, I’m sharing my ultimate favorites that have not only won over my dinner guests but have also taken the internet by storm. From savory kabobs to the simplest refreshing drinks, these are the recipes that will make your next gathering unforgettable.
How to make rotel dip?

Why we love this
This dip is the ultimate comfort food, bringing a creamy, spicy, and savory explosion to every single chip it touches. We love it because it’s a nostalgic crowd-pleaser that evokes memories of game days and late-night kitchen chats, with its golden, velvety cheese base and the punchy kick of green chilies. The aroma of browned meat mingling with melted cheese is enough to draw anyone into the kitchen, and the way it stays warm and gooey makes it the undisputed star of any snack board. It’s thick, indulgent, and has just the right amount of heat to keep you coming back for just one more scoop.
Ingredients
- 1 lb Ground Beef or Breakfast Sausage
- 1 block (32 oz) Velveeta Cheese, cubed
- 2 cans (10 oz) Ro-Tel Diced Tomatoes and Green Chilies
- 1/2 cup Milk (optional, for creaminess)
- Fresh Cilantro for garnish
- Tortilla chips for serving
How to make it
- Begin by browning your ground beef or sausage in a large skillet over medium-high heat. Use a wooden spoon to break the meat into small, even crumbles to ensure a consistent texture throughout the dip.
- Cook the meat until it is thoroughly browned and no pink remains, usually taking about 7-10 minutes. Once cooked, drain the excess fat carefully to prevent the dip from becoming oily.
- Lower the heat to medium-low and add the cubed Velveeta cheese to the skillet. It is crucial to cut the cheese into small, uniform cubes so that it melts evenly without scorching.
- Pour in both cans of Ro-Tel, including the juices. The acidity from the tomatoes helps balance the richness of the cheese.
- Stir the mixture constantly with a spatula. If you prefer a thinner consistency, slowly whisk in the milk until you reach your desired silkiness.
- Continue stirring until the cheese is completely smooth and bubbling slightly. This usually takes about 5-8 minutes.
- Transfer the dip to a slow cooker on the ‘warm’ setting for serving, and garnish with fresh cilantro to add a pop of color and freshness.
How to make hummingbird nectar?

Why we love this
Creating your own hummingbird nectar is one of those simple lifestyle joys that connects your home directly to the vibrant energy of nature. There is something deeply peaceful about watching these tiny, iridescent jewels zip through your garden, and knowing you’ve provided them with a clean, energy-rich fuel source makes it even more rewarding. The clear liquid mimics the natural nectar found in flowers, providing a shimmering invitation for wildlife to visit your patio or balcony. It’s a beautiful, minimal-effort way to enhance your outdoor ambiance while supporting the local ecosystem with a treat they truly adore.
Ingredients
- 1 cup Granulated White Sugar
- 4 cups Filtered Water
- A small saucepan
- Hummingbird feeder
How to make it
- Measure out 4 cups of filtered water and pour it into a clean saucepan. Using filtered water ensures there are no harsh chemicals like chlorine that could harm the delicate birds.
- Bring the water to a light boil over medium heat. You don’t need a rolling boil; just enough heat to ensure the sugar dissolves completely and any impurities in the water are neutralized.
- Once the water reaches a boil, remove it from the heat and stir in 1 cup of white granulated sugar. It is vital to use only white sugar, as honey can grow mold and organic/brown sugars contain iron levels that are toxic to hummingbirds.
- Stir vigorously until the water is completely clear and no sugar crystals remain at the bottom of the pan.
- Allow the mixture to cool completely to room temperature. Filling a feeder with hot liquid can warp the plastic or glass and potentially injure the birds.
- Pour the cooled nectar into your feeder and store any leftovers in a clean jar in the refrigerator for up to two weeks. Change the nectar in your feeder every 3-5 days to keep it fresh and safe.
How to cook summer pasta?

Why we love this
Summer pasta is the embodiment of seasonal lightness, trading heavy cream sauces for the bright, zesty notes of citrus and fresh herbs. We love this dish because it feels sophisticated yet takes mere minutes to assemble, making it perfect for those golden-hour dinners on the deck. The texture is a beautiful contrast between the silkiness of al dente noodles and the burst of juicy, blistered cherry tomatoes, all tied together by a fragrant garlic-infused oil. It’s the kind of meal that smells like a Mediterranean vacation, filling the air with the scent of basil and lemon zest while leaving you feeling energized rather than weighed down.
Ingredients
- 12 oz Spaghetti or Linguine
- 1 pint Cherry Tomatoes, halved
- 3 cloves Garlic, thinly sliced
- 1/4 cup Extra Virgin Olive Oil
- 1/2 cup Fresh Basil leaves, torn
- 1/2 cup Parmesan cheese, freshly grated
- Zest and juice of 1 Lemon
- Red pepper flakes (optional)
How to make it
- Bring a large pot of heavily salted water to a boil. Adding plenty of salt is your only chance to season the pasta itself; it should taste like the sea.
- Add the pasta and cook it for 1-2 minutes less than the package instructions. This ensures it stays ‘al dente’ and can finish cooking in the sauce without becoming mushy.
- While the pasta cooks, heat the olive oil in a large skillet over medium heat. Add the sliced garlic and red pepper flakes, sautéing for about 2 minutes until the garlic is golden and fragrant but not burnt.
- Add the halved cherry tomatoes to the skillet with a pinch of salt. Cook them for 4-5 minutes, stirring occasionally, until they begin to soften and release their juices into the oil.
- Before draining the pasta, reserve 1 cup of the starchy pasta water—this is the ‘liquid gold’ that creates a cohesive sauce.
- Transfer the pasta directly into the skillet with the tomatoes. Pour in half of the reserved pasta water, the lemon juice, and the lemon zest.
- Toss everything together vigorously over medium heat, adding more pasta water as needed, until a light, glossy sauce coats every strand.
- Remove from heat, fold in the fresh basil and Parmesan cheese, and serve immediately with an extra drizzle of olive oil.
How to make cucumber salad?
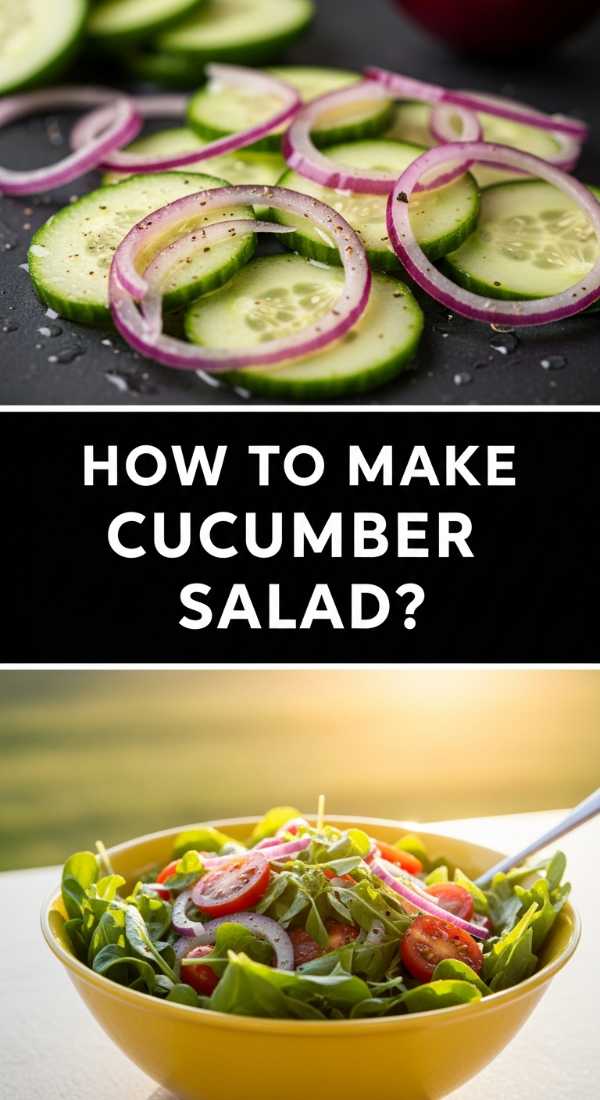
Why we love this
This cucumber salad is the ultimate palate cleanser, offering a crisp, cooling crunch that provides the perfect counterpoint to any grilled meat or spicy dish. We love it for its sheer simplicity and the way the thin, translucent slices of cucumber soak up the tangy, slightly sweet vinegar dressing. The addition of red onion provides a sharp bite, while fresh dill adds a grassy, aromatic depth that makes the whole dish feel incredibly garden-fresh. It’s a vibrant, hydrating side that looks beautiful on a board, with its bright green hues and the delicate speckles of herbs catching the light.
Ingredients
- 2 large English Cucumbers, thinly sliced
- 1/2 Red Onion, thinly sliced into half-moons
- 1/2 cup White Wine Vinegar or Apple Cider Vinegar
- 2 tbsp Granulated Sugar
- 1 tsp Salt
- 1/2 tsp Black Pepper
- 3 tbsp Fresh Dill, chopped
How to make it
- Start by slicing the English cucumbers into very thin rounds. Using a mandoline slicer is recommended here to achieve paper-thin slices that will absorb the dressing quickly and evenly.
- Place the sliced cucumbers in a colander and sprinkle with the salt. Let them sit for about 10 minutes to draw out excess moisture, which prevents the salad from becoming watery later.
- While the cucumbers rest, whisk together the vinegar, sugar, and black pepper in a large mixing bowl until the sugar is completely dissolved.
- Pat the cucumbers dry with a paper towel and add them to the bowl along with the thinly sliced red onions.
- Toss the vegetables thoroughly in the dressing, ensuring every slice is well-coated.
- Fold in the fresh chopped dill. Using fresh herbs instead of dried makes a significant difference in the final aroma of the dish.
- Cover and refrigerate the salad for at least 30 minutes before serving. This chilling time allows the flavors to meld and the cucumbers to become even more crisp and refreshing.
How to grill summer kabobs?
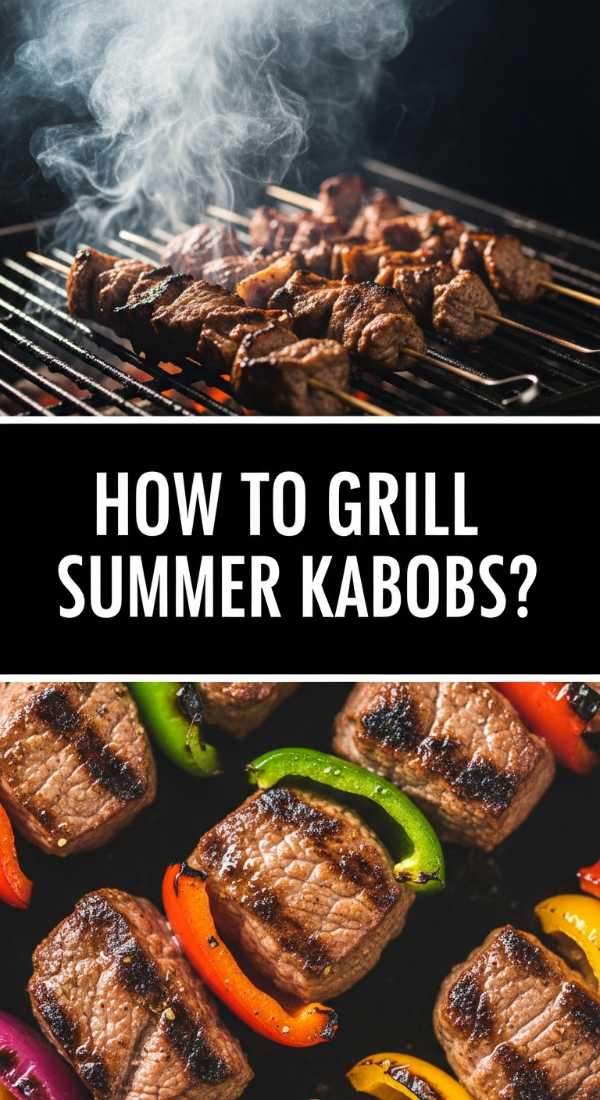
Why we love this
Kabobs are the quintessential summer food because they turn dinner into a colorful, interactive experience that feels like a celebration. We love the way the high heat of the grill caramelizes the edges of the vegetables and sears the meat, locking in juices while adding a smoky, charred depth of flavor. There’s something so satisfying about the ‘perfect bite’—a piece of tender protein followed by a sweet burst of bell pepper and a savory chunk of onion. They look stunning arranged on a board, showing off a rainbow of colors and textures that invite everyone to grab a stick and start eating.
Ingredients
- 1.5 lbs Top Sirloin or Chicken Breast, cut into 1-inch cubes
- 2 Bell Peppers (different colors), cut into chunks
- 1 Red Onion, cut into large wedges
- 1 Zucchini, sliced into thick rounds
- 1/2 cup Soy Sauce
- 1/4 cup Olive Oil
- 2 tbsp Honey
- 3 cloves Garlic, minced
- Wooden or metal skewers
How to make it
- If using wooden skewers, soak them in water for at least 30 minutes prior to use to prevent them from burning or catching fire on the grill.
- In a large bowl, whisk together the soy sauce, olive oil, honey, and minced garlic to create a marinade. Add the cubed meat and toss to coat. Let it marinate in the refrigerator for at least 1 hour, or up to 4 hours for maximum flavor.
- Preheat your grill to medium-high heat (about 400°F). Ensure the grates are clean and lightly oiled to prevent sticking.
- Assemble the kabobs by threading the meat and vegetables onto the skewers in an alternating pattern. Don’t pack them too tightly; leaving a tiny bit of space between pieces allows the heat to circulate and cook everything evenly.
- Place the kabobs on the grill. Cook for about 10-12 minutes, turning them a quarter-turn every 3 minutes.
- Look for deep sear marks and ensure the meat has reached its safe internal temperature (145°F for beef, 165°F for chicken). The vegetables should be tender with slightly charred edges.
- Remove from the grill and let them rest for 5 minutes before serving to allow the juices in the meat to redistribute.
How to cook healthy meals?
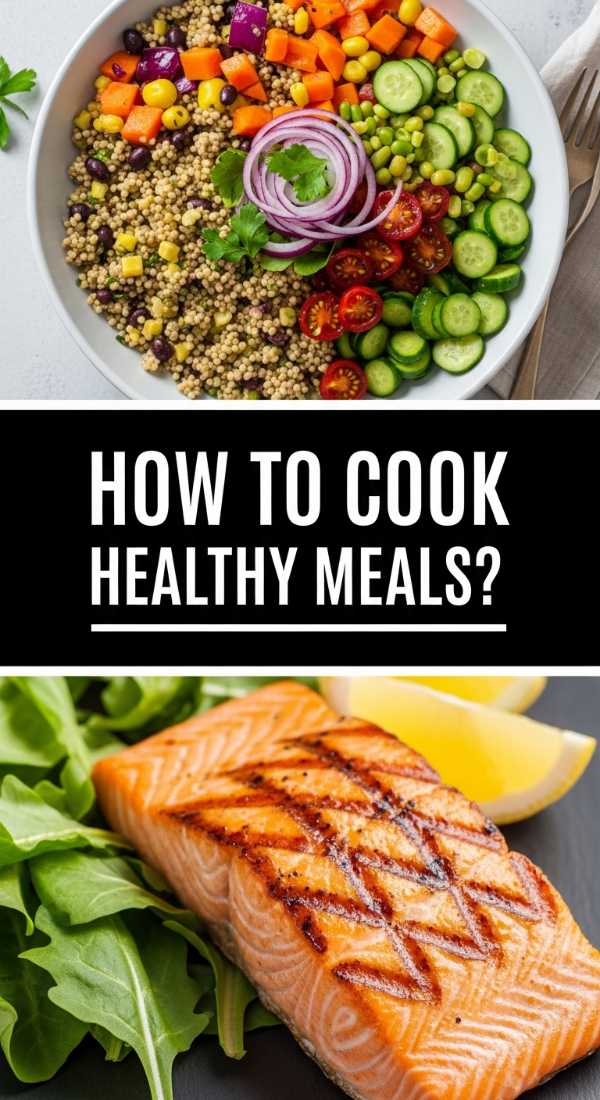
Why we love this
Healthy cooking doesn’t have to be boring; in fact, it’s an opportunity to celebrate the natural, vibrant flavors of whole foods. We love the approach of ‘bowl-style’ healthy meals because they are infinitely customizable, visually stunning, and leave you feeling nourished and light. The combination of a hearty grain, a lean protein, and an array of colorful vegetables provides a symphony of textures—from the chew of quinoa to the snap of raw radishes. It’s a mindful way of eating that focuses on abundance rather than restriction, filling your plate with antioxidants and energy while looking absolutely gorgeous on a shared board.
Ingredients
- 1 cup Dry Quinoa or Brown Rice
- 2 Roasted Sweet Potatoes, cubed
- 1 cup Chickpeas, drained and rinsed
- 2 cups Baby Spinach or Kale
- 1 Avocado, sliced
- 1/4 cup Lemon-Tahini Dressing
- Pumpkin seeds or Sprouts for garnish
How to make it
- Start by cooking your base grain. For quinoa, rinse it thoroughly, then simmer with 2 cups of water or broth for 15 minutes. Let it sit covered for 5 minutes after cooking, then fluff it with a fork to keep it light and airy.
- Prepare your roasted elements. Toss cubed sweet potatoes in olive oil, salt, and paprika, and roast at 400°F for 20-25 minutes until tender and caramelized on the outside.
- Prepare your protein. If using chickpeas, you can serve them raw for a creamy texture or toss them in a pan with a little cumin and olive oil for 5 minutes to give them a warm, spiced exterior.
- Wash and dry your leafy greens. If using kale, massage it with a tiny bit of olive oil and salt for 2 minutes to soften the fibers and make it more palatable.
- Assemble the components in distinct sections on a large board or platter. This ‘deconstructed’ look is what makes it viral-ready and allows guests to build their own perfect portion.
- Add the fresh elements last, such as the sliced avocado and sprouts, to ensure they don’t brown or wilt.
- Drizzle the lemon-tahini dressing over everything just before serving, or provide it in a small bowl on the side for dipping.
How to bake summer desserts?

Why we love this
Summer desserts are all about letting the fruit do the heavy lifting, with buttery, flaky crusts acting as the perfect vessel for seasonal sweetness. We love a rustic galette because it’s purposefully imperfect, feeling cozy and artisanal rather than fussy. The aroma of bubbling berries or peaches mingling with cinnamon and butter filling the kitchen is the ultimate sign of a summer afternoon well spent. Each bite offers a crunch of sugar-coated crust followed by the jammy, concentrated flavor of sun-ripened fruit, making it the perfect centerpiece for a dessert board accompanied by a scoop of melting vanilla bean ice cream.
Ingredients
- 1 Refrigerated Pie Crust (or homemade)
- 3 cups Fresh Berries (Blueberries, Raspberries, or Blackberries)
- 1/3 cup Granulated Sugar
- 1 tbsp Cornstarch
- 1 tsp Lemon Juice
- 1 Egg (for egg wash)
- Turbinado sugar for topping
How to make it
- Preheat your oven to 400°F and line a large baking sheet with parchment paper to prevent sticking and catch any fruit juices that might bubble over.
- In a large bowl, gently toss your fresh berries with the granulated sugar, cornstarch, and lemon juice. The cornstarch is essential as it thickens the fruit juices into a glossy sauce during baking.
- Roll out your pie crust on the parchment paper until it’s roughly a 12-inch circle. It doesn’t have to be a perfect circle; the rustic edges are part of the charm.
- Mound the fruit mixture into the center of the dough, leaving a 2-inch border all the way around the edge.
- Carefully fold the edges of the dough up and over the fruit, pleating it as you go. The center should remain open so the fruit can roast and the steam can escape.
- Beat the egg with a tablespoon of water and brush the crust lightly with the egg wash. This is the secret to a professional-looking, golden-brown finish.
- Sprinkle the crust generously with turbinado sugar for an extra crunch.
- Bake for 25-30 minutes, or until the crust is deep golden brown and the fruit filling is bubbling thick. Let it cool for at least 15 minutes to allow the filling to set before slicing.
How to make refreshing drinks?

Why we love this
A truly refreshing drink is the soul of a summer gathering, providing a cool, sparkling reprieve from the heat. We love this watermelon-based cooler because it captures the literal essence of summer in a glass, with its vibrant pink hue and zesty, uplifting aroma. It’s light, hydrating, and just fancy enough to feel like a special occasion without any of the effort of a complicated cocktail. The combination of sweet fruit, tart citrus, and the tingle of carbonation creates a sensory experience that is both invigorating and deeply satisfying, especially when served in a glass frosted with condensation.
Ingredients
- 4 cups Cubed Seedless Watermelon (chilled)
- 1/2 cup Fresh Lemon Juice
- 2 cups Sparkling Water or Club Soda
- 2 tbsp Honey or Agave (optional)
- Fresh Mint leaves
- Ice cubes
How to make it
- Place the chilled watermelon cubes into a high-speed blender. Blend on high until the fruit is completely liquefied and smooth.
- If you prefer a perfectly clear drink, pour the watermelon puree through a fine-mesh strainer into a large pitcher to remove the pulp. For a more rustic, ‘agua fresca’ style, keep the pulp in.
- Stir in the fresh lemon juice and your sweetener of choice. Whisk until the honey or agave is fully incorporated into the cold liquid.
- Just before serving, pour in the sparkling water. Stir very gently to combine—over-stirring will cause the carbonation to dissipate, and you want those lively bubbles!
- Fill large glasses with plenty of ice. Pour the watermelon mixture over the ice until the glasses are three-quarters full.
- Garnish each glass with a sprig of fresh mint. Pro tip: slap the mint against your hand before adding it to the glass to release the essential oils and aroma.
- Add a small wedge of watermelon to the rim for a viral-worthy presentation that looks as good as it tastes.
How to make party sandwiches?

Why we love this
Party sandwiches, especially warm sliders, are the ultimate ‘grab-and-go’ food that keeps the energy of a party moving. We love them because they offer a savory, melt-in-your-mouth experience that is incredibly satisfying to eat with your hands. The contrast between the soft, pillowy rolls and the salty, melted cheese and deli meats is elevated by a savory butter glaze that crisps up in the oven. They are easy to batch-cook, meaning you can serve a dozen people at once, and they look adorable lined up on a board, glistening with herb-flecked butter and topped with a sprinkle of poppy seeds.
Ingredients
- 1 pack (12 count) Hawaiian Sweet Rolls
- 1/2 lb Sliced Deli Ham or Turkey
- 1/2 lb Sliced Swiss or Provolone Cheese
- 1/2 cup Melted Butter
- 1 tbsp Dijon Mustard
- 1 tsp Worcestershire Sauce
- 1 tbsp Poppy Seeds
- 1/2 tsp Garlic Powder
How to make it
- Preheat your oven to 350°F. Without pulling the rolls apart, use a long serrated knife to slice the entire slab of rolls in half horizontally.
- Place the bottom half of the rolls into a baking dish or on a parchment-lined sheet pan.
- Layer the sliced deli meat evenly over the bottom buns, followed by a generous layer of cheese slices. Overlapping the cheese slightly ensures every bite is gooey.
- Place the top half of the rolls back onto the meat and cheese layer.
- In a small bowl, whisk together the melted butter, Dijon mustard, Worcestershire sauce, and garlic powder. This savory glaze is what transforms basic sandwiches into ‘party’ sandwiches.
- Use a pastry brush to coat the tops of the rolls generously with the butter mixture, then sprinkle the poppy seeds evenly over the top.
- Cover the dish with aluminum foil and bake for 10 minutes. This allows the cheese to melt without the tops of the rolls burning.
- Remove the foil and bake for another 5-7 minutes until the tops are golden brown and slightly crisp. Slice into individual sliders and serve warm.
How to prepare camping meals?
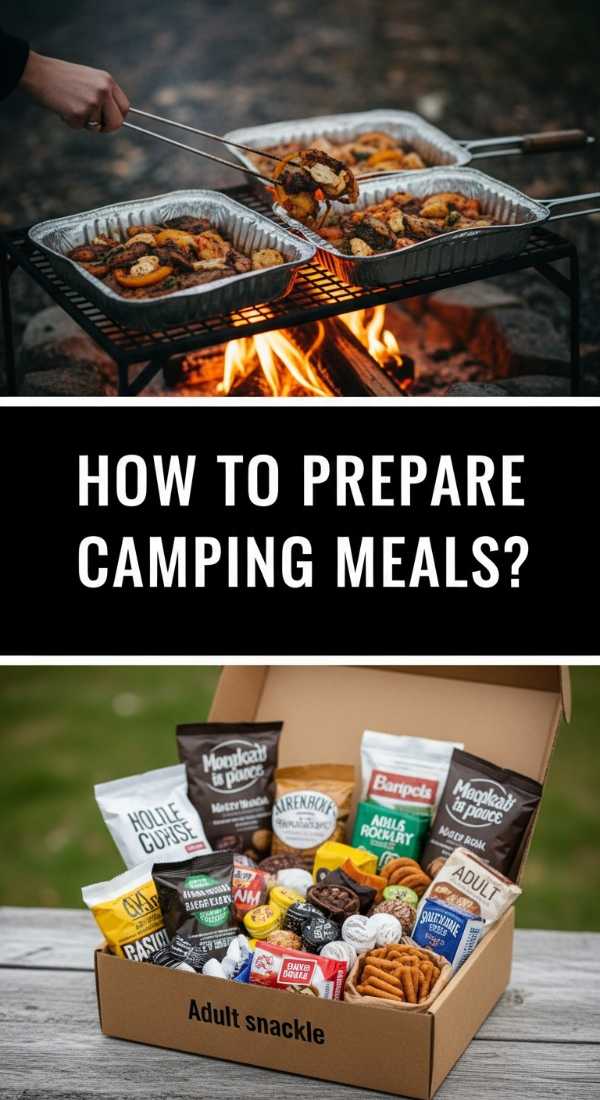
Why we love this
Camping meals are all about the romance of outdoor cooking combined with the cleverness of low-mess prep. We love foil-packet meals because they turn the campfire into a natural oven, steaming the ingredients in their own juices for a flavor that is incredibly concentrated and tender. There’s a rustic, adventurous feeling to peeling back the silver foil to reveal a bubbling, hot meal while sitting under the stars. They are the ultimate lifestyle hack for travelers, as they require zero cleanup and can be prepped at home, leaving you more time to enjoy the crisp air and the crackle of the fire.
Ingredients
- 2 Large Chicken Breasts, cubed
- 1 cup Smoked Sausage, sliced
- 2 ears of Corn, cut into 2-inch rounds
- 1/2 lb Baby Potatoes, halved
- 2 tbsp Olive Oil
- 1 tbsp Cajun seasoning or Old Bay
- Heavy-duty Aluminum Foil
How to make it
- Cut four large sheets of heavy-duty aluminum foil (about 12×12 inches). Using heavy-duty foil is critical as regular foil can tear easily over the high heat of coals.
- In a large mixing bowl, combine the cubed chicken, sliced sausage, corn, and potatoes. Drizzle with olive oil and sprinkle the seasoning over everything.
- Toss the mixture thoroughly with your hands to ensure every piece of potato and corn is coated in oil and spices.
- Divide the mixture evenly between the four sheets of foil, placing the ingredients in the center.
- Fold the sides of the foil up to meet in the middle and fold over twice to create a seal. Fold the ends in as well, ensuring there are no gaps where steam can escape.
- Place the packets directly on a grill grate over a campfire or on a bed of hot coals (not directly in the high flames).
- Cook for 20-25 minutes, carefully flipping the packets halfway through using tongs.
- To check for doneness, carefully open one packet (watch out for the hot steam!). The potatoes should be fork-tender and the chicken should be opaque and juicy. Serve directly in the foil for that authentic camping experience.
Conclusion
Hosting doesn’t have to be a high-stress performance. By focusing on these simple, viral-worthy food board ideas, you can bring a sense of warmth and abundance to your home without spending all day in the kitchen. From the sizzle of the grill to the sweet, rustic charm of a berry galette, these recipes are designed to be shared, enjoyed, and celebrated. So, grab a board, pick your favorite subtopics from this list, and get ready to create something beautiful that your friends and family will be talking about long after the last bite is gone.