
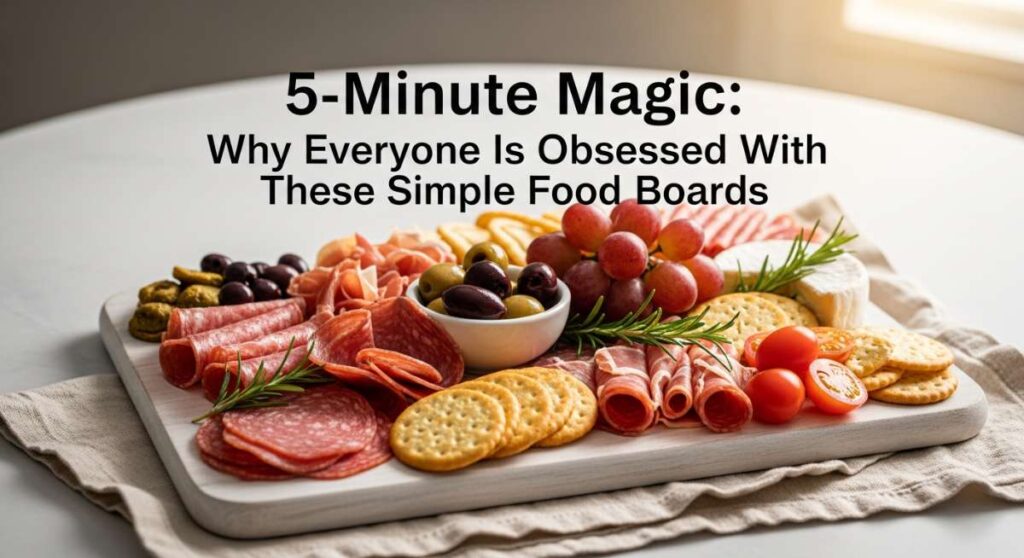
Let’s be honest: life moves way too fast lately. Between the endless pings of our phones and the hustle of our daily commutes, the last thing anyone wants to do is spend three hours over a hot stove when friends come over. That’s exactly why the world has collectively fallen in love with the ‘Food Board’ movement. It’s not just about cheese anymore; it’s about creating a shared experience that looks like a work of art but takes less time than ordering takeout.
I remember the first time I set down a massive, colorful board instead of a plated meal. The air in the room instantly changed. Instead of everyone sitting stiffly, there was reaching, laughing, and ‘you have to try this’ moments. It’s a low-pressure way to eat that celebrates freshness and variety. Today, I’m sharing my favorite viral board inspirations that will make you the hero of every summer gathering without breaking a sweat.
7 Best Summer Crockpot Recipes (Step-by-Step Guide)

Why we love this
There is something deeply satisfying about the aroma of slow-cooked BBQ chicken wafting through a house cooled by the AC. This board features tender, shredded chicken that literally melts in your mouth, paired with the cool, crisp snap of homemade coleslaw and buttery toasted sliders. The contrast between the smoky, tangy sauce and the sweet, yeasty rolls creates a symphony of textures that feels like a backyard party in every bite, all while you spend your afternoon by the pool instead of in the kitchen.
Ingredients
- 2 lbs boneless skinless chicken breasts
- 1.5 cups premium hickory BBQ sauce
- 1/4 cup apple cider vinegar
- 1 tablespoon smoked paprika
- 12 mini brioche slider buns
- 2 cups shredded cabbage mix
- 1/2 cup creamy mayo-based dressing
How to make it
- Prepare the chicken by patting it dry with paper towels to ensure the seasonings stick. Place the breasts in the bottom of a 6-quart crockpot.
- Whisk together the BBQ sauce, apple cider vinegar, and smoked paprika in a small bowl to create a balanced acidic-to-sweet profile. Pour this evenly over the chicken.
- Cover and cook on LOW for 6-7 hours. Avoid using the HIGH setting if possible, as the slow breakdown of connective tissue at lower temperatures results in a much more succulent, tender texture.
- Check for doneness: the chicken should reach an internal temperature of 165°F and shred easily with two forks. Once shredded, let it sit in the warm juices for 15 minutes to reabsorb the flavor.
- Lightly toast the brioche buns under a broiler for 45-60 seconds until the edges are golden brown and crisp. This prevents the bread from getting soggy when the juicy chicken is added.
- Assemble the board by placing the warm chicken in a central bowl, surrounded by the toasted buns and a separate bowl of chilled coleslaw for guests to build their own.
10 Refreshing Healthy Summer Salads (Step-by-Step Guide)

Why we love this
This Mediterranean-style grain board is a visual masterpiece, popping with vibrant greens, deep purples, and sun-kissed reds. Imagine the crunch of fresh Persian cucumbers hitting your palate followed by the creamy, salty burst of high-quality sheep’s milk feta. The aroma of chopped mint and parsley fills the room, making the whole experience feel like a seaside lunch in Santorini. It’s light, hydrating, and leaves you feeling energized rather than weighed down by the summer heat.
Ingredients
- 2 cups cooked quinoa or farro
- 1 pint cherry tomatoes, halved
- 2 large English cucumbers, diced
- 1/2 red onion, thinly sliced
- 1 cup Kalamata olives, pitted
- 8 oz block of Greek feta
- Fresh mint, parsley, and lemon zest
How to make it
- Start by cooking your grains (quinoa or farro) in salted vegetable broth instead of water. This infuses the base with savory depth. Spread the cooked grains on a baking sheet to cool completely before assembling to maintain the crispness of the vegetables.
- Dice the cucumbers and halve the tomatoes. Pro tip: sprinkle the tomatoes with a pinch of sea salt and let them sit for 5 minutes to draw out their natural sugars.
- Create a simple vinaigrette using 3 parts extra virgin olive oil to 1 part fresh lemon juice. Whisk vigorously until emulsified and thick.
- Arrange the grains in the center of a large wooden board. Cluster the vegetables, olives, and feta in distinct sections around the grains to create a striking ‘rainbow’ effect.
- Garnish the entire board with a generous handful of chiffonade-cut mint and parsley. The herbs should be cut just before serving to prevent bruising and oxidation.
- Drizzle the vinaigrette over the board right at the table to keep the textures fresh and the colors bright.
8 Viral Cookout Side Dishes (Step-by-Step Guide)

Why we love this
Nothing screams summer like the charred, smoky aroma of Mexican Street Corn, and serving it on a board makes it a social event. Each cob is a canvas of creamy cotija cheese, spicy tajin, and zesty lime. The warmth of the grilled corn contrasts beautifully with the cold, silky crema, creating a texture that is simultaneously crunchy, juicy, and velvety. It’s the kind of dish that gets messy in the best way possible, encouraging everyone to dig in and get their hands a little dirty.
Ingredients
- 6 ears of fresh sweet corn, husks removed
- 1/2 cup Mexican crema or sour cream
- 1/2 cup crumbled Cotija cheese
- 2 tablespoons Tajin seasoning
- 1/2 cup fresh cilantro, chopped
- 2 limes, cut into wedges
How to make it
- Preheat your grill to medium-high (about 400°F). Lightly oil the grates to prevent the corn from sticking.
- Place the corn directly on the grates. Grill for 10-12 minutes, turning occasionally. You are looking for even charring—dark brown to black spots—on all sides, which indicates the natural sugars are caramelizing.
- While the corn is hot, brush each ear generously with the Mexican crema. The residual heat from the corn will help the crema melt slightly into the kernels.
- Roll the coated corn in a tray filled with crumbled Cotija cheese, pressing gently so the cheese adheres to the crema.
- Arrange the finished cobs on a long board. Dust the entire platter with Tajin seasoning for that iconic kick of chili and lime.
- Scatter fresh cilantro over the top and tuck lime wedges into the gaps between the corn. Serve immediately while the corn is still steaming.
5 Easy Summer Dessert Recipes (Step-by-Step Guide)

Why we love this
This ‘Deconstructed Strawberry Shortcake’ board is pure nostalgia. The scent of macerated strawberries—sweet, floral, and slightly tart—is the ultimate fragrance of July. You get the soft, pillowy texture of fresh whipped cream against the slightly crumbly, buttery golden exterior of mini shortcakes. It’s a DIY dessert dream where guests can pile their boards high with extra berries or a double dollop of cream, making every bite exactly how they want it.
Ingredients
- 2 lbs fresh strawberries, sliced
- 3 tablespoons granulated sugar
- 1 batch of mini buttermilk biscuits or shortcakes
- 2 cups heavy whipping cream
- 1/4 cup powdered sugar
- Fresh basil leaves for garnish
How to make it
- Place sliced strawberries in a glass bowl and toss with the granulated sugar. Let them sit at room temperature for at least 30 minutes. This process, called maceration, creates a thick, ruby-red syrup that is essential for the dish.
- In a chilled metal bowl, beat the heavy cream and powdered sugar until soft peaks form. Do not overbeat, or it will become grainy; you want a silky, cloud-like consistency.
- Warm the mini biscuits in a 300°F oven for 5 minutes just to revive the butter within the dough. Slice them in half horizontally.
- Place the bowl of syrupy strawberries in the center of the board and the whipped cream in a matching bowl beside it.
- Fan the warm biscuit halves around the bowls. Add small clusters of whole strawberries for a pop of bright color.
- Finely slice fresh basil and sprinkle it over the berries just before serving for a surprising, sophisticated herbal finish that cuts through the sweetness.
12 Quick Summer Dinner Ideas (Step-by-Step Guide)

Why we love this
The ‘Naan Pizza Board’ is the ultimate solution for those ‘I’m too tired to cook’ Tuesday nights. The aroma of melting mozzarella and toasted garlic fills the air in minutes. Because naan is pre-baked, you get a perfectly crispy-yet-chewy base that rivals any wood-fired oven. It’s a sensory delight of bubbling cheese, aromatic pesto, and the spicy heat of pepperoni, all presented in a way that feels like a fancy bistro meal rather than a 15-minute assembly job.
Ingredients
- 4-6 pieces of stone-fire naan bread
- 1 jar of high-quality marinara or pesto sauce
- 2 cups shredded mozzarella cheese
- Assorted toppings: pepperoni, bell peppers, red onion
- Red pepper flakes and dried oregano
How to make it
- Preheat your oven to 425°F. Place the naan directly on the oven racks for 2 minutes to crisp the bottom slightly before adding toppings.
- Remove the naan and spread a thin layer of sauce over each piece. Avoid overloading the center, as this can lead to a ‘soggy’ middle; leave about a half-inch border for the crust.
- Generously cover with mozzarella and your chosen toppings. For the best flavor, use thinly sliced red onions that will caramelize quickly in the high heat.
- Bake for 8-10 minutes, or until the cheese is bubbling and showing golden-brown spots. The edges of the naan should be deeply toasted.
- Slide the pizzas onto a large cutting board. Use a pizza cutter to slice them into strips or triangles while they are still piping hot.
- Garnish with red pepper flakes and serve with a side of cold ranch or balsamic glaze for dipping.
6 Addictive Summer Party Dips (Step-by-Step Guide)

Why we love this
Whipped Feta is the trend that won’t quit for a reason: it’s incredibly luxurious. The texture is like a savory cloud—airy, salty, and incredibly smooth. When topped with warm, blistered tomatoes that pop with sweet juice, it becomes a multi-sensory experience. You get the cool dip against the warm topping, and the fragrance of roasted garlic and olive oil is simply intoxicating. Paired with toasted pita points, it’s the kind of board that people will hover over until every last swipe is gone.
Ingredients
- 8 oz block of feta (in brine)
- 1/2 cup Greek yogurt
- 1 pint cherry tomatoes
- 3 cloves garlic, smashed
- 1/4 cup olive oil
- Fresh oregano and pita bread
How to make it
- In a food processor, combine the feta (drained) and the Greek yogurt. Process on high for 2-3 minutes, scraping down the sides often, until the mixture is completely smooth and fluffy.
- In a small skillet, heat the olive oil over medium heat. Add the cherry tomatoes and smashed garlic cloves.
- Sauté the tomatoes for about 5-7 minutes, until the skins begin to burst and the juices thicken into a light sauce. Season with a pinch of salt and pepper.
- Spread the whipped feta in a wide, shallow bowl, creating a well in the center with the back of a spoon.
- Pour the hot tomatoes and garlic oil directly into the well. The contrast of the hot oil hitting the cold feta creates an amazing aroma.
- Surround the bowl with toasted pita chips and cucumber slices on a wooden board. Garnish with fresh oregano leaves for a final touch of green.
10 Refreshing Fun Summer Drinks (Step-by-Step Guide)

Why we love this
Forget the standard cooler; a ‘DIY Mocktail Board’ is the way to hydrate in style. The visual of sparkling water bubbling over fresh berries and bright citrus slices is the definition of refreshing. You can smell the zing of fresh lime and the sweet, earthy scent of muddled raspberries. It’s an interactive way for guests to customize their hydration, turning a simple drink into a sophisticated, cooling ritual that keeps everyone feeling bright and festive under the summer sun.
Ingredients
- 1 liter sparkling mineral water
- 1 cup fresh raspberries and blueberries
- 2 limes and 1 lemon, sliced thin
- 1 bunch of fresh mint
- Simple syrup or agave nectar
- Plenty of crushed ice
How to make it
- Prepare your ‘flavor station’ by placing the fruit, citrus slices, and mint in small, elegant glass bowls. This prevents the board from getting messy.
- To ensure maximum flavor, lightly bruise the mint leaves by clapping them between your hands before placing them in the bowl; this releases the essential oils.
- Fill a large pitcher with the sparkling water and a few slices of lemon. Keep this in an ice bucket next to the board.
- Set out highball glasses and a small jigger for the simple syrup. Pro tip: use clear ice cubes for a high-end ‘lounge’ look.
- Instruct guests to muddle their choice of fruit in the bottom of their glass with a splash of syrup before adding ice and sparkling water.
- Arrange everything on a waterproof tray or board to catch any condensation or spills from the ice.
7 Delicious Summer Pasta Salads (Step-by-Step Guide)

Why we love this
This Pesto Tortellini board takes the humble pasta salad and turns it into a gourmet antipasto spread. The cheese-filled tortellini are tender and savory, coated in a vibrant green basil pesto that smells like a summer garden. Mixed with salty prosciutto ribbons and sharp provolone, every bite is a complex balance of flavors. It’s hearty enough to be a main course but served at room temperature, making it perfect for those long, lingering golden-hour dinners on the patio.
Ingredients
- 1 lb refrigerated cheese tortellini
- 1/2 cup basil pesto (homemade or store-bought)
- 1/4 lb thinly sliced prosciutto
- 1 cup marinated artichoke hearts
- 1/2 cup sun-dried tomatoes
- Fresh parmesan shavings
How to make it
- Boil the tortellini in heavily salted water. Follow the package directions carefully, but aim for ‘al dente’—usually 2-3 minutes for fresh pasta. Overcooked tortellini will fall apart when tossed.
- Immediately drain the pasta and rinse under cold water to stop the cooking process and remove excess starch, which prevents clumping.
- Toss the cold pasta with the pesto until every crevice is coated. If the pesto is too thick, thin it with a teaspoon of olive oil.
- Roll the prosciutto slices into tight ‘roses’ to make them easy to grab and visually stunning on the board.
- Arrange the pesto tortellini in the center of the board. Surround it with the prosciutto roses, artichokes, and sun-dried tomatoes.
- Top the entire board with large shavings of parmesan cheese. Use a vegetable peeler to get those wide, restaurant-style curls that melt slightly on the tongue.
15 Easy Portable Beach Snacks (Step-by-Step Guide)
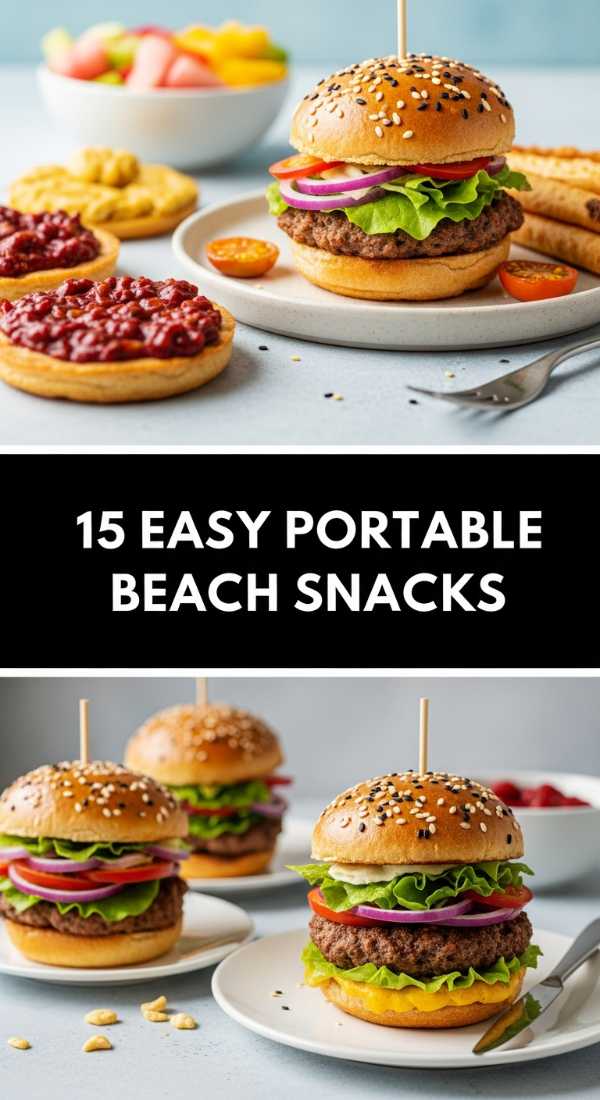
Why we love this
The ‘Beach Snack Board’ is all about high-energy, low-mess grazing. Think of the salty crunch of pretzels followed by the tropical sweetness of dried mango and fresh pineapple. It’s a sensory escape that mirrors the environment—salty air and sweet sunshine. The textures range from chewy jerky to crisp nuts, providing a satisfying variety that keeps your energy up for swimming and volleyball without requiring a fork or a plate.
Ingredients
- 1 cup salted almonds or cashews
- 1 pack of beef or turkey jerky
- 2 cups fresh pineapple chunks
- 1 cup dried mango strips
- 2 cups mini pretzels
- Individual hummus pods
How to make it
- If you are taking this to the beach, choose a board with a lid or use a sturdy bento box. Preparation is key to keeping things sand-free!
- Slice the pineapple into bite-sized chunks and pat them dry with a paper towel. Excess moisture will make the pretzels nearby go soft.
- Place the ‘dry’ snacks (nuts, pretzels, jerky) in separate corners of the board to create a foundation.
- Layer the ‘damp’ snacks (pineapple, mango) in the center, ideally in a small container or on a bed of parchment paper.
- Add the hummus pods last. These act as a creamy ‘dip’ for the pretzels and even the jerky for a salty-savory combo.
- Seal the board tightly and keep it in a cooler bag. The secret to a great beach board is temperature; the pineapple should be icy cold when you bite into it.
8 Best Grilled Kabob Recipes (Step-by-Step Guide)

Why we love this
There is an elemental joy to eating food off a stick, especially when it’s these Honey-Garlic Shrimp Skewers. The shrimp are succulent and snappy, coated in a sticky glaze that caramelizes over the open flame. You get the charred aroma of red peppers and onions mixed with the sweet scent of warm honey. It’s a colorful, exciting board that feels celebratory and upscale, yet it’s incredibly easy to pull together for a crowd of hungry friends.
Ingredients
- 1 lb jumbo shrimp, peeled and deveined
- 1 red bell pepper and 1 red onion, cut into chunks
- 1/4 cup honey
- 3 cloves garlic, minced
- 2 tablespoons soy sauce
- Wooden or metal skewers
How to make it
- If using wooden skewers, soak them in water for at least 30 minutes. This prevents them from igniting on the grill.
- Whisk together the honey, minced garlic, and soy sauce in a small bowl. Reserve half of this mixture to use as a fresh glaze later.
- Thread the shrimp, pepper chunks, and onion chunks onto the skewers, alternating for color and flavor distribution. Ensure they aren’t crowded too tightly, so the heat can circulate around each piece.
- Grill over medium-high heat for 2-3 minutes per side. Shrimp cook very quickly; they are done when they turn opaque and form a ‘C’ shape. Avoid ‘O’ shapes, which mean they are overcooked and rubbery.
- In the final minute of grilling, brush the reserved honey-garlic glaze over the skewers to create a glossy, flavorful finish.
- Lay the skewers out on a large board bedded with fresh lemon slices and a sprinkle of parsley for a professional, vibrant presentation.
The Magic of the Board
At the end of the day, these food boards aren’t just about the ‘aesthetic’—though they certainly look great on your feed. They are about lowering the barrier to connection. When we take the pressure off ourselves to serve a formal, plated meal, we open up space for more laughter, more stories, and more second helpings. So, grab a wooden plank, gather your favorite ingredients, and let the 5-minute magic happen in your own home this summer.