
There is something inherently magical about the way a simple board of food can transform a regular Tuesday night into a core memory. I remember the first time I set out a sprawling spread of summer favorites on my old wooden butcher block; the room immediately filled with laughter as my friends reached over one another, picking at vibrant fruits and savory meats. It wasn’t just about the food; it was about the lack of formality, the shared experience, and the way the colors seemed to dance under the warm golden hour light streaming through the kitchen window.
We are all craving connection more than ever, and that is exactly why the ‘food board’ trend has absolutely taken over our feeds. It strips away the pressure of a three-course meal and replaces it with a tactile, sensory journey that invites everyone to the table. Whether you are hosting a backyard bash or just trying to survive a humid weekday, these simple, assembly-style meals are the ultimate hack for a stress-free, beautiful life. Let’s dive into the ultimate components that make these boards so irresistible.
How to make summer crockpot chicken?

Why we love this
There is nothing quite like the effortless luxury of a succulent, slow-cooked chicken that practically falls apart at the mere suggestion of a fork. The aroma of sweet citrus and garlic wafting through the house all afternoon creates an atmosphere of cozy anticipation without ever having to turn on the oven. Each bite is a tender explosion of moisture, perfectly seasoned to provide a savory base that anchors the lighter, crispier elements of your summer food board. It’s the ultimate ‘set it and forget it’ protein that feels fancy but requires zero sweat.
Ingredients
- 3 lbs boneless, skinless chicken thighs
- 1 cup zesty Italian dressing
- 1/4 cup fresh lime juice
- 3 cloves minced garlic
- 1 teaspoon smoked paprika
- Salt and cracked black pepper to taste
How to make it
- Begin by patting your chicken thighs dry with paper towels to ensure the seasoning adheres properly; place them in a single layer at the bottom of a 6-quart crockpot.
- In a small whisking bowl, combine the Italian dressing, fresh lime juice, minced garlic, and smoked paprika, stirring vigorously until the oil and citrus are fully emulsified.
- Pour the liquid mixture over the chicken, using tongs to turn each piece so they are thoroughly coated in the marinade.
- Set your crockpot to the ‘Low’ heat setting; for the most tender results, cook for 5 to 6 hours. Do not use the high setting if you want that signature ‘melt-in-your-mouth’ texture.
- Once the internal temperature reaches 165°F and the meat pulls apart easily, remove the chicken and shred it using two large forks on a separate plate to prevent splashing.
- Drizzle a quarter cup of the remaining pot juices back over the shredded meat to keep it moist before piling it onto your serving board.
How to make fresh summer salad?

Why we love this
A fresh summer salad is the literal breath of fresh air every heavy cookout needs, offering a crisp, cooling contrast to charred meats and salty snacks. Imagine the snap of garden-fresh cucumbers paired with the juicy, sun-ripened burst of heirloom tomatoes, all tied together by a herbaceous vinaigrette that sings with acidity. The texture is a symphony of crunch and silkiness, leaving your palate feeling cleansed and energized rather than weighed down. It is a celebration of the season’s bounty that looks as stunning as it tastes on a crowded board.
Ingredients
- 2 cups chopped Persian cucumbers
- 1 pint cherry tomatoes, halved
- 1/2 red onion, thinly sliced
- 1/4 cup crumbled feta cheese
- Fresh basil and mint leaves
- 3 tbsp olive oil and 1 tbsp red wine vinegar
How to make it
- Start by prepping your vegetables; slice the cucumbers into thick half-moons and the tomatoes into halves to ensure they hold their shape and don’t become mushy.
- To take the ‘bite’ out of the red onion, soak the thin slices in a bowl of ice water for 10 minutes, then pat dry before adding to the mix.
- In a large chilled glass bowl, toss the cucumbers, tomatoes, and onions together gently so as not to bruise the delicate produce.
- Whisk the olive oil and red wine vinegar with a pinch of sea salt in a small jar until the mixture thickens slightly.
- Pour the dressing over the vegetables only when you are ready to serve; this prevents the greens from wilting under the acidity.
- Finish by folding in the crumbled feta and hand-torn herbs, which adds a creamy, aromatic top note that elevates the entire dish.
How to prepare cookout side dishes?

Why we love this
Cookout sides are the nostalgic heartbeat of any summer gathering, bringing that familiar, smoky comfort that reminds us of childhood picnics and bare feet in the grass. We love the way a charred ear of corn or a smoky batch of beans provides a rugged, earthy depth to the food board’s profile. There’s a certain smokiness in the air and a rich, buttery finish on the tongue that makes these sides feel substantial and deeply satisfying. They bridge the gap between ‘snack’ and ‘meal,’ making the board feel like a true feast.
Ingredients
- 4 ears of fresh sweet corn
- 2 tbsp salted butter, softened
- 1 tsp chili lime seasoning
- 1 can of high-quality baked beans
- 1/2 cup diced smoked bacon
How to make it
- Preheat your grill to a medium-high heat (around 400°F) to ensure you get those beautiful, dark char marks without drying out the kernels.
- Peel back the husks of the corn but leave them attached at the base for a rustic handle; rub each ear generously with softened salted butter.
- Place the corn directly on the grates, rotating every 2 minutes for a total of 8-10 minutes until the kernels are bright yellow with toasted brown spots.
- While the corn grills, place a small cast-iron skillet on the cooler side of the grill; sauté the diced bacon until crispy.
- Add the baked beans to the skillet with the bacon, stirring occasionally until the sauce thickens and bubbles at the edges.
- Remove the corn and immediately sprinkle with chili lime seasoning, then serve alongside the warm, smoky beans for a perfect duo.
How to make creamy pasta salad?

Why we love this
Creamy pasta salad is the ultimate crowd-pleaser, offering a velvety, chilled indulgence that feels like a hug in a bowl. Each spiral of pasta acts as a vessel for a tangy, herb-flecked sauce that coats the tongue in a rich, satisfying way. We love the playful medley of textures—from the soft, al dente noodles to the sudden pop of frozen peas or the crunch of celery. It’s a nostalgic staple that provides a neutral, comforting balance to the spicier or more acidic elements on your food board.
Ingredients
- 1 lb fusilli or rotini pasta
- 1 cup mayonnaise
- 2 tbsp yellow mustard
- 1/4 cup diced celery
- 1/2 cup frozen peas (thawed)
- 1 tsp dried dill and garlic powder
How to make it
- Boil a large pot of heavily salted water—it should taste like the sea—to season the pasta from the inside out as it cooks.
- Cook the pasta for exactly 1 minute less than the package directions for ‘al dente’; you want it to have a firm bite so it doesn’t get soggy in the dressing.
- Drain the pasta and immediately rinse it under cold running water to stop the cooking process and remove excess starch.
- In a large mixing bowl, whisk together the mayonnaise, mustard, dill, and garlic powder until the dressing is completely smooth and pale yellow.
- Fold the cooled pasta, celery, and peas into the dressing using a rubber spatula, ensuring every nook and cranny of the noodles is filled.
- Refrigerate for at least 2 hours before serving; this allows the flavors to marry and the dressing to set for that perfect creamy consistency.
How to make zesty rotel dip?

Why we love this
There is an undeniable, addictive joy in a bowl of warm, gooey cheese dip that sits at the center of a board like a molten sun. The zesty rotel dip brings a punchy, bold heat that wakes up the taste buds, cutting through the richness of the melted cheese with the bite of green chiles and tomatoes. It’s the kind of dish that encourages ‘double dipping’ (among friends, of course!) and creates a focal point for social interaction. Warm, savory, and just a little bit spicy, it’s the ultimate comfort food for a casual gathering.
Ingredients
- 1 lb Velveeta or processed cheese, cubed
- 1 can (10 oz) Ro-Tel diced tomatoes and green chilies
- 1/2 lb ground sausage or chorizo
- 1/2 tsp cumin
- Tortilla chips for serving
How to make it
- Start by browning your ground sausage in a skillet over medium heat, breaking it into very small crumbles until no pink remains.
- Drain the excess fat from the skillet thoroughly; too much grease will cause the cheese dip to separate and become oily.
- In a slow cooker or a heavy-bottomed saucepan, combine the cubed cheese and the entire can of Ro-Tel (do not drain the liquid from the can, as it provides the flavor!).
- Stir in the cooked sausage and the cumin, which adds an earthy undertone that complements the spice of the chiles.
- Heat on low, stirring frequently with a wooden spoon to prevent the cheese from scorching or sticking to the bottom of the pan.
- Once the dip is silky and pourable, transfer it to a ceramic bowl and place it in the center of your food board, surrounded by sturdy chips.
How to cook healthy summer dinners?

Why we love this
Healthy summer dinners are all about vitality and color, making you feel light and nourished even after a long day in the heat. We love the clean, vibrant flavors of grilled lean proteins paired with charred seasonal vegetables that taste like sunshine on a plate. There’s a beautiful simplicity in using high-quality olive oils and fresh lemon to let the natural ingredients shine without heavy sauces. It’s the kind of meal that leaves you feeling satisfied and glowing, making it the perfect centerpiece for a wellness-focused food board.
Ingredients
- 2 large chicken breasts, sliced into strips
- 1 bunch of asparagus, ends trimmed
- 2 bell peppers, sliced into thick ribbons
- 2 tbsp avocado oil
- 1 lemon, sliced into rounds
- Fresh cracked pepper and sea salt
How to make it
- Preheat a large sheet pan in a 425°F oven for 5 minutes; a hot pan ensures the vegetables sear rather than steam.
- In a bowl, toss the chicken strips, asparagus, and bell peppers with avocado oil—which has a high smoke point—until everything is glistening.
- Carefully spread the mixture onto the preheated sheet pan in a single layer, ensuring nothing is overlapping so the heat can circulate.
- Place the lemon rounds on top of the chicken; as they roast, the juice will caramelize and infuse the meat with a bright, sweet acidity.
- Roast for 15-18 minutes, or until the chicken is golden and the asparagus is tender-crisp with slightly charred tips.
- Finish with a final squeeze of fresh lemon juice and a sprinkle of flaky sea salt before arranging the colorful heaps onto your board.
How to make refreshing summer drinks?

Why we love this
A refreshing summer drink is the ultimate sensory reset, offering a chilled, effervescent clink of ice that signals the start of relaxation. We love the way the condensation beads on the glass while the scent of muddled mint and fresh citrus fills the air. These drinks aren’t just beverages; they are accessories to the meal, providing a bright, bubbly counterpoint to savory snacks. Whether it’s a spiked lemonade or a botanical mocktail, the crisp finish and herbal notes make every sip feel like a mini-vacation.
Ingredients
- 1 cup fresh squeezed lemon juice
- 3/4 cup simple syrup (equal parts water and sugar)
- 2 cups sparkling water
- Fresh mint sprigs
- Sliced strawberries or cucumbers
- Ice cubes
How to make it
- Create your simple syrup by heating sugar and water until dissolved, then let it cool completely; this ensures your drink isn’t gritty.
- In a large glass pitcher, combine the fresh lemon juice and the cooled simple syrup, stirring well to create a concentrated base.
- Take a handful of fresh mint leaves and gently ‘slap’ them between your palms to release the essential oils without making them bitter.
- Add the mint and your choice of fruit (strawberries for sweetness, cucumbers for coolness) to the pitcher and muddle lightly with a long spoon.
- Just before serving, pour in the sparkling water to maintain the carbonation; if you add it too early, the drink will go flat.
- Fill tall glasses to the brim with ice, pour the mixture over the top, and garnish with an extra sprig of mint for a professional, ‘viral’ look.
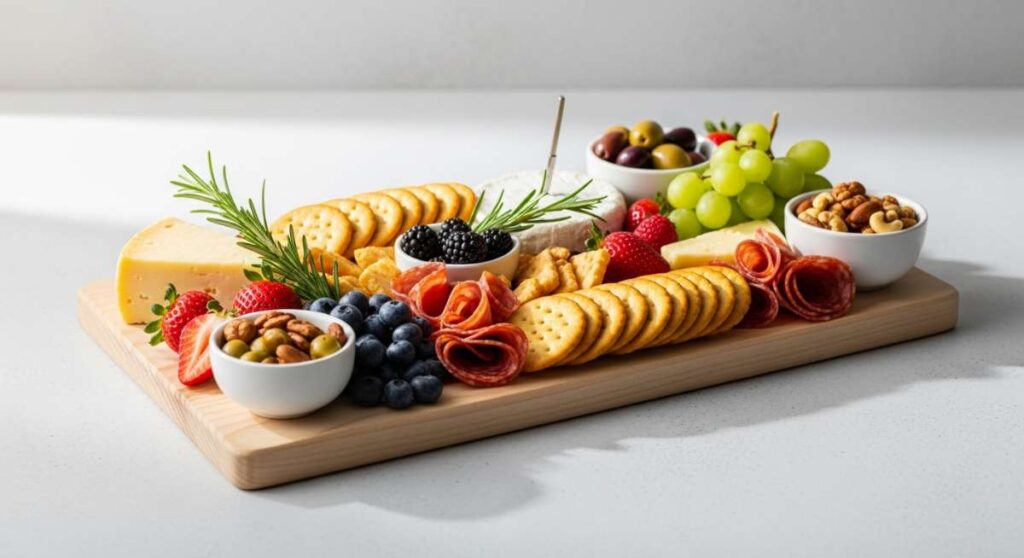
How to prepare easy summer lunches?
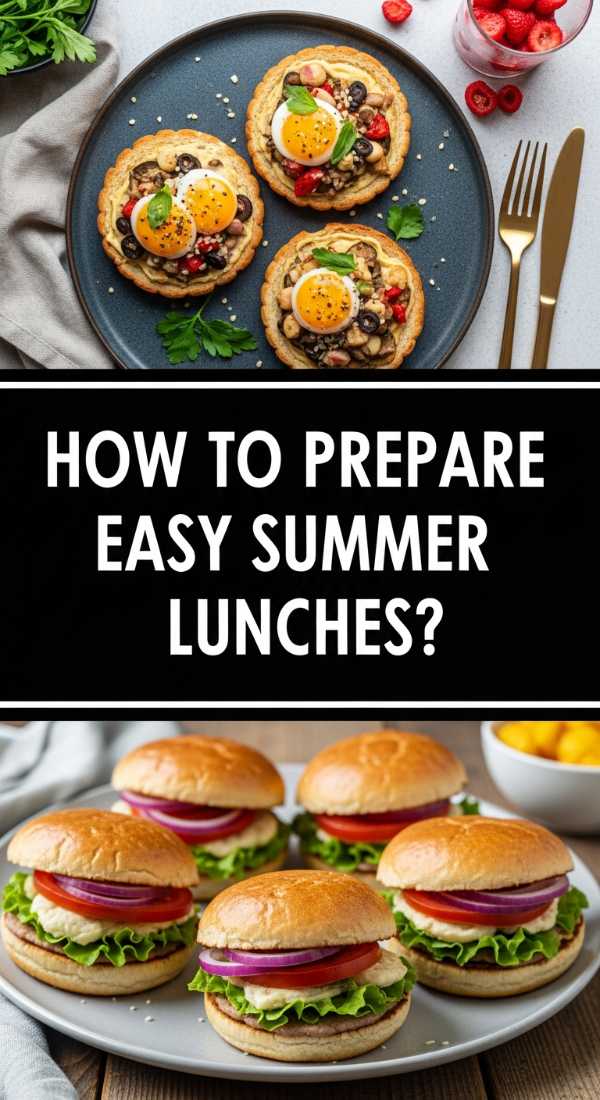
Why we love this
Easy summer lunches are the heroes of the midday slump, offering a fast, fresh, and visually stunning way to refuel without turning on a single appliance. We love the ‘pick-and-choose’ nature of these boards, where a slice of sharp cheddar can meet a sweet grape or a salty piece of prosciutto. It’s a low-effort, high-reward way to eat that feels sophisticated and indulgent. The combination of textures—crunchy crackers, creamy cheeses, and juicy fruits—provides a satisfying variety that keeps lunch from feeling boring.
Ingredients
- Assorted deli meats (prosciutto, salami)
- Hard and soft cheeses (cheddar, brie)
- Handful of toasted almonds
- Fresh grapes and sliced apples
- Whole grain crackers
How to make it
- Start with your largest items first; place two small bowls on your board to hold loose items like nuts or olives, creating structural anchors.
- Fold your deli meats into ‘ribbons’ or fan them out to create height and visual interest, making the meat look more appetizing than flat slices.
- Slice the hard cheeses into uniform triangles and leave the soft cheeses whole with a small spreader knife nearby.
- Fill the remaining gaps with clusters of grapes and apple slices; dip the apple slices in lemon water first to prevent them from browning.
- Add the toasted almonds to the small bowls and tuck the crackers into the curves of the meat and cheese sections.
- Ensure there are no ‘bald spots’ on the board by adding small sprigs of parsley or extra nuts to make the spread look lush and abundant.
How to bake sweet summer desserts?

Why we love this
Sweet summer desserts are the grand finale that everyone saves room for, offering a sugary, fruit-forward conclusion to a beautiful day. We love the combination of a buttery, golden crust with the jammy, bubbling intensity of seasonal berries or stone fruits. There is a rustic charm to a summer galette or a fruit crumble that looks perfectly imperfect on a wooden board. The warmth of the baked fruit paired with a dollop of cold, whipped cream creates a temperature contrast that is pure heaven on the tongue.
Ingredients
- 2 cups fresh blueberries or peaches
- 1/4 cup granulated sugar
- 1 tbsp cornstarch (to thicken juices)
- 1 store-bought refrigerated pie crust
- 1 egg (for egg wash)
- Coarse sanding sugar
How to make it
- Preheat your oven to 400°F and line a baking sheet with parchment paper to prevent the fruit juices from sticking.
- In a medium bowl, gently toss your fruit with the granulated sugar and cornstarch; let it sit for 5 minutes until the fruit starts to release its juices.
- Unroll the pie crust onto the parchment paper and pile the fruit into the center, leaving a 2-inch border of dough all the way around.
- Fold the edges of the dough over the fruit, overlapping as you go to create a rustic, ‘free-form’ galette shape.
- Whisk the egg with a teaspoon of water and brush the crust generously; this is the secret to that shiny, professional golden-brown finish.
- Sprinkle the crust with coarse sanding sugar for a delightful crunch, and bake for 20-25 minutes until the fruit is bubbling and the crust is firm.
How to grill perfect summer kabobs?

Why we love this
Grill kabobs are the ultimate ‘party food,’ offering a rainbow of colors and flavors conveniently served on a stick. We love the way the high heat of the grill creates those crispy, caramelized edges on the meat while the vegetables stay tender and sweet. There is something deeply satisfying about the charred aroma of smoke mixed with savory seasonings. They look incredible lined up on a food board, providing an easy-to-grab option that is both portion-controlled and packed with variety.
Ingredients
- 1 lb sirloin steak or chicken breast, cubed
- 1 red onion, cut into large chunks
- 1 zucchini, sliced into thick rounds
- 1/2 cup teriyaki or BBQ sauce
- Wooden or metal skewers
How to make it
- If using wooden skewers, soak them in water for at least 30 minutes before grilling to prevent them from catching fire on the grates.
- Cut your meat and vegetables into uniform 1-inch pieces; this is crucial for ensuring that everything cooks at the same rate.
- Thread the ingredients onto the skewers, alternating between meat, onion, and zucchini to allow the flavors to mingle as they heat.
- Preheat your grill to medium-high and lightly oil the grates using a folded paper towel dipped in vegetable oil and held with tongs.
- Place the kabobs on the grill and sear for 3-4 minutes per side; use a brush to baste them with sauce only during the last 2 minutes of cooking.
- Applying sauce too early will cause the sugars to burn before the meat is cooked through; look for a charred exterior and an internal meat temp of 145°F (steak) or 165°F (chicken).
Wrapping Up the Board Trend
Whether you’re building a board for two or twenty, the secret lies in the variety and the love you put into each component. These trends are viral for a reason: they make feeding people feel less like a chore and more like a creative outlet. So, grab your biggest platter, pick a few of these recipes, and get ready to be the host everyone is obsessed with this summer!