

Easy & Aesthetic: The Ultimate Viral Food Board Guide
There is something truly magical about the way food brings us together during the golden hours of summer. I remember one specific evening last July, the sun dipping low and painting the sky in hues of apricot and lavender, while my closest friends gathered around a massive wooden board overflowing with colors and scents. There was no formal seating, no stiff three-course meal—just the sound of laughter, the clinking of ice in glasses, and the simple joy of sharing small, beautiful bites. That is the heart of the ‘viral food board’ trend: it’s about creating an experience that feels effortless yet looks like a work of art.
In this guide, I’m showing you exactly how to master the art of the aesthetic summer board. We aren’t just throwing things on a tray; we are Curating a vibe. Whether you’re hosting a backyard bash or a quiet sunset picnic, these recipes are designed to be visually stunning, incredibly delicious, and surprisingly easy to pull together. Let’s dive into the sensory details and professional techniques that will make your next gathering the talk of the season.
How to cook summer meals?
Why we love this
Summer cooking is all about honoring the vibrance of the season without spending hours over a hot stove. We love this approach because it focuses on peak-season produce—think sun-ripened tomatoes that smell like the earth and sweet corn that snaps with every bite. There is a specific sensory delight in the contrast between a chilled glass of crisp wine and a warm, herb-infused flatbread served right off the grill. It feels light on the palate but rich in soul, evoking memories of seaside vacations and slow, breezy afternoons where the only thing on the agenda is enjoying the company you’re with.
Ingredients
- Artisan sourdough or flatbread
- Heirloom tomatoes (multi-colored)
- Fresh basil and oregano
- Burrata cheese
- Extra virgin olive oil
- Flaky sea salt and cracked black pepper
How to make it
- Begin by preheating your outdoor grill or a heavy cast-iron grill pan to medium-high heat (about 400°F). You want a high enough heat to achieve those distinct char marks without drying out the bread.
- Brush both sides of your flatbread generously with high-quality olive oil. This creates a barrier that prevents sticking and ensures a golden, crispy texture.
- Place the bread on the grates for 2-3 minutes per side. Watch for the dough to puff slightly and develop dark, caramelized grill lines.
- While the bread is warm, tear the burrata cheese by hand and spread it over the surface. The residual heat will soften the creamy center of the cheese perfectly.
- Slice the heirloom tomatoes into varying thicknesses to add visual texture to your board. Arrange them over the cheese, then finish with a heavy hand of fresh herbs, a drizzle of oil, and the flaky salt.
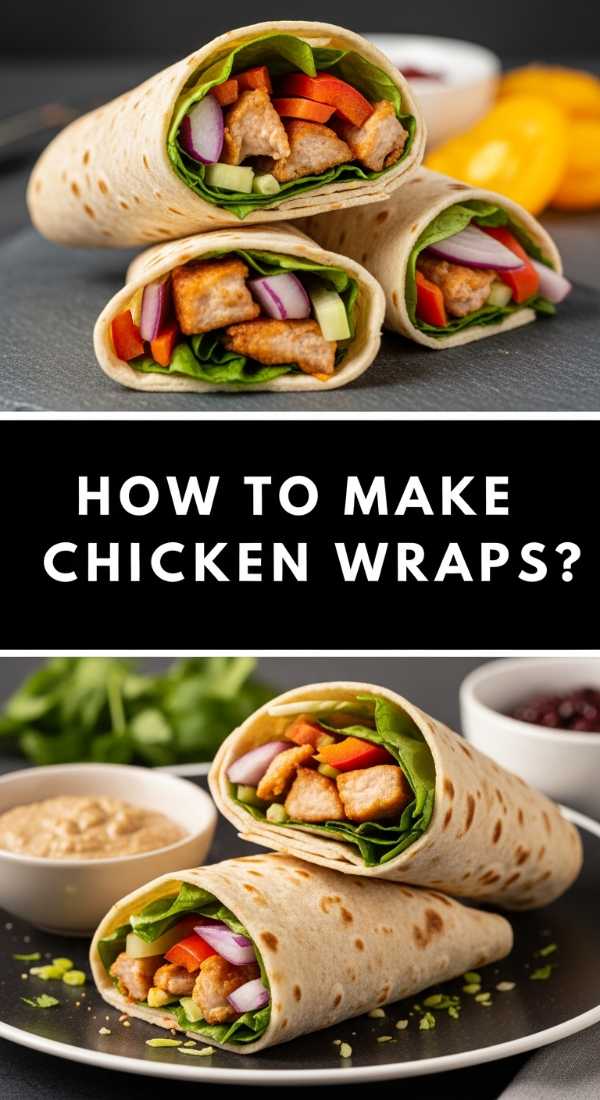
How to make chicken wraps?
Why we love this
Chicken wraps are the ultimate portable luxury for a summer food board. We love them because they offer a perfect balance of textures: the soft, pillowy give of a fresh tortilla, the crunch of cold romaine, and the savory, juice-dripping tenderness of perfectly seasoned chicken. When you bite into one, you get a rush of zesty lime and creamy sauce that cuts through the heat of the day. They are beautiful when sliced on a bias and stacked tall, showing off the vibrant layers of green, gold, and purple inside, making them a centerpiece that guests can grab and enjoy while mingling.
Ingredients
- Thinly sliced chicken breast
- Large flour tortillas (warmed)
- Avocado lime crema
- Shredded purple cabbage
- Fresh cilantro
- Smoked paprika and garlic powder
How to make it
- Season the chicken breast with a blend of smoked paprika, garlic powder, salt, and pepper. Ensure even coating on all sides for maximum flavor penetration.
- Heat a non-stick skillet over medium heat with a tablespoon of avocado oil. Sauté the chicken until the internal temperature reaches exactly 165°F. Look for a golden-brown crust; if the pan gets too dry, add a splash of lime juice to deglaze and keep the meat moist.
- Warm the tortillas in a dry pan for 15 seconds per side until they are pliable and soft. This step is crucial to prevent tearing during the rolling process.
- Layer a generous amount of crema in the center, followed by the cabbage, cilantro, and sliced chicken.
- Fold the sides in tightly and roll from the bottom up, maintaining firm pressure. Use a sharp serrated knife to cut the wrap on a 45-degree angle for that professional, aesthetic look.
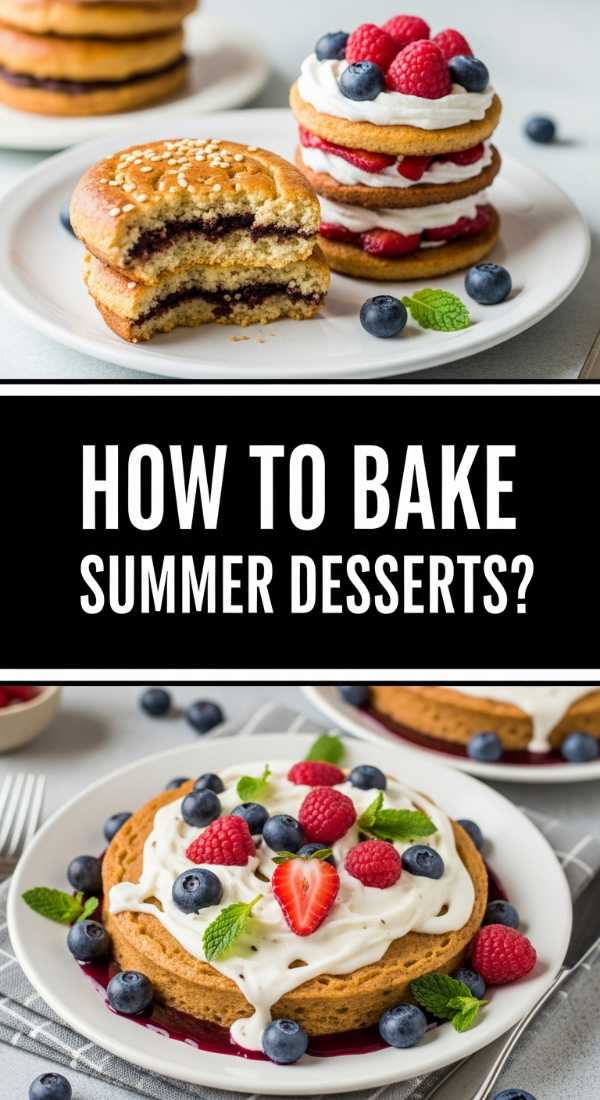
How to bake summer desserts?
Why we love this
Summer baking should feel like a celebration of the orchard. We love a rustic berry galette because it doesn’t require the perfection of a traditional pie; it’s messy, juicy, and stunningly artisanal. The aroma of bubbling berries mixing with buttery, flaky pastry wafting through the house is the ultimate scent of home. There is a deep satisfaction in seeing the deep purples and reds of the fruit bleeding slightly into the golden-brown crust, served with a melting dollop of vanilla bean cream that pools in the center. It is the definition of a cozy, sweet end to a sun-drenched day.
Ingredients
- Refrigerated pie crust or homemade shortcrust
- Fresh blueberries, raspberries, and blackberries
- Granulated sugar and cornstarch
- Lemon zest
- Egg wash (1 egg + 1 tsp water)
- Coarse sparkling sugar
How to make it
- Preheat your oven to 400°F (200°C). Line a baking sheet with parchment paper to prevent the fruit juices from sticking to the pan.
- In a bowl, gently toss the berries with sugar, a tablespoon of cornstarch (this thickens the juices), and fresh lemon zest. Be careful not to crush the fruit; you want whole berries for texture.
- Roll out the pastry dough into a rough circle on the parchment paper. Pile the fruit mixture into the center, leaving a 2-inch border all around.
- Fold the edges of the dough over the fruit, pleating as you go. The center should remain open. This ‘rustic’ fold is what gives it the viral aesthetic.
- Brush the crust with the egg wash and sprinkle generously with coarse sugar. Bake for 25-30 minutes until the crust is a deep golden brown and the fruit is bubbling vigorously. Let it cool for 15 minutes before sliding onto your board.
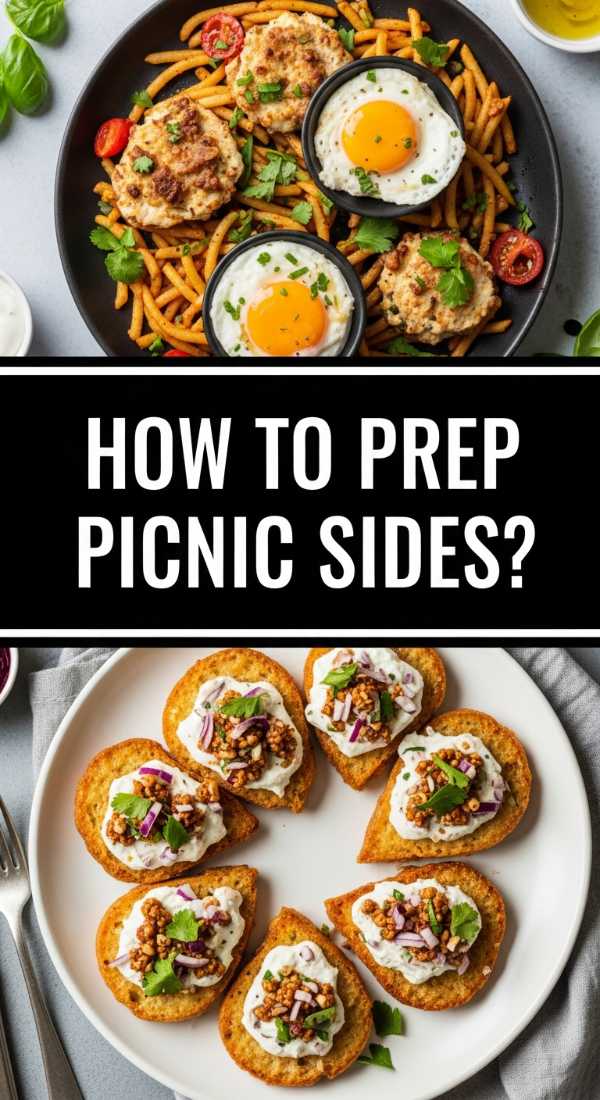
How to prep picnic sides?

Why we love this
Picnic sides are the unsung heroes of the food board, providing the variety and ‘nibble-factor’ that keeps guests engaged. We love these because they allow for a play on temperatures and flavors—think savory whipped feta, crunchy kettle chips, and briney olives. The sensory experience is all about the ‘snap’ and ‘dip.’ There’s something so chic about a series of small, curated bowls filled with different textures that invite people to customize their own bites. It turns a simple meal into an interactive exploration of flavor that feels both fancy and completely relaxed.
Ingredients
- Block of feta cheese
- Greek yogurt
- Honey and chili flakes
- Assorted crackers and crostini
- Marinated olives and cornichons
How to make it
- To make the whipped feta, combine the feta block and a half cup of Greek yogurt in a food processor. Pulse until the mixture is light, airy, and completely smooth—this usually takes about 2-3 minutes of high-speed blending.
- Transfer the dip to a shallow bowl and use the back of a spoon to create ‘swirls’ on the surface. These ridges are perfect for catching honey and oil.
- Drizzle with warm honey and sprinkle with red chili flakes for a sweet-heat finish.
- Arrange the bowl in the center of a small wooden board. Surround it with a variety of textures: buttery crackers for richness, toasted crostini for crunch, and olives for a salty punch.
- Keep the cold elements in an insulated container until the moment of serving to ensure the dip stays thick and refreshing.
How to mix summer cocktails?
Why we love this
A signature summer cocktail is the crown jewel of any aesthetic board setup. We love a Watermelon Mint Refresher because it looks like a sunset in a glass and tastes like pure hydration and joy. The fragrance of slapped mint leaves is instantly cooling, and the sight of condensation building on a crystal-clear glass is the universal sign that the party has started. It’s light, not too sweet, and has a sophisticated profile that makes everyone feel like they’re at a high-end rooftop bar, even if they’re just in your backyard.
Ingredients
- Fresh watermelon juice (strained)
- Fresh lime juice
- Agave nectar
- Sparkling water or Prosecco
- Handful of fresh mint leaves
- Ice cubes with frozen berries inside
How to make it
- Start by making ‘aesthetic ice.’ Place a single raspberry or blueberry in each cube of an ice tray, fill with water, and freeze. This adds a viral, professional touch to the drink.
- In a cocktail shaker, muddle 5-6 fresh mint leaves with a teaspoon of agave nectar. Use a firm twisting motion to release the aromatic oils without shredding the leaves.
- Add 3 ounces of watermelon juice and 1 ounce of lime juice. Fill the shaker with regular ice and shake vigorously for 15 seconds until the outside of the shaker is frosty.
- Strain the mixture into a glass filled with your berry ice cubes. Top with sparkling water for a mocktail or Prosecco for a cocktail.
- Garnish with a large sprig of mint and a small wedge of watermelon perched on the rim. Serve immediately while the bubbles are active.
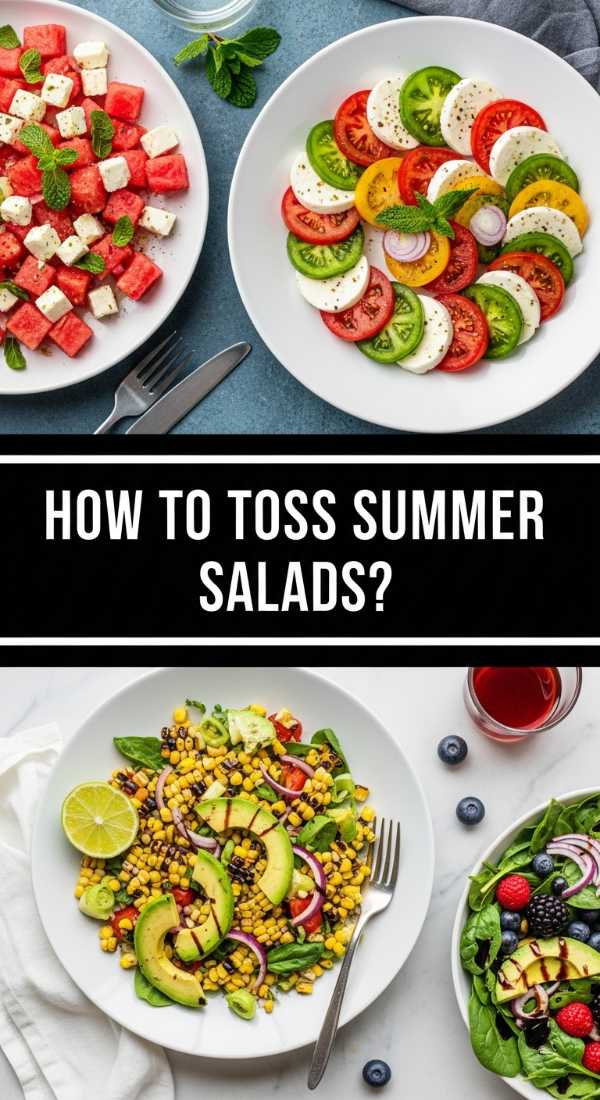
How to toss summer salads?
Why we love this
Forget boring lettuce; summer salads are a riot of color and sophistication. We love a Peach and Burrata salad because it plays with the boundary between sweet and savory. The velvet skin of a ripe peach against the creamy, milky heart of fresh cheese is a texture lover’s dream. The aroma of balsamic reduction and toasted pine nuts adds a depth that makes the dish feel substantial. It looks incredibly high-end on a board, with the bright orange of the fruit popping against the white cheese and dark green basil leaves.
Ingredients
- Ripe yellow peaches
- Arugula or wild greens
- Ball of fresh burrata
- Balsamic glaze
- Toasted pine nuts
- Thinly sliced prosciutto (optional)
How to make it
- Layer a bed of peppery arugula on a large, flat platter. This provides a structural base and a bitey flavor contrast to the sweet fruit.
- Slice the peaches into thick wedges. For an extra layer of flavor, sear them quickly on a hot grill for 1 minute per side to caramelize the natural sugars.
- Place the burrata ball in the center of the greens and gently break it open with a knife so the cream spills out slightly.
- Nestle the peach wedges and ribbons of prosciutto around the cheese.
- Just before serving, drizzle the entire board with a thick balsamic glaze in a zig-zag pattern. Sprinkle with toasted pine nuts for a nutty crunch. The key here is not to over-toss; let the ingredients sit in their distinct, beautiful layers.
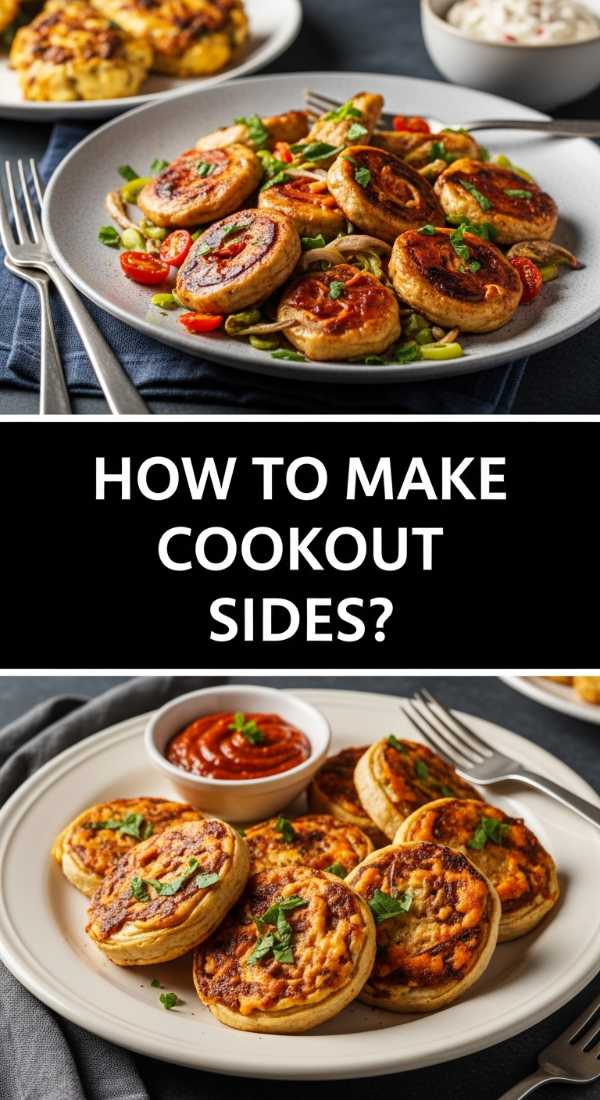
How to make cookout sides?
Why we love this
Cookout sides often steal the show, and we love them for their nostalgic, smoky charm. A grilled street corn (elote) board is the ultimate crowd-pleaser. The smell of charred corn husks and the salty tang of cotija cheese is irresistible. It’s messy in the best way possible—creamy sauce dripping, a hint of lime zest, and the smoky warmth of chili powder. It brings a festive, street-fair energy to your food board that encourages people to dig in with their hands and enjoy the tactile experience of eating.
Ingredients
- Fresh ears of corn (shucked)
- Mexican crema or mayonnaise
- Cotija cheese (crumbled)
- Chili powder or Tajin seasoning
- Fresh cilantro and lime wedges
How to make it
- Preheat your grill to medium-high. Place the corn directly on the grates. Grill for about 10-12 minutes, turning every few minutes, until the kernels are bright yellow and have charred spots all over.
- While the corn is hot, use a pastry brush to coat each ear with a thin layer of crema or mayo. The heat helps the sauce melt into the crevices of the kernels.
- Roll the coated corn in a plate of crumbled cotija cheese until heavily encrusted.
- Dust with a light sprinkle of chili powder for color and a subtle kick of heat.
- Arrange the corn on your board, garnished with plenty of lime wedges and chopped cilantro. Provide small napkins, as this is a deliciously ‘hands-on’ dish.
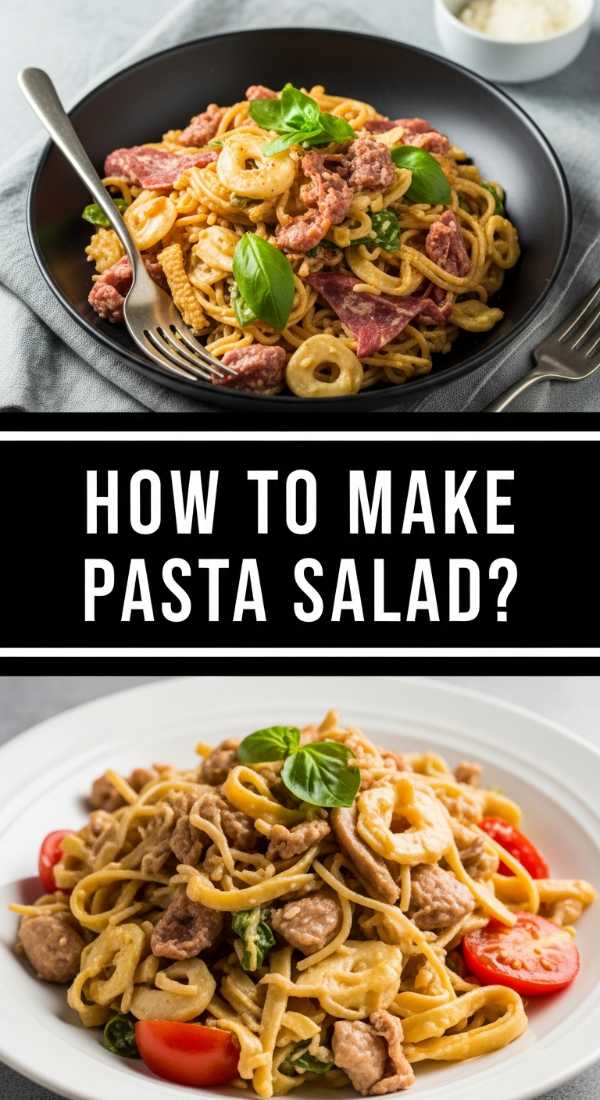
How to make pasta salad?

Why we love this
Pasta salad is the backbone of a great food board because it’s hearty and holds up beautifully in the sun. We love a Mediterranean-style pasta salad because it’s a mosaic of flavors—salty olives, sharp feta, and bright lemon. The texture of al dente pasta mixed with crunchy cucumbers and juicy tomatoes is deeply satisfying. It’s the kind of dish that actually tastes better as it sits, as the pasta soaks up the herbaceous vinaigrette, making it the perfect low-stress addition to a long afternoon of hosting.
Ingredients
- Fusilli or Farfalle pasta
- Cucumber (diced)
- Cherry tomatoes (halved)
- Kalamata olives
- Red onion (finely minced)
- Lemon-oregano vinaigrette
How to make it
- Boil the pasta in heavily salted water until it is ‘al dente’—firm to the bite. Do not overcook, or it will become mushy when the dressing is added.
- Drain the pasta and immediately rinse with cold water to stop the cooking process and remove excess starch. This keeps the noodles from sticking together.
- In a large bowl, whisk together olive oil, lemon juice, dried oregano, salt, and garlic to create the vinaigrette.
- Toss the cooled pasta with the dressing, then fold in the cucumbers, tomatoes, onions, and olives.
- For the best aesthetic, serve in a wide, shallow wooden bowl rather than a deep one. Top with extra feta and fresh parsley just before placing it on the main food board.
How to prepare healthy recipes?
Why we love this
Healthy additions to a food board don’t have to be boring—they should be the most colorful parts! We love rainbow veggie skewers with a tahini drizzle because they are a feast for the eyes and the body. The sensory experience is all about the ‘snap’ of perfectly cooked vegetables and the earthy, nutty aroma of toasted sesame. They offer a refreshing break from heavier items, providing a clean, crisp palate cleanser that leaves you feeling energized rather than weighed down. It’s proof that aesthetic and nutritious go hand-in-hand.
Ingredients
- Zucchini, bell peppers, and red onion
- Cherry tomatoes
- Tahini paste
- Lemon juice and maple syrup
- Sesame seeds
How to make it
- Cut the vegetables into uniform 1-inch chunks. Consistency in size ensures they all finish cooking at the same time.
- Thread the vegetables onto bamboo skewers in a repeating color pattern (red, orange, green, purple) for maximum visual impact.
- Lightly brush with olive oil and season with salt. Grill over medium heat for 6-8 minutes, turning once, until the edges are softened and slightly charred.
- Make the drizzle by whisking tahini, lemon juice, a splash of water, and a drop of maple syrup until smooth and pourable.
- Lay the skewers on the board and ‘strip’ them with the tahini sauce. Sprinkle with sesame seeds for a professional, finished look.
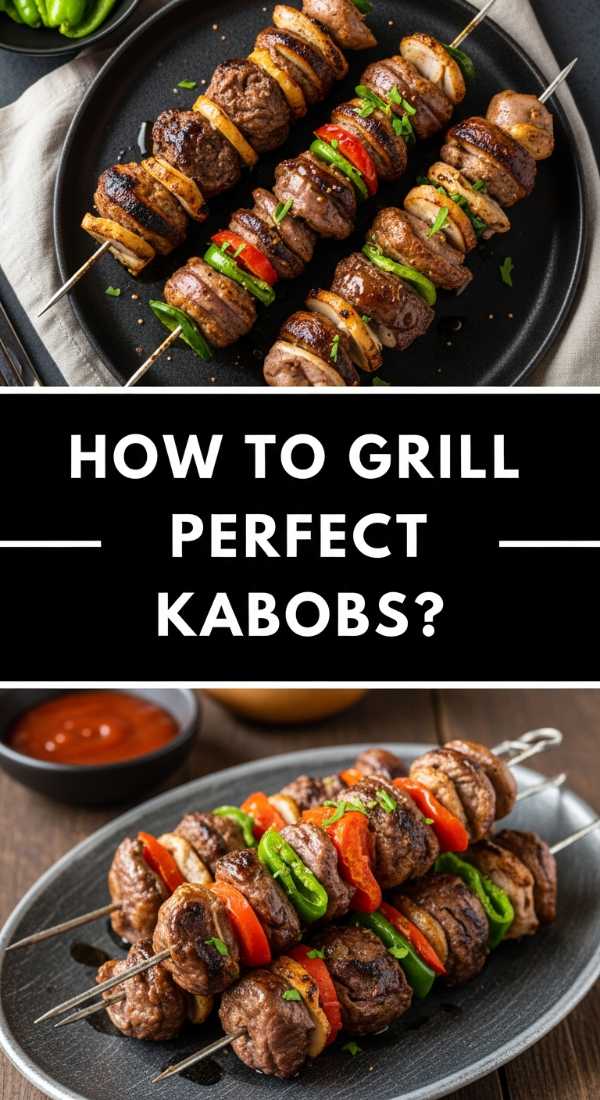
How to grill perfect kabobs?
[IMAGE_10]
Why we love this
Kabobs are the ultimate ‘viral’ food because they are essentially a meal on a stick. We love marinated steak and herb kabobs because they bring a robust, savory element to the board that feels substantial. The smell of searing meat and garlic butter hitting the flames is the quintessential scent of summer hosting. There’s a wonderful contrast between the charred, smoky exterior of the meat and the tender, juicy center. Arranged in a fan shape on a board, they look like a rustic feast fit for a king, yet they are so easy for guests to eat while standing and talking.
Ingredients
- Sirloin steak tips (cubed)
- Garlic cloves (minced)
- Fresh rosemary and thyme
- Soy sauce and Worcestershire sauce
- Butter (melted)
How to make it
- Marinate the steak cubes in a mixture of soy sauce, Worcestershire, minced garlic, and chopped herbs for at least 2 hours (or overnight for maximum tenderness).
- If using wooden skewers, soak them in water for 30 minutes prior to threading to prevent them from catching fire on the grill.
- Thread 4-5 pieces of steak per skewer, leaving a small gap between pieces. If they are packed too tightly, the sides won’t brown properly.
- Grill over high heat (450°F) to sear the outside quickly. For medium-rare, cook for about 3 minutes per side. Use a meat thermometer to pull them off at 130°F.
- While the meat rests, brush with melted garlic butter. The residual heat will melt the butter into the grains of the meat, creating a glossy, mouth-watering finish for your board display.
Conclusion: The Art of the Shared Table
Creating a viral-worthy food board isn’t about perfection; it’s about the abundance of the season and the joy of sharing. When you combine these diverse elements—from the smoky kabobs to the sweet berry galettes—you create a tapestry of flavors that invites people to linger, taste, and connect. Remember to use different heights, textures, and small bowls to create visual interest. Most importantly, keep the drinks cold and the atmosphere warm. Your guests won’t just remember the food; they’ll remember the way they felt sitting around your beautiful, bountiful table. Happy hosting!
Frequently Asked Questions
How do I keep my food board fresh if hosting outdoors?
The best way to maintain freshness is to assemble the board in stages. Keep temperature-sensitive items like dairy and meats in the fridge until the very last moment. Use marble boards or chilled platters to help keep items cool, and always host in a shaded area to avoid direct sunlight on the food.
What is the best way to arrange a board for the ‘viral’ look?
Start with your largest items first (like the bowls of dip or the pasta salad) to create ‘anchor points.’ Then, build out from there with your medium items (wraps, corn, kabobs). Finally, fill in every single gap with small items like berries, nuts, or herbs. A ‘no-gaps’ look is what gives it that lush, professional aesthetic.
Can I prepare these elements ahead of time?
Absolutely! Most of these components, like the pasta salad, the whipped feta, and the marinated steak, can be prepped 24 hours in advance. The actual assembly of the board should happen about 30 minutes before guests arrive to ensure everything looks its best.