

There is something truly magical about the way a perfectly curated food board can transform a simple afternoon gathering into a viral-worthy event. We’ve all scrolled through those mesmerizing social media feeds, eyes lingering on the vibrant colors and effortless elegance of a board overflowing with fresh ingredients. It’s more than just food; it’s an invitation to slow down, connect, and savor the beauty of the present moment with the people we love most.
Building an aesthetic food board isn’t about being a professional chef; it’s about the art of assembly and the joy of shared flavors. In this guide, I’m taking you behind the scenes of my favorite ‘viral’ staples—from crunchy wraps to sun-drenched salads—to help you build a board that isn’t just delicious, but a total masterpiece. Let’s dive into the textures, aromas, and secrets that will make your next spread the talk of the town.
HOW TO MAKE CAESAR WRAPS?
Why we love this
There is an undeniable satisfaction in the crisp, cool snap of Romaine lettuce paired with the rich, velvety texture of a classic Caesar dressing. Every bite offers a harmonious blend of salty parmesan, zesty lemon, and the earthy crunch of golden croutons tucked inside a soft, pillowy flour tortilla. It’s the ultimate handheld comfort food that feels light enough for a summer afternoon but hearty enough to satisfy a real appetite. The aroma of toasted garlic and savory chicken wafting from the board is enough to make anyone’s mouth water instantly.
Ingredients
- Large flour tortillas (room temperature)
- Grilled chicken breast, sliced into strips
- Hearts of Romaine lettuce, chopped
- Shaved Parmesan cheese
- Creamy Caesar dressing
- Croutons (crushed slightly)
- Freshly cracked black pepper
How to make it
- Prepare your chicken by grilling it over medium-high heat until it reaches an internal temperature of 165°F; let it rest for 5 minutes before slicing to ensure the juices redistribute for maximum tenderness.
- In a large mixing bowl, toss the chopped Romaine lettuce with just enough Caesar dressing to coat every leaf, ensuring the greens aren’t weighed down but are fully flavorful.
- Lay a tortilla flat on a clean surface and spread a thin layer of extra dressing across the center to act as a ‘glue’ for the other ingredients.
- Layer the sliced chicken, the dressed lettuce, a handful of crushed croutons for hidden crunch, and a generous sprinkling of shaved Parmesan.
- Fold the sides of the tortilla inward, then roll tightly from the bottom up, maintaining firm pressure so the wrap stays intact when sliced diagonally for the board.
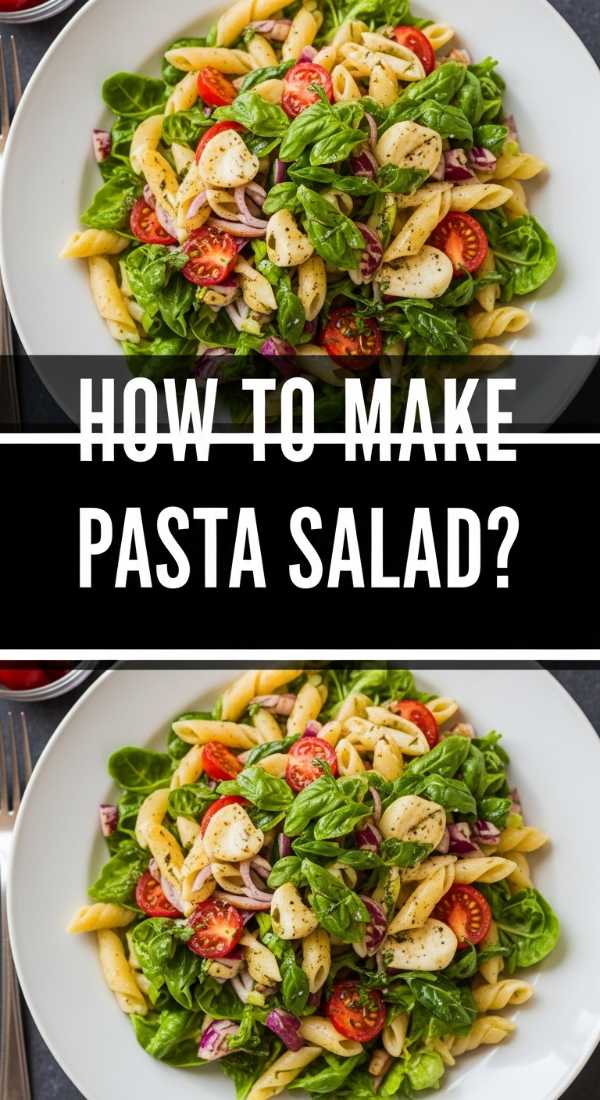
HOW TO MAKE PASTA SALAD?

Why we love this
A vibrant pasta salad is the undisputed crown jewel of any outdoor food board, bringing a playful medley of shapes and colors that catch the light beautifully. We love the way the al dente pasta cradles the tangy vinaigrette, releasing a burst of herbaceous aroma every time the bowl is passed. The contrast between the soft pasta and the sharp, salty punch of kalamata olives or feta cheese creates a sensory experience that feels like a Mediterranean vacation on a plate. It’s refreshing, endlessly customizable, and only gets better as the flavors meld together over time.
Ingredients
- Rotini or Fusilli pasta
- Cherry tomatoes, halved
- English cucumber, diced
- Red onion, finely minced
- Feta cheese crumbles
- Black olives or Kalamata olives
- Italian herb vinaigrette
- Fresh parsley and oregano
How to make it
- Boil the pasta in heavily salted water until it is just past ‘al dente’; this slightly softer texture allows the pasta to better absorb the dressing as it cools in the fridge.
- Drain the pasta and immediately rinse it under cold running water to stop the cooking process and remove excess starch, which prevents the salad from becoming gummy.
- In a massive bowl, combine the cooled pasta with your diced vegetables, ensuring everything is cut into bite-sized pieces for a consistent forkful every time.
- Pour half of your vinaigrette over the mixture and toss gently; let it sit in the refrigerator for at least 30 minutes to allow the pasta to ‘drink’ the flavors.
- Just before serving on your board, add the remaining dressing and the feta cheese to ensure the salad looks glistening and fresh rather than dry.
HOW TO PREPARE SUMMER SALADS?

Why we love this
Summer salads are an explosion of seasonal bounty, celebrating the peak sweetness of fruits and the peppery bite of fresh greens. There is something deeply rejuvenating about a salad that features stone fruits or berries paired with creamy goat cheese and toasted nuts, creating a profile that is both sweet and savory. The fragrance of torn mint and basil leaves lingering in the air adds a botanical depth that makes the meal feel sophisticated and light. It’s the kind of dish that looks like a work of art on your board, with jewel-toned fruits nestled in emerald leaves.
Ingredients
- Arugula or Spring Mix
- Fresh peaches or strawberries, sliced
- Goat cheese or Burrata
- Candied pecans or walnuts
- Balsamic glaze
- Fresh mint leaves
- Extra virgin olive oil
How to make it
- Start with a base of thoroughly dried greens; moisture is the enemy of a crisp salad, so use a salad spinner or pat them dry with a clean towel.
- Slice your fruit into uniform wedges; if using peaches, consider a quick 1-minute sear on a hot grill pan to caramelize the natural sugars for an extra layer of smoky flavor.
- Scatter the greens on a wide, shallow platter rather than a deep bowl to ensure every ingredient is visible and accessible for your aesthetic board layout.
- Dot the salad with small dollops of goat cheese or place a whole burrata ball in the center, breaking it open just before guests arrive so the creamy interior flows out.
- Finish with a precise drizzle of thick balsamic glaze and a final sprinkle of flaky sea salt to brighten all the natural flavors of the fruit.
HOW TO GRILL PERFECT KABOBS?

Why we love this
Kabobs bring a smoky, charred intensity to the board that immediately draws a crowd with the irresistible scent of caramelized protein and blistered vegetables. The sizzle of the grill creates those beautiful dark marks that look so professional and appetizing against the bright colors of bell peppers and red onions. We love the interactive nature of pulling tender pieces of meat from the skewer, feeling the warmth and smelling the infusion of garlic and woodsmoke. It’s a tactile, rustic addition that provides a hearty anchor to an otherwise light and airy spread.
Ingredients
- Sirloin steak or chicken thighs, cubed
- Bell peppers (red, yellow, green)
- Red onion, cut into chunks
- Zucchini rounds
- Olive oil, soy sauce, and honey (for marinade)
- Wooden or metal skewers
How to make it
- If using wooden skewers, soak them in water for at least 30 minutes prior to use to prevent them from igniting on the hot grill.
- Marinate your protein for at least 2 hours in a mixture of oil, acid (like lemon or vinegar), and aromatics to break down the muscle fibers for a melt-in-your-mouth texture.
- Thread the skewers by alternating meat and vegetables tightly; keeping them close together helps the ingredients steam slightly on the inside while the outsides char.
- Preheat your grill to a high heat (about 400°F) and oil the grates thoroughly; sear the kabobs for 3-4 minutes per side without moving them to develop those iconic grill marks.
- Brush on a final coating of glaze during the last 2 minutes of cooking to create a sticky, glossy finish that looks incredible on the serving board.
HOW TO BAKE SUMMER DESSERTS?

Why we love this
Nothing concludes a board experience quite like a warm, fruit-forward dessert that smells like sunshine and butter. We love the rustic charm of a galette or a crumble, where the juices of bubbling berries stain the golden crust in a way that looks perfectly imperfect. The aroma of cinnamon and vanilla mixing with the scent of baked peaches creates an atmosphere of pure nostalgia and homey warmth. It’s the sweet finale that invites everyone to linger a little longer, picking at the buttery crumbs and savoring the last bits of the evening.
Ingredients
- Mixed berries (blueberries, raspberries, blackberries)
- All-purpose flour and chilled butter (for crust)
- Granulated sugar and lemon zest
- Cornstarch (to thicken juices)
- Egg wash (1 egg + 1 tbsp water)
- Turbinado sugar (for topping)
How to make it
- Whisk your fruit with sugar, lemon zest, and a touch of cornstarch; let it sit for 10 minutes so the cornstarch can begin to absorb the excess moisture from the fruit.
- Roll out your chilled dough into a rough circle on parchment paper; the coldness of the butter is crucial for creating those flaky, air-filled layers during baking.
- Mound the fruit in the center of the dough, leaving a 2-inch border, then gently fold the edges over the fruit, pleating the dough as you go for a rustic look.
- Brush the edges with an egg wash and sprinkle generously with coarse turbinado sugar, which provides a sparkling, crunchy texture contrast to the soft fruit.
- Bake at 400°F until the crust is deep golden brown and the fruit filling is visibly bubbling and thickened, ensuring the bottom is fully cooked and crisp.
HOW TO MIX SUMMER COCKTAILS?

Why we love this
A signature summer cocktail is the ultimate accessory for your food board, offering a cooling, botanical escape from the heat. We love the clinking of ice against glass and the way a bright garnish—like a sprig of rosemary or a slice of blood orange—adds a pop of intentional beauty to the scene. The scent of slapped mint and freshly squeezed citrus is incredibly uplifting, setting a celebratory tone for the entire meal. Whether it’s a fizzy spritz or a muddled fruit infusion, these drinks act as the perfect palate cleanser between bites of savory cheese and salty meats.
Ingredients
- Base spirit (Gin, Tequila, or Vodka)
- Fresh lime or lemon juice
- Simple syrup or agave
- Club soda or Prosecco
- Fresh herbs (Mint, Basil, or Rosemary)
- Seasonal fruit (Watermelon, Cucumber, or Berries)
How to make it
- Muddle your fresh fruit and herbs in the bottom of a shaker first; use a firm but gentle twisting motion to release the essential oils without shredding the leaves.
- Add your citrus juice and sweetener, followed by the spirit; fill the shaker with plenty of ice—the more ice you use, the colder the drink gets without over-diluting.
- Shake vigorously for at least 15 seconds; you’ll know it’s ready when the outside of the metal shaker becomes frosty and painful to hold.
- Double strain the mixture into a glass filled with fresh ice to ensure no small bits of pulp or torn herbs ruin the smooth mouthfeel of the cocktail.
- Top with a splash of bubbles and garnish with an extra slice of fruit or a herb sprig that has been ‘slapped’ between your palms to wake up its fragrance.
HOW TO MAKE COOKOUT SIDES?

Why we love this
Cookout sides are the unsung heroes that provide the essential textures and familiar comforts that tie a whole board together. We love the creamy, tangy decadence of a classic potato salad or the buttery, charred sweetness of corn on the cob seasoned with smoked paprika. These dishes bring a sense of abundance and variety, offering salty, sweet, and acidic notes that complement the main proteins perfectly. The sight of a bowl of golden, herb-flecked sides nestled among the fresh components makes the entire spread feel like a true feast rather than just a snack.
Ingredients
- Sweet corn on the cob
- Red potatoes (boiled and cubed)
- Mayonnaise and Dijon mustard
- Fresh dill and chives
- Smoked paprika and sea salt
- Unsalted butter
How to make it
- For the corn, peel back the husks but leave them attached to use as a handle; char the kernels over an open flame until they are bright yellow with dark brown spots.
- Slather the hot corn in a compound butter mixed with lime zest and paprika, allowing the heat to melt the flavors deep into the crevices of the kernels.
- For the potato salad, boil the potatoes in vinegared water; the acidity penetrates the potato skin and seasons them from the inside out before the dressing is even added.
- Fold in the dressing while the potatoes are still slightly warm so they absorb the creaminess, but be careful not to over-mix or the potatoes will break down and become mushy.
- Garnish with a massive amount of fresh green herbs right before placing the bowl on the board to keep the colors vibrant and the aromas sharp.
HOW TO PREP HEALTHY SNACKS?

Why we love this
Healthy snacks provide the crunch and vitality that keep a food board feeling energized and light rather than heavy. We love the vibrant snap of raw sugar snap peas, the earthy richness of a smooth beet hummus, and the satisfying saltiness of dry-roasted almonds. These components add a rainbow of colors—deep purples, bright greens, and earthy tans—that make the board look incredibly nutrient-dense and appealing. There’s a quiet joy in knowing that these beautiful, delicious bites are also nourishing your body, making the indulgence feel balanced and thoughtful.
Ingredients
- Rainbow carrots (peeled and sliced)
- Sugar snap peas
- Watermelon radishes (thinly sliced)
- Homemade or store-bought hummus
- Raw almonds or walnuts
- Apple slices (tossed in lemon to prevent browning)
How to make it
- Prep your vegetables by placing them in an ice-water bath for 10 minutes before serving; this ‘shocks’ the cell walls, making them extra crunchy and refreshing.
- Slice the watermelon radishes using a mandoline on the thinnest setting to create translucent, flower-like rounds that add a high-end visual flair to the board.
- Transfer your hummus to a small ceramic bowl and create a deep ‘swirl’ on the surface with a spoon; fill the indentation with high-quality olive oil and a sprinkle of za’atar.
- Arrange the vegetables in a fan shape around the dip, grouping similar colors together to create a ‘gradient’ effect that is very popular in viral food photography.
- Fill any small gaps on the board with clusters of nuts or seeds, which provide a different scale of texture and help the board look ‘full’ and abundant.
HOW TO MAKE POOL SNACKS?
Why we love this
Pool snacks need to be effortlessly easy to grab, staying fresh and enticing even in the summer sun. We love the hydrating, icy coldness of frozen grapes or the simple, salty pleasure of cheese cubes paired with crisp crackers that don’t get soggy. These snacks are designed for grazing between laps or while lounging, offering quick bursts of energy and hydration. The visual of condensation on a bowl of chilled fruit or the orderly rows of bite-sized snacks creates a sense of organized relaxation that is perfect for a poolside ‘board’ aesthetic.
Ingredients
- Green and red grapes (frozen)
- Cheddar or Monterey Jack cubes
- Multigrain crackers
- Pretzel sticks
- Mini bell peppers filled with cream cheese
- Chilled pineapple wedges
How to make it
- Freeze your grapes for at least 4 hours on a flat baking sheet; this prevents them from clumping together and turns them into tiny, healthy sorbet bites.
- Cut your cheese into uniform 1-inch cubes; uniformity is key for a ‘clean’ aesthetic, and cubes are more heat-resistant than thin slices which might sweat and curl.
- Use small silicon cupcake liners or tiny ramekins to hold the crackers and pretzels; this keeps them separate from the ‘wet’ fruits so they stay perfectly crunchy.
- Slice mini bell peppers in half and fill them with a seasoned whipped cream cheese, topping them with ‘everything bagel’ seasoning for an easy, no-mess handheld snack.
- Keep the entire board on a bed of crushed ice or use a chilled marble slab to maintain the temperature of the dairy and fruit throughout the afternoon.
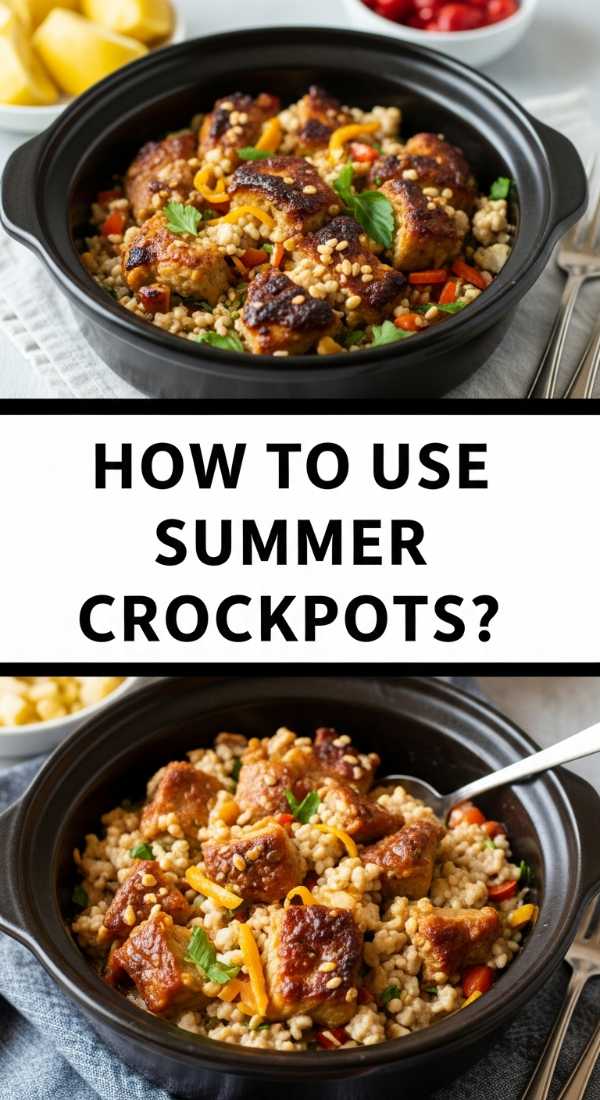
HOW TO USE SUMMER CROCKPOTS?
[IMAGE_10]
Why we love this
The summer crockpot is a secret weapon for creating a main focal point for your board without heating up the entire kitchen. We love the way slow-cooked, shredded meat—like carnitas or buffalo chicken—becomes so tender it practically melts, soaking up every drop of its savory, spiced braising liquid. The rich, mouthwatering aroma fills the house all day, building anticipation for the meal without requiring any active standing over a hot stove. It provides a warm, succulent contrast to the cold salads and raw veggies, making the board feel like a complete, multi-dimensional dining experience.
Ingredients
- Chicken breasts or pork shoulder
- Chicken broth or pineapple juice
- Dried spices (Cumin, chili powder, garlic powder)
- Salsa or hot sauce
- Lime juice and honey
How to make it
- Place your protein in the crockpot and rub it thoroughly with a dry spice blend before adding any liquid; this ensures the seasoning sticks to the meat.
- Pour in just enough liquid (broth or juice) to cover the bottom third of the meat; you want to braise the meat, not boil it, to maintain a better shredded texture.
- Set the temperature to ‘Low’ and cook for 6-8 hours; the low-and-slow method is essential for breaking down tough connective tissues into succulent, tender ribbons.
- Once cooked, remove the meat and shred it using two forks; return it to the pot for 20 minutes to soak up the concentrated juices left at the bottom.
- Serve the warm shredded meat in a beautiful cast-iron crock or bowl right in the center of your board, surrounded by mini buns or tortillas for DIY sliders.
The Art of the Finished Spread
Creating a viral-worthy food board is truly an exercise in mindfulness and creativity. By focusing on high-quality ingredients, contrasting textures, and thoughtful presentation, you turn a meal into a memory. Remember, the best boards are the ones that reflect your personal style and the flavors you love most. So, grab your favorite platter, start layering these delicious components, and enjoy the beautiful, edible landscape you’ve created.