
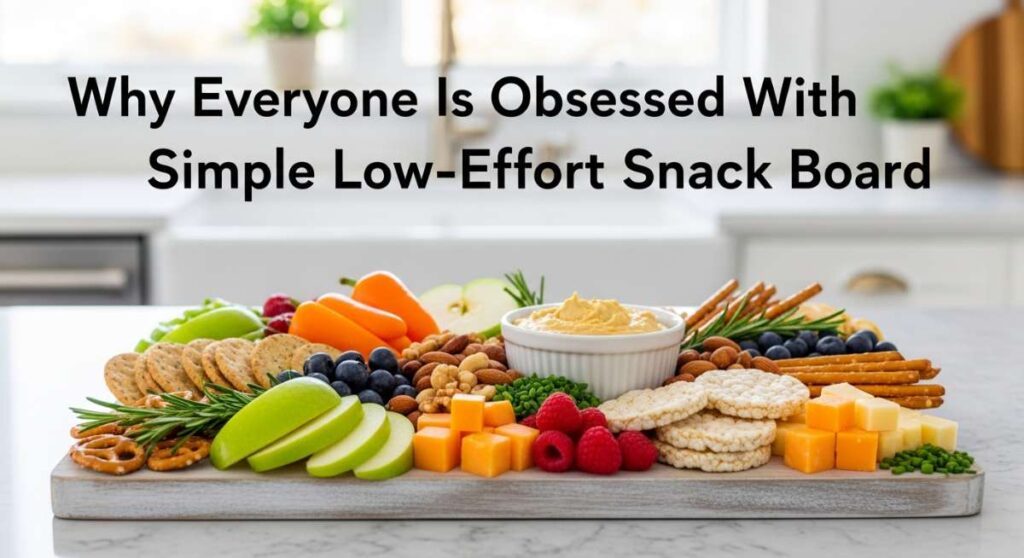
There’s a specific kind of magic that happens when you set a board down in the middle of a sun-drenched table. It’s that collective sigh of relief from your guests, the immediate reaching of hands, and the way the conversation instantly shifts from polite small talk to genuine, laughter-filled connection. In a world that feels increasingly complicated, we are all collectively craving the simple, the tangible, and the delicious. That is exactly why the internet has fallen head-over-heels for the low-effort snack board—it’s not about perfection; it’s about presence.
I remember the first time I ditched the multi-course plated dinner for a scattered, beautiful mess of flavors. I was exhausted, the house was a wreck, but the company was precious. Instead of stressing over a hot stove, I assembled a variety of vibrant, textures and colors. The result? Everyone stayed longer, ate better, and I actually got to enjoy my own party. This post is a love letter to that effortless hosting style, featuring ten versatile elements that can turn any wooden plank into a viral-worthy feast.
How to make cucumber salad?

Why we love this
This salad is the ultimate palate cleanser, offering a crisp, cooling snap that cuts through heavier board elements like cheeses or cured meats. The aroma of fresh dill combined with the sharp, acidic bite of rice vinegar creates a refreshing sensory experience that smells like a garden in mid-July. As you bite into the paper-thin slices, the gentle crunch echoes the brightness of the season, leaving a clean, zesty finish on your tongue that makes you want to reach back for just one more forkful.
Ingredients
- 2 large English cucumbers
- 1/2 red onion, thinly sliced
- 1/2 cup rice vinegar
- 2 tablespoons fresh dill, chopped
- 1 tablespoon honey or sugar
- 1 teaspoon sea salt
- 1/2 teaspoon red pepper flakes
How to make it
- Begin by washing your cucumbers thoroughly; use a mandoline slicer to achieve paper-thin, uniform rounds, which ensures every piece absorbs the dressing evenly.
- Place the sliced cucumbers in a colander and sprinkle with a teaspoon of salt, letting them sit for about 15 minutes to draw out excess moisture—this keeps the salad from becoming watery.
- In a separate small glass bowl, whisk together the rice vinegar, honey, and red pepper flakes until the sweetener is completely dissolved and the dressing looks clear.
- Pat the cucumbers dry with a clean kitchen towel and transfer them to a large mixing bowl along with the thinly sliced red onions and the freshly chopped dill.
- Pour the vinaigrette over the vegetables and toss gently with tongs to ensure every slice is coated; let it marinate in the fridge for at least 30 minutes before serving to let the flavors meld.
How to bake strawberry pie?

Why we love this
There is nothing quite like the scent of bubbling strawberries and buttery pastry wafting through a warm kitchen to make a house feel like a home. The texture of a perfect strawberry pie is a study in contrasts: the flaky, salt-kissed crust shattering against a jammy, ruby-red filling that is sweet but tempered by a hint of lemon zest. Each slice is a nostalgic journey, reminding us of roadside stands and summer picnics, with a vibrant color that pops beautifully when placed next to savory items on a dessert-focused board.
Ingredients
- 2 disks of refrigerated pie crust (or homemade)
- 6 cups fresh strawberries, hulled and halved
- 3/4 cup granulated sugar
- 1/4 cup cornstarch
- 1 tablespoon lemon juice
- 1 teaspoon vanilla extract
- 1 egg (for egg wash)
How to make it
- Preheat your oven to 400°F (200°C) and roll out one disk of pie dough, fitting it snugly into a 9-inch pie plate while leaving a slight overhang for crimping later.
- In a large mixing bowl, gently toss the halved strawberries with sugar, cornstarch, lemon juice, and vanilla until the berries are glossy and the powder is no longer visible.
- Pour the strawberry mixture into the prepared bottom crust, heaping them slightly in the center to account for the fruit shrinking as it cooks and releases its juices.
- Roll out the second piece of dough and place it over the top, either as a solid sheet with steam vents or cut into strips for a classic lattice pattern.
- Crimp the edges to seal, brush the top with a beaten egg wash for a golden sheen, and bake for 45-50 minutes until the crust is deeply browned and the filling is thick and bubbling through the vents.
How to marinate grilled chicken?
Why we love this
Adding a protein element like marinated chicken transforms a simple snack board into a satisfying meal that guests will rave about. The aroma of garlic and charred herbs hitting the grill creates an instant atmosphere of outdoor celebration and hospitality. When done right, the meat is incredibly succulent, carrying the bright notes of citrus and the earthy depth of oregano into every fiber. The texture is tender with just enough resistance from the caramelized exterior, providing a savory anchor to your spread.
Ingredients
- 1.5 lbs chicken breast or thighs
- 1/3 cup olive oil
- 1/4 cup fresh lemon juice
- 4 cloves garlic, minced
- 1 tablespoon dried oregano
- 1 teaspoon smoked paprika
- Salt and black pepper to taste
How to make it
- Prepare the chicken by patting it dry and cutting it into uniform strips or bite-sized cubes, which allows for maximum surface area to be in contact with the marinade.
- In a gallon-sized resealable bag or a shallow glass dish, combine the olive oil, lemon juice, minced garlic, oregano, and smoked paprika, whisking to emulsify the oil and acid.
- Submerge the chicken in the marinade, ensuring every piece is coated; seal the bag while removing as much air as possible to force the flavors into the meat.
- Refrigerate for at least 2 hours, though 6-8 hours is ideal for the most tender results; avoid marinating longer than 12 hours as the lemon juice can start to break down the proteins too much.
- Grill over medium-high heat (about 400°F) for 5-7 minutes per side, looking for clear juices and an internal temperature of 165°F, then let the meat rest for 5 minutes before slicing to lock in the moisture.
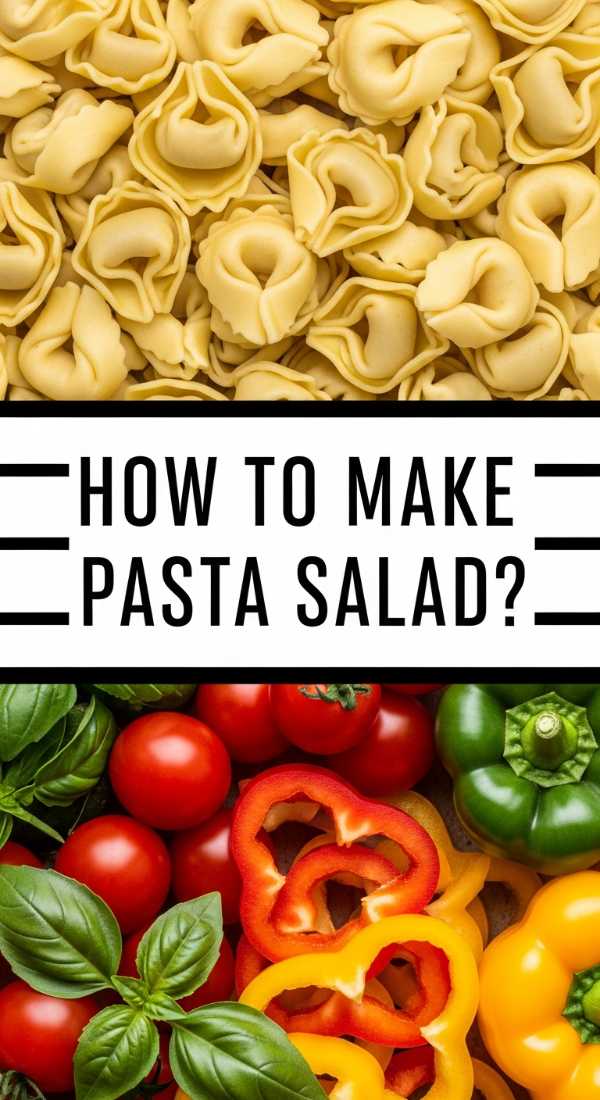
How to make pasta salad?
Why we love this
Pasta salad is the ultimate versatile canvas for color and texture, making it an essential component for a visual feast. We love the way the al dente pasta ridges catch the tangy vinaigrette, ensuring a burst of flavor in every bite. The combination of chewy pasta, creamy mozzarella pearls, and crunchy vegetables creates a multi-sensory experience that feels both indulgent and light. It’s the kind of dish that tastes even better as it sits, making it the perfect low-stress preparation for an afternoon gathering.
Ingredients
- 1 lb rotini or fusilli pasta
- 1 cup cherry tomatoes, halved
- 1/2 cup English cucumber, diced
- 1/2 cup Kalamata olives, sliced
- 4 oz mozzarella pearls
- 1/2 cup Italian dressing
- Fresh basil leaves for garnish
How to make it
- Bring a large pot of heavily salted water to a rolling boil and cook the pasta according to the package directions, but aim for “al dente” so it holds its shape when tossed.
- Immediately drain the pasta and rinse it under cold running water to stop the cooking process and remove excess starch, which prevents the pasta from sticking together.
- In a large serving bowl, combine the cooled pasta with the halved cherry tomatoes, diced cucumbers, olives, and the fresh mozzarella pearls.
- Drizzle the Italian dressing over the mixture and toss thoroughly, ensuring the dressing penetrates the spirals of the pasta for maximum flavor distribution.
- Taste and adjust seasoning with extra salt or pepper, then cover and chill for at least one hour; garnish with freshly torn basil just before serving to maintain the herb’s vibrant green color.
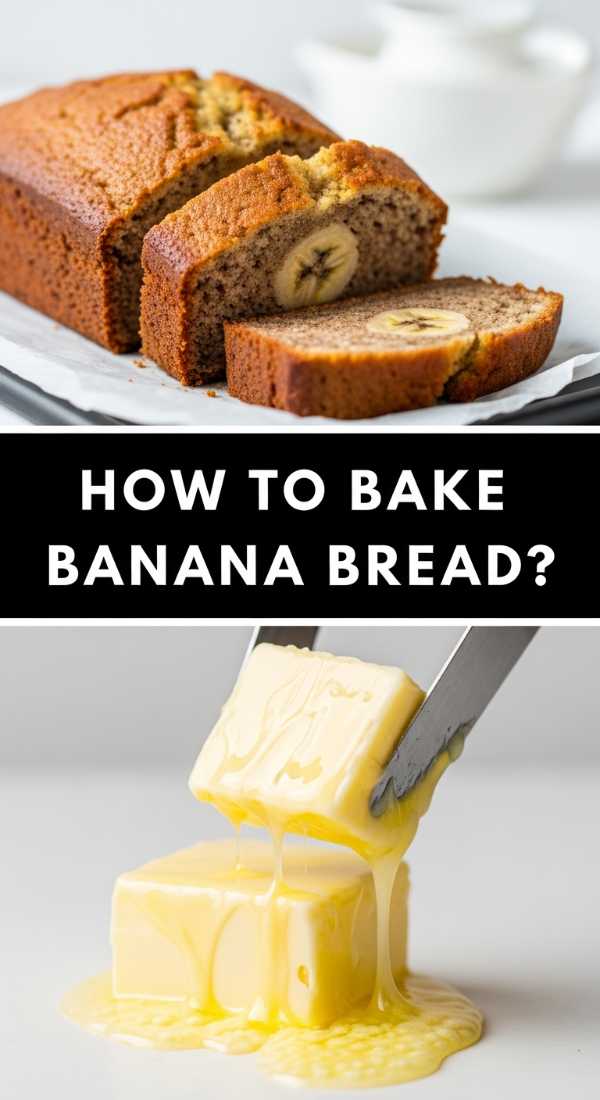
How to bake banana bread?

Why we love this
A slice of warm, dense banana bread is like a culinary hug, offering a deep, caramelized sweetness that pairs perfectly with a spread of salty cheeses or nuts. The aroma of cinnamon and overripe bananas baking in the oven is intoxicating, filling the home with a sense of cozy comfort that is impossible to ignore. The texture is moist and soft, with a tight crumb that holds up beautifully when sliced thin for a board, offering a rich, velvety mouthfeel that satisfies any sweet tooth.
Ingredients
- 3 very ripe bananas, mashed
- 1/3 cup melted butter
- 1/2 cup granulated sugar
- 1/2 cup brown sugar
- 1 large egg, beaten
- 1 teaspoon vanilla extract
- 1.5 cups all-purpose flour
- 1 teaspoon baking soda
How to make it
- Preheat your oven to 350°F (175°C) and grease a 4×8-inch loaf pan with butter or non-stick spray to ensure the bread releases easily after baking.
- In a large bowl, mash the ripe bananas with a fork until they are mostly smooth with only a few small lumps remaining for texture.
- Stir the melted butter into the mashed bananas using a wooden spoon, then fold in the sugars, beaten egg, and vanilla extract until the mixture is cohesive.
- Sprinkle the baking soda and salt directly over the wet ingredients, then gently fold in the flour—be careful not to overmix, as this will lead to a tough, rubbery loaf.
- Pour the batter into the prepared pan and bake for 50-60 minutes, or until a tester inserted into the center comes out clean; let the loaf cool in the pan for 10 minutes before transferring to a wire rack.
How to use sourdough discard?

Why we love this
Sourdough discard is the secret weapon of the resourceful home cook, adding a sophisticated, tangy depth to simple snacks. We love how it transforms what would be waste into a gourmet addition to our board, providing a subtle fermented note that pairs exquisitely with honey or sharp cheddar. When baked into crackers or flatbreads, it has a light, crisp texture and a complex aroma that hints at the artisan baking process, making even the simplest gathering feel a bit more elevated and intentional.
Ingredients
- 1 cup sourdough discard (unfed)
- 2 tablespoons melted butter
- 1/2 teaspoon sea salt
- 1 teaspoon dried herbs (rosemary or thyme)
- Flaky salt for topping
How to make it
- Preheat your oven to 325°F (165°C) and line a large rimmed baking sheet with a piece of parchment paper or a silicone baking mat.
- In a medium bowl, whisk together the sourdough discard, melted butter, sea salt, and your choice of dried herbs until the mixture is smooth and pours easily.
- Pour the batter onto the center of the parchment paper and use an offset spatula to spread it into a very thin, even layer, almost to the edges of the pan.
- Bake for 10 minutes, then remove from the oven to score the batter into squares using a pizza cutter; this ensures clean edges once the crackers are fully dried out.
- Return to the oven for another 20-30 minutes until the crackers are golden brown and firm to the touch; let them cool completely on the pan to reach maximum crunchiness.
How to cook on blackstone?
Why we love this
Cooking on a Blackstone griddle is a theatrical experience that brings the party outside, allowing the cook to be part of the social circle. The sheer surface area allows you to develop incredible caramelization—that “Maillard reaction”—on everything from vegetables to smash burgers simultaneously. We love the rhythmic sound of the spatulas against the steel and the smoky, savory steam that rises, promising a meal with those distinct, crispy edges that only a high-heat flat top can provide.
Ingredients
- Assorted vegetables (peppers, onions, zucchini)
- Thinly sliced steak or chicken
- High-smoke point oil (avocado or canola)
- Butter for finishing
- Your favorite dry rub or seasoning blend
How to make it
- Ensure your Blackstone is properly seasoned and preheat it on medium-high for about 10 minutes until you see a light wispy smoke coming off the surface.
- Apply a thin layer of high-heat oil across the surface using a squeeze bottle, spreading it with your spatula to create a non-stick cooking environment.
- Place your denser items, like onions and peppers, on the hottest part of the griddle first, tossing them frequently to get a char without burning the centers.
- Move the vegetables to a lower-heat zone (usually the edges) and place your proteins in the center, pressing down firmly with a press or spatula to maximize contact and crust formation.
- Finish by tossing everything together with a pat of butter and a final sprinkle of seasoning, then use the wide spatulas to scoop the entire feast onto a serving platter in one satisfying motion.
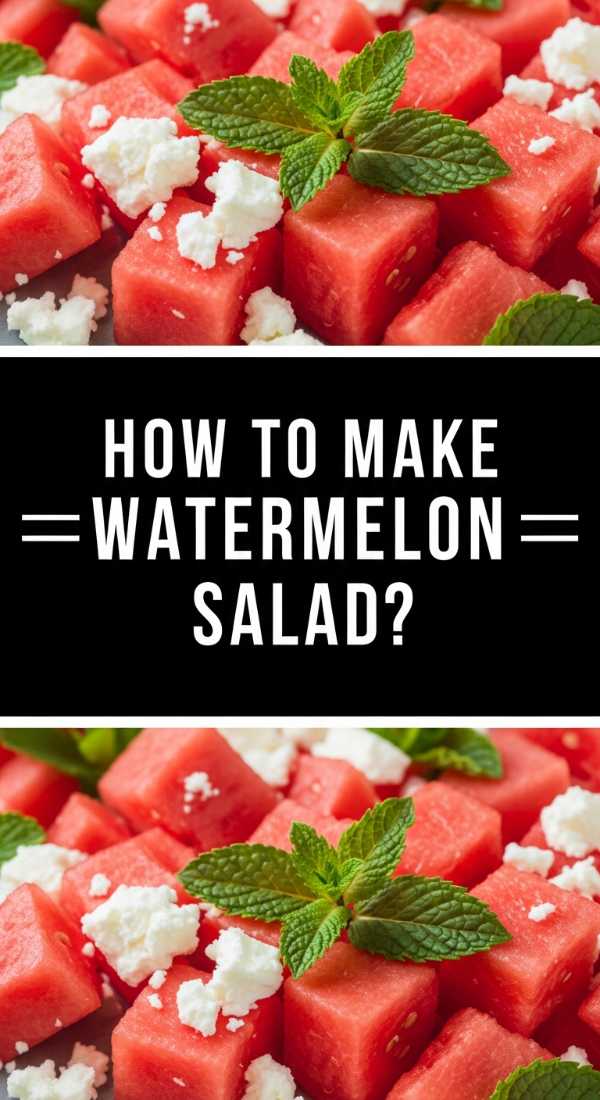
How to make watermelon salad?

Why we love this
Watermelon salad is the ultimate visual showstopper, offering a neon-pink pop of color that screams summer. The sensory experience is a wild ride: the icy, dripping sweetness of the melon clashing beautifully with the creamy, salty crumbles of feta cheese. Aromatic mint leaves add a herbal finish that clears the sinuses and refreshes the palate, making this dish the perfect antidote to a hot afternoon. It’s light, hydrating, and possesses a unique “crunchy-soft” texture that keeps you coming back for more.
Ingredients
- 6 cups cubed seedless watermelon
- 1/2 cup crumbled feta cheese
- 1/4 cup fresh mint leaves, chiffonade
- 2 tablespoons extra virgin olive oil
- 1 tablespoon lime juice
- A pinch of flaky sea salt
How to make it
- Start with a cold, seedless watermelon that has been refrigerated for at least 4 hours; cube the fruit into uniform 1-inch squares for a clean, professional look.
- In a wide, shallow bowl, arrange the watermelon cubes in a single layer or a gentle mound, being careful not to crush the delicate fruit.
- Whisk the olive oil and lime juice together in a small ramekin and drizzle it lightly over the watermelon to add a subtle shine and a hint of acidity.
- Sprinkle the crumbled feta cheese evenly across the top, ensuring there is a bit of white against the pink in every section of the dish.
- Finish with the thin ribbons of fresh mint and a light dusting of flaky sea salt, serving immediately while the melon is still crisp and cold.
How to bake pound cake?

Why we love this
A classic pound cake is the height of elegance in its simplicity, offering a rich, buttery flavor that acts as the perfect base for berries or cream on a snack board. The texture is unmistakably dense yet velvety, melting on the tongue with a sweet, vanilla-forward finish. We love the golden-brown crust that develops on the outside, providing a slight sugary resistance before giving way to the soft, pale interior. It’s a timeless bake that feels substantial and luxurious, filling the kitchen with the scent of sugar and toasted butter.
Ingredients
- 1 cup unsalted butter, softened
- 1 cup granulated sugar
- 4 large eggs, room temperature
- 2 teaspoons vanilla extract
- 1.5 cups all-purpose flour
- 1/2 teaspoon salt
How to make it
- Preheat your oven to 325°F (165°C) and prepare a loaf pan by greasing it thoroughly and dusting it with a light coating of flour to prevent any sticking.
- In a stand mixer, cream the softened butter and sugar together for at least 5 minutes on medium-high speed until the mixture is pale, light, and incredibly fluffy.
- Add the eggs one at a time, beating well after each addition and scraping down the sides of the bowl to ensure the emulsion stays smooth and doesn’t break.
- Lower the mixer speed and gradually add the flour and salt, mixing only until just combined; overmixing at this stage will ruin the signature tender texture of the cake.
- Pour the thick batter into the pan and bake for 60-70 minutes, checking with a skewer for doneness; let it cool completely before slicing for the cleanest, most beautiful pieces.
How to make hummingbird nectar?
[IMAGE_10]
Why we love this
While not for human consumption on the board, making hummingbird nectar is a lifestyle ritual that brings the beauty of nature right to your window while you enjoy your snacks. There is a quiet, meditative joy in boiling the sugar water, knowing you are providing energy for these tiny, iridescent creatures. The clear liquid is simple and pure, and the sight of a hummingbird hovering nearby while you share a meal with friends adds a layer of enchantment to any gathering. It’s a small act of stewardship that pays off in high-speed, fluttering wings and vibrant color.
Ingredients
- 1 cup granulated white sugar
- 4 cups filtered water
How to make it
- Combine the sugar and water in a medium saucepan over medium heat, stirring occasionally until the sugar is completely dissolved into the liquid.
- Bring the mixture to a brief boil for about 1-2 minutes; this helps to slow the growth of bacteria and mold once the nectar is placed in the feeder outside.
- Remove the pan from the heat and allow the nectar to cool completely to room temperature; never put hot nectar in a feeder as it can warp the plastic or harm the birds.
- Once cooled, fill your hummingbird feeder, ensuring you do not add any red dye, as this is unnecessary and can be harmful to the birds’ health.
- Store any extra nectar in a clean, sealed container in the refrigerator for up to two weeks, and be sure to clean your feeder every few days to keep your feathered visitors safe.
The Joy of Low-Effort Hosting
At the end of the day, the obsession with the simple snack board isn’t just about the food—it’s about the freedom it gives us. By choosing recipes that are easy to prep, visually stunning, and crowd-pleasing, we reclaim our time and our energy. Whether you’re tossing a quick pasta salad or watching the hummingbirds from your porch, these little moments of culinary joy remind us that life is best served simply. So, grab a board, pick a few of these favorites, and invite someone over. The magic is in the sharing.