

There is something undeniably magical about that moment when you look at a corner of your home and see not just what it is, but what it could be. We’ve all been there—scrolling through our feeds late at night, eyes widening at a transformation so clever and beautiful it makes our hearts skip a beat. It’s that spark of inspiration that whispers, ‘I can do that, too.’ Whether you have a sprawling backyard or a cozy balcony, the projects currently taking over the internet right now are all about reclaiming our spaces and infusing them with personality, soul, and a little bit of sweat equity.
Creating a home you love isn’t about having a massive budget; it’s about the stories we tell through the colors we choose and the structures we build with our own two hands. These viral DIYs aren’t just trends; they are invitations to slow down, get your hands a little dirty, and create a sanctuary that reflects exactly who you are. From the earthy scent of fresh cedar in the garden to the satisfying click of a stencil meeting a concrete floor, these projects engage all your senses and turn the mundane into the extraordinary.
How to Build a Garden Trellis for More Privacy

Why we love this
There is a profound sense of peace that comes from a secluded garden nook, where the world fades away behind a wall of living greenery. This trellis project offers more than just a boundary; it provides a vertical canvas for climbing jasmine or romantic roses to weave through. Imagine the intoxicating, honey-sweet aroma of blooms catching the evening breeze while the rough, textured grain of natural cedar provides a sturdy, grounded contrast to the delicate, flickering shadows of leaves dancing against the wood.
Essential Elements:
- Weather-resistant cedar or pressure-treated lumber (2x4s for the frame, 1x2s for the slats).
- Galvanized wood screws.
- Outdoor wood stain or sealant.
- Post-hole digger and quick-set concrete (if free-standing).
- Climbing plants like Clematis, Honeysuckle, or Star Jasmine.
How to make it
- Measure your intended space carefully, ensuring you account for at least 18-24 inches of post depth if you are anchoring it into the ground for stability against wind.
- Cut your vertical 2×4 support posts to size, then cut your horizontal 1×2 slats to the desired width of the trellis, ensuring all cuts are square for a professional finish.
- Lay the two side posts parallel on a flat surface and begin attaching the 1×2 slats using a spacer block (about 2 inches wide) to ensure perfectly even gaps between every single piece.
- Pre-drill every hole before driving in your galvanized screws; this is a critical professional tip to prevent the cedar from splitting and ensuring the structure lasts for years.
- Once assembled, sand the entire structure with 120-grit sandpaper to remove stamps or splinters, then apply a high-quality UV-rated outdoor sealant to preserve the wood’s warm, golden hue.
- Dig your post holes, level the trellis perfectly using a spirit level, and pour in the quick-set concrete, bracing the structure until it is fully cured before planting your vines at the base.
How to Style Porch Planters for Instant Curb Appeal
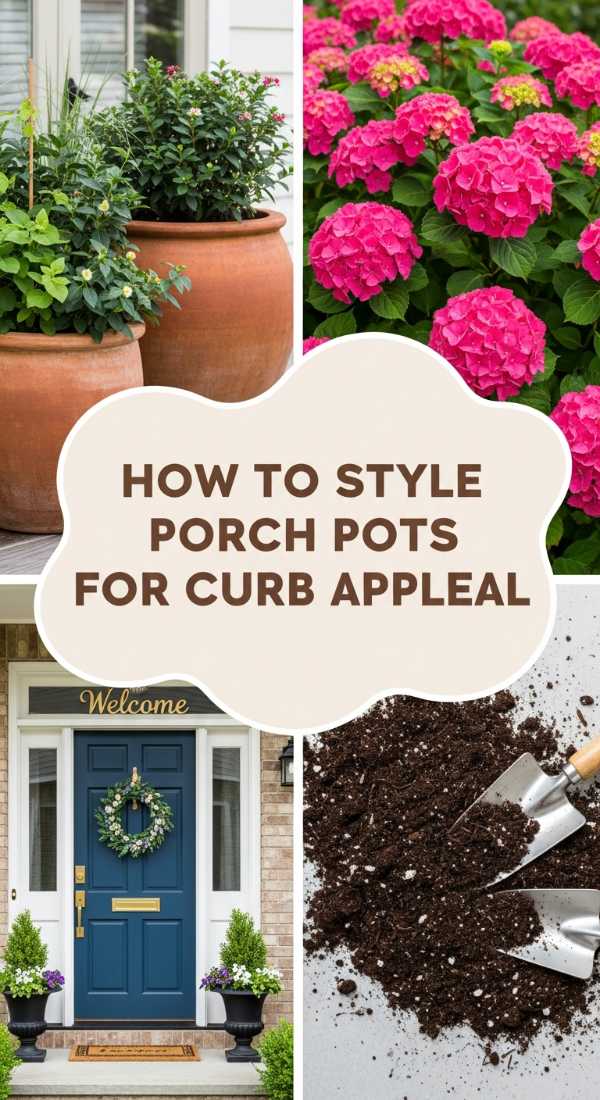
Why we love this
First impressions start at the front door, and nothing says ‘welcome home’ quite like a pair of lush, expertly styled planters. The visual impact of vibrant, overflowing greenery against a crisp entryway creates an immediate sense of luxury and care. You can almost feel the cool, damp earth as you tuck in your ‘thriller, filler, and spiller’ plants, creating a multi-dimensional masterpiece that smells of damp moss and fresh petunias, instantly softening the hard lines of your home’s architecture.
Essential Elements:
- Two large, high-quality planters (ceramic or heavy-duty resin).
- Premium moisture-control potting mix.
- Slow-release fertilizer granules.
- A ‘Thriller’ plant (e (tall focal plant like Dracaena or Grass).
- A ‘Filler’ (mid-height mounding plants like Geraniums or Lantana).
- A ‘Spiller’ (trailing plants like Sweet Potato Vine or Creeping Jenny).
How to make it
- Clean your planters thoroughly and ensure they have adequate drainage holes; if not, carefully drill three to four half-inch holes in the bottom to prevent root rot.
- Fill the bottom third of the container with empty plastic water bottles or packing peanuts to reduce weight and save on expensive soil, then top with high-quality potting mix.
- Mix in your slow-release fertilizer granules into the top six inches of soil to ensure your plants have a steady food supply throughout the growing season.
- Place your ‘Thriller’ plant in the center (or back, if against a wall), ensuring the top of the root ball is about an inch below the rim of the pot.
- Surround the focal plant with your ‘Fillers,’ packing them closely enough to look full but leaving a tiny bit of room for growth, then tuck the ‘Spillers’ along the very edges so they can tumble over the side.
- Water deeply until water runs out of the bottom, and finish with a layer of decorative mulch or moss to retain moisture and provide a polished, designer look.
How to Use River Rocks for a Low Maintenance Yard
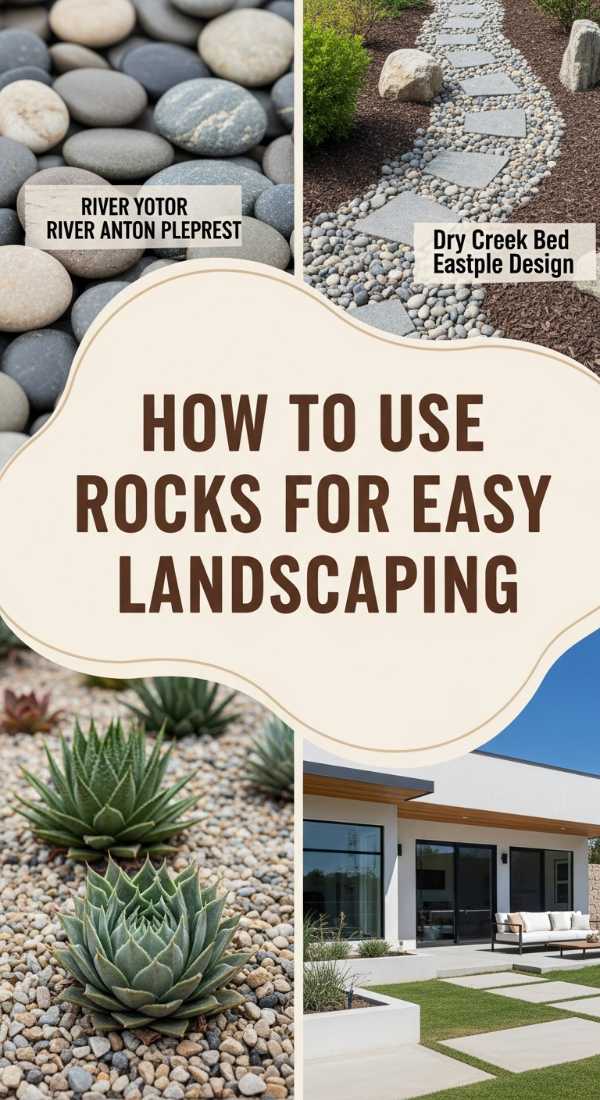
Why we love this
There is a serene, Zen-like quality to the smooth, cool surface of river rocks nestled into a landscape. They bring an organic, grounded texture to the yard that feels both modern and timeless, replacing the high-maintenance thirst of a lawn with a palette of soft greys, tans, and creams. When the rain hits them, they glisten with a deep, rich luster, and the sound of footsteps crunching softly over the stones provides a rhythmic, grounding sensory experience that connects you directly to the earth.
Essential Elements:
- Bulk river rocks (1-3 inch diameter is standard).
- Heavy-duty landscape fabric (pro-grade).
- Steel or plastic landscape edging.
- Garden rake and shovel.
- Landscape staples.
How to make it
- Clear the area of all grass, weeds, and debris, then use a shovel to excavate about 2-3 inches of soil to ensure the rocks sit flush with the surrounding ground level.
- Tamp the soil down firmly to create a stable base, then roll out your professional-grade landscape fabric, overlapping edges by at least 6 inches to prevent any stubborn weed growth.
- Secure the fabric with landscape staples every 12 inches, making sure it is pulled taut and smooth across the entire surface area.
- Install your edging material along the perimeter to keep the stones contained; use a mallet to drive the stakes deep into the ground so the edge doesn’t heave during temperature changes.
- Pour the river rocks onto the fabric in small mounds, then use a heavy-duty garden rake to spread them evenly to a depth of roughly two inches, ensuring no fabric is visible.
- Rinse the rocks with a garden hose to remove the fine dust from the quarry, revealing their natural colors and ensuring your new low-maintenance zone looks pristine.
How to Build a Backyard Grill Station for Summer Entertaining
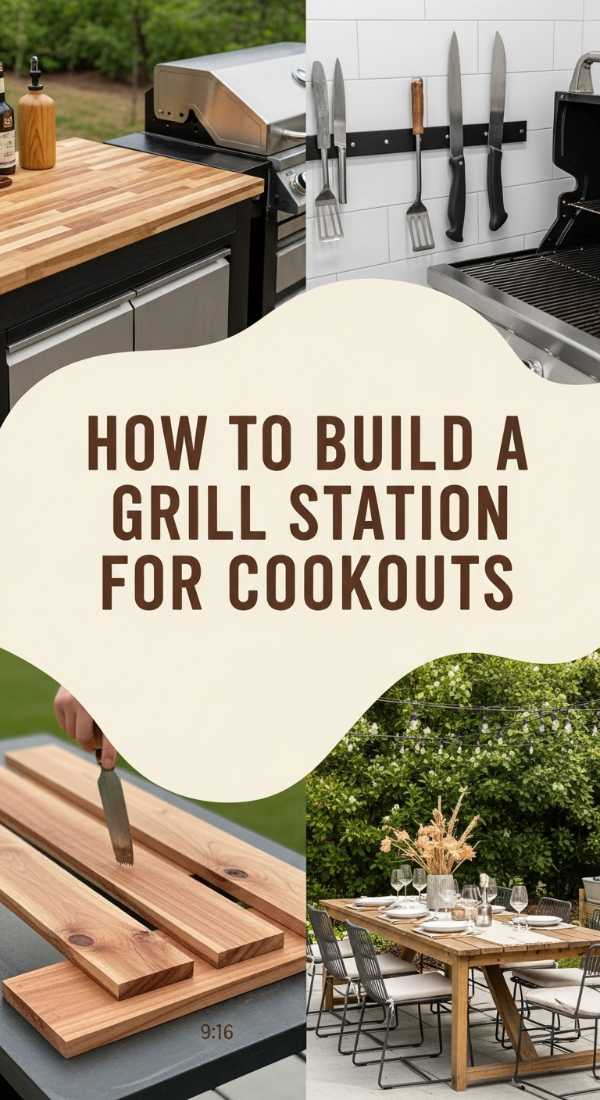
Why we love this
The heart of the home moves outdoors the moment the grill is lit and the scent of charred oak and marinating meats fills the air. A dedicated grill station transforms a simple cookout into a culinary event, offering a smooth, expansive workspace that makes the ‘grill master’ feel like a professional chef. There is something incredibly satisfying about the tactile feel of a cold stone countertop under your hands while you prep, and the organized convenience of having every tool exactly where it belongs in the heat of a summer party.
Essential Elements:
- Pressure-treated 4x4s and 2x4s for the frame.
- Exterior-grade plywood or cement board.
- Stone veneer or outdoor-rated tile.
- Countertop material (concrete, granite, or tiled).
- Stainless steel drop-in grill or a custom cutout for your existing grill.
How to make it
- Design your layout on paper first, ensuring you have at least 24 inches of counter space on either side of the grill for prep and serving platters.
- Construct the base frame using pressure-treated lumber and deck screws, ensuring every corner is perfectly square and the entire structure is leveled on your patio surface.
- Sheath the frame in cement board rather than plywood if you plan on using stone veneer, as this provides a superior, non-combustible surface for the mortar to bond to.
- Apply your stone veneer or tile using outdoor-rated thin-set mortar, working from the bottom up and using spacers to keep your lines clean and professional.
- Measure and cut your countertop; if using concrete, build a melamine form, pour the mix, and let it cure for at least 7 days before polishing and sealing it for heat and stain resistance.
- Install the grill and any accessories like paper towel holders or magnetic tool strips, ensuring all gas lines (if applicable) are connected by a professional or checked twice for leaks.
How to Modernize a Ranch Exterior for a Fresh Look

Why we love this
A ranch-style home has a classic silhouette, but a modern refresh can breathe entirely new life into its long, low lines. By playing with contrast—think deep charcoals against warm wood accents—you create a sophisticated, high-end look that feels contemporary yet grounded. The transformation is visual and emotional; as the old, faded siding disappears under a coat of crisp, matte paint and new hardware glints in the sun, the entire property begins to feel like a high-end retreat rather than just a house.
Essential Elements:
- High-quality exterior paint (Satin or Matte finish).
- Cedar planks for accent siding or shutters.
- Modern black hardware (house numbers, mailbox, lighting).
- Power washer and high-quality paint sprayer.
- Wood sealer and professional-grade caulk.
How to make it
- Start by power washing the entire exterior to remove decades of dust and oxidation; let the surface dry for at least 48 hours to ensure the paint adheres perfectly.
- Scrape away any peeling paint and apply a high-quality exterior caulk to all gaps around windows and doors to create a seamless, weather-tight seal.
- Use a professional paint sprayer for the main body of the house, applying two thin, even coats rather than one thick one to avoid drips and ensure a durable, smooth finish.
- Install cedar slat accents on a portion of the facade or as shutters; pre-stain these with a clear or light oak UV-protectant to provide that signature modern ‘warm wood’ contrast.
- Swap out outdated, small light fixtures for oversized, matte black lanterns and replace old house numbers with sleek, floating sans-serif digits for a designer touch.
- Finish the look by painting the front door in a bold, contrasting color or stripping it back to natural wood, creating a focal point that draws the eye and ties the modern aesthetic together.
How to Stencil Concrete Patios for a Designer Finish
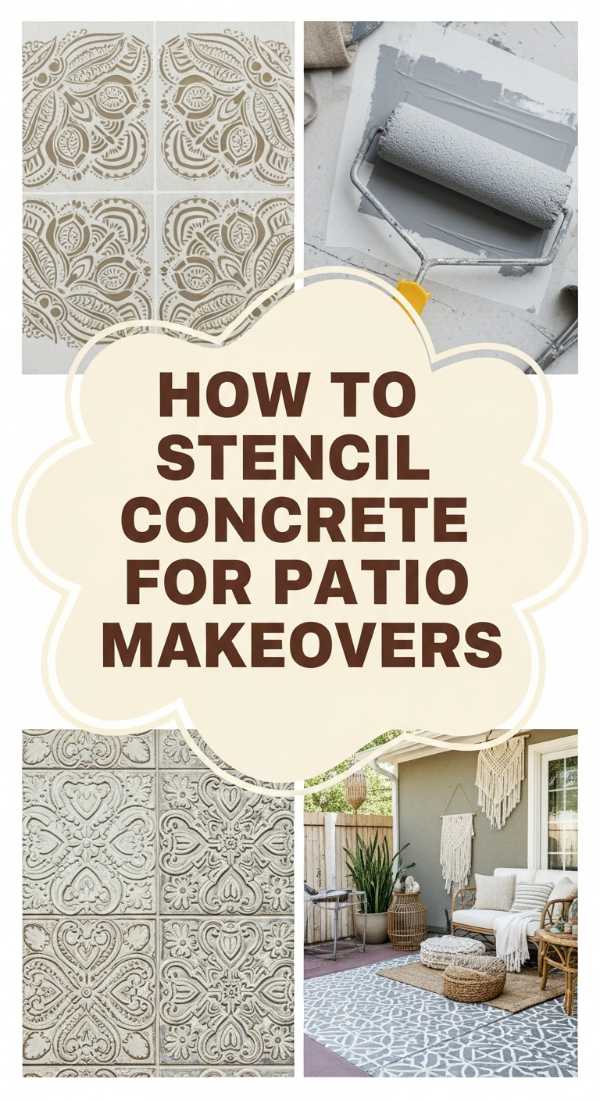
Why we love this
Why settle for gray, uninspired concrete when you can have a Mediterranean-inspired courtyard right in your backyard? Stenciling is a labor of love that rewards you with a stunning, intricate pattern that mimics the look of expensive cement tiles. The process of peeling back the stencil to reveal a perfect, crisp design is incredibly gratifying, and the finished product—a tapestry of pattern underfoot—transforms your patio into an outdoor ‘rug’ that feels soft on the eyes and luxurious under bare feet.
Essential Elements:
- Large-scale floor stencil pattern.
- Concrete-specific porch and patio paint (Base color and Pattern color).
- High-density foam rollers and a stencil brush.
- Painter’s tape and a measuring tape.
- Clear outdoor concrete sealer.
How to make it
- Clean the concrete surface with a degreaser and a stiff brush, then etch it with a mild acid wash if the concrete is very smooth to ensure the paint bonds for the long term.
- Apply two coats of your base color (usually a lighter neutral) using a long-handle roller, allowing it to dry fully for at least 24 hours between coats.
- Locate the center of your patio and mark it; start your first stencil here to ensure the pattern is symmetrical and flows evenly toward the edges of the space.
- Secure the stencil with painter’s tape and use a ‘dry brush’ technique—loading the roller with paint and then rolling most of it off onto a paper towel—to prevent bleeding under the stencil.
- Carefully move the stencil, aligning the registration marks with your previous section, and continue across the patio, using a small brush to touch up any minor imperfections.
- Once the entire pattern is dry, apply two coats of a high-quality clear concrete sealer in a slip-resistant finish to protect your hard work from the elements and foot traffic.
How to Style a Pallet Mud Kitchen for Endless Outdoor Play

Why we love this
There is nothing quite like the joyful, messy creativity of a child lost in play, and a pallet mud kitchen is the ultimate stage for these childhood memories. It smells of damp earth, crushed mint leaves, and imagination. This project turns humble, reclaimed wood into a rustic workstation where ‘mud pies’ are gourmet delicacies. The weathered texture of the pallets combined with shiny stainless steel bowls creates a charming, cottage-core aesthetic that looks beautiful in the garden while providing hours of screen-free entertainment.
Essential Elements:
- Two or three heat-treated (HT) wood pallets.
- Stainless steel mixing bowls (to serve as sinks).
- Old kitchen faucets or knobs.
- Outdoor-rated wood glue and deck screws.
- A set of hooks for ‘utensils.’
How to make it
- Ensure your pallets are stamped with ‘HT’ (Heat Treated) rather than ‘MB’ (Methyl Bromide) to ensure they are safe for children to touch and play around.
- Disassemble one pallet to use the boards for shelving and a countertop, then use two upright pallets to form the base and backboard of the kitchen.
- Sand every single surface of the wood with 80-grit then 120-grit sandpaper to eliminate all splinters; this is the most time-consuming but vital step for safety.
- Cut holes in your countertop boards using a jigsaw, sized specifically to the diameter of your stainless steel bowls so they sit snugly as ‘sinks.’
- Assemble the kitchen using wood glue and screws, adding a high shelf for storing ‘ingredients’ like pinecones and stones, and installing your old faucet for a realistic touch.
- Finish with a coat of non-toxic, child-safe outdoor wood oil to protect the wood from moisture while keeping its natural, rustic appearance.
How to Create Whimsical Glass Art for a Colorful Garden

Why we love this
Garden glass art captures the sun and scatters it across your flower beds in a kaleidoscope of brilliant color. These ‘garden totems’ or ‘glass flowers’ add a touch of whimsy and height to your landscape even in the dead of winter when the blooms have faded. The smooth, cool touch of vintage glassware and the way it rings like a bell when gently tapped adds a delicate, musical quality to your outdoor space, turning your yard into a sparkling, jewel-toned gallery.
Essential Elements:
- Vintage glass plates, bowls, and vases (thrifted).
- Heavy-duty waterproof glass adhesive (like GE Silicone II).
- Copper pipe or sturdy rebar for the stakes.
- Rubber mallet.
- Glass drill bits (if mounting horizontally).
How to make it
- Spend time ‘shopping’ your local thrift stores for colorful, textured glass; look for sun-catchers, dessert plates, and interesting vases that will stack well together.
- Clean all glass pieces thoroughly with rubbing alcohol to remove any oils or residues that could interfere with the adhesive’s bond.
- Experiment with stacking your pieces on a flat table until you find a balanced, aesthetically pleasing ‘totem’ or ‘flower’ shape that resonates with your style.
- Apply a generous bead of clear silicone adhesive to the contact points of each glass piece, stacking them carefully and allowing the entire structure to cure undisturbed for at least 48 hours.
- For upright totems, attach a glass vase or a specific ‘adapter’ piece to the bottom of your stack that will fit snugly over a copper pipe.
- Drive your copper pipe or rebar into the ground using a rubber mallet, then carefully slide your glass masterpiece over the top, ensuring it is secure and level to catch the maximum amount of light.
How to Design a Nostalgic Bedroom for the Ultimate Retro Vibe

Why we love this
A nostalgic bedroom is like a warm hug from the past, blending the bold textures of the 70s with the soft, dreamy pastels of the 90s. It’s a space that feels deeply personal and curated, filled with the cozy glow of a lava lamp and the tactile richness of velvet throw pillows. Stepping into a room like this feels like stepping out of the hectic modern world and into a sanctuary where time moves a little slower and every object has a story to tell.
Essential Elements:
- Vintage-inspired wallpaper or a bold accent wall color (mustard, sage, or terracotta).
- Textured textiles (chenille, velvet, or shag rugs).
- Retro lighting (mushroom lamps or neon signs).
- Second-hand teak or rattan furniture.
- Record player and vinyl display.
How to make it
- Start by choosing a color palette that anchors the ‘era’ you love most; for a 70s vibe, lean into earthy ochres and oranges; for a 90s feel, go for soft lavenders and inflatable-inspired accents.
- Apply a peel-and-stick wallpaper with a geometric or floral retro pattern to one main wall to act as the focal point of the entire room.
- Layer your bedding with different textures—start with high-thread-count cotton sheets, add a heavy chenille bedspread, and finish with a variety of velvet and faux-fur cushions for maximum depth.
- Source a piece of ‘hero’ furniture from a local vintage shop, such as a mid-century modern nightstand or a rattan headboard, and clean it with wood oil to restore its original luster.
- Curate your lighting by avoiding harsh overhead lights; instead, place lamps at varying heights around the room to create a soft, amber glow that highlights the textures of the space.
- Add the final ‘nostalgia’ layers—a dedicated corner for a record player, a gallery wall of polaroid photos, and a few thriving indoor plants like a Monstera or Pothos to bring life to the retro aesthetic.
How to Create a Cozy Duck Enclosure for Happy Backyard Pets

Why we love this
There is a unique, pastoral joy in hearing the soft, rhythmic ‘quacks’ of happy ducks in your own backyard. A cozy enclosure isn’t just a home; it’s a rustic retreat that combines practical safety with farmhouse charm. Imagine the scent of fresh, dry straw and the sight of your ducks splashing in a clean pond, their feathers glistening under the sun. This project brings a sense of wholesome, sustainable living to your home, creating a peaceful ritual of morning feedings and evening lock-ups.
Essential Elements:
- Hardware cloth (1/2 inch mesh) for predator protection.
- Timber for the frame (2x4s and plywood).
- A sloped roof with shingles or corrugated metal.
- A small water feature or heavy-duty plastic pool.
- Bedding (straw or pine shavings).
How to make it
- Frame out the coop using pressure-treated lumber, ensuring the floor is elevated at least 6-12 inches off the ground to prevent dampness and deter burrowing predators.
- Use hardware cloth for all ‘window’ and run areas; unlike chicken wire, hardware cloth is strong enough to stop raccoons and foxes, which is critical for duck safety.
- Install a sloped roof to allow for rain runoff, using corrugated metal for that classic farmhouse ‘ping’ sound during rainstorms and excellent durability.
- Create a wide, easy-to-clean door and a ramp with ‘cleats’ (small strips of wood) so the ducks can easily navigate the incline even when their feet are wet.
- Incorporate a dedicated ‘wet zone’ in the attached run with a pond that can be easily drained and refilled, as ducks require water to clean their bills and feathers daily.
- Fill the coop with a deep layer of high-quality straw, ensuring there is plenty of ventilation near the roofline to keep the air fresh while protecting the ducks from drafts.
Conclusion: Your Home, Your Masterpiece
At the end of the day, these DIY projects are about more than just home improvement; they are about the pride that comes from saying, ‘I built that.’ Whether you’re stenciling a patio or building a sanctuary for backyard ducks, you are weaving your own story into the very fabric of your living space. So grab your tools, embrace the beautiful mess of the process, and start creating the home you’ve always dreamed of—one project at a time.