

5-Minute Snacking: The Simple Food Board Going Viral Right Now
We have all been there—that hazy mid-afternoon slump where the kitchen feels like a mountain you just aren’t ready to climb, yet your cravings are calling for something more than just a handful of dry crackers. There is a certain magic in the ‘Simple Food Board’ movement that has taken the internet by storm lately. It’s not about perfection or intricate garnishes; it’s about the emotional relief of assembling a vibrant, nourishing spread in mere minutes that feels like a celebration of the everyday. It’s about the clinking of small plates, the shared laughter over a snack, and the way a well-composed board can turn a mundane Tuesday into a memory.
The beauty of this trend lies in its versatility, blending the comfort of classic home-style recipes with the freshness of seasonal produce. Whether you are prepping for a solo lunch or hosting a spontaneous backyard gathering, these ideas bridge the gap between ‘effortless’ and ‘extraordinary.’ In this guide, we are diving deep into the elements that make these boards go viral, from nostalgic pies to the crunchiest summer salads, ensuring your next snack session is as photogenic as it is delicious.
7 Best Shoney’s Strawberry Pie Recipes (Step-by-Step Guide)

Why we love this
There is something undeniably nostalgic about a Shoney’s style strawberry pie, with its glossy, ruby-red glaze cascading over mounds of plump, sun-ripened berries. As you slice into it, the aroma of sweet sugar and fresh fruit fills the air, instantly transporting you to a sunny diner booth from years gone by. The texture is a masterclass in contrasts: the buttery, crumbly crust provides a sturdy base for the silky-smooth gelatin glaze that coats every single crevice of the fruit. It’s a cooling, vibrant dessert that feels like a hug in pie form, perfect for rounding out any snack board with a burst of bright, berry sweetness.
Ingredients
- 1 pre-baked 9-inch pie crust
- 2 lbs fresh strawberries, hulled and cleaned
- 1 cup granulated sugar
- 1 cup water
- 3 tbsp cornstarch
- 3 oz package strawberry flavored gelatin
- Whipped cream for topping
How to make it
- Start by carefully washing your strawberries and patting them completely dry; any excess moisture will thin out your glaze later. Hull the berries and keep them whole for that iconic, towering look.
- In a medium saucepan over medium heat, whisk together the granulated sugar, water, and cornstarch. Bring the mixture to a gentle boil, stirring constantly to prevent the cornstarch from clumping or burning on the bottom.
- Continue to simmer the mixture for about 2-3 minutes until it transitions from a cloudy appearance to a clear, thick syrup. Watch for a slow, viscous bubble—this is your visual cue that the starch has fully activated.
- Remove the pan from the heat and immediately whisk in the strawberry gelatin powder. Stir vigorously until every crystal is dissolved and the glaze is a uniform, deep red color.
- Allow the glaze to cool slightly for about 10 minutes so it doesn’t cook the berries. Meanwhile, arrange your whole strawberries snugly inside the pre-baked pie shell, pointing the tips upward.
- Slowly pour the slightly cooled glaze over the berries, ensuring every strawberry is thoroughly coated and the gaps are filled. Refrigerate the pie for at least 3-4 hours until the glaze is firmly set and cold to the touch.
5 Easy Rotel Dip Recipes for Your Next Party
Why we love this
The scent of Rotel dip is the universal signal that the party has officially started, characterized by the smoky aroma of browned sausage and the sharp, creamy tang of melted cheese. As you dip a salty tortilla chip into the bowl, the heavy, velvet-like consistency clings perfectly, offering a spicy kick from the diced green chilies. It’s a warm, indulgent experience that satisfies every savory craving, with the steam rising from the bowl carrying notes of cumin and garlic. This dip isn’t just food; it’s a centerpiece that brings people together, encouraging communal snacking and endless refills.
Ingredients
- 1 lb processed cheese (like Velveeta), cubed
- 1 can (10 oz) Ro*Tel diced tomatoes and green chilies
- 1 lb ground breakfast sausage or taco-seasoned beef
- 1/2 tsp smoked paprika
- Fresh cilantro for garnish
How to make it
- Place a large skillet over medium-high heat and add your ground sausage or beef. Use a wooden spoon to break the meat into small crumbles as it browns.
- Cook the meat thoroughly until it reaches an internal temperature of 160°F and no pink remains. Drain the excess fat carefully into a glass jar—this ensures your dip is creamy rather than oily.
- Turn your stove heat down to low. Add the cubed processed cheese directly into the skillet with the meat, stirring gently as it begins to soften and lose its shape.
- Open the can of Ro*Tel tomatoes and pour the entire contents (including the liquid) into the skillet. The acidity in the tomato juice helps balance the richness of the cheese.
- Continue to stir the mixture in a slow, circular motion over low heat. It is crucial not to rush this process with high heat, which can cause the cheese to seize or burn; aim for a slow, consistent melt until the dip is perfectly smooth.
- Once the dip is bubbling softly and fully incorporated, sprinkle in the smoked paprika. Serve immediately in a warmed bowl to maintain that perfect dipping consistency throughout the evening.
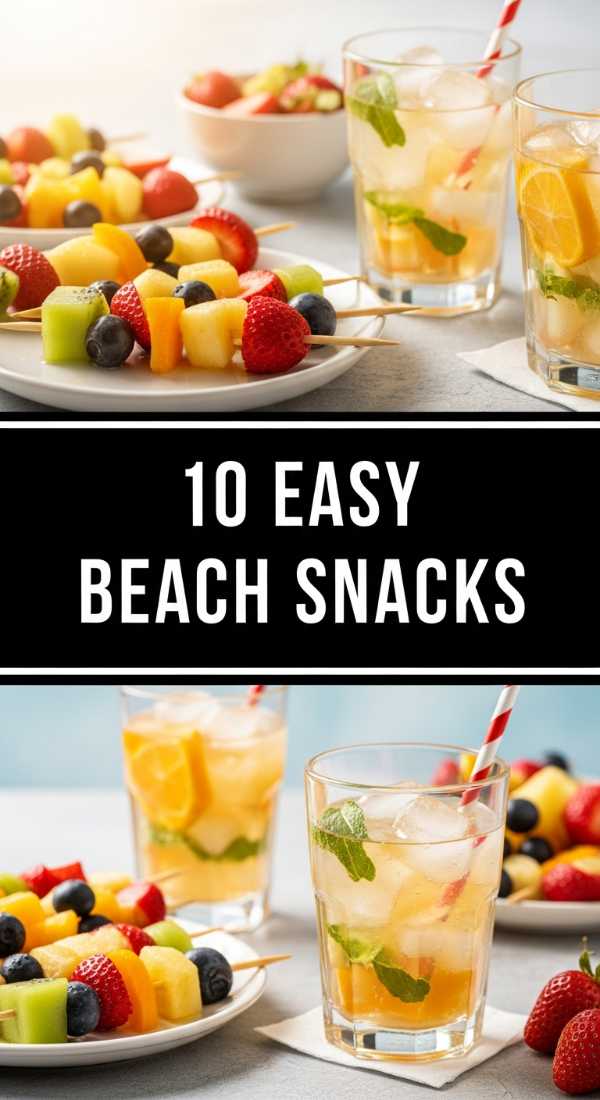
10 Simple Beach Snack Ideas for Summer Fun
Why we love this
Imagine the sun on your skin and the rhythmic sound of waves as you open a cooler to find the perfect, refreshing beach snack. These snacks are designed for portability and resilience against the heat, focusing on textures that stay crisp and flavors that hydrate. From the satisfying snap of chilled cucumber slices to the salty crunch of air-popped popcorn, beach snacks provide a necessary energy boost between swims. The sensory experience is all about freshness—the cold temperature of the food contrasting with the warm sand, and the clean, bright flavors of fruit and light grains that won’t weigh you down.
Ingredients
- Frozen grapes and melon skewers
- Individual hummus cups with carrot sticks
- Rice cakes with almond butter
- Salted edamame (steamed and chilled)
- Dried mango strips
How to make it
- For the frozen fruit, wash your grapes and melon chunks thoroughly the night before. Thread them onto skewers or place them in a single layer on a baking sheet to freeze individually before transferring to a bag; this prevents them from freezing into a solid block.
- Prepare the hummus cups by spooning two tablespoons of dip into the bottom of small, airtight mason jars. Standing the carrot and celery sticks upright in the hummus keeps them crisp and makes for a mess-free, one-handed snack.
- Steam your edamame in a pot of boiling water for exactly 4 minutes until they are bright green and tender. Immediately shock them in an ice bath to stop the cooking process and preserve the color, then sprinkle generously with coarse sea salt.
- Package your rice cakes in a hard-sided container to prevent crushing. Store the almond butter in a separate small container to be spread just before eating, which keeps the rice cake from becoming soggy in the humidity.
- Layer all snacks in an insulated cooler bag with at least three large ice packs. Place the items that need to stay coldest, like the hummus and frozen grapes, at the very bottom directly against the ice.
8 Best Pre Made Camping Meals to Save Time
Why we love this
Camping is all about the crackle of the fire and the smell of pine, but no one wants to spend their entire outdoor adventure hovering over a stove. Pre-made camping meals offer the luxury of a home-cooked dinner with the convenience of a grab-and-go snack, featuring hearty ingredients that stand up well to being reheated over charcoal. There is something profoundly satisfying about peeling back the foil of a pre-assembled packet to reveal steaming, seasoned potatoes and savory proteins. The flavors are deep and comforting, designed to replenish your energy after a long hike while letting you focus on the starlit sky rather than a sink full of dishes.
Ingredients
- Pre-marinated chicken breast or steak tips
- Foil packet potatoes (sliced thin with onions)
- Vacuum-sealed breakfast burritos
- Mason jar overnight oats
- Hearty chili (pre-cooked and frozen)
How to make it
- Start your prep three days in advance by marinating your proteins in heavy-duty zip-top bags. Use acidic marinades (lemon or vinegar-based) to help tenderize the meat, and squeeze out all the air before sealing to ensure maximum flavor penetration.
- Construct your foil packets by layering thinly sliced potatoes and onions on a double layer of heavy-duty aluminum foil. Add a generous pat of butter, salt, and herbs, then fold the edges tightly to create a steam-proof seal that won’t leak onto the grill.
- Assemble breakfast burritos with scrambled eggs, cheese, and cooked chorizo. Wrap them first in parchment paper, then in foil; the parchment prevents the tortilla from sticking to the foil when you heat it over the campfire grate.
- Freeze your pre-cooked chili in flat, quart-sized freezer bags. This allows them to act as additional ice packs in your cooler during the trip, and they will thaw perfectly by the second or third night for a quick pour-and-heat dinner.
- When you arrive at the campsite, wait for your fire to burn down to a bed of glowing red coals rather than active flames. Place your foil packets on the outer edges of the grate for indirect heat, rotating them every 10 minutes to ensure even cooking without scorching the bottom.
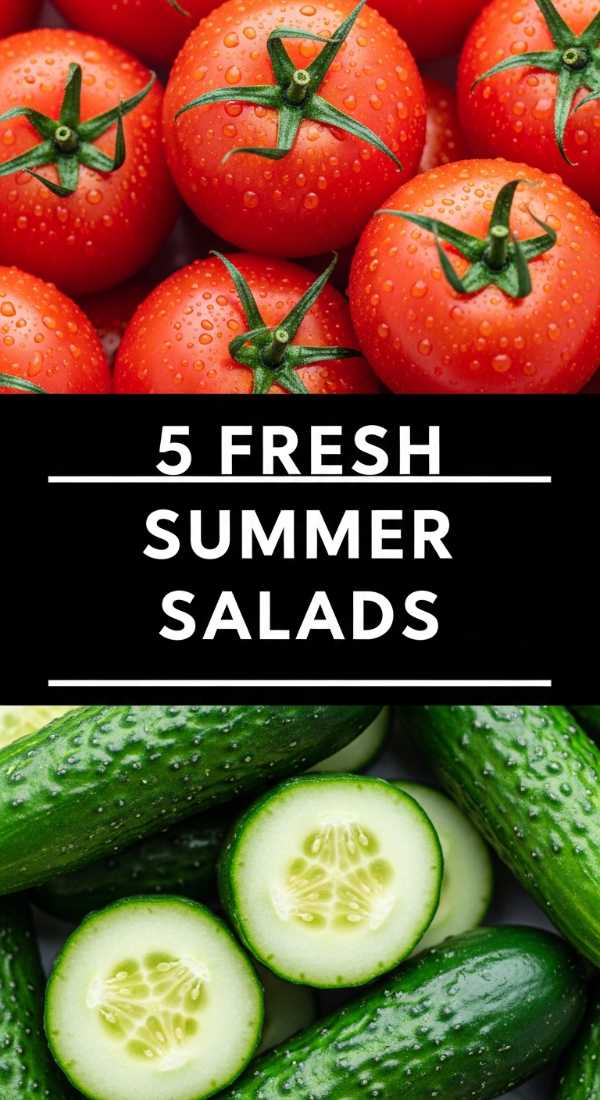
5 Fresh Tomato Cucumber Salad Recipes You’ll Love
Why we love this
This salad is the ultimate tribute to the peak of summer, where the scent of fresh basil and the tang of red wine vinegar fill the kitchen. Each bite is an explosion of textures: the yielding, juicy sweetness of a vine-ripened tomato paired with the sharp, clean snap of a chilled Persian cucumber. It’s a dish that feels incredibly light yet deeply satisfying, with the dressing forming a beautiful ‘marry’ of juices at the bottom of the bowl that you’ll want to soak up with crusty bread. The vibrant colors—deep reds, bright greens, and slivers of purple onion—make it a stunning visual addition to any viral food board.
Ingredients
- 3 large heirloom tomatoes, chopped
- 2 English cucumbers, sliced into half-moons
- 1/2 red onion, thinly mandolined
- 1/4 cup extra virgin olive oil
- 2 tbsp red wine vinegar
- 1/2 cup crumbled feta cheese
- Fresh cracked black pepper and flaky sea salt
How to make it
- Begin by slicing your cucumbers and placing them in a colander over the sink. Sprinkle them with a pinch of salt and let them sit for 10 minutes; this draws out excess water so your salad doesn’t become watery after assembly.
- Core and chop your tomatoes into bite-sized wedges. Use a serrated knife to ensure clean cuts without crushing the delicate interior of the fruit.
- In a small glass jar, combine the olive oil, red wine vinegar, and a pinch of dried oregano. Shake vigorously until the dressing is emulsified and looks slightly creamy.
- Combine the tomatoes, drained cucumbers, and onions in a large wooden bowl. Toss gently by hand or with large spoons to ensure the vegetables are mixed without bruising the tomatoes.
- Drizzle the dressing over the vegetables and toss once more. This is the time to add your cracked black pepper, which will cling to the oil on the vegetables.
- Top with the crumbled feta cheese just before serving. Avoid over-mixing once the cheese is added to keep the cubes intact and the dressing clear rather than cloudy.
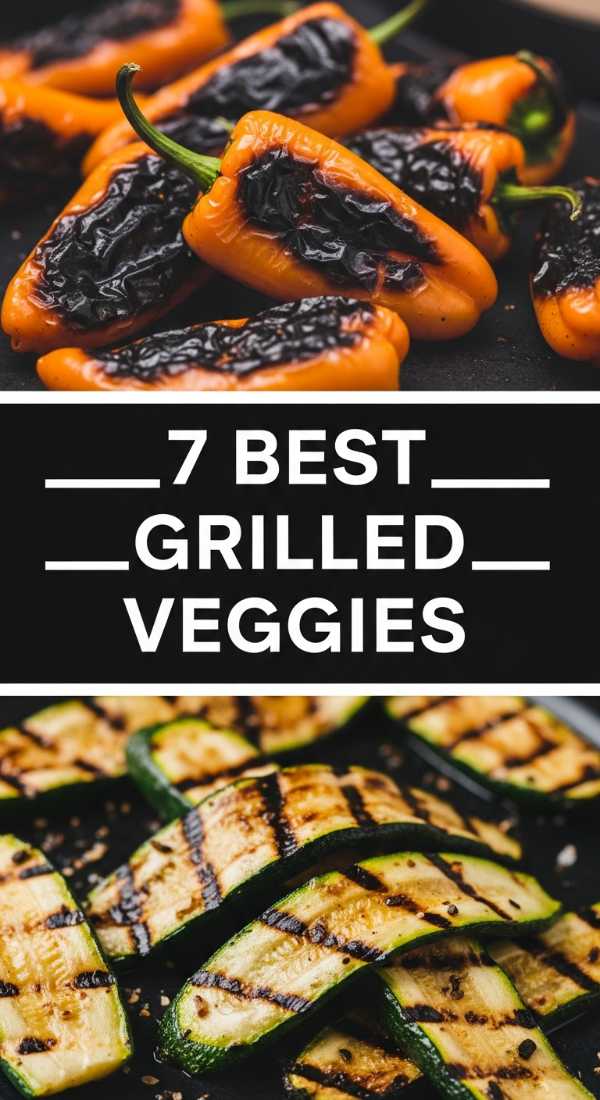
7 Top Grilled Veggies on the Grill Ideas

Why we love this
Grilling vegetables transforms them from simple sides into charred, caramelized stars of the show. The aroma of smoky bell peppers and slightly burnt onion edges is enough to make anyone’s mouth water, bringing a sophisticated depth to your vegetable platter. There is a specific joy in seeing those perfect, dark grill marks across a bright yellow squash or a vibrant asparagus spear. The texture becomes tender and succulent, with the high heat of the grill intensifying the natural sugars in the produce, creating a sweet-and-savory profile that pairs perfectly with a cold dipping sauce or a drizzle of balsamic glaze.
Ingredients
- Zucchini and yellow squash, sliced lengthwise
- Bell peppers (red, orange, and yellow), quartered
- Whole portobello mushroom caps
- Asparagus spears, woody ends trimmed
- Balsamic reduction and olive oil
How to make it
- Preheat your grill to medium-high (about 400°F). A hot grate is the only way to achieve those beautiful char marks without overcooking the inside of the vegetable into mush.
- Place all your prepped vegetables in a large bowl and toss them with high-smoke-point oil (like avocado oil) and salt. Avoid using butter at this stage as it will burn too quickly under direct flame.
- Lay the zucchini and squash slices diagonally across the grates. Do not move them for at least 3-4 minutes; this patience is what creates the defined sear lines that look so professional.
- For the asparagus, lay them perpendicular to the grill grates so they don’t fall through, or use a perforated grill basket. Cook them for only 5 minutes until they are bright green and just starting to blister.
- Once all veggies are tender and charred, remove them to a platter. Immediately drizzle with a thick balsamic reduction while they are still hot; the heat helps the glaze soak into the charred surfaces.
10 Quick Easy Summer Meals for Busy Nights

Why we love this
Summer nights are for lingering on the porch, not standing over a hot stove, which is why quick, easy meals are the backbone of a viral lifestyle. These meals focus on minimal heat and maximum flavor, utilizing pre-cooked proteins and fresh produce to create something that feels like a gourmet treat. The sensory experience is light and airy—crisp lettuce cups, chilled shrimp, and zesty citrus dressings that cut through the humidity of a July evening. It’s the feeling of total ease, knowing you can have a colorful, healthy dinner on the table in the time it takes to pour a glass of iced tea.
Ingredients
- Rotisserie chicken (shredded)
- Pre-washed arugula or spring mix
- Canned chickpeas (rinsed and dried)
- Store-bought pesto or chimichurri
- Quick-cooking couscous or quinoa
How to make it
- Start by preparing your quick grain, like couscous, by simply adding boiling water and covering for 5 minutes. Fluff it with a fork and immediately zest a lemon over it to brighten the flavor profile.
- Shred the rotisserie chicken while it is still slightly warm, as the meat pulls away from the bone more easily. Toss the chicken in a bowl with two tablespoons of pesto to keep it moist and flavorful.
- Crisp up your chickpeas in a dry pan over high heat for 3 minutes. This adds a much-needed crunch to your meal without the need for heavy croutons or frying.
- Assemble ‘power bowls’ by layering the greens at the bottom, followed by a scoop of the lemon couscous and a generous portion of the pesto chicken.
- Garnish with any leftover fresh herbs you have on hand—mint, parsley, or basil all work beautifully to add a final layer of aromatic freshness to the bowl.
5 Best Chicken Caesar Wraps Recipes for Lunch

Why we love this
The Chicken Caesar wrap is a masterclass in the balance of creamy, crunchy, and savory notes. When you bite through the soft, flour tortilla, you are met with the cool, refreshing snap of Romaine lettuce followed by the rich, umami punch of Parmesan cheese and anchovy-laced dressing. The aroma of garlic and black pepper is prominent, making this a lunch that feels truly indulgent despite its simplicity. It’s the ultimate ‘on-the-go’ fuel that keeps its integrity even if packed in a bag for a few hours, offering a reliable and delicious texture that satisfies the deepest of savory cravings.
Ingredients
- Large flour tortillas
- Grilled chicken breast, sliced into strips
- Chopped Romaine hearts
- Shredded Parmesan cheese
- Creamy Caesar dressing and croutons (crushed)
How to make it
- Lay your tortilla on a flat surface and warm it for 10 seconds in a dry skillet; a warm tortilla is more pliable and less likely to tear during the rolling process.
- In a medium mixing bowl, toss the chopped Romaine and chicken strips with the Caesar dressing. It is important to dress the salad before putting it in the wrap to ensure every bite is evenly coated.
- Add a handful of crushed croutons to the salad mixture. Crushing them slightly ensures they provide crunch without creating large bumps that make the wrap difficult to seal.
- Place the filling in a horizontal line across the center of the tortilla, leaving about 2 inches of space on each side. Sprinkle the shredded Parmesan directly over the filling.
- Fold the sides of the tortilla inward over the filling, then start rolling from the bottom up, tucking the edge tightly as you go. Visual cue: the wrap should feel firm and cylindrical, not loose or floppy.
- Slice the wrap on a sharp diagonal. This not only makes it look beautiful for your food board but also makes it easier to handle and eat.
10 Viral Summer Desserts to Cool You Down

Why we love this
Nothing says viral summer like a dessert that looks like a work of art and keeps you perfectly chilled. These desserts focus on frozen textures—from the icy granita that melts on your tongue to the rich, slow-churned creaminess of a homemade fruit pop. The colors are electric: bright magentas from dragonfruit, deep oranges from mango, and creamy whites from coconut milk. Each bite is an escape from the heat, providing a sensory rush of sweetness followed by the refreshing sting of cold that makes summer afternoons so much more bearable. They are the perfect ‘finishing touch’ for a viral food board, adding height and vibrant pops of color.
Ingredients
- Fresh fruit purees (mango, strawberry, peach)
- Coconut milk or Greek yogurt
- Honey or agave nectar
- Edible flowers or mint leaves for garnish
- Popsicle molds or small paper cups
How to make it
- Blend your fresh fruit into a smooth puree using a high-speed blender. Strain the mixture through a fine-mesh sieve if you prefer a smooth texture without seeds or pulp.
- In a separate bowl, whisk together your base (coconut milk or yogurt) with your sweetener of choice. Taste the mixture; remember that flavors become slightly muted once frozen, so it should be a tiny bit sweeter than you think you need.
- For a marbled look, alternate pouring the fruit puree and the creamy base into your molds. Use a skewer to gently swirl the layers together—stop after two or three swirls to avoid mixing them into a solid color.
- Drop in a few edible flowers or a mint leaf near the edge of the mold so they are visible through the ice once frozen. This is the ‘viral’ secret to making them look professional.
- Freeze for a minimum of 6 hours. When ready to serve, run the outside of the mold under warm water for 5 seconds to loosen the dessert without melting the intricate edges.
8 Best Picnic Side Dishes for Your Next Outing
[IMAGE_10]
Why we love this
The perfect picnic side dish is one that travels well and actually tastes better as the flavors meld over time. Think of hearty pasta salads with sun-dried tomatoes or a tangy German potato salad that doesn’t rely on mayonnaise. The texture should be robust—nothing that will wilt or turn soggy in the heat—offering a satisfying chew and a bright, acidic finish. There is an emotional comfort in opening a reusable container to find a rainbow of beans, corn, and herbs, all perfectly seasoned and ready to be shared on a checkered blanket under the shade of a big oak tree.
Ingredients
- Orzo pasta or cheese tortellini
- Sun-dried tomatoes and Kalamata olives
- Fresh parsley and dill, chopped fine
- Lemon-tahini or herb vinaigrette
- Roasted chickpeas or toasted pine nuts
How to make it
- Cook your pasta in heavily salted water until it is just past al dente. For picnic salads, you want the pasta slightly softer so it can absorb the dressing without becoming tough when served cold.
- Drain the pasta and immediately toss it with half of your dressing while it is still steaming. This allows the pasta to soak up the aromatics into its core rather than just coating the surface.
- Let the pasta cool to room temperature before adding your fresh herbs and vegetables. If you add them while the pasta is hot, the herbs will turn dark and lose their vibrant flavor.
- Fold in your ‘heavy’ ingredients last, such as olives, sun-dried tomatoes, and feta. These items are salty and acidic, and they will help season the rest of the dish as it sits.
- Chill the side dish for at least two hours before your picnic. Just before leaving, toss in your toasted pine nuts or roasted chickpeas; this ensures they stay crunchy and provide a textural contrast to the soft pasta.
Final Thoughts on the Viral Snacking Trend
Whether you’re assembling a towering strawberry pie or a simple bowl of tomato-cucumber salad, the viral simple food board is all about bringing intentionality to your snacks. These recipes prove that you don’t need a professional kitchen or hours of prep time to create something that feels special and tastes incredible. By focusing on fresh ingredients and simple techniques, you can turn every meal into a viral-worthy moment that nourishes both your body and your soul. So, grab a board, pick a few of these favorites, and start snacking!