
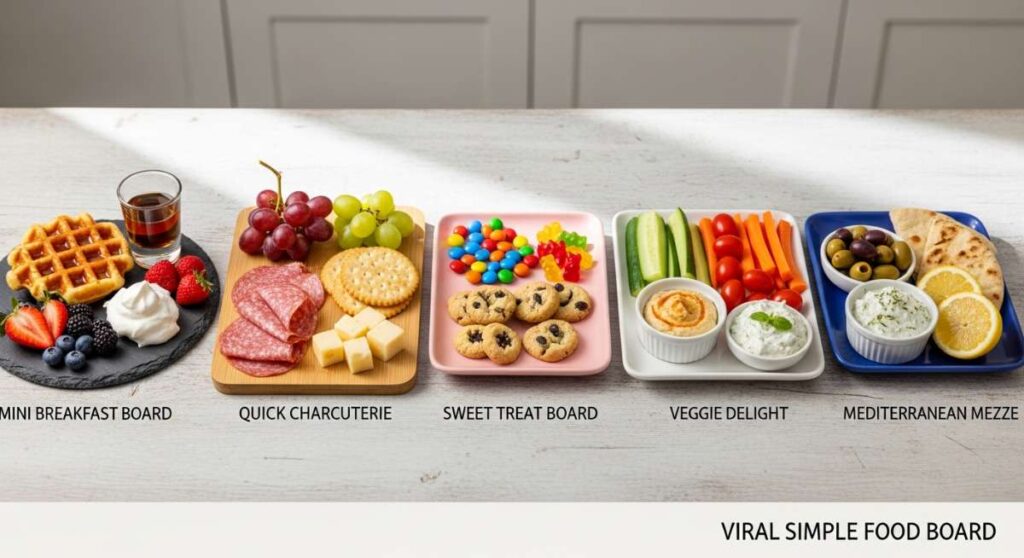
5 Viral Food Board Ideas You Can Make in Under 15 Minutes
There is something inherently magical about a gathering that centers around a beautifully curated food board. It’s more than just a meal; it’s a visual celebration of color, texture, and flavor that invites everyone to lean in, share a story, and grab a bite. As someone who loves hosting but often finds themselves short on time, I have mastered the art of the ‘fast-prep’ board. These ideas are designed to help you spend less time in the kitchen and more time making memories with the people you love.
The secret to a viral-worthy lifestyle board isn’t hours of labor—it’s the thoughtful arrangement of fresh ingredients and a few reliable shortcuts. Whether you are prepping for a sunny backyard picnic, a cozy movie night, or a sophisticated garden party, these recipes provide that ‘wow factor’ without the stress. Let’s dive into ten incredible ways to elevate your summer hosting game with minimal effort and maximum impact.
How to make the ultimate Shoney’s strawberry pie

Why we love this
This pie is pure nostalgia served on a plate, capturing the essence of a sun-drenched strawberry patch in early June. We love the contrast between the buttery, flaky crust and the jewel-toned, glossy glaze that clings to every plump berry. When you slice into it, the aroma of sweet sugar and fresh fruit fills the room, making it an instant centerpiece for any dessert board. It is the perfect balance of refreshing tartness and indulgent sweetness that feels like a cool breeze on a humid summer afternoon.
Ingredients
- 1 pre-baked 9-inch pie crust
- 2 lbs fresh strawberries, hulled and cleaned
- 1 cup granulated sugar
- 3 tablespoons cornstarch
- 1 cup water
- 1/2 package (3 oz) strawberry flavored gelatin
- Whipped cream for garnish
How to make it
- Begin by selecting the most vibrant, firm strawberries you can find; wash them thoroughly and remove the green hulls, then pat them dry with a paper towel to ensure the glaze sticks perfectly.
- In a medium saucepan over medium-high heat, whisk together the sugar, cornstarch, and water until the mixture is smooth and the white streaks of cornstarch disappear completely.
- Bring the mixture to a rolling boil while stirring constantly; once it starts to thicken and turn translucent (usually about 2-3 minutes), reduce the heat to low.
- Stir in the strawberry gelatin powder and cook for an additional minute until fully dissolved, then remove the pan from the heat and allow it to cool slightly so it doesn’t wilt the fresh fruit.
- Arrange the whole strawberries snugly inside the pre-baked pie crust, pointing the tips upward for a professional, tiered look that mimics the classic diner style.
- Carefully pour the cooling glaze over the berries, ensuring every nook and cranny is filled and every berry is coated in a thick, ruby-red layer.
- Place the pie in the refrigerator for at least 3-4 hours to allow the gelatin to set firmly before slicing with a hot, sharp knife and topping with a generous cloud of whipped cream.
How to prepare the perfect Rotel dip

Why we love this
Rotel dip is the ultimate crowd-pleaser, a creamy and slightly spicy staple that anchors any savory snack board with its golden, molten goodness. We love how the savory richness of the melted cheese melts into the zesty, diced tomatoes and green chilies, creating a velvety texture that’s impossible to resist. The aroma of browning meat and melted cheddar creates an immediate sense of comfort and celebration. It is the kind of dip that brings people together, hovering over the bowl with a bag of salty tortilla chips and a lot of laughter.
Ingredients
- 1 lb Velveeta cheese, cubed
- 1 can (10 oz) Ro-Tel Diced Tomatoes and Green Chilies
- 1 lb ground beef or breakfast sausage
- 1 teaspoon taco seasoning
- Optional: Fresh cilantro and jalapeños for garnish
How to make it
- Place a large skillet over medium-high heat and add the ground beef or sausage, breaking it apart with a wooden spoon into small, uniform crumbles.
- Cook the meat until it is thoroughly browned and no pink remains, which usually takes about 5-7 minutes; once cooked, drain the excess grease carefully to ensure the dip stays smooth and not oily.
- Reduce the heat to low and add the cubes of Velveeta cheese directly into the skillet with the meat, stirring frequently to prevent the cheese from scorching on the bottom.
- Once the cheese begins to soften, pour in the entire can of Ro-Tel (including the juice, as this provides essential acidity and moisture) and sprinkle in the taco seasoning.
- Continue to stir the mixture over low heat until the cheese is completely melted and the dip has reached a uniform, silky-smooth consistency.
- Observe the dip for visual cues: it should be thick enough to coat the back of a spoon but loose enough to dip a chip without breaking it.
- Transfer the dip to a pre-warmed serving bowl or a small slow cooker on the ‘warm’ setting to maintain that perfect gooey texture throughout your party.
How to make fresh chicken Caesar wraps
Why we love this
These wraps are a masterclass in texture, offering a satisfying crunch of romaine lettuce followed by the savory, tender bite of seasoned chicken. We love the way the creamy Caesar dressing binds the sharp parmesan cheese and the smoky notes of the chicken together inside a soft, flour tortilla. There is a refreshing, clean aroma that comes from the fresh greens and lemon zest that makes these feel light yet filling. They are the perfect ‘handheld’ addition to a lunch board, looking elegant when sliced on a bias and stacked high.
Ingredients
- 2 large flour tortillas
- 2 cups cooked rotisserie chicken, shredded
- 2 cups romaine lettuce, chopped finely
- 1/4 cup shaved Parmesan cheese
- 1/2 cup Caesar dressing
- 1/2 cup garlic croutons, lightly crushed
- 1/2 teaspoon cracked black pepper
How to make it
- Prepare your ‘filling station’ by tossing the chopped romaine lettuce and shredded chicken in a large bowl to ensure an even distribution of protein and greens.
- Drizzle the Caesar dressing over the mixture and add the shaved parmesan; use tongs to fold the ingredients together until every leaf is lightly lacquered in dressing without being soggy.
- Lightly warm your flour tortillas in a dry skillet for about 15 seconds per side; this makes them more pliable and prevents them from tearing during the rolling process.
- Lay the tortilla flat and place a generous portion of the salad mixture in the lower third of the wrap, leaving about two inches of space on the sides.
- Sprinkle the crushed croutons over the top to add a hidden layer of crunch that mimics the experience of eating a traditional salad.
- Fold the sides of the tortilla inward toward the center, then tightly roll from the bottom up, tucking the filling in firmly as you go to create a compact cylinder.
- Slice the wrap diagonally in the center to showcase the colorful interior layers and serve immediately while the lettuce is at its peak crispness.
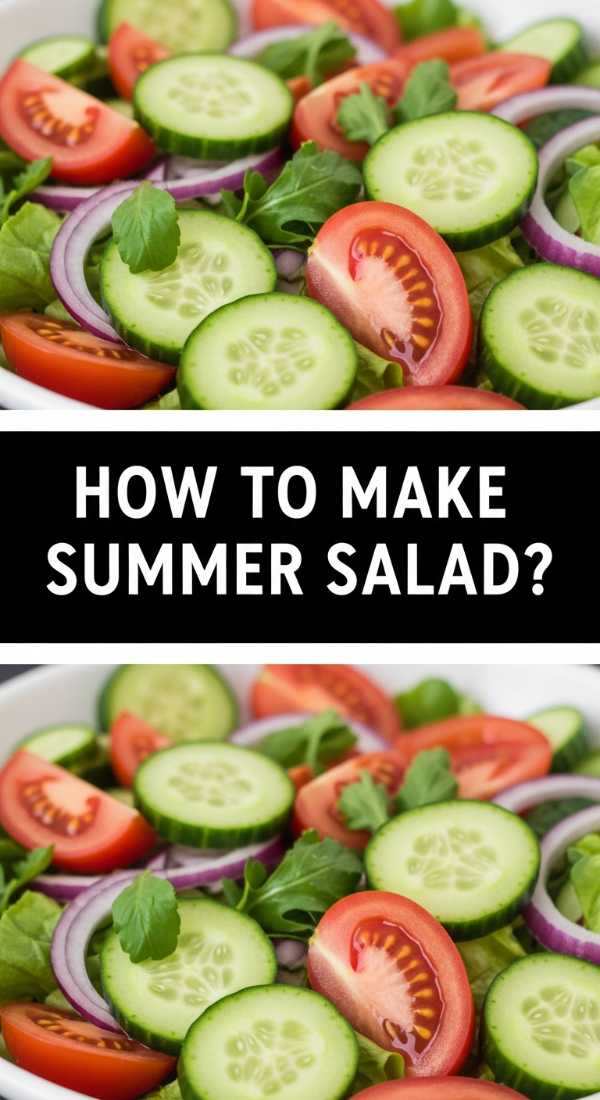
How to create a refreshing tomato cucumber salad

Why we love this
This salad is like summer in a bowl, radiating brightness with its vibrant reds, greens, and purples. We love the crisp, watery snap of the cucumbers paired with the soft, acidic burst of vine-ripened tomatoes and the creamy tang of crumbled feta. The aroma of fresh parsley and red onion macerating in red wine vinegar is incredibly appetite-whetting and clean. It provides a much-needed acidic balance to a food board, acting as a palate cleanser between heavier bites while looking like a pile of fresh garden jewels.
Ingredients
- 3 large Persian cucumbers, sliced into rounds
- 1 pint cherry tomatoes, halved
- 1/4 red onion, thinly sliced into half-moons
- 1/3 cup crumbled feta cheese
- 3 tablespoons extra virgin olive oil
- 1 tablespoon red wine vinegar
- 1 teaspoon dried oregano
- Salt and pepper to taste
How to make it
- In a small glass jar or bowl, whisk together the olive oil, red wine vinegar, dried oregano, salt, and pepper until the dressing is emulsified and slightly thickened.
- Place the sliced cucumbers and halved cherry tomatoes into a large mixing bowl; ensure the tomatoes are cut neatly to release just enough juice to mingle with the dressing.
- Add the thinly sliced red onions, which should be sliced almost paper-thin to provide a sharp bite without overpowering the delicate sweetness of the tomatoes.
- Pour the prepared vinaigrette over the vegetables and toss gently with large spoons, ensuring every surface is coated in the herb-infused oil.
- Gently fold in the crumbled feta cheese at the very end; doing this last prevents the cheese from breaking down too much and clouding the dressing.
- Allow the salad to sit at room temperature for about 10 minutes before serving; this ‘marinating’ time allows the salt to draw out the natural juices of the vegetables.
- Give it one final toss and serve in a shallow bowl to highlight the rustic, colorful textures that make this dish a visual standout.
How to grill perfect veggie kabobs
Why we love this
There is nothing quite like the smoky, charred aroma of vegetables hitting a hot grill to signal that summer has arrived. We love the way the high heat caramelizes the natural sugars in bell peppers and onions, turning them sweet and tender while keeping a slight structural bite. The visual appeal of rainbow-colored vegetables stacked on a skewer adds an element of fun and height to any food board. Each bite offers a medley of textures, from the meaty zucchini to the snap of a blistered tomato, all tied together by a savory herb marinade.
Ingredients
- 2 large bell peppers (red and yellow), cut into chunks
- 1 large zucchini, sliced into thick rounds
- 1 red onion, cut into wedges
- 8 oz whole button mushrooms
- 1/4 cup olive oil
- 2 cloves garlic, minced
- 1 tablespoon balsamic vinegar
- 1 teaspoon dried thyme
How to make it
- If using wooden skewers, soak them in water for at least 20 minutes prior to use to prevent them from catching fire or splintering on the grill.
- Prepare the marinade by whisking the olive oil, minced garlic, balsamic vinegar, and thyme in a large bowl until well combined.
- Toss all the prepared vegetable chunks into the marinade, ensuring every piece is glistening; let them sit for 10 minutes to absorb the garlicky flavors.
- Thread the vegetables onto the skewers, alternating colors and types (e.g., pepper, onion, zucchini, mushroom) to create a visually striking pattern and ensure even cooking.
- Preheat your grill to medium-high heat (about 400°F); you should be able to hold your hand above the grates for only 3-4 seconds.
- Place the kabobs on the grill and cook for 8-12 minutes, turning them a quarter-turn every few minutes until you see beautiful dark grill marks and the vegetables have softened slightly.
- Remove the kabobs from the heat when the edges of the onions begin to char and the peppers look slightly blistered, then brush with any remaining marinade for a final burst of flavor.
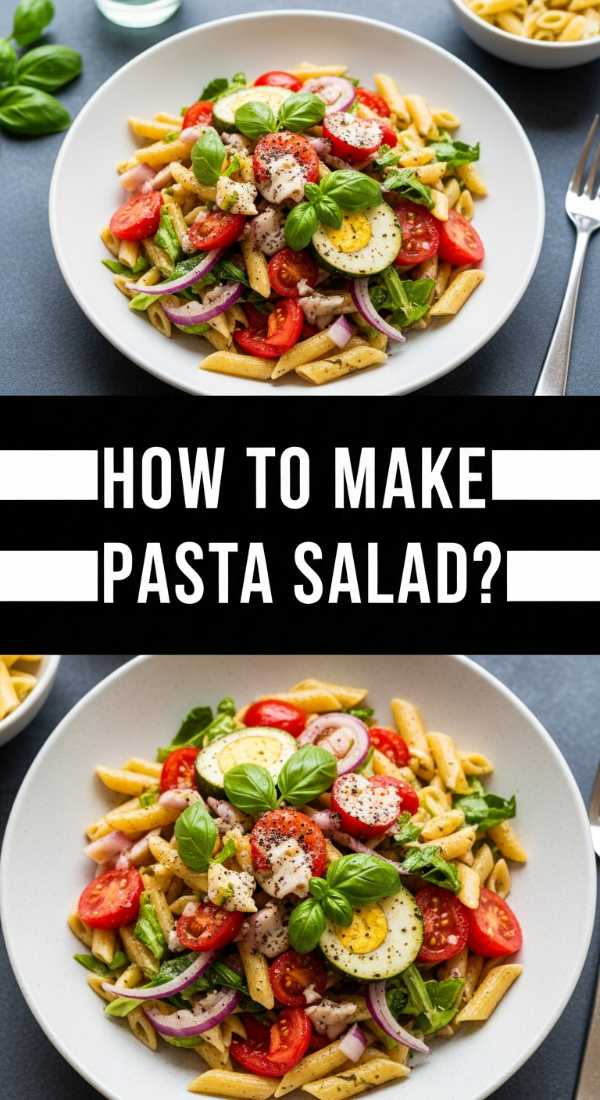
How to cook summer pasta salad for crowds

Why we love this
Pasta salad is the ultimate ‘make-ahead’ hero that actually tastes better the longer it sits, making it perfect for low-stress hosting. We love the bouncy texture of al dente rotini noodles and how they trap the zesty Italian dressing in their spirals. The combination of salty olives, sharp pepperoni, and creamy mozzarella pearls creates a complex flavor profile that satisfies everyone. Its aroma is bright and herbaceous, and its ability to stay fresh at room temperature makes it a reliable anchor for a large outdoor food board.
Ingredients
- 1 lb rotini or fusilli pasta
- 1 cup Italian vinaigrette dressing
- 1 cup cherry tomatoes, halved
- 1/2 cup black olives, sliced
- 1 cup fresh mozzarella pearls
- 1/2 cup diced pepperoni or salami
- 1/4 cup chopped fresh parsley
How to make it
- Bring a large pot of heavily salted water to a rolling boil; the water should taste like the sea to properly season the pasta from the inside out.
- Add the pasta and cook for exactly one minute less than the package directions specify to ensure a firm ‘al dente’ texture that won’t get mushy once the dressing is added.
- Drain the pasta and immediately rinse it under cold running water to stop the cooking process and wash away excess starch, which prevents the noodles from sticking together.
- Transfer the cooled pasta to a massive mixing bowl and add the cherry tomatoes, olives, mozzarella pearls, and pepperoni.
- Pour the Italian dressing over the mixture and toss thoroughly; the pasta will absorb some of the dressing as it sits, so don’t be afraid to be generous.
- Cover the bowl and refrigerate for at least 30 minutes, though two hours is ideal for the flavors of the meat and cheese to fully penetrate the pasta.
- Just before serving, add the fresh parsley and give it a final stir; if the salad looks a bit dry, add another splash of dressing to restore that glossy, appetizing sheen.
How to mix refreshing summer cocktails

Why we love this
A great summer cocktail is a sensory experience, from the clinking of ice cubes against glass to the fragrant burst of slapped mint. We love the effervescence of a well-balanced drink that combines the citrusy bite of lime with the floral sweetness of fresh berries. There is something so sophisticated about a clear, sparkling liquid garnished with bright fruit that instantly elevates the mood of a party. It’s the ultimate way to cool down, offering a crisp, clean finish that washes away the summer heat.
Ingredients
- 2 oz gin or vodka
- 1 oz fresh lime juice
- 3/4 oz simple syrup
- 4-5 fresh blackberries or raspberries
- 3-4 fresh mint leaves
- Club soda to top
- Ice cubes
How to make it
- In a sturdy cocktail shaker, combine the fresh berries and mint leaves with the simple syrup.
- Use a muddler to gently press down on the berries and mint; you want to release the juices and essential oils without completely pulverizing the leaves into bitter bits.
- Add the gin or vodka and the fresh lime juice to the shaker, then fill the shaker halfway with large, solid ice cubes.
- Secure the lid and shake vigorously for about 15 seconds until the outside of the shaker feels frosty and cold to the touch.
- Strain the mixture into a highball glass filled with fresh ice; using fresh ice in the glass ensures your drink doesn’t become diluted by the melted ice from the shaker.
- Top the glass with a splash of chilled club soda, which adds a lively carbonation that lifts the heavier fruit flavors.
- Garnish with a sprig of mint (slap it against your hand first to release the aroma) and a whole berry for a professional, ‘viral’ presentation.
How to make homemade hummingbird nectar

Why we love this
While not for the humans, making nectar is a lifestyle ritual that brings the beauty of nature right to your patio. We love the simplicity of this clear, sweet syrup and the joy of watching vibrant hummingbirds zip back and forth to enjoy a homemade treat. The process is clean and chemical-free, avoiding the unnecessary red dyes found in store-bought versions. It’s a peaceful, rewarding hobby that adds a literal ‘buzz’ of excitement to your outdoor living space, making your home feel like a lush sanctuary.
Ingredients
- 1 cup white granulated sugar
- 4 cups water
How to make it
- Measure out the water and sugar using a precise 4:1 ratio; this concentration most closely mimics the natural nectar found in flowers and is safest for the birds’ digestion.
- Pour the water into a clean saucepan and bring it to a boil over high heat; boiling helps neutralize any impurities in the water and ensures the sugar dissolves completely.
- Once boiling, stir in the white granulated sugar—never use honey, brown sugar, or artificial sweeteners, as these can be fatal to hummingbirds.
- Whisk the mixture until the water is perfectly clear and no sugar crystals are visible at the bottom of the pan.
- Remove from the heat and allow the nectar to cool completely to room temperature; pouring hot liquid into a plastic feeder can warp the feeder and burn the birds.
- Fill your clean hummingbird feeder with the cooled solution and store any leftovers in a sealed glass jar in the refrigerator for up to two weeks.
- Clean your feeder every 3-5 days with hot water (no soap) to prevent mold growth, ensuring your feathered friends have a safe and healthy place to dine.
How to prep easy summer crockpot meals
Why we love this
The crockpot is an underrated summer tool that keeps your kitchen cool while delivering incredibly tender, flavor-packed meals. We love the ‘set it and forget it’ nature of slow cooking, which frees up your entire afternoon for the pool or the beach. The aroma of slow-simmered pork or chicken infused with BBQ spices wafting through the house is mouth-watering. It allows you to create bulk proteins for sliders or tacos that are juicy and succulent, providing a warm, hearty element to an otherwise cold food board.
Ingredients
- 3 lbs pork shoulder or chicken breasts
- 1.5 cups BBQ sauce
- 1/4 cup apple cider vinegar
- 1 tablespoon smoked paprika
- 1 teaspoon onion powder
- 1/2 cup chicken broth
How to make it
- Place the meat into the bottom of your slow cooker, ensuring it is spread out evenly; if using pork shoulder, trim away any excessively thick layers of fat first.
- In a small bowl, whisk together the BBQ sauce, apple cider vinegar, smoked paprika, onion powder, and chicken broth to create a thin, savory braising liquid.
- Pour the sauce over the meat, using a brush or spoon to coat the entire surface so the flavors can penetrate as it cooks.
- Set the crockpot to ‘Low’ and cook for 7-8 hours (or ‘High’ for 4-5 hours); low and slow is always preferred for the most tender, ‘fall-apart’ results.
- Check for doneness by inserting two forks into the center of the meat; it should shred effortlessly with very little resistance.
- Once fully cooked, remove the meat to a separate bowl and shred it, then add a few ladles of the cooking liquid back in to keep it moist and savory.
- Serve the shredded meat in a small crock or bowl in the center of a board surrounded by mini buns, coleslaw, and pickles for an easy build-your-own-slider station.
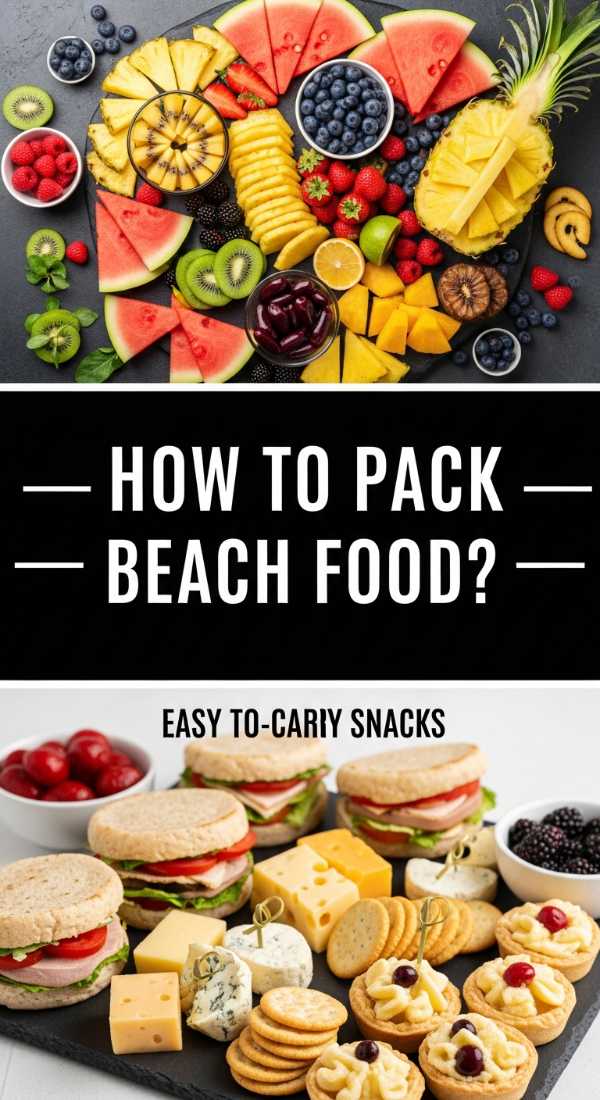
How to pack the best beach food
[IMAGE_10]
Why we love this
Beach food is all about portability and the perfect balance of salty, sandy-fingers-friendly snacks. We love the convenience of pre-portioned bites that don’t require utensils and stay fresh under the sun. The combination of chilled fruits, sturdy wraps, and crunchy snacks creates a satisfying mix that fuels a day of swimming and relaxation. There is a specific joy in opening a cooler to find neatly packed, colorful containers of food that look as good as they taste, turning a simple beach trip into a gourmet outing.
Ingredients
- Sturdy flour wraps (Turkey or Veggie)
- Pre-cut fruit skewers (grapes, melon, pineapple)
- Individual bags of pita chips or pretzels
- Frozen grapes (act as ice packs!)
- Hard cheeses (Cheddar or Gouda)
- Hummus in small sealed containers
How to make it
- When preparing wraps, avoid ‘wet’ ingredients like tomatoes or excessive mayo directly against the tortilla; instead, use a layer of cheese or lettuce as a moisture barrier to prevent sogginess.
- Wrap each sandwich or wrap tightly in parchment paper and then foil; the parchment keeps it fresh while the foil provides structural integrity and insulation.
- Thread fruit onto wooden skewers and place them in a rigid plastic container; this prevents the fruit from being crushed by heavier items in the cooler.
- Freeze a handful of grapes or small water bottles the night before; tuck these around your perishable items to act as edible ice packs that save space.
- Choose hard cheeses over soft ones, as they hold their shape much better in warmer temperatures and provide a satisfying, high-protein snack.
- Pack your cooler in reverse order: place the items you’ll eat last at the bottom and the things you’ll snack on immediately (like the fruit and chips) right on top.
- Ensure everything is in airtight, leak-proof containers to prevent melting ice water from getting into your food, keeping your beach board crisp and delicious.
Conclusion
Creating a viral food board is less about professional culinary training and more about the love and intention you put into the presentation. By choosing vibrant ingredients and using these quick, 15-minute techniques, you can transform any ordinary afternoon into a celebrated occasion. Remember, the best food is the kind that invites people to linger a little longer and enjoy the sweetness of the season together.