

There is something truly magical about a summer afternoon where the only thing on your to-do list is to sit back, relax, and enjoy a spread of beautiful food. We’ve all seen those mesmerizing TikTok videos of perfectly curated food boards that look almost too good to eat, but I’m here to tell you that the secret isn’t just in the aesthetics—it’s in the heart and flavor you put into every single bite. Creating a viral-worthy food board is about more than just laying out snacks; it’s about crafting an experience that feels like a warm hug for your friends and family.
When I think about the ultimate summer gathering, I imagine the clinking of ice in glasses, the smell of steak on the grill, and the bright, vibrant colors of fresh garden produce. It’s that feeling of connection and simple joy that we’re trying to capture. Whether you’re hosting a backyard bash or a cozy porch hangout, this collection of recipes will help you build a food board that isn’t just a meal—it’s a memory. Let’s dive into how you can bring these viral sensations into your own kitchen!
How to make strawberry pie

Why we love this
This strawberry pie is the absolute epitome of early summer charm, capturing the essence of sun-ripened berries in a flaky, buttery embrace. As you slice into it, the aroma of sweet, macerated strawberries fills the air, mingling with the scent of golden-brown pastry. The texture is a delightful contrast between the crisp, brittle crust and the silky, luscious strawberry glaze that coats every juicy piece of fruit. It’s a bright, refreshing dessert that feels both nostalgic and incredibly fresh, making it the perfect centerpiece for a sweet-focused board.
Ingredients
- 1 pre-baked 9-inch pie crust
- 1 quart fresh strawberries, hulled
- 1 cup granulated sugar
- 3 tablespoons cornstarch
- 1 cup water
- 1 small box (3oz) strawberry-flavored gelatin
- Whipped cream for topping
How to make it
- Begin by preparing your pie crust; ensure it is fully baked and cooled to room temperature before adding any filling to prevent sogginess.
- Wash and hull your strawberries, selecting about half of the prettiest ones to leave whole or halved, and place them decoratively inside the cooled pie shell.
- In a medium saucepan, combine the sugar, cornstarch, and water over medium heat, whisking constantly to ensure there are no lumps.
- Bring the mixture to a gentle boil and continue to cook, stirring frequently, until the liquid becomes thick and clear, which usually takes about 3 to 5 minutes.
- Remove the pan from the heat and immediately stir in the strawberry gelatin powder until it is completely dissolved and the mixture is a vibrant red.
- Allow the glaze to cool slightly so it isn’t piping hot, then pour it evenly over the strawberries in the pie crust, ensuring every berry is well-coated.
- Refrigerate the pie for at least 3 to 4 hours, or until the filling is firmly set and chilled throughout.
- Serve with a generous dollop of fresh whipped cream right before presenting it on your board.
How to make rotel dip

Why we love this
There is a reason this dip has gone viral time and time again; it is the ultimate comfort food that brings a punch of bold, savory flavor to any gathering. The texture is incredibly velvety and gooey, with little pockets of spice from the green chilies and chunks of hearty, seasoned meat. When you dip a salty tortilla chip into the warm, melted cheese, the aroma of cumin and browned beef hits you, promising a snack that is as satisfying as it is addictive. It’s the kind of dish that disappears in minutes because it hits every single flavor note people crave.
Ingredients
- 1 lb ground beef or spicy sausage
- 1 block (16 oz) Velveeta cheese, cubed
- 1 can (10 oz) Ro-Tel Diced Tomatoes and Green Chilies, undrained
- 1/2 teaspoon garlic powder
- Tortilla chips for serving
How to make it
- In a large skillet over medium-high heat, crumble and brown your ground beef or sausage until it is completely cooked through and no pink remains.
- Carefully drain the excess grease from the skillet to ensure your dip isn’t oily; this is a crucial step for a smooth, professional texture.
- Turn your heat down to low and add the cubed Velveeta cheese to the skillet along with the meat.
- Pour in the entire can of Ro-Tel (do not drain the liquid, as this provides the necessary moisture and acidity) and sprinkle in the garlic powder.
- Stir the mixture continuously with a wooden spoon or spatula as the cheese melts to prevent it from scorching on the bottom of the pan.
- Once the dip is completely smooth and the ingredients are fully incorporated, transfer it to a small slow cooker on the ‘warm’ setting or a heated serving bowl.
- Keep it warm throughout your party to maintain that perfect, dippable consistency.
How to make chicken wraps
Why we love this
These chicken wraps are the perfect versatile addition to a food board, offering a fresh and light alternative to heavier snacks. Imagine biting into a soft, flour tortilla to find tender, seasoned chicken paired with the crisp snap of fresh romaine and the creamy tang of a signature dressing. The combination of textures—from the chewy wrap to the crunchy vegetables—is incredibly satisfying, and the subtle herb aromas make them feel sophisticated yet approachable. They are easy to grab, mess-free, and look stunning when sliced on a diagonal to reveal their colorful interiors.
Ingredients
- 2 large flour tortillas
- 1 cup cooked chicken breast, shredded or sliced
- 1/2 cup shredded cheddar cheese
- 1 cup chopped romaine lettuce
- 1/4 cup diced tomatoes
- 2 tablespoons ranch or Caesar dressing
How to make it
- Lay your tortillas flat on a clean cutting board and slightly warm them in the microwave for 10 seconds to make them more pliable and prevent tearing.
- Spread a thin layer of your chosen dressing across the center of each tortilla, leaving a small border around the edges.
- Layer the shredded lettuce, diced tomatoes, and shredded cheese evenly over the dressing.
- Place the cooked chicken in a line down the center of the vegetables; ensuring the chicken is seasoned with salt and pepper during its original cooking process is key for depth of flavor.
- To fold, tuck in the sides of the tortilla first, then firmly roll from the bottom up, keeping the filling tight as you go.
- Once rolled, place the wrap seam-side down on the board to hold its shape.
- Use a sharp serrated knife to slice the wraps in half or into smaller “pinwheel” rounds for the board.
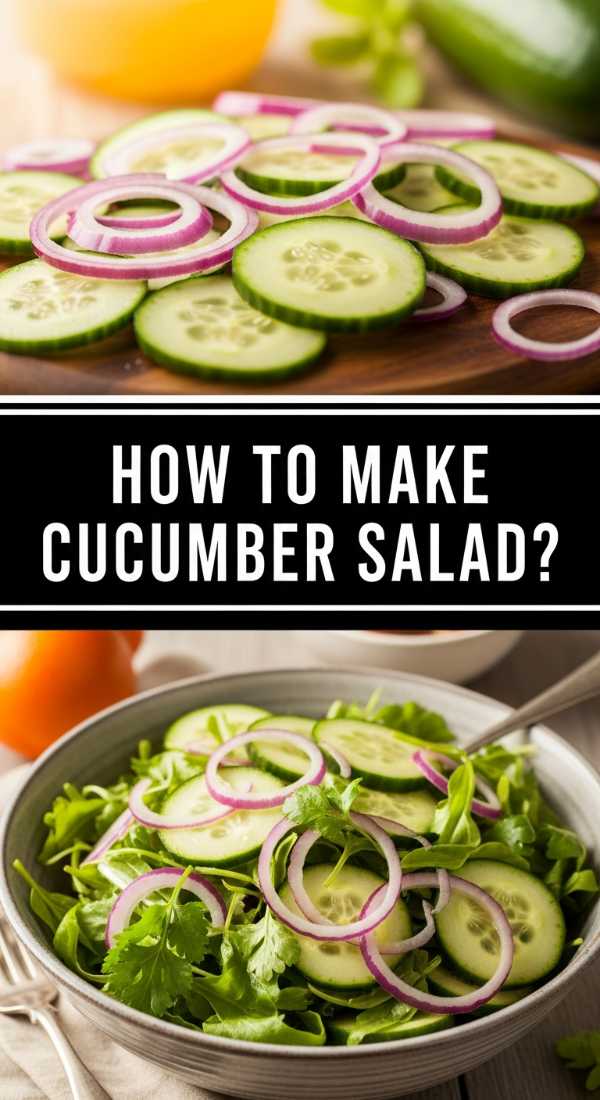
How to make cucumber salad
Why we love this
Cucumber salad is the refreshing palate cleanser every food board needs, especially during the sweltering heat of summer. The translucent, paper-thin slices of cucumber are soaked in a zesty vinegar brine that provides a sharp, bright contrast to richer items like cheese or meats. Every bite offers a cool, hydrating crunch followed by the aromatic punch of fresh dill and the subtle sweetness of red onion. It’s a visually light and airy dish that adds a pop of garden-fresh green to your presentation, making the whole board feel balanced and healthy.
Ingredients
- 2 large English cucumbers
- 1/2 red onion, thinly sliced
- 1/2 cup white vinegar
- 1/4 cup water
- 2 tablespoons granulated sugar
- 1 tablespoon fresh dill, chopped
- Salt and black pepper to taste
How to make it
- Using a mandoline slicer or a very sharp knife, slice the English cucumbers into thin, uniform rounds; using English cucumbers is preferred because they have thinner skins and fewer seeds.
- Place the sliced cucumbers and the thinly sliced red onions in a large glass bowl.
- In a separate small bowl, whisk together the white vinegar, water, sugar, salt, and pepper until the sugar has completely dissolved.
- Pour the vinegar mixture over the cucumbers and onions, ensuring all the slices are submerged in the brine.
- Toss in the freshly chopped dill, which adds that signature herbal aroma and flavor.
- Cover the bowl and refrigerate for at least 1 to 2 hours before serving; this allows the flavors to meld and the cucumbers to become slightly pickled.
- Drain any excess liquid before placing the salad in a small serving dish on your food board to prevent it from making other items soggy.
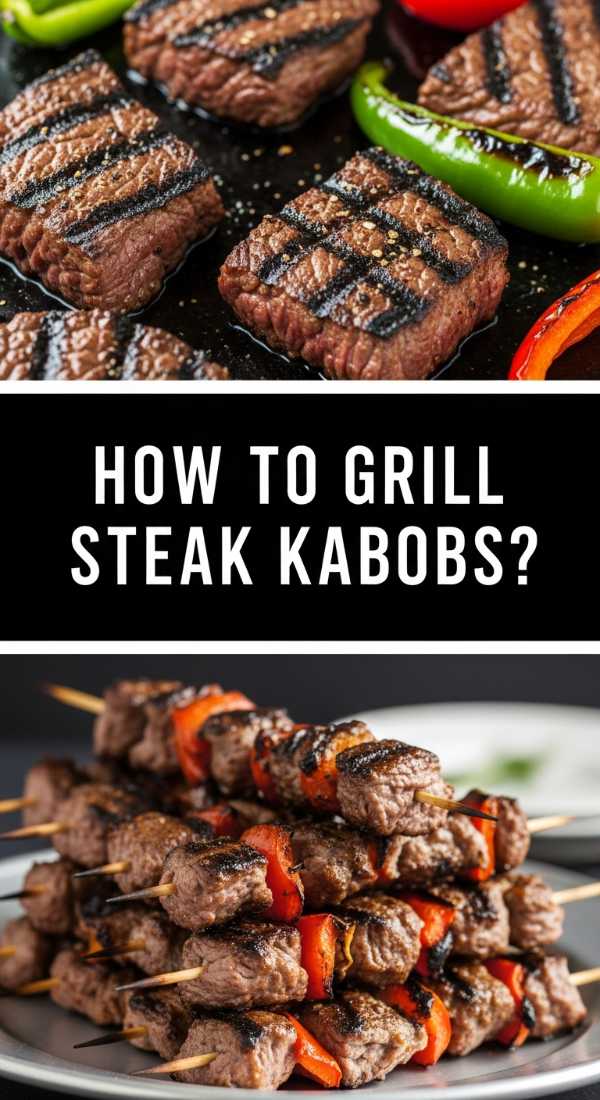
How to grill steak kabobs
Why we love this
Steak kabobs bring a smoky, charred sophistication to your food board that is guaranteed to impress any guest. The sight of juicy, perfectly seared cubes of sirloin nestled between caramelized bell peppers and onions is enough to make anyone’s mouth water. As they hit the grill, the aroma of sizzling fat and savory marinade fills the air, creating an irresistible backyard vibe. The texture is a masterclass in contrasts: the exterior of the steak has a slightly salty crust, while the inside remains tender and succulent, paired with vegetables that have just enough bite left in them.
Ingredients
- 1.5 lbs top sirloin steak, cut into 1-inch cubes
- 2 bell peppers (any color), cut into chunks
- 1 large red onion, cut into chunks
- 1/4 cup soy sauce
- 2 tablespoons olive oil
- 2 cloves garlic, minced
- 1 teaspoon smoked paprika
- Wooden or metal skewers
How to make it
- In a large bowl or zip-top bag, combine the soy sauce, olive oil, minced garlic, and smoked paprika to create your marinade.
- Add the steak cubes to the marinade, tossing to coat thoroughly, and let them sit in the refrigerator for at least 30 minutes (or up to 4 hours) to tenderize the meat.
- If using wooden skewers, soak them in water for at least 20 minutes to prevent them from burning on the grill.
- Thread the steak, peppers, and onions onto the skewers, alternating the ingredients to ensure the flavors mingle and the presentation looks vibrant.
- Preheat your grill to medium-high heat (about 400°F) and lightly oil the grates.
- Place the kabobs on the grill and cook for 8 to 10 minutes, turning them every few minutes to ensure an even sear and a perfect medium-rare to medium finish.
- Look for deep grill marks and slightly charred edges on the vegetables as a sign of completion.
- Remove from the grill and let the meat rest for 5 minutes before serving to lock in the juices.
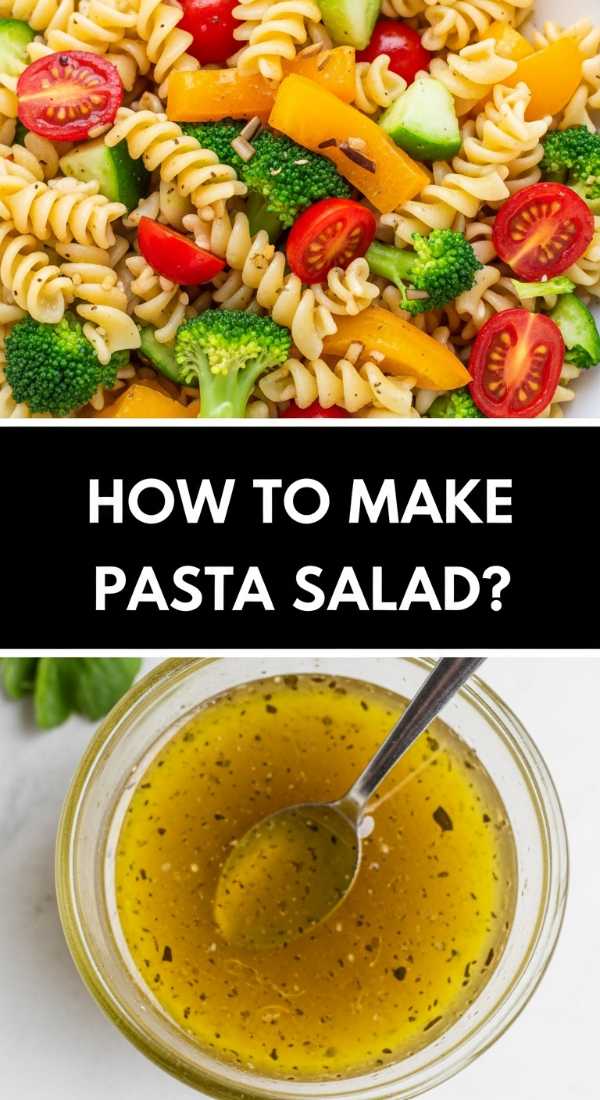
How to make pasta salad

Why we love this
A classic Italian-style pasta salad is a crowd-pleaser that offers a medley of textures and a zesty, herbaceous flavor profile. The rotini pasta spirals are the perfect vessel for holding onto the tangy vinaigrette, while the pearls of mozzarella, salty olives, and crisp vegetables provide a new surprise in every forkful. It smells like an Italian deli in the best way possible—briny, garlicky, and fresh. This dish is hearty enough to satisfy hunger but light enough to be enjoyed alongside a variety of other board components, making it a versatile staple for any viral spread.
Ingredients
- 1 lb rotini pasta
- 1 cup Italian dressing
- 1 cup cherry tomatoes, halved
- 1/2 cup black olives, sliced
- 1/2 cup mini mozzarella pearls
- 1/4 cup diced bell peppers
- 1/4 cup chopped fresh parsley
How to make it
- Cook the rotini pasta in a large pot of heavily salted boiling water until it reaches an ‘al dente’ texture; do not overcook, as the pasta will soften further as it marinates.
- Drain the pasta and immediately rinse it under cold running water to stop the cooking process and remove excess starch, which prevents sticking.
- In a large mixing bowl, combine the cooled pasta with half of the Italian dressing, tossing well to coat every spiral.
- Add the halved cherry tomatoes, sliced olives, mozzarella pearls, and diced bell peppers to the bowl.
- Toss everything together gently, then cover and refrigerate for at least 4 hours, or ideally overnight, to let the pasta absorb the flavors.
- Just before serving, pour the remaining half of the dressing over the salad and toss again to give it a fresh, glossy look.
- Garnish with fresh parsley for a pop of color and a final hit of herbal fragrance.
How to make hummingbird food

Why we love this
While not for the human guests, adding a hummingbird feeder near your outdoor food board station creates an enchanting, lively atmosphere that guests will adore. There is something so peaceful about watching these tiny, iridescent creatures dart in for a drink while you enjoy your own meal. This simple sugar water recipe is clear and pure, mimicking the natural nectar found in flowers without any harmful dyes. It’s a small detail that elevates the lifestyle aspect of your gathering, making your patio feel like a true garden sanctuary.
Ingredients
- 1 cup refined white sugar
- 4 cups water
How to make it
- In a medium saucepan, mix the white sugar and water together; use only refined white sugar, as honey, brown sugar, or artificial sweeteners can be harmful to birds.
- Bring the mixture to a low boil for 1 to 2 minutes; this helps dissolve the sugar completely and kills any bacteria or mold spores present in the water.
- Remove the pan from the heat and allow the solution to cool completely to room temperature.
- Do not add red food coloring; the red parts of your bird feeder are enough to attract the hummingbirds, and dyes can be unhealthy for them.
- Once cool, fill your hummingbird feeder and store any extra nectar in a clean jar in the refrigerator for up to one week.
- Remember to clean your feeder every few days to ensure the nectar stays fresh and safe for your winged visitors.
How to mix summer cocktails
Why we love this
A perfectly mixed summer cocktail is the ultimate accessory for your food board, offering a cold, refreshing sip that cuts through salty snacks. Imagine the sound of a cocktail shaker rhythmically clinking with ice, followed by the sight of a vibrant drink being poured into a salt-rimmed glass. The aroma is usually a bright burst of citrus zest and fresh herbs like mint or basil, instantly evoking feelings of vacation and relaxation. Whether it’s a mojito, a margarita, or a simple spritz, the balance of sweet, sour, and spirited notes makes every moment feel like a celebration.
Ingredients
- 2 oz spirit of choice (Vodka, Gin, or Tequila)
- 1 oz fresh lime or lemon juice
- 3/4 oz simple syrup
- Fresh mint leaves or fruit slices for muddling
- Club soda to top
- Ice cubes
How to make it
- Start by placing your fresh herbs or fruit slices into the bottom of a sturdy glass or cocktail shaker and gently muddle them to release their aromatic oils and juices.
- Fill the shaker halfway with large, solid ice cubes; using plenty of ice is key to chilling the drink quickly without too much dilution.
- Add your chosen spirit, the fresh citrus juice, and the simple syrup to the shaker.
- Secure the lid and shake vigorously for about 15 to 20 seconds—you’ll know it’s ready when the outside of the shaker feels frost-cold to the touch.
- Strain the mixture into a fresh glass filled with clean ice.
- Top with a splash of club soda for a bit of effervescence and stir gently with a long spoon.
- Garnish with a sprig of mint or a wheel of citrus to give it that professional, Instagram-worthy finish.
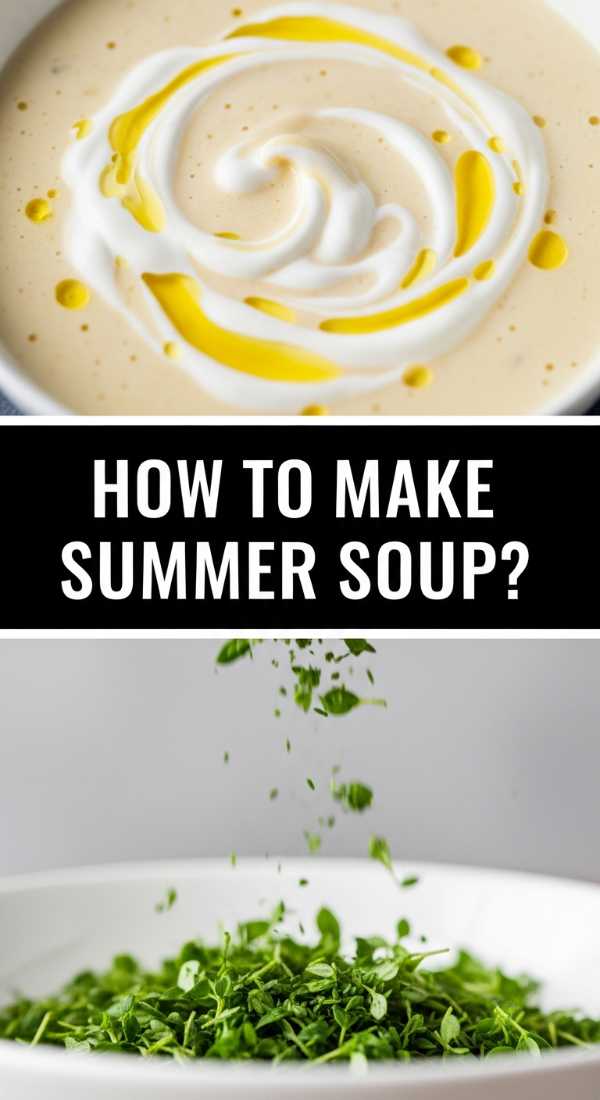
How to make summer soup
Why we love this
Summer soup, like a chilled Gazpacho, is a sophisticated and surprisingly refreshing addition to a food board, served in small shooters or bowls. It’s like tasting a garden in a spoon—vibrant, cold, and packed with the essence of vine-ripened tomatoes and crisp peppers. The texture is smooth yet has a slight rustic weight to it, with the richness of high-quality olive oil rounding out the acidity of the vegetables. It’s an unexpected element that adds a gourmet touch, offering a cool, savory liquid component that cleanses the palate between bites of cheese and bread.
Ingredients
- 2 lbs ripe tomatoes, roughly chopped
- 1 cucumber, peeled and chopped
- 1 red bell pepper, deseeded and chopped
- 1 small red onion, chopped
- 1 clove garlic
- 2 tablespoons sherry vinegar
- 1/4 cup extra virgin olive oil
- Salt and pepper to taste
How to make it
- Combine the chopped tomatoes, cucumber, bell pepper, onion, and garlic in a high-speed blender.
- Pulse the mixture until it reaches your desired consistency; some prefer it completely smooth and silky, while others like a bit of a rustic, chunky texture.
- While the blender is running on low, slowly drizzle in the extra virgin olive oil and sherry vinegar to emulsify the soup and create a creamy mouthfeel.
- Season generously with salt and black pepper, tasting as you go to ensure the acidity of the vinegar is perfectly balanced by the salt.
- Pour the soup into a glass container and chill in the refrigerator for at least 4 hours, or preferably overnight, as the flavors develop significantly when cold.
- Before serving, give the soup a quick stir and pour into small glasses or ramekins to place on your board.
- Garnish with a tiny drizzle of olive oil or a single microgreen leaf for a high-end look.
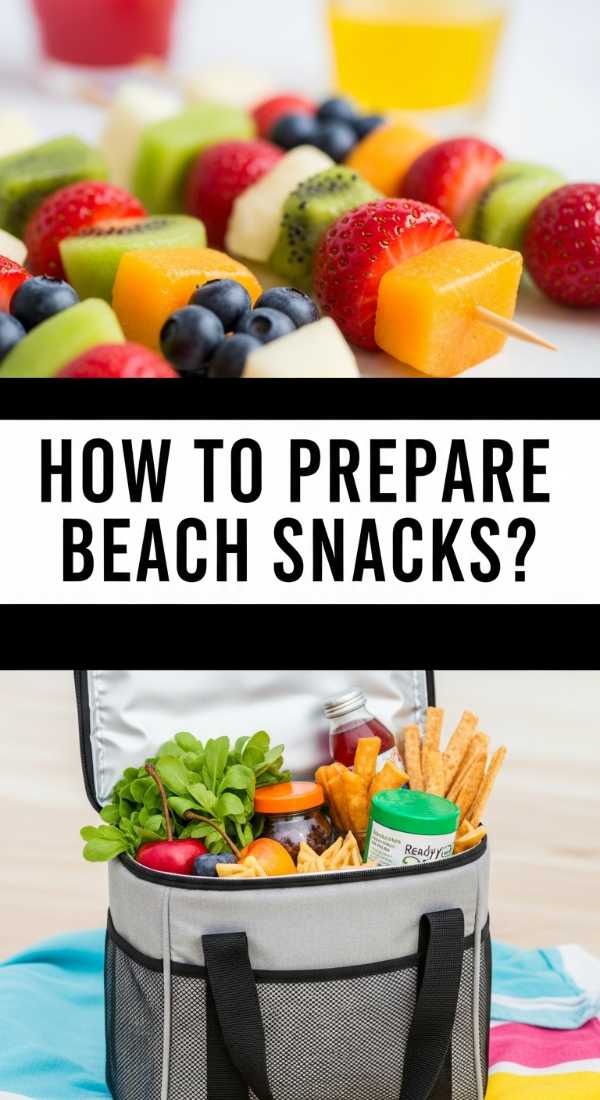
How to prepare beach snacks
[IMAGE_10]
Why we love this
Beach snacks are all about effortless enjoyment and the perfect balance of salty and sweet to keep your energy up under the sun. Picture a container filled with chilled, juicy watermelon cubes paired with crunchy, sea-salt dusted pretzels and savory nuts. The aroma of the salty air combines with the sweet scent of fruit to create the ultimate sensory experience. These snacks are designed to be portable and durable, meaning they won’t wilt in the heat, and they provide that satisfying crunch that makes outdoor lounging so much better.
Ingredients
- 2 cups cubed watermelon or pineapple
- 1 cup mini pretzels
- 1/2 cup mixed nuts (almonds, cashews)
- 1/2 cup cheese cubes (sharp cheddar or gouda)
- Individual silicone liners or jars
How to make it
- Prep your fruit by cutting it into uniform, bite-sized cubes; ensure they are patted dry with a paper towel to prevent excess moisture from leaking into other snacks.
- Select a variety of salty components like pretzels and nuts that provide a high-contrast texture to the soft fruit.
- Use small jars or silicone cupcake liners to create individual portions on your board, which keeps the items separated and prevents the crackers or pretzels from getting soggy.
- Keep the fruit and cheese in a separate chilled container until the very moment you are ready to assemble the board.
- Arrange the portions in a cluster, mixing the sweet and salty items together visually to create an inviting, abundant look.
- If you are taking these to the actual beach, pack them in airtight containers and store them at the bottom of a cooler directly against the ice packs to maintain freshness.
Conclusion
Building a viral-worthy food board is truly an art form that blends flavor, texture, and a bit of creative flair. From the smoky char of steak kabobs to the refreshing zing of a cucumber salad, every element we’ve discussed works together to create a cohesive and impressive spread. Remember, the best boards are the ones made with love and shared with even better company. I can’t wait to see your versions of these TikTok-inspired creations—happy hosting staples!