
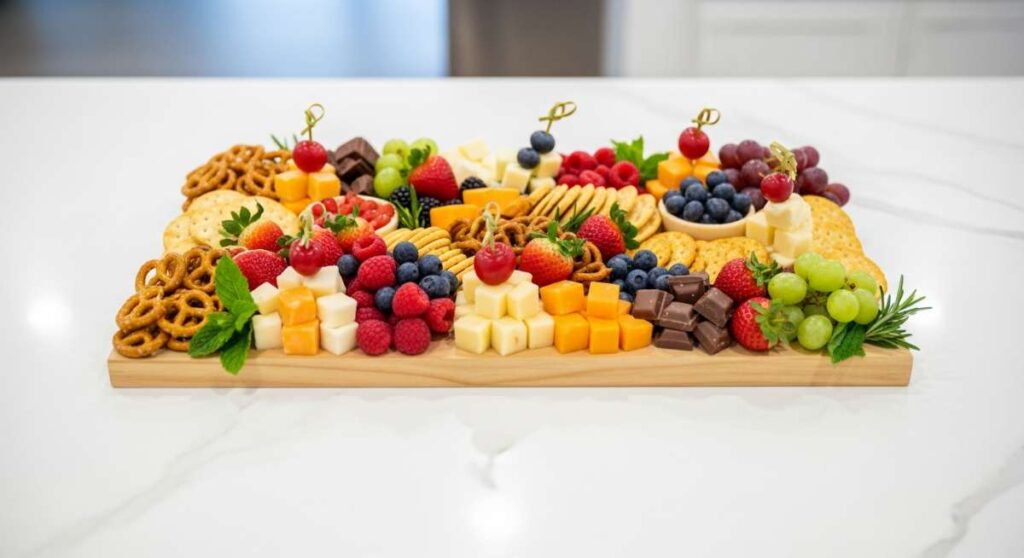
There is something almost magical about the way a beautifully curated board can bring people together, isn’t there? I remember the first time I set out a spread for my closest friends; the room immediately filled with a different kind of energy. It wasn’t just about the food—it was about the shared experience of reaching for a bite, the clinking of glasses, and the effortless flow of conversation that happens when everyone feels at home. In our fast-paced lives, these moments of connection are the true luxuries we all crave.
Building the perfect viral snack board isn’t about being a professional chef; it’s about the art of assembly and the joy of presentation. I’ve spent countless afternoons experimenting with textures and colors to find that perfect balance that makes guests gasp the moment they walk into the kitchen. Whether you are hosting a grand celebration or just trying to make a Tuesday night feel special, these simple additions and recipes will elevate your hosting game to viral status in under 10 minutes.
How to Bake Fudgy Brownies for the Ultimate Dessert Craving
Why we love this
There is nothing quite like the intoxicating aroma of melting dark chocolate and butter wafting through the house to signal that something wonderful is on its way. These brownies are the epitome of indulgence, featuring a crackly, paper-thin top that yields to a center so dense and fudgy it practically melts on your tongue. The deep, cocoa-rich scent combined with a hint of vanilla creates a sensory experience that feels like a warm hug for your soul, making it the perfect centerpiece for a dessert-focused snack board.
Essential Elements:
- High-quality dark chocolate (60% cocoa or higher)
- Unsalted European-style butter
- Granulated and light brown sugar
- Large farm-fresh eggs
- Pure vanilla extract
- Dutch-process cocoa powder
- Flaky sea salt for finishing
How to make it
- Begin by preheating your oven to 350°F (175°C) and lining an 8×8 inch baking pan with parchment paper, leaving an overhang on the sides for easy removal.
- In a heat-proof bowl set over simmering water (a double boiler), melt 8 ounces of chopped chocolate and 1/2 cup of butter together, stirring constantly until the mixture is glossy and completely smooth.
- In a separate large bowl, whisk 2 large eggs with 1 cup of sugar and 1/2 cup of brown sugar for at least 3-5 minutes; this aeration is the secret to getting that iconic shiny, crinkly brownie top.
- Slowly fold the cooled chocolate mixture into the egg mixture using a silicone spatula, ensuring you don’t deflate the air you just whipped in.
- Sift in 1/2 cup of flour and 1/4 cup of cocoa powder, then gently fold until just combined—do not overmix, or the brownies will become cakey rather than fudgy.
- Pour the batter into the prepared pan and bake for 22-25 minutes; you are looking for the edges to be set while the center remains slightly wobbly to ensure maximum fudginess.
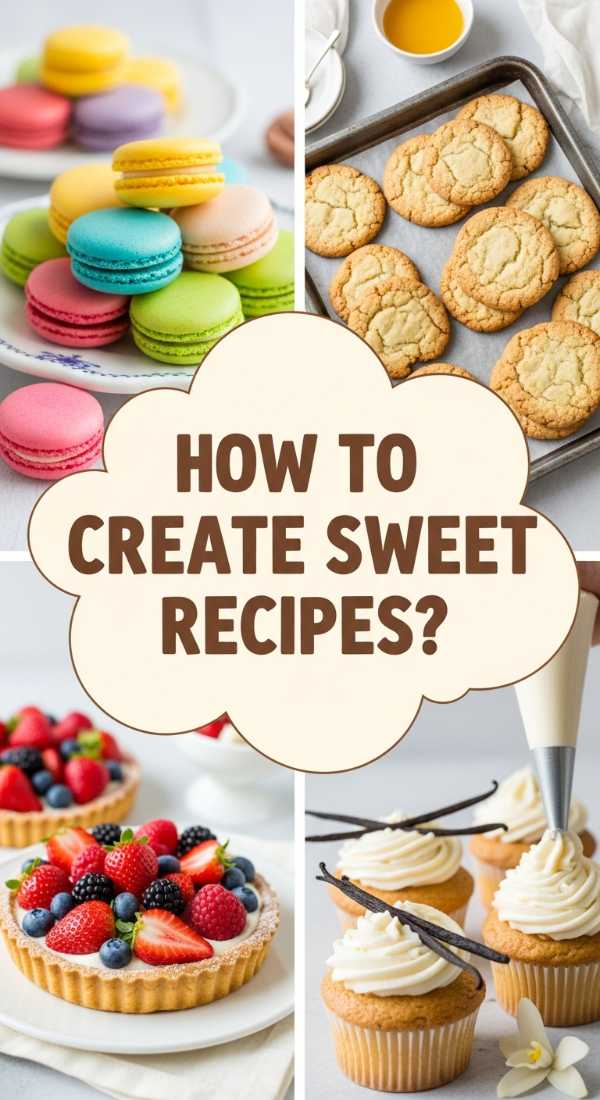
How to Create Sweet Recipes for a Joyful Family Gathering

Why we love this
Family gatherings are built on the foundation of shared sweetness, and these recipes are designed to spark joy in every generation. Imagine the sight of golden-brown crusts dusted with powdered sugar, sparkling under the dining room lights, while the air fills with the scent of caramelized fruit and warm cinnamon. The texture is a delightful contrast of crispy edges and soft, pillowy interiors that invite everyone to dig in with their hands, fostering a sense of informal warmth and genuine laughter around the table.
Essential Elements:
- Seasonal fresh berries or stone fruits
- Chilled heavy whipping cream
- Puff pastry sheets (all-butter)
- Honey or maple syrup
- Fresh mint leaves for garnish
- Zest of organic lemons
How to make it
- Thaw your puff pastry in the refrigerator overnight so it remains cold but pliable, which is essential for achieving those thousand buttery layers.
- Roll out the pastry on a lightly floured surface and cut into small 3-inch squares or circles using a biscuit cutter for a uniform, aesthetic look.
- Score a smaller border inside each shape with a knife, being careful not to cut all the way through; this allows the edges to rise while the center stays flat for toppings.
- Brush the edges with an egg wash (one egg beaten with a teaspoon of water) to ensure a deep, professional golden-brown shine once baked.
- Bake at 400°F (200°C) for 12-15 minutes until puffed and golden; the visual cue is a distinct lifting of the pastry layers.
- Once cooled, top with a dollop of whipped cream (beaten until stiff peaks form) and a tumble of honey-macerated berries for a fresh, vibrant finish.
How to Mix Glitter Slime for the Most Colorful Afternoon Play
Why we love this
While not edible, including a tactile activity like glitter slime near a kids’ snack station creates a multi-sensory environment that keeps little hands busy and minds engaged. The mesmerizing shimmer of the glitter caught in the translucent goo provides a visual feast, while the cool, squishy texture offers a grounding sensory experience. It’s a wonderful way to add a pop of prismatic color to your afternoon setup, making the entire environment feel like a whimsical wonderland of creativity and fun.
Essential Elements:
- Clear washable school glue
- Saline solution (containing boric acid)
- Baking soda
- Fine and chunky holographic glitter
- Liquid food coloring (optional)
- Mixing bowls and spatulas
How to make it
- Pour 4 ounces of clear school glue into a glass mixing bowl, ensuring you scrape the sides to get every drop for a consistent batch size.
- Add 1/2 teaspoon of baking soda to the glue and stir thoroughly; this acts as a firming agent to help the slime hold its shape.
- Stir in your choice of glitter—start with a tablespoon of fine glitter and a teaspoon of chunky glitter to create a multidimensional, galaxy-like effect.
- Add 1 tablespoon of saline solution slowly, stirring vigorously as the mixture begins to pull away from the sides of the bowl and form a cohesive mass.
- Once the slime has clumped together, remove it from the bowl and knead it with your hands for 2-3 minutes; the warmth of your hands helps the polymers link, resulting in a smoother stretch.
- If the slime is too sticky, add one more drop of saline solution at a time until you reach the desired consistency that snaps and stretches without residue.
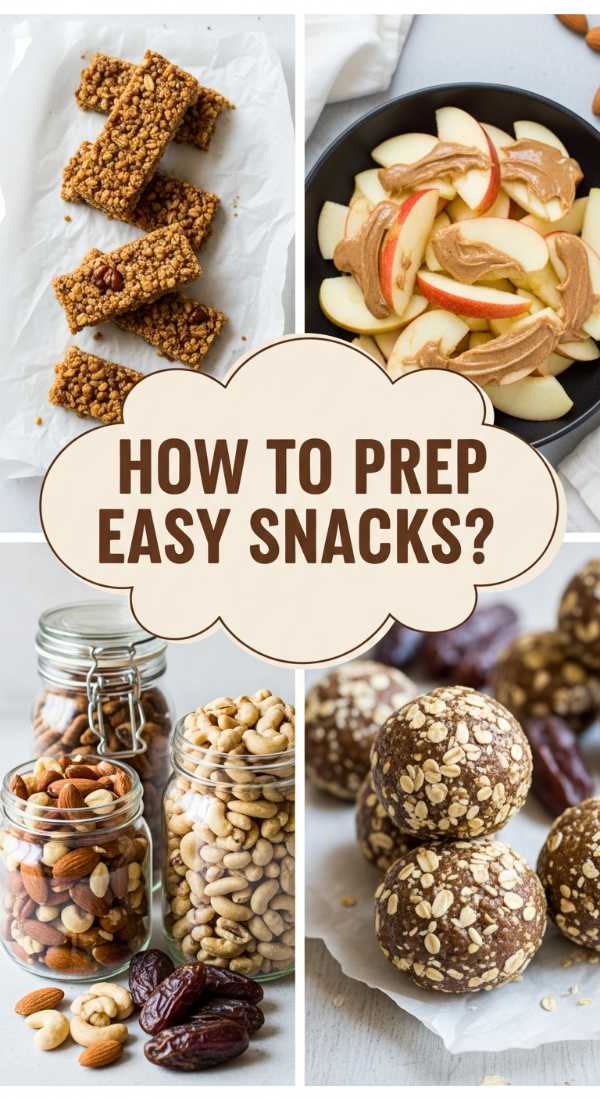
How to Prep Easy Snack Recipes for Your Busy Workday Rush

Why we love this
The workday rush often leaves us reaching for uninspired options, but a well-prepped snack board can turn a stressful afternoon into a moment of culinary respite. We love the vibrant crunch of garden-fresh vegetables paired with creamy, protein-rich dips that provide sustained energy without the mid-afternoon slump. The earthy aroma of toasted nuts combined with the sharp tang of aged cheese creates a sophisticated palate that feels much more like a gourmet treat than a quick desk-side bite.
Essential Elements:
- English cucumbers and mini bell peppers
- Roasted red pepper hummus
- Raw almonds and walnuts
- Sharp white cheddar or gouda
- Whole grain seed crackers
- Dried apricots or figs
How to make it
- Wash and dry all produce thoroughly; using a mandoline or a sharp chef’s knife, slice cucumbers into thick rounds that can act as sturdy “vessels” for your dips.
- Portion your hummus into small, aesthetic ramekins to prevent the crackers from getting soggy and to keep the board looking organized and clean.
- Toast your raw nuts in a dry pan over medium heat for 3-5 minutes, tossing frequently until they release a fragrant, nutty aroma and turn slightly golden.
- Slice the cheese into uniform cubes or thin triangles; for the best flavor, let the cheese sit at room temperature for 10 minutes before serving.
- Layer the crackers in a “river” pattern across your board to create a sense of movement and visual flow that leads the eye toward the colorful vegetables.
- Fill any small gaps on the board with dried fruits and the toasted nuts to create a lush, abundant look that feels generous and satisfying.
How to Layer Pasta Bake Recipes for the Most Comforting Dinner

Why we love this
There is something deeply primal and comforting about the scent of bubbling marinara sauce and melted mozzarella cheese browning in the oven. This dish is the ultimate crowd-pleaser for a snack board because it can be served in small, warm portions that offer a hearty contrast to cold appetizers. The way the edges of the pasta get slightly crispy and caramelized while the center remains soft and cheesy creates a texture profile that is nothing short of addictive, promising warmth and satisfaction in every forkful.
Essential Elements:
- Rigatoni or Penne pasta
- High-quality marinara sauce
- Whole milk ricotta cheese
- Shredded mozzarella and parmesan
- Fresh basil leaves
- Garlic and Italian herbs
How to make it
- Boil your pasta in heavily salted water for 2 minutes less than the package instructions for ‘al dente’; the pasta will finish cooking in the sauce, preventing it from becoming mushy.
- In a large bowl, mix 1 cup of ricotta with one egg, a pinch of nutmeg, and chopped basil to create a creamy, flavorful binder that keeps the bake moist.
- Spread a thin layer of marinara at the bottom of your baking dish to prevent the pasta from sticking and to ensure flavor in every layer.
- Toss the undercooked pasta with the remaining sauce and half of your mozzarella, then layer it into the dish, dolloping the ricotta mixture throughout.
- Top with a generous, even layer of mozzarella and parmesan; for a professional finish, add a sprinkle of dried oregano and a drizzle of olive oil.
- Bake at 375°F (190°C) for 20-25 minutes, then turn on the broiler for the last 2 minutes to achieve those sought-after charred, golden cheese bubbles.
How to Smoke Savory Brisket for the Most Tender Backyard Feast

Why we love this
Smoking a brisket is a true labor of love, and the reward is a piece of meat so tender it practically falls apart at the touch of a fork. The deep, woodsy aroma of hickory or oak smoke permeates the air, creating an atmosphere of rustic sophistication that is perfect for a backyard gathering. We love the contrast between the dark, peppery “bark” on the outside and the succulent, pink smoke ring on the inside, offering a complex flavor profile of salt, spice, and natural beef richness.
Essential Elements:
- Whole packer beef brisket
- Coarse Kosher salt and cracked black pepper
- Post oak or hickory wood chunks
- Apple cider vinegar (for spritzing)
- High-quality butcher paper
- A reliable meat thermometer
How to make it
- Trim the brisket while cold, leaving about 1/4 inch of fat cap to render down and keep the meat moist during the long smoking process.
- Apply a generous rub of equal parts salt and pepper (the “Dalmatian rub”); press the spices into the meat firmly to ensure they adhere and form a crust.
- Preheat your smoker to a consistent 225°F (107°C) using indirect heat; stability in temperature is the most critical factor for a tender result.
- Place the brisket on the smoker fat-side up and cook until the internal temperature reaches 165°F (74°C), spritzing with apple cider vinegar every hour after the first 3 hours.
- Wrap the brisket tightly in butcher paper (this helps the meat get through the “stall” while maintaining the integrity of the bark) and return to the smoker.
- Continue cooking until the internal temperature reaches 203°F (95°C) and the thermometer probes the meat like soft butter; let it rest for at least 2 hours before slicing against the grain.
How to Build Vibrant Tacos for the Freshest Taco Tuesday Party
Why we love this
Tacos are the ultimate snack board addition because they are naturally communal and visually stunning with their rainbow of toppings. The zesty aroma of fresh lime and the sharp, clean scent of cilantro immediately awaken the appetite, while the textures range from the soft, warm embrace of a tortilla to the sharp crunch of pickled radishes. It’s a customizable feast that allows every guest to be their own chef, making the meal an interactive and vibrant highlight of any evening.
Essential Elements:
- Small corn or flour tortillas
- Protein (grilled shrimp, seasoned beef, or black beans)
- Pickled red onions and radishes
- Crumbled cotija cheese
- Creamy avocado lime crema
- Fresh cilantro and lime wedges
How to make it
- Warm your tortillas directly over a gas flame for 10-15 seconds per side until they are slightly charred and pliable; keep them wrapped in a clean cloth to stay warm.
- Cook your chosen protein over high heat to achieve a nice sear; for shrimp, use a cast-iron skillet with lime juice and chili powder for a 2-minute quick sauté.
- Prepare a quick pickle by soaking thinly sliced red onions in apple cider vinegar, sugar, and salt for 15 minutes to add a bright, acidic pop to the board.
- Blend one ripe avocado with 1/4 cup of Greek yogurt, lime juice, and a handful of cilantro until smooth to create a vibrant, drizzle-worthy crema.
- Arrange the components on the board in separate clusters, using small bowls for the liquids and piling the tortillas high in the center.
- Garnish the entire board with a shower of fresh cilantro and extra lime wedges to encourage guests to squeeze fresh citrus over their creations.
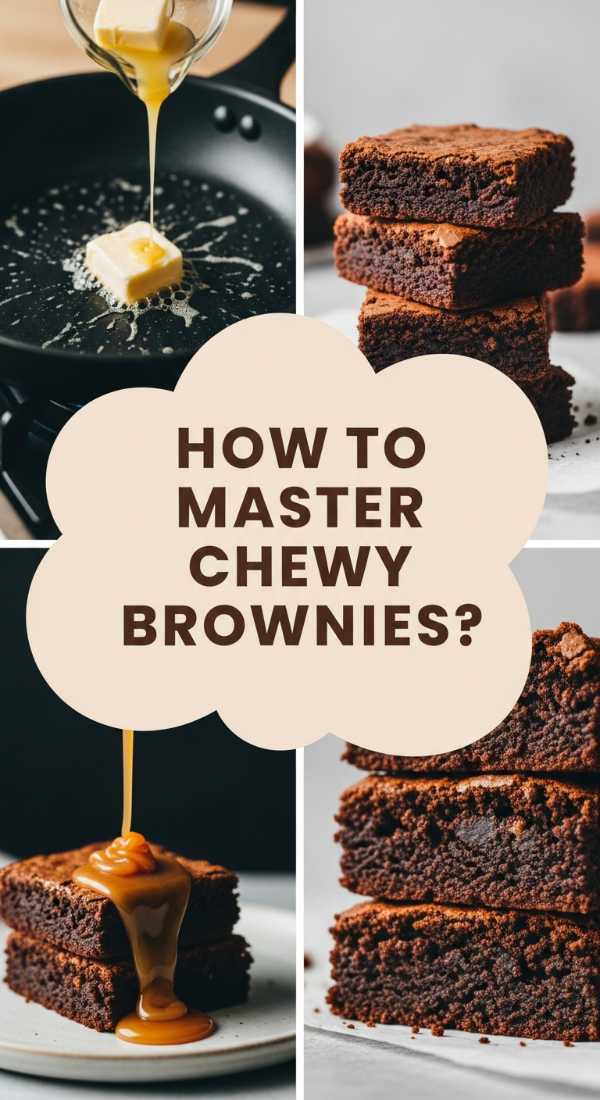
How to Master Chewy Brownie Recipes for a Gourmet Kitchen Experience

Why we love this
For those who prefer a bit of resistance and a satisfying “bite” to their desserts, the chewy brownie is the ultimate gourmet achievement. This version focuses on a complex interplay of fats and sugars to create a texture that is elastic yet soft, leaving a rich coating of high-quality chocolate on the palate. The subtle inclusion of espresso powder enhances the chocolate without tasting like coffee, providing a sophisticated depth that makes these brownies feel right at home on a high-end dessert board.
Essential Elements:
- Melted butter and neutral oil blend
- Extra-large eggs at room temperature
- Bread flour (for higher protein and chew)
- Instant espresso powder
- Semi-sweet chocolate chunks
- Dark brown sugar (for moisture and chew)
How to make it
- Combine 1/2 cup of melted butter and 2 tablespoons of oil with 1 1/2 cups of dark brown sugar; the combination of fats and the molasses in the sugar creates the chewy texture.
- Whisk in 2 eggs and a tablespoon of vanilla, beating until the mixture is slightly pale and thick to ensure proper structure.
- In a separate bowl, whisk together 3/4 cup of bread flour, 1/2 cup of cocoa powder, and 1 teaspoon of espresso powder; the bread flour’s gluten is the key to the chewiness.
- Gently fold the dry ingredients into the wet until just streaks remain, then stir in 1 cup of large semi-sweet chocolate chunks.
- Spread the batter into a lined pan and bake at 325°F (163°C)—a slightly lower temperature than usual—for 28-32 minutes to prevent the edges from drying out before the center sets.
- Allow the brownies to cool completely in the pan before slicing; this “setting” time is crucial for the gluten to firm up and create that perfect chewy resistance.
How to Cook Yummy Recipes for a Truly Unforgettable Dinner Date

Why we love this
When cooking for a dinner date, the goal is to create dishes that are as visually appealing as they are delicious, setting a romantic and intimate tone for the night. We love recipes that involve light, elegant flavors like lemon-butter scallops or garlic-infused pastas that don’t leave you feeling overly full but rather perfectly satisfied. The delicate aroma of searing seafood and fresh herbs creates an atmosphere of care and attention to detail, turning a simple meal into a memorable shared moment under soft lighting.
Essential Elements:
- Fresh sea scallops or high-grade pasta
- Dry white wine (like Sauvignon Blanc)
- Fresh garlic and shallots
- Cold unsalted butter
- Fresh flat-leaf parsley
- High-quality olive oil
How to make it
- Pat your proteins (like scallops) completely dry with paper towels; moisture is the enemy of a good sear and will cause the food to steam rather than caramelize.
- Heat a stainless steel or cast-iron pan over medium-high heat with a tablespoon of high-smoke-point oil until the oil is shimmering but not smoking.
- Place the scallops in the pan and leave them undisturbed for 2 minutes to develop a deep, golden-brown crust; use a fish spatula to gently check for release.
- Flip the scallops and add 2 tablespoons of butter, a smashed garlic clove, and a sprig of parsley to the pan, basting the scallops with the foaming butter for 1 minute.
- Deglaze the pan with a splash of white wine, scraping up the browned bits (fond) to create a simple, luxurious pan sauce in seconds.
- Plate immediately on warmed dishes to keep the food at the ideal temperature, finishing with a final squeeze of lemon and a sprinkle of fresh herbs for brightness.
How to Design Aesthetic Sweet Recipes for a Stunning Dessert Table
[IMAGE_10]
Why we love this
The visual appeal of a dessert table is often what guests remember most, and designing aesthetic sweet recipes is all about the harmony of color and shape. We love the soft, pastel hues of macarons paired with the structural elegance of tiered fruit tarts and shimmering glass bowls of candy. The scent is a sweet symphony of sugar, cream, and berries that invites guests to linger and admire the craftsmanship before they even take their first bite, making the table a true centerpiece of any celebration.
Essential Elements:
- Miniature tart shells (pre-baked or homemade)
- Pastry cream or lemon curd
- Edible flowers (like pansies or violas)
- Clear glaze or apricot jam
- Various sizes of display pedestals
- Coordinated napkins and labels
How to make it
- Fill your miniature tart shells with a smooth, chilled lemon curd or vanilla pastry cream using a piping bag for a clean, professional look.
- Arrange small berries or sliced fruit in a symmetrical pattern on top of the cream; using a pair of culinary tweezers can help with precision for smaller items.
- Warm a tablespoon of apricot jam with a teaspoon of water and brush it lightly over the fruit to create a professional “patisserie” shine that prevents the fruit from drying out.
- Incorporate height into your design by using cake stands and overturned crates covered in fabric to create multiple levels of visual interest.
- Space out different colors and textures—place the matte finish of macarons next to the glossy shine of the tarts to create a balanced, curated aesthetic.
- Add the finishing touch by placing a few edible flowers or sprigs of mint around the platters to fill in empty spaces and add a touch of organic beauty to the arrangement.
Wrapping Up Your Viral Host Journey
Creating a viral snack board is less about following strict rules and more about embracing your own creativity and the joy of hosting. By combining these diverse elements—from the decadent fudginess of brownies to the fresh, vibrant pop of a taco station—you create an experience that appeals to every sense. Remember that the best boards are those that feel abundant and approachable, inviting your guests to dive in and make memories together. So, grab your favorite platter, start experimenting with these recipes, and watch as your gatherings become the talk of your social circle!