
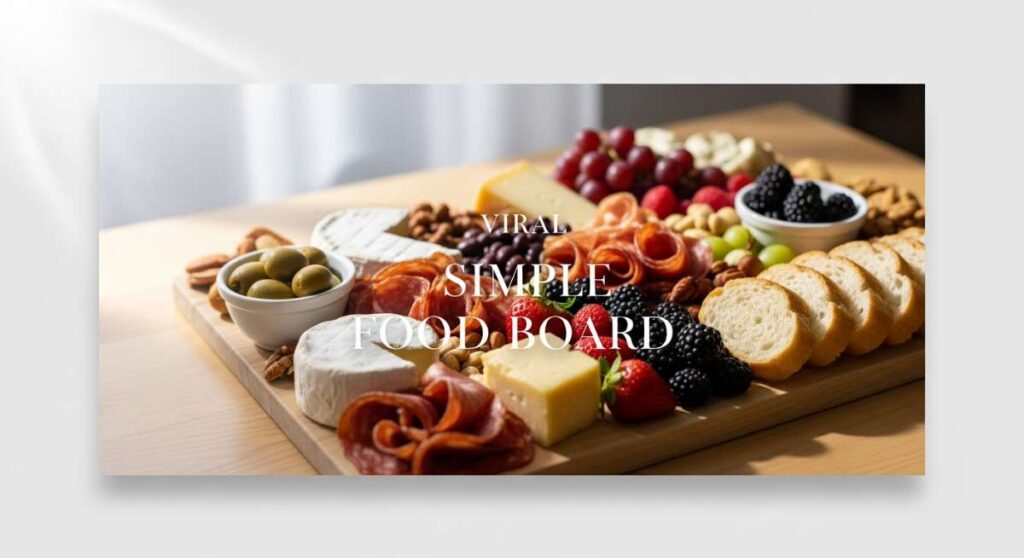
Why This Simple Food Board Strategy Is Going Viral Right Now
There is something inherently magical about gathering around a table, not for a formal three-course meal, but for a sprawling, colorful board of treats that invites everyone to lean in, share stories, and linger. Lately, my social media feeds have been overflowing with a new kind of ‘Food Board Strategy’ that moves beyond just cheese and crackers. It’s about creating a tapestry of textures and temperatures—think warm, gooey brownies nestled next to crisp street tacos and pillowy marshmallows. It’s a celebration of comfort food in a way that feels curated yet completely approachable, and honestly, it’s changed the way I host forever.
The secret to why this is going viral isn’t just the aesthetics; it’s the emotional resonance of ‘grazing’ on our favorite childhood comforts. When you place a board in the center of the room filled with the aroma of cinnamon, melted cheese, and fresh-baked bread, the atmosphere shifts instantly. It breaks down the barriers of a traditional dinner party and turns every meal into an interactive experience. Whether you’re hosting a cozy movie night or a festive weekend brunch, this strategy is all about the ‘wow’ factor without the stress of plated service. Let’s dive into the essential components that make these boards truly legendary.
How to make fluffy marshmallows?

Why we love this
Nothing compares to the ethereal, cloud-like texture of a homemade marshmallow, far removed from the gummy, store-bought variety. As you bite into one, you’re met with a delicate sweetness and a soft, velvety resistance that melts away into a creamy vanilla finish. The aroma of toasted sugar and pure vanilla extract fills your kitchen, creating a nostalgic warmth that feels like a hug in confection form. These are the ultimate board additions because they provide a visual lightness and a gourmet touch that pairs perfectly with fruits and chocolates.
Ingredients
- 3 packets unflavored gelatin
- 1 cup cold water, divided
- 1 1/2 cups granulated sugar
- 1 cup light corn syrup
- 1/4 tsp salt
- 1 tbsp pure vanilla extract
- Powdered sugar and cornstarch for dusting
How to make it
- Place the gelatin into the bowl of a stand mixer along with 1/2 cup of the cold water. Let it ‘bloom’ for at least 10 minutes while you prepare the syrup.
- In a small saucepan, combine the remaining 1/2 cup water, granulated sugar, corn syrup, and salt. Cover and cook over medium-high heat for 3 to 4 minutes.
- Uncover the pan and clip on a candy thermometer. Continue to cook until the mixture reaches 240°F (soft ball stage), which usually takes about 7 to 8 minutes. Remove from heat immediately once it hits the temperature.
- Turn the stand mixer on low speed and slowly pour the hot sugar syrup down the side of the bowl into the gelatin. Once combined, increase the speed to high.
- Whip the mixture for 12 to 15 minutes until it becomes very thick, glossy, and lukewarm to the touch. Add the vanilla extract in the last minute of whipping.
- While whipping, dust a 9×9 inch pan heavily with a 50/50 mix of powdered sugar and cornstarch. Pour the fluff into the pan, smoothing the top with a wet spatula.
- Let the marshmallows sit uncovered for at least 4 hours or overnight to set. Once firm, turn onto a dusted surface, cut into squares with a greased knife, and toss in more sugar/starch mix to prevent sticking.
How to bake pumpkin pie?

Why we love this
A slice of pumpkin pie is the quintessential symbol of cozy autumn afternoons, offering a rich, custard-like texture that feels incredibly luxurious on the palate. The warmth of cinnamon, ginger, and cloves cuts through the earthy sweetness of the pumpkin, creating a complex flavor profile that lingers beautifully. There is something deeply satisfying about the contrast between the flaky, buttery crust and the smooth, spice-laden filling that smells like home and holidays. It’s a centerpiece item for any dessert board, inviting guests to enjoy the comforting essence of the season in every creamy bite.
Ingredients
- 1 (15 oz) can pumpkin puree
- 3 large eggs
- 1/2 cup brown sugar
- 1/3 cup white sugar
- 1 1/2 cups heavy cream
- 1 tsp cinnamon, 1/2 tsp ginger, 1/4 tsp cloves
- 1 unbaked 9-inch deep-dish pie crust
How to make it
- Preheat your oven to 425°F (218°C). Roll out your pie crust and fit it into a deep-dish pie plate, crimping the edges for a decorative look.
- In a large mixing bowl, whisk the eggs until lightly beaten, then stir in the pumpkin puree, white sugar, and brown sugar until the mixture is uniform and smooth.
- Gradually whisk in the cinnamon, ginger, and cloves, ensuring no spice clumps remain. Slowly pour in the heavy cream while stirring constantly until the filling is perfectly blended.
- Pour the pumpkin mixture into the prepared pie shell. Place the pie on a baking sheet to catch any spills.
- Bake at 425°F for the first 15 minutes. This high heat helps set the crust and prevents it from getting soggy.
- Reduce the oven temperature to 350°F (175°C) and continue baking for 40 to 50 minutes. The pie is done when the edges are set and slightly puffed, but the center still has a slight, jello-like wobble.
- Cool the pie completely on a wire rack for at least 2 to 3 hours. This cooling period is critical for the custard to finish setting to a sliceable consistency.
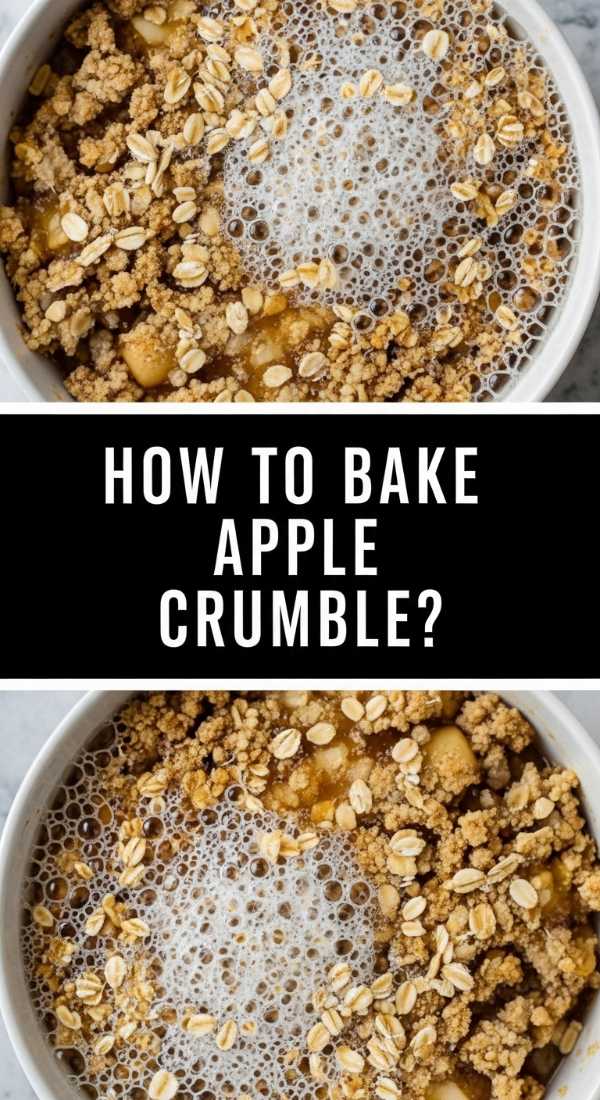
How to bake apple crumble?
Why we love this
The apple crumble is a masterclass in textural harmony, featuring tender, cinnamon-infused apples that break down into a luscious compote beneath a mountain of golden, buttery oats. As it bakes, the juices from the fruit bubble up and caramelize with the brown sugar, creating a scent that is intoxicatingly sweet and fruity. Each spoonful offers a delightful crunch from the toasted topping followed by the soft, tart acidity of the apples, making it a rustic and heart-warming addition to any spread. It’s best served warm, providing a comforting heat that balances out cold elements on a board like whipped cream or cheese.
Ingredients
- 6 large Granny Smith apples, peeled and sliced
- 1/2 cup granulated sugar
- 1 tbsp cinnamon
- 1 1/2 cups all-purpose flour
- 1 cup rolled oats
- 1 cup brown sugar
- 1 cup cold unsalted butter, cubed
How to make it
- Preheat your oven to 375°F (190°C) and grease a large baking dish with butter.
- In a large bowl, toss the sliced apples with the granulated sugar and cinnamon until every slice is evenly coated. Spread the apples into the prepared baking dish in an even layer.
- In a separate bowl, combine the flour, rolled oats, and brown sugar. Mix well to distribute the sugar evenly through the dry ingredients.
- Add the cold, cubed butter to the flour mixture. Using your fingertips or a pastry cutter, work the butter into the dry ingredients until it resembles coarse crumbs with some pea-sized chunks remaining.
- Sprinkle the crumble mixture generously over the apples, making sure to cover the fruit entirely to trap the steam and juices.
- Bake for 40 to 45 minutes. You are looking for the topping to be deep golden brown and the apple juices to be thick and bubbling around the edges.
- Allow the crumble to rest for 10 minutes before serving. This allows the fruit juices to thicken slightly, making it easier to scoop onto your board.
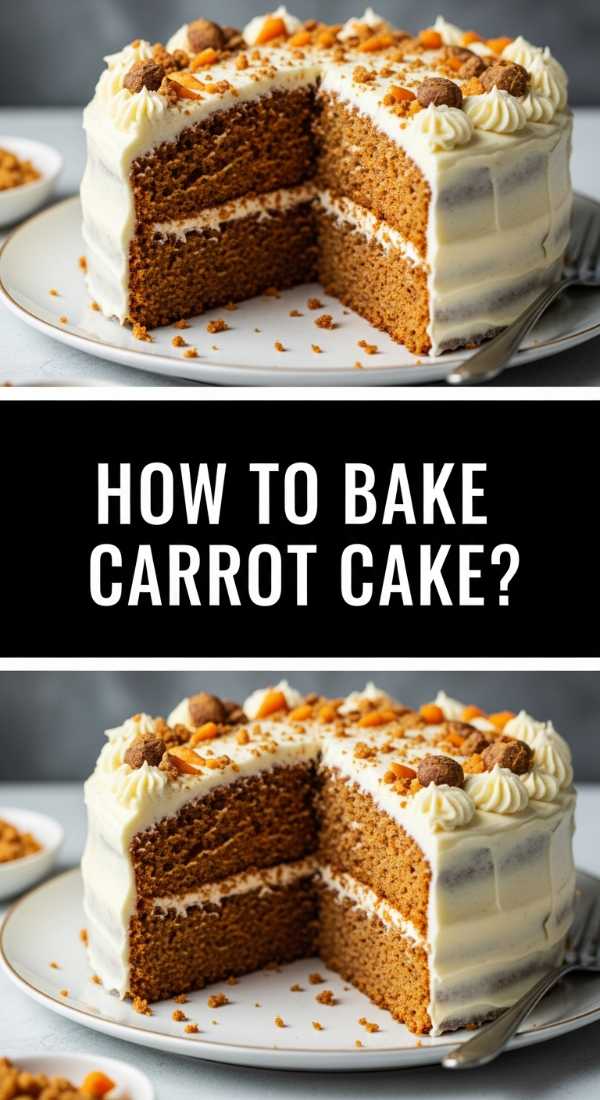
How to bake carrot cake?
Why we love this
Carrot cake is the ultimate choice for those who crave a cake that is moist, dense, and full of character, offering an earthy sweetness that is perfectly countered by tangy cream cheese frosting. The inclusion of finely grated carrots and chopped pecans provides a delightful variety in texture, while the aromatic blend of nutmeg and cinnamon creates a deeply spiced crumb. It feels like a sophisticated treat that manages to be both rustic and elegant at the same time, filling the air with a spicy, bakery-fresh fragrance. On a food board, small cubes of this cake act as decadent nuggets of joy that pair beautifully with hot tea or coffee.
Ingredients
- 2 cups all-purpose flour
- 2 cups sugar
- 1 tsp baking soda, 1 tsp baking powder
- 3 cups finely grated carrots
- 1 cup vegetable oil
- 4 large eggs
- 8 oz cream cheese, 1/2 cup butter, 4 cups powdered sugar (for frosting)
How to make it
- Preheat your oven to 350°F (175°C). Grease and flour two 9-inch round cake pans or one 9×13 inch rectangular pan.
- In a large bowl, whisk together the flour, sugar, baking soda, baking powder, and a pinch of salt. Ensure there are no large lumps in the dry mixture.
- In another bowl, beat the eggs and vegetable oil together until emulsified. Slowly fold in the grated carrots, ensuring they are evenly distributed in the liquid.
- Gradually add the dry ingredients to the wet ingredients, stirring just until combined. Avoid overmixing, as this can make the cake tough.
- Pour the batter into the prepared pans and bake for 30 to 35 minutes. Test for doneness by inserting a toothpick into the center; it should come out clean or with just a few moist crumbs.
- Let the cakes cool in the pans for 10 minutes before transferring to a wire rack to cool completely. The cake must be stone-cold before frosting.
- For the frosting, beat the softened cream cheese and butter together until fluffy. Gradually add powdered sugar until smooth and spreadable. Frost the cake generously and chill for 30 minutes before slicing.
How to make chocolate cookies?

Why we love this
The perfect chocolate chip cookie is a sensory journey, beginning with a crisp, buttery edge that gives way to a soft, chewy, and slightly under-baked center. Pools of dark, melted chocolate create rich, bitter-sweet pockets that explode with flavor, especially when topped with a delicate sprinkle of flaky sea salt. The aroma of browning butter and toasted sugar is perhaps the most inviting scent in the culinary world, making these cookies an absolute essential for a viral food board. They represent the ultimate comfort food, bridging the gap between a casual snack and a gourmet dessert experience.
Ingredients
- 1 cup unsalted butter, browned and cooled
- 3/4 cup brown sugar, 3/4 cup granulated sugar
- 1 large egg + 1 yolk
- 2 tsp vanilla extract
- 2 1/4 cups all-purpose flour
- 1 tsp baking soda
- 2 cups dark chocolate chunks
- Flaky sea salt for finishing
How to make it
- Start by browning the butter in a light-colored skillet over medium heat. Whisk constantly until the butter foams, turns a nutty brown, and smells like toasted hazelnuts. Pour into a bowl and let it cool until solid but soft.
- In a stand mixer, cream the cooled brown butter with both sugars for at least 3 to 5 minutes until the mixture is light and aerated.
- Add the egg, egg yolk, and vanilla extract. Beat on medium speed until the mixture looks pale and slightly increased in volume.
- Sift the flour and baking soda together, then fold them into the wet ingredients by hand using a spatula until only a few streaks of flour remain.
- Fold in the dark chocolate chunks. For the best flavor, cover the dough and refrigerate it for at least 24 hours. This hydrates the flour and develops a deep, toffee-like flavor.
- Preheat oven to 350°F (175°C). Scoop large balls of dough onto a parchment-lined sheet, leaving plenty of space for spreading.
- Bake for 10 to 12 minutes. The edges should be golden, but the centers should still look slightly soft. Sprinkle with sea salt immediately upon removal from the oven.
How to make street tacos?

Why we love this
Street tacos bring a vibrant, savory energy to a food board, offering a perfect balance of charred proteins, sharp onions, and zesty lime. The smell of sizzling meat hitting a hot cast-iron skillet combined with the earthy scent of toasted corn tortillas is enough to make anyone’s mouth water. Each bite is a collision of textures: the tender, juicy meat, the crunch of fresh white onion, and the bright, herbal pop of cilantro. They are the ultimate ‘handheld’ food, making them an ideal centerpiece for an interactive board where guests can customize their own toppings and enjoy a burst of authentic flavor.
Ingredients
- 1 lb flank steak or chicken thighs, finely diced
- 2 tbsp soy sauce, 1 tbsp lime juice, 1 tsp cumin
- Small corn tortillas
- 1 white onion, finely diced
- 1 bunch fresh cilantro, chopped
- Salsa verde and lime wedges
How to make it
- In a bowl, marinate the diced meat with soy sauce, lime juice, cumin, and a splash of oil for at least 30 minutes. This ensures the meat is flavorful and tender.
- Heat a heavy cast-iron skillet over high heat until it is wisps of smoke begin to appear. You want a very hot surface to achieve a proper sear.
- Add the meat to the skillet in a single layer. Do not crowd the pan; cook in batches if necessary. Let the meat sear undisturbed for 2 minutes to develop a brown crust, then toss and cook for another 2 to 3 minutes until fully cooked.
- While the meat rests, heat another dry pan over medium-high heat. Warm the corn tortillas for about 30 seconds per side until they are pliable and show light char marks. Keep them warm in a clean kitchen towel.
- To assemble, place a generous spoonful of meat onto two stacked tortillas (the ‘street style’ double layer prevents tearing).
- Top with a sprinkle of diced onions and a heavy hand of chopped cilantro.
- Serve with a side of salsa verde and plenty of lime wedges for squeezing, which provides the necessary acidity to cut through the richness of the meat.
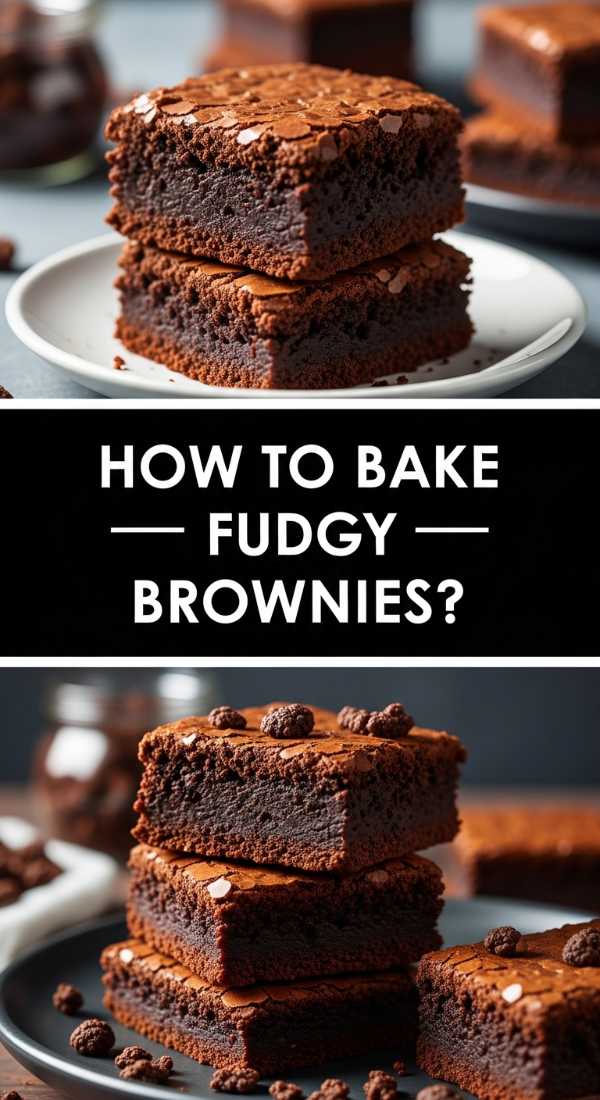
How to bake fudgy brownies?
Why we love this
A truly fudgy brownie is a chocolate lover’s dream, possessing a density that is almost truffle-like and a top that shatters like thin tissue paper. The intense cocoa aroma is deep and sophisticated, while the taste is a perfect marriage of high-quality chocolate and buttery richness that coats the tongue. These brownies don’t just sit on a board; they command attention with their dark, glossy appearance and decadent promise of a gooey center. They are the perfect foil for salty elements like pretzels or nuts, making them a versatile star in any dessert-heavy food board strategy.
Ingredients
- 1 cup unsalted butter, melted
- 2 cups granulated sugar
- 4 large eggs
- 3/4 cup high-quality cocoa powder
- 1 cup all-purpose flour
- 1/2 tsp salt
- 1 tsp vanilla extract
How to make it
- Preheat your oven to 325°F (165°C). Line an 8-inch square baking pan with parchment paper, leaving an overhang on the sides for easy removal.
- In a large bowl, whisk the melted butter and granulated sugar together vigorously for about 2 minutes. The sugar won’t fully dissolve, but the mixture should look unified.
- Add the eggs one at a time, whisking thoroughly after each addition. This step is the secret to the ‘crackly’ top; you want to incorporate enough air into the eggs to create that meringue-like crust.
- Stir in the vanilla extract. Sift the cocoa powder, flour, and salt directly into the wet ingredients.
- Using a spatula, gently fold the dry ingredients into the wet until just combined. Over-mixing at this stage will create a cakey texture rather than a fudgy one, so stop as soon as the flour disappears.
- Pour the batter into the prepared pan and smooth the top. Bake for 30 to 35 minutes.
- Test with a toothpick at the 30-minute mark. You want the toothpick to come out with wet, sticky crumbs attached, not clean. Let the brownies cool completely in the pan to set the fudge before cutting into small, decadent squares.
How to bake cheesy pasta?
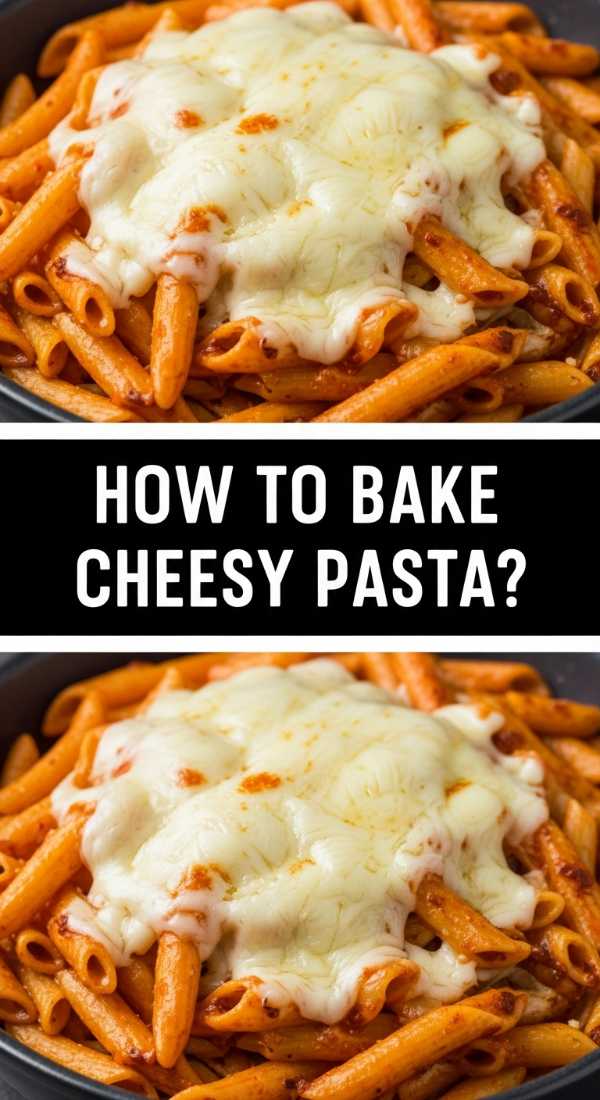
Why we love this
Cheesy pasta, specifically a baked macaroni, is the ultimate crowd-pleaser that brings a golden, bubbling warmth to your food board presentation. The visual of molten cheese stretching as a scoop is lifted is pure food theater, accompanied by the savory, nutty scent of toasted breadcrumbs and sharp cheddar. The texture is a delightful contrast between the soft, sauce-coated noodles and the crunchy, broiled crust on top. It’s a hearty, soul-satisfying dish that anchors a board, providing a savory foundation that makes everyone reach for a second helping. It’s comfort in a casserole dish, turned into a shareable board delight.
Ingredients
- 1 lb elbow macaroni
- 1/4 cup butter, 1/4 cup flour
- 3 cups whole milk
- 4 cups sharp cheddar cheese, shredded
- 1 cup gruyere cheese, shredded
- 1/2 cup panko breadcrumbs
How to make it
- Preheat your oven to 375°F (190°C). Boil the macaroni in salted water for 2 minutes less than the package directions for ‘al dente’. The pasta will finish cooking in the oven.
- In a large pot, melt the butter over medium heat. Whisk in the flour and cook for 1 to 2 minutes to create a roux, which should look like a pale paste and smell slightly nutty.
- Slowly pour in the milk, whisking constantly to prevent lumps. Continue cooking and whisking until the sauce thickens enough to coat the back of a spoon (this is your bechamel).
- Remove from heat and stir in 3 cups of the cheddar and all of the gruyere until the sauce is smooth and glossy. Season with salt and pepper to taste.
- Fold the cooked macaroni into the cheese sauce until every noodle is submerged. Pour the mixture into a greased baking dish.
- Top with the remaining cup of cheddar and the panko breadcrumbs. This creates that iconic dual-texture topping.
- Bake for 25 to 30 minutes until the sauce is bubbling and the top is a deep golden brown. For extra crunch, broil for the final 2 minutes, watching closely to avoid burning.
How to make chicken soup?

Why we love this
While often served in a bowl, a small ‘shooter’ or cup of homemade chicken soup is a surprising and deeply appreciated addition to a diverse food board. The golden, clear broth carries the essence of slow-simmered vegetables and herbs, offering a clean, savory aroma that balances out richer, heavier foods. It provides a moment of warmth and hydration, with tender morsels of chicken and perfectly softened carrots that melt in the mouth. It’s the ultimate ‘wellness’ food that adds a rustic, homemade touch to your spread, making the entire board feel like a comprehensive, nourishing meal rather than just a collection of snacks.
Ingredients
- 1 whole chicken (approx. 3-4 lbs)
- 3 carrots, 3 celery stalks, 1 large onion (roughly chopped)
- 4 cloves garlic, smashed
- 2 bay leaves, 1 tsp peppercorns
- Fresh parsley and thyme
- Fine sea salt to taste
How to make it
- Place the whole chicken in a large stockpot and cover with cold water (about 1 inch above the chicken). Bring to a gentle boil over medium-high heat.
- As it begins to boil, use a spoon to skim off any gray foam that rises to the top. This ensures a clear, beautiful broth.
- Add the onions, carrots, celery, garlic, bay leaves, peppercorns, and herbs. Reduce the heat to low and simmer, partially covered, for about 1 to 1.5 hours. Do not let it boil vigorously, as this emulsifies the fat and makes the soup cloudy.
- Carefully remove the chicken from the pot. Let it cool slightly, then remove the skin and bones, shredding the meat into bite-sized pieces.
- Strain the broth through a fine-mesh sieve into a clean pot, discarding the mushy vegetables and aromatics.
- Add fresh, sliced carrots and celery to the strained broth and simmer for 10 minutes until tender.
- Return the shredded chicken to the pot and season generously with salt. Serve in small glass cups on your board, garnished with fresh parsley for a pop of color.
How to bake buttery scones?

Why we love this
A perfectly baked scone is a marvel of pastry engineering, boasting a tall, craggy exterior that shatters to reveal a soft, flaky, and intensely buttery interior. The scent of sweet cream and toasted flour is subtle yet irresistible, making these a sophisticated companion for jams, honey, or savory meats on your food board. Because they are less sweet than a cookie but richer than bread, they serve as a versatile bridge between the various flavors in your strategy. There is a refined, tea-time elegance to a well-made scone that instantly elevates the visual appeal of your viral-worthy grazing spread.
Ingredients
- 2 cups all-purpose flour
- 1/4 cup sugar
- 1 tbsp baking powder
- 1/2 cup cold unsalted butter, grated
- 1/2 cup heavy cream + 1 egg (whisked together)
- Pinch of salt
How to make it
- Preheat your oven to 400°F (200°C) and line a baking sheet with parchment paper. High heat is essential for the steam to lift the layers of the scone.
- In a large bowl, whisk together the flour, sugar, baking powder, and salt.
- The secret to flakiness: Grate the frozen or very cold butter into the flour. Use a fork to toss the butter shreds with the flour until they are coated. Do not use your hands, as the heat will melt the butter.
- Make a well in the center and pour in the cream and egg mixture. Use a fork to gently fold the ingredients together until a shaggy dough forms. It should look slightly dry; do not overwork it.
- Turn the dough onto a lightly floured surface and pat it into a 1-inch thick circle. Fold the dough in half and pat it down again; repeat this 3 times to create physical layers of butter and flour.
- Cut the circle into 8 wedges using a sharp knife. Brush the tops with a little extra cream for a golden finish.
- Bake for 15 to 18 minutes until the tops are golden brown and the scones have doubled in height. Serve warm on the board for the best texture.
Conclusion
The beauty of this viral food board strategy lies in its versatility and the way it celebrates the ‘imperfectly perfect.’ By combining these high-quality, homemade elements—from the savory crunch of street tacos to the pillowy sweetness of marshmallows—you create a dining experience that is as much about connection as it is about flavor. So, grab your largest wooden board, pick a few of these recipes, and watch as your guests hover, chat, and enjoy the ultimate comfort spread. It’s time to make your next gathering go viral in the best way possible: with full hearts and happy bellies.
FAQ Section
Q: Can I prepare these items in advance?
A: Absolutely! Most of these items, like the brownies, cookies, and marshmallows, can be made 1-2 days ahead. Just ensure they are stored in airtight containers to maintain freshness.
Q: How do I keep the hot items warm on the board?
A: The trick is to place the hot items (like the tacos or cheesy pasta) on the board last. You can also use small pre-heated ceramic dishes to help retain the temperature for as long as possible.
Q: What is the best way to arrange the board for a viral look?
A: Start with your largest items or bowls first, then build around them. Fill in the gaps with ‘fillers’ like grapes, nuts, or herbs to create a lush, overflowing appearance that looks great in photos!