
We’ve all been there: sitting on the sofa, staring at that one big, blank, beige wall and feeling absolutely nothing. It’s the “builder-grade blues,” that sense that your home is just a series of boxes rather than a reflection of your soul. Your walls are the biggest real estate in your home, yet we often treat them as an afterthought, a backdrop rather than the main event. But what if your walls could whisper stories of nature, luxury, and artistic expression every time you walked into the room?
The era of “safe” painting is over, and I am so excited to share these viral design hacks that are currently setting the internet on fire. From the earthy smell of living moss to the sleek, cinematic glow of a custom media wall, we’re diving deep into how you can transform your space from a basic house into a sanctuary that feels curated, expensive, and deeply personal. Let’s stop settling for boring and start creating walls that actually make us want to stay home.
How to Create a Lush Green Wall for Ultimate Relaxation

Why we love this
There is something deeply primal and soothing about bringing the outdoors in; it’s like a deep breath for your living room. The visual feast of varying shades of emerald and forest green creates a textured tapestry that literally cleans the air while providing a soft, organic aroma of damp earth and fresh leaves. Touching the cool, waxy leaves after a long day at the office provides an instant sensory reset, making your home feel like a misty woodland retreat where the stress of the world simply cannot find you.
Essential Elements:
- Modular vertical planter system or moisture-proof backing
- Automated drip irrigation or easy-access watering reservoir
- Selection of low-light plants like Pothos, Ferns, and Philodendrons
- High-quality organic potting mix with perlite for drainage
- Full-spectrum LED grow lights (if natural light is scarce)
How to make it
- Begin by installing a moisture barrier, such as a PVC sheet or a specialized pond liner, against your drywall to prevent any water damage or mold growth over time.
- Secure your modular wall planters or a sturdy wooden trellis grid directly into the studs of the wall using heavy-duty screws to ensure the weight of the wet soil is fully supported.
- Carefully prepare your plants by removing them from their nursery pots and gently loosening the root balls before placing them into the wall pockets with a blend of moisture-retentive potting soil.
- Arrange the plants with trailing varieties like Ivy at the bottom and bushier ferns at the top to create a waterfall effect that masks the structure of the planters.
- Set up your irrigation system, ensuring the water flow is even from top to bottom, and test the drainage path to avoid puddles on your flooring.
How to Design a Chic Fence Wall for Maximum Privacy
Why we love this
A fence shouldn’t just be a boundary; it should be a warm embrace for your outdoor sanctuary. We love this hack because it uses the rich, honeyed tones of cedar or the sleek mystery of charred wood to create a private cocoon that smells faintly of resin and sunshine. The way the light filters through narrow slats at golden hour creates a rhythmic pattern of shadows on the grass, turning your backyard into a high-end boutique hotel lounge where you can finally relax without the prying eyes of neighbors.
Essential Elements:
- Horizontal cedar or composite wood slats
- Black powder-coated steel posts for a modern contrast
- Precision spacers (1/4 inch to 1/2 inch)
- UV-resistant exterior wood stain or sealer
- Hidden fastener clips for a seamless, screw-free look
How to make it
- Dig post holes to a depth of at least 24 inches (or below the frost line), insert your steel or pressure-treated posts, and pour quick-set concrete, ensuring every post is perfectly plumb using a level.
- Apply a high-quality UV-protective stain to all sides of your wood slats before installation to ensure the wood is sealed against rot and silvering from the sun.
- Starting from the bottom, attach your first slat approximately two inches off the ground to allow for air circulation and prevent moisture absorption from the soil.
- Use your precision spacers between each subsequent slat to maintain a consistent gap, which allows wind to pass through while still providing visual privacy.
- Secure the slats from the back or use a hidden fastening system to maintain the clean, architectural lines that define the modern chic aesthetic.
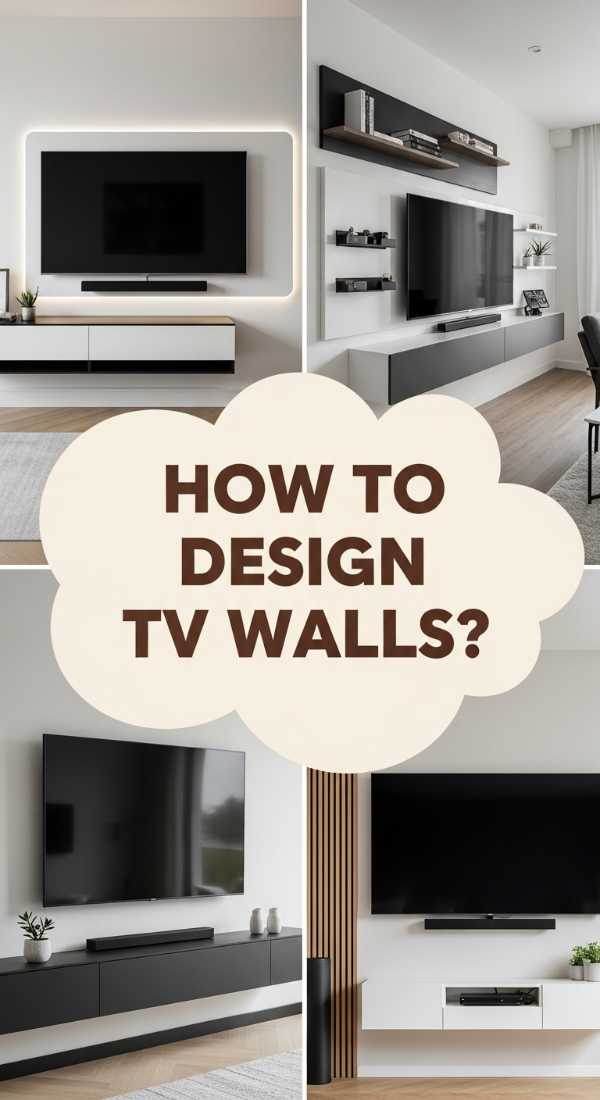
How to Achieve a Modern TV Wall for Seamless Entertainment
Why we love this
The modern TV wall is the ultimate marriage of technology and art, turning a bulky appliance into a sleek design statement. We love how this look eliminates visual clutter, hiding those messy cables and providing a smooth, matte surface that feels incredibly satisfying to the touch. It transforms your viewing experience into a cinematic event, where the soft glow of integrated lighting against a dark accent wall makes colors on the screen pop with a vividness that feels both futuristic and incredibly cozy.
Essential Elements:
- Ultra-thin tilting or flush-mount TV wall bracket
- Recessed cable management box (In-wall power kit)
- Matte-finish charcoal or navy blue accent paint
- Floating media console for storage
- Wireless soundbar or recessed speakers
How to make it
- Mark the exact center of your viewing area and install a recessed power and cable management box behind where the TV will sit to hide all wires inside the wall.
- Apply two coats of high-pigment matte paint to the wall area; the dark color helps the TV screen blend in when it is turned off, making the room feel more like a lounge and less like a tech hub.
- Mount your TV bracket into the studs, checking multiple times with a level to ensure a perfectly horizontal placement that prevents any neck strain.
- Install a floating console at least 12-18 inches below the TV to house gaming consoles or cable boxes, ensuring all connections run through the wall to the TV.
- Finish by applying LED backlighting strips to the rear of the TV to create a “halo” effect, which reduces eye strain and adds a professional, high-end glow to the room.
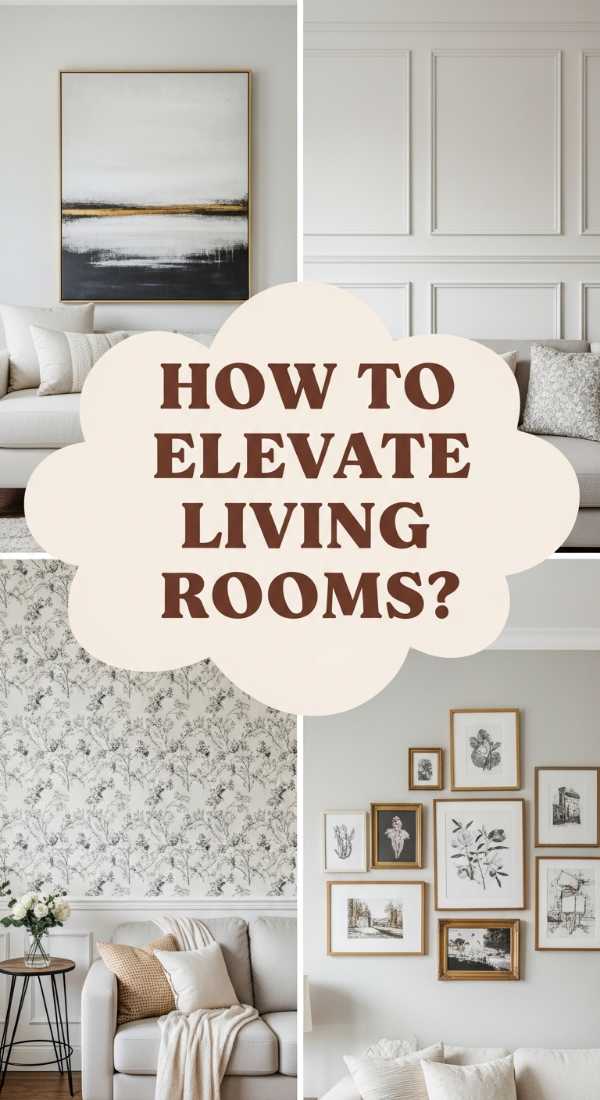
How to Curate Living Room Walls for Sophisticated Style
Why we love this
Sophistication is all about the layers, and a curated living room wall feels like a personal museum of your life’s best moments. We love the tactile contrast between smooth, gold-leafed frames and the rough texture of a linen-wrapped canvas. The room takes on a sophisticated air as the warm light from dedicated picture lamps hits the art, creating an atmosphere that feels expensive, thoughtful, and deeply storied, as if every piece of decor has a secret to tell you while you sip your evening tea.
Essential Elements:
- Picture rail molding or traditional wainscoting
- Dimmable brass or matte black picture lights
- A mix of oversized statement art and smaller curated sketches
- High-quality archival mats for framing
- Command strips or heavy-duty brass picture hooks
How to make it
- Plan your layout on the floor first by tracing your frames onto kraft paper and taping the cutouts to the wall to visualize the balance and spacing before hammering a single nail.
- Install wainscoting or simple box molding on the lower third of the wall to provide a classic, architectural foundation that grounds the room.
- Place your largest “anchor” piece of art at eye level (roughly 57-60 inches from the floor) and build your smaller pieces around it in a loose, asymmetrical grid.
- Install battery-operated or hardwired picture lights above the most significant pieces to create pools of light that draw the eye and add a layer of warmth.
- Mix textures by incorporating a wall-hung ceramic piece or a textile hanging among the framed art to break up the hard lines and add a touch of softness.
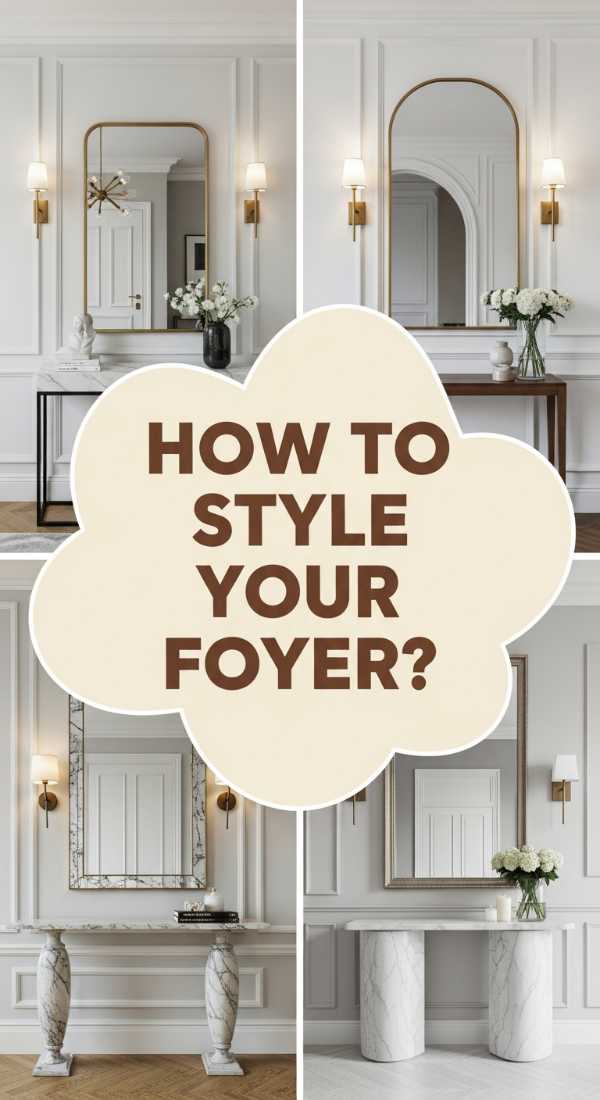
How to Craft a Grand Entrance Foyer for a Warm Welcome

Why we love this
The foyer is your home’s first impression, and a grand entrance wall should feel like a warm hug. We love the way a well-designed foyer wall uses mirrors to bounce light around a cramped space, making it feel airy and bright. The scent of a luxury candle on a marble console table, paired with the sight of a perfectly styled wall, creates a transition zone that tells your brain, “You are home, and you can finally relax,” setting a serene tone for the rest of the house.
Essential Elements:
- Large-scale circular or arched mirror
- Slimline console table in wood or stone
- Statement wall sconces or a designer pendant
- Textured wallpaper or a bold paint color
- Decorative tray for keys and mail
How to make it
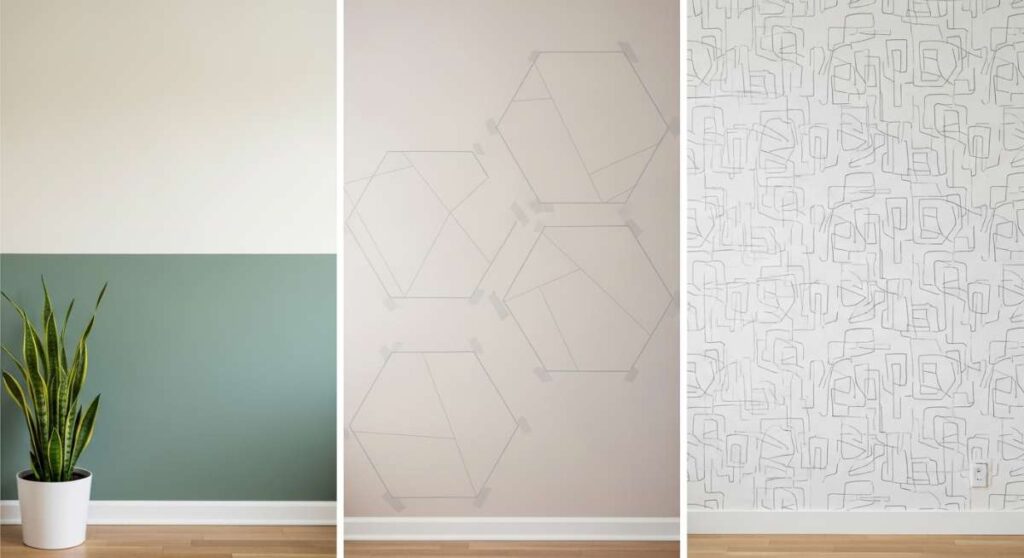
- Identify the primary wall facing the door and apply a textured grasscloth wallpaper or a deep, welcoming paint tone like terracotta or sage green.
- Mount a large, high-quality mirror in the center of the wall to reflect light from the front door and create the illusion of a much larger, grander hallway.
- Position a slim console table underneath the mirror, ensuring it is narrow enough to allow for easy foot traffic but sturdy enough to hold decorative objects.
- Flank the mirror with two elegant wall sconces mounted at eye level to provide a soft, symmetrical glow that eliminates harsh shadows.
- Style the tabletop with a tall vase of seasonal branches and a small ceramic bowl to hide everyday clutter, keeping the entrance looking pristine and intentional.
How to Master Luxury TV Wall Design for an Upscale Look

Why we love this
Luxury is often found in the materials, and this design hack elevates the humble TV wall into a five-star hotel feature. We love the cool, smooth touch of faux-marble porcelain slabs contrasted with the warmth of vertical wooden slats. It creates a multi-dimensional experience where the TV becomes part of a larger architectural sculpture. The subtle aroma of polished wood and the high-end visual of integrated stone make the entire living area feel like an upscale penthouse, even if you’re just watching the local news.
Essential Elements:
- Large-format porcelain tiles or marble-effect panels
- Vertical oak or walnut wood slat panels (Acoustic panels)
- Recessed LED strip lighting (Warm white)
- Flush-mount “Frame” style TV
- Invisible cabinet doors for hidden electronics
How to make it
- Construct a bump-out wall frame using 2×4 studs to create a recessed niche specifically sized for your TV so it can sit completely flush with the surrounding surface.
- Apply large-format porcelain panels to the center section of the wall using high-strength construction adhesive and thin-set mortar for a seamless, stone-like appearance.
- Install vertical wood slat panels on either side of the stone center to add texture and provide acoustic dampening for better sound quality in the room.
- Tuck flexible LED light strips into the channels where the wood meets the stone, creating a soft backlit glow that highlights the textures of both materials.
- Mount your TV within the recessed niche using a specialized flush-mount bracket, ensuring all cables are routed through the bump-out to a hidden cabinet at the base.
How to Integrate Greenery Walls for a Natural Workspace

Why we love this
Working from home can feel clinical, but a greenery wall in your workspace brings a burst of life that fuels creativity and focus. We love the crisp, oxygen-rich air that a wall of living plants provides, cutting through the stagnant feeling of a small office. Looking up from a glowing computer screen to see the intricate patterns of a Monstera leaf or the cascading vines of a Pothos provides a much-needed “micro-break” for your eyes, making the work day feel less like a chore and more like a day in a garden studio.
Essential Elements:
- Modular felt-pocket vertical garden system
- Automatic timer-controlled irrigation system
- Lush, air-purifying plants (Snake plants, Spider plants)
- Waterproof backing board
- Dedicated grow lights for consistent health
How to make it
- Secure a waterproof backing board to the wall behind your desk to protect your home’s structure from the humidity of the plants.
- Mount a felt-pocket system or a series of tilted pots onto the board, ensuring they are spaced closely enough so the foliage will eventually overlap and hide the mechanics.
- Choose plants with varying textures—mix the spiky leaves of a Snake plant with the soft, flowing leaves of a Fern to create visual interest.
- Install a small, quiet water pump and a reservoir at the base (or top) of the wall to automate the watering process, ensuring the plants stay hydrated even during busy work weeks.
- Position a high-lumen LED lamp above the wall to ensure the plants get the 12-14 hours of light they need to stay vibrant and lush throughout the seasons.
How to Build an Artistic Fence Wall for Garden Expression
Why we love this
Your garden is your canvas, and an artistic fence wall is the ultimate statement piece. We love this because it breaks the monotony of traditional fencing with laser-cut metal panels or hand-painted murals that catch the light. As the sun moves across the sky, the artistic cutouts cast intricate, dancing shadows on your patio, creating a living piece of art that changes every hour. It feels like having your own private gallery where the breeze and the chirping birds are the only other visitors.
Essential Elements:
- Decorative laser-cut steel or aluminum panels
- High-contrast exterior paint colors
- Weatherproof outdoor spotlights
- Climbing flowering vines (Jasmine or Clematis)
- Corrosion-resistant hardware
How to make it
- Select three to four decorative metal panels with a pattern that complements your home’s architecture, such as a geometric or botanical design.
- Paint your existing wooden fence a dark, dramatic color like charcoal or obsidian to provide a high-contrast backdrop for the panels.
- Mount the panels using spacers so they sit about an inch off the fence; this creates a shadow gap that adds depth and makes the art appear to float.
- Plant fast-growing climbers like Star Jasmine at the base, weaving the young tendrils through the metal patterns to integrate nature with the industrial art.
- Install low-voltage landscape lighting at the base of the wall, pointing upward to illuminate the panels and vines, turning the fence into a glowing masterpiece at night.
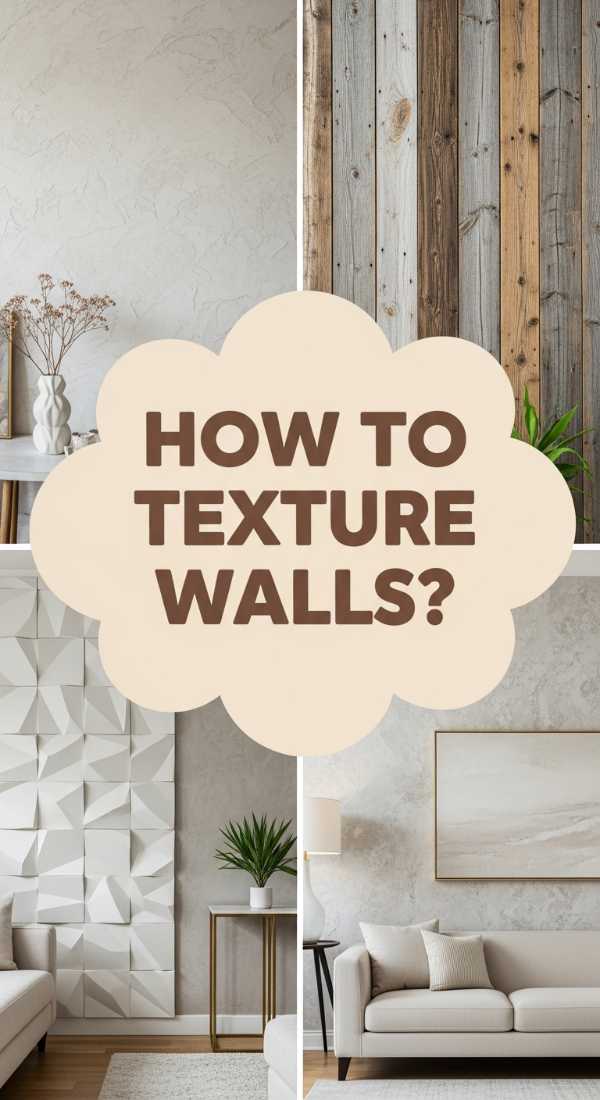
How to Blend Textures in Living Room Wall Design for Depth
Why we love this
Flat walls are forgettable, but a blended texture wall is a sensory masterpiece. We love the way rough-hewn stone feels against smooth, polished plaster, or how a velvet-wrapped panel absorbs light while a metallic inlay reflects it. It creates a space that feels rich and layered, like a well-tailored suit. The room feels quieter and more intimate because the varied textures absorb sound, making your late-night conversations feel private and cozy while the visual depth keeps your eyes wandering and discovering new details.
Essential Elements:
- Venetian plaster or Limewash paint
- Fluted wood panels or 3D wall tiles
- Brass or copper trim strips
- Dimmable wall-wash lighting
- Upholstered fabric wall panels
How to make it
- Start by applying a limewash or Venetian plaster finish to the majority of the wall to create a soft, mottled base that looks like aged stone.
- Install a section of fluted wood or 3D geometric tiles on one third of the wall to introduce a hard, rhythmic texture that contrasts with the plaster.
- Use slim brass or metal transition strips to hide the seams between different materials, giving the design a professional, high-end jewelry-like finish.
- Incorporate a small section of fabric or suede padding near a seating area to provide a soft, tactile element that also serves as a comfortable headrest or backrest.
- Install “wall-wash” lighting in the ceiling or floor to graze the surface of the wall, which emphasizes the peaks and valleys of the different textures and creates dramatic shadows.
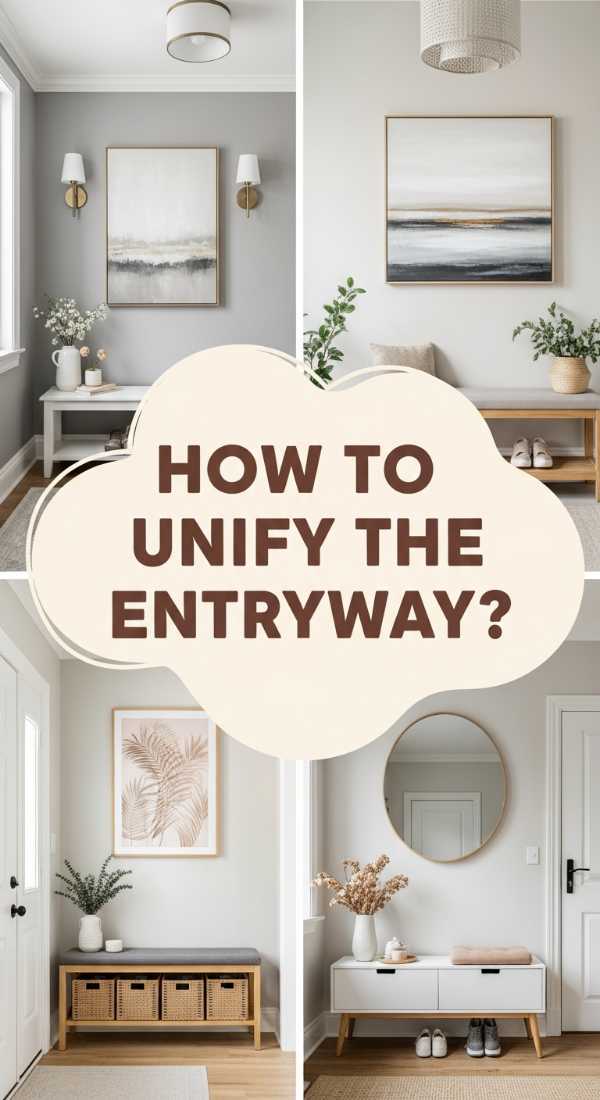
How to Coordinate Foyer Walls for a Seamless Arrival
[IMAGE_10]
Why we love this
Coordination is the secret to that “designer” look where everything feels intentional. We love this hack because it uses color and material repetition to guide the eye from the front door into the heart of the home. The smell of fresh flowers on a coordinated pedestal and the smooth rhythm of matching hardware make the act of coming home feel like a professional transition from the chaos of the outside world to the peace of your inner sanctum. It’s about creating a visual flow that feels effortless and incredibly chic.
Essential Elements:
- A consistent color palette (The 60-30-10 rule)
- Matching hardware (Knobs, hooks, and hinges)
- Coordinated frames and mirrors
- Integrated storage that matches the wall color
- Consistent flooring or a matching runner rug
How to make it
- Choose a primary neutral color for the walls and use it in different finishes (matte for the walls, semi-gloss for the trim) to create subtle, sophisticated coordination.
- Replace all mismatched coat hooks and door hardware with a unified finish, such as brushed brass or matte black, to tie the various wall elements together.
- Paint any built-in storage or benches the exact same color as the wall to make them “disappear,” which keeps the small foyer space feeling uncluttered and spacious.
- Ensure that any art or mirrors on the foyer walls use the same frame material or color as the hardware for a cohesive, “boutique hotel” aesthetic.
- Extend a runner rug from the door into the next room that picks up the accent colors from your foyer walls, physically and visually pulling guests into your home.
Conclusion: Your Walls Are Your Canvas
Transforming your home doesn’t require a massive renovation budget; it just requires a bit of imagination and the courage to step away from the beige paint can. Whether you choose to bring in the life-giving energy of a green wall or the structured elegance of a textured TV nook, remember that your walls should make you feel something. They are the backdrop to your life, so make them beautiful, make them textured, and most importantly, make them yours. Go ahead, try one of these viral hacks this weekend—your home will thank you for it!