
We’ve all been there—scrolling through Pinterest at 2 AM, pinning dreams of sun-drenched reading nooks and galleries that look like they belong in a Parisian flat. There is a specific kind of magic that happens when a house finally starts to feel like a home. It’s in the way the morning light hits a framed memory or how a textured wall hanging softens the echo of a busy day. Your home should be more than just a place to sleep; it should be a living, breathing reflection of your soul and a sanctuary for your wildest dreams.
Transforming your space doesn’t require a professional interior designer or a bottomless bank account; it requires a bit of intention and the courage to fill your walls with things that make your heart skip a beat. Whether you’re living in a cozy studio apartment or a sprawling suburban house, the walls are your canvas. Today, I’m sharing the ultimate secrets to curating that ‘Pinterest-perfect’ aesthetic that feels warm, human, and uniquely yours.
How to Elevate Outdoor Wall Decor for a Luxe Garden Oasis
Why we love this
There is something incredibly restorative about an outdoor space that feels like a high-end resort. When you elevate your garden walls, you create a tactile experience where the rough grain of reclaimed wood meets the velvet softness of climbing ivy. The air smells of damp earth and blooming jasmine, creating a sensory retreat that invites you to linger long after the sun goes down. It’s about creating a lush, immersive environment where the boundary between architecture and nature dissolves into pure, outdoor luxury.
Essential Elements:
- Weather-resistant cedar or teak wall panels
- Iron-wrought vertical planters
- Copper outdoor sconces for warm ambient lighting
- UV-resistant outdoor canvas art
- Climbing vines like Star Jasmine or Honeysuckle
How to make it
- Begin by deep-cleaning your exterior surface; use a pressure washer on a medium setting to remove soot and debris, ensuring a pristine ‘canvas’ for your decor.
- Measure the focal point of your wall at eye level (roughly 57-60 inches from the ground) to determine the center of your primary installation.
- Secure heavy-duty masonry anchors or wood screws into the wall studs, ensuring they can withstand wind gusts and moisture weight.
- Install your architectural panels first, leaving a half-inch gap behind them for airflow to prevent mold and wood rot.
- Mount your vertical planters using a staggered ‘Z-pattern’ to ensure water runoff from the top plants feeds the bottom ones without over-saturating the roots.
- Finalize the look by weaving solar-powered fairy lights through the greenery, tucking the wires behind the frame for a seamless, professional finish.
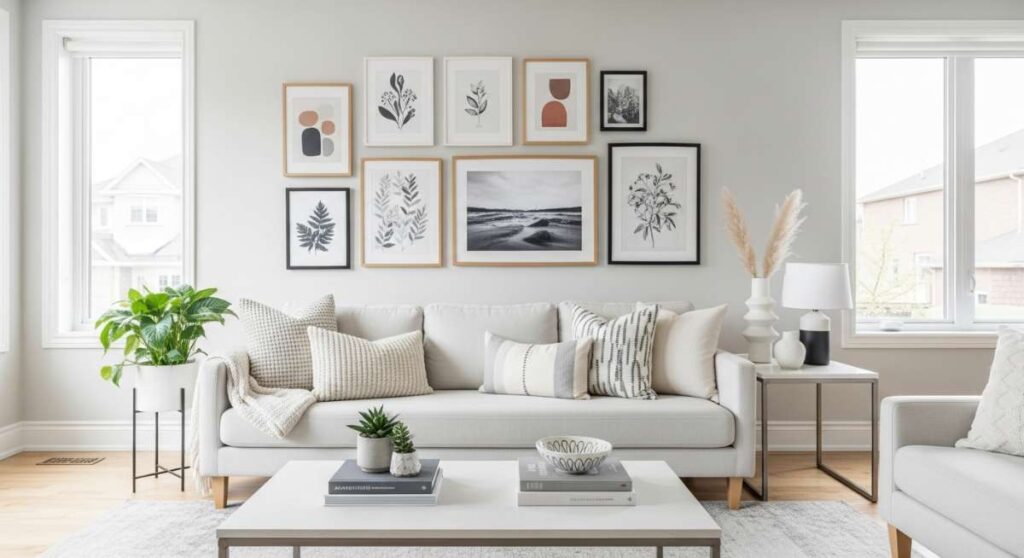
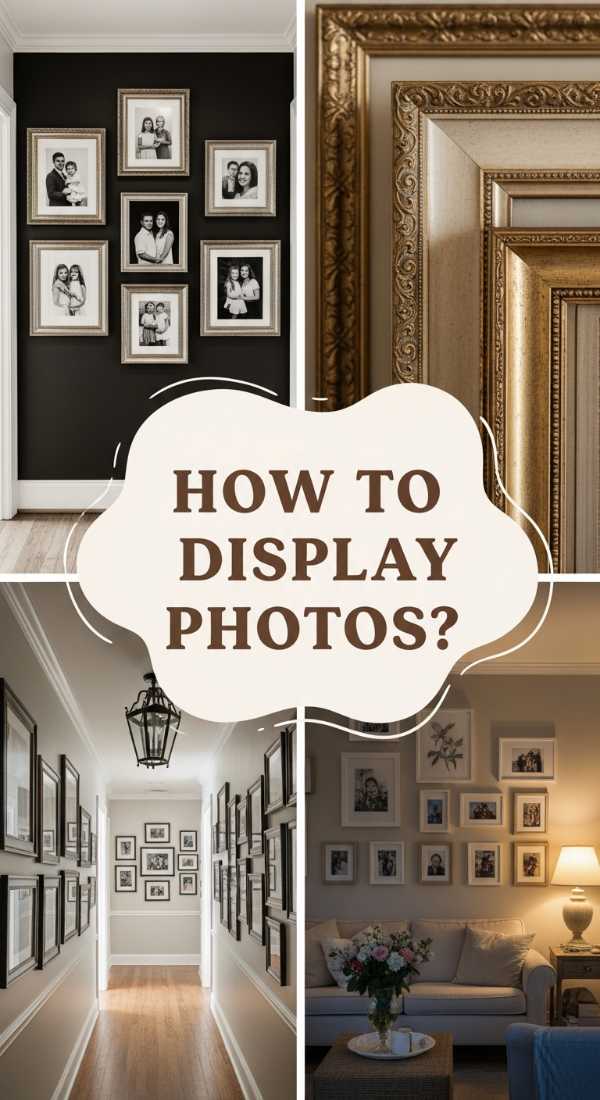
How to Arrange Family Photos Wall Decor for a Heartfelt Home Gallery

Why we love this
A family gallery is the heartbeat of a home, a visual narrative of growth, laughter, and the passage of time. When curated with intention, it feels like a warm embrace every time you walk down the hall. The texture of matte-finish paper against crisp white matting adds a sophisticated depth, while the scent of old wood frames brings a nostalgic comfort. It’s about more than just pictures; it’s about frozen moments of joy that create a rhythmic, architectural flow throughout your living space.
Essential Elements:
- Uniform frames for a modern look or mismatched vintage frames for eclectic charm
- Acid-free white matting
- High-resolution black and white or sepia prints
- Leveling tool and painters tape
- Heavy-duty hanging wire
How to make it
- Start by selecting your images and converting them to a consistent color profile (like high-contrast black and white) to ensure visual harmony across different years and lighting conditions.
- Lay all of your framed photos out on the floor in front of the wall to ‘dry run’ the arrangement; aim for a 2-3 inch consistent gap between every frame.
- Trace each frame onto kraft paper, cut out the shapes, and tape them to the wall using low-tack painters tape to visualize the final ‘heat map’ of the gallery.
- Use a laser level to find the horizontal ‘horizon line’ of the gallery, ensuring the central row of photos is perfectly straight.
- Hammer your nails directly through the kraft paper templates to guarantee precision, then tear the paper away once the nail is secure.
- Hang the frames and use small adhesive ‘bumpers’ on the bottom corners of each frame to keep them from shifting and to protect the paint.
How to Style Patio Wall Decor Outdoor for Cozy Sunset Gatherings
Why we love this
The patio is the soul of summer, and styling the walls transforms a simple deck into an intimate ‘outdoor room.’ Imagine the sound of wind chimes catching a breeze and the soft glow of lanterns reflecting off textured macrame. The smell of cedarwood and charcoal smoke fills the air as you settle into a space that feels grounded and intentional. It’s the perfect backdrop for long conversations under the stars, offering a cozy, cocoon-like feeling that traditional open patios lack.
Essential Elements:
- Large-scale macrame wall hangings
- Galvanized metal buckets for wall-mounted herbs
- Weatherproof LED Edison bulb string lights
- Natural bamboo or reed fencing panels
- Hanging terracotta pots
How to make it
- Prep the area by installing a sturdy horizontal support beam or heavy-duty outdoor command hooks along the top of the patio wall.
- Drape your primary texture element—like a large macrame piece or bamboo screen—to act as the soft ‘foundation’ layer of the wall.
- Layer in your ‘living’ elements by mounting herb planters at varying heights; ensure you use a masonry bit if drilling into brick to avoid cracking the mortar.
- String your lights in a ‘swag’ pattern, allowing for a gentle 10-12 inch drop between attachment points to create that relaxed, whimsical vibe.
- Check the ‘weight balance’ by stepping back 10 feet; if one side looks ‘heavy,’ add a smaller decorative element like a metal sunburst or clock to restore symmetry.
- Treat all fabric elements with a UV-protectant spray to prevent fading and ensure the colors stay vibrant through the season.
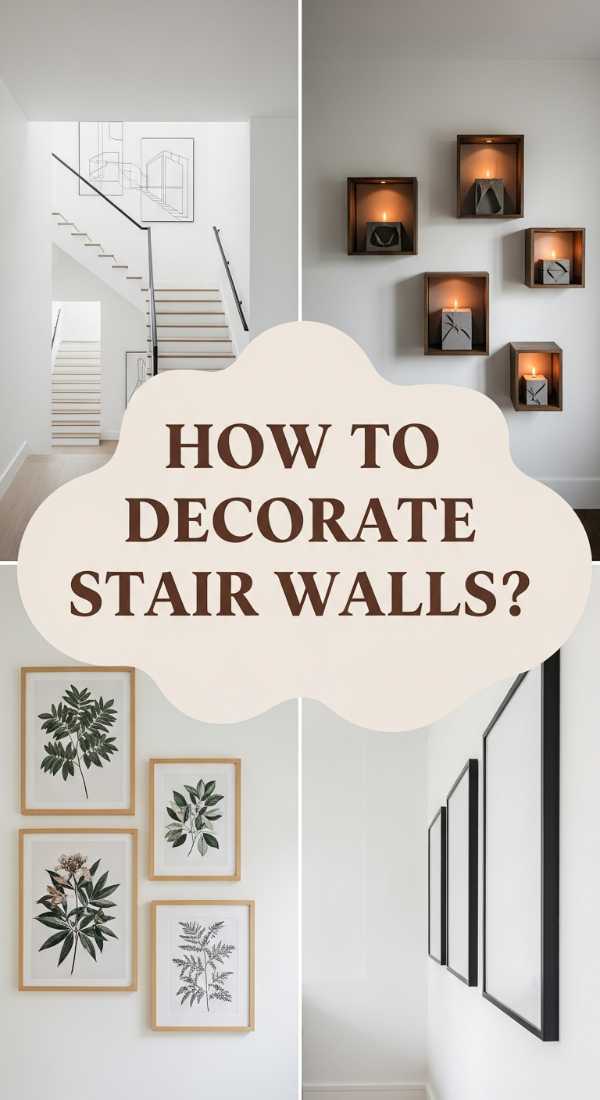
How to Plan Stairs Wall Decor Ideas for an Elegant Architectural Flow

Why we love this
The staircase is often a forgotten transition space, but with the right decor, it becomes a breathtaking architectural journey. There is a rhythmic elegance to art that follows the upward incline, drawing the eye toward the heights of your home. The feeling is one of movement and grace, where the cool touch of metal railings meets the warmth of curated canvases. It creates a sense of discovery with every step, turning a functional necessity into a sophisticated gallery experience.
Essential Elements:
- Coordinated art series (triptychs or sets of four)
- Slim-profile gallery frames
- Adjustable picture lights (battery or hardwired)
- Stair-step measuring jig
- Command strips for easy adjustments
How to make it
- Identify the ‘stair line’ by measuring 58 inches up from each individual step; this creates an invisible diagonal line that your art should follow.
- Select art pieces that share a common thread—whether it’s a color palette, a medium, or a theme—to prevent the narrow space from feeling cluttered.
- Mark the center point of each stair tread and project it upward to your diagonal line to find the perfect ‘anchor’ spot for each frame.
- When hanging, ensure that the frames are spaced exactly 4 inches apart horizontally to maintain a tight, professional architectural flow.
- Use a spirit level on every single frame, as the diagonal movement of the stairs can trick the eye into thinking straight lines are tilted.
- Add overhead picture lights to the top 20% of the frames to wash the wall in light, creating a high-end museum atmosphere in your transition space.
How to Curate Dorm Wall Decor for the Ultimate Aesthetic Study Space

Why we love this
Dorm life is all about carving out an identity in a temporary space. A well-curated study wall is the ultimate mood-booster; it’s where cozy textures meet high-functioning inspiration. The soft flicker of fairy lights against a collage of prints creates a dreamlike atmosphere that makes late-night cram sessions feel almost magical. The scent of a vanilla candle (or a reed diffuser!) and the sight of your favorite quotes create a personalized sanctuary that wards off homesickness and fuels creativity.
Essential Elements:
- Aesthetic print kits or postcards
- Battery-operated clip lights
- Grid wire wall organizer
- Removable vinyl decals
- Fabric tapestries or flags
How to make it
- Clean your dorm walls with rubbing alcohol to remove any oils; this ensures your adhesives will bond perfectly without damaging the school’s paint.
- Map out a ‘zone’ for your desk—usually a 4×4 foot square—where the most visually stimulating items will live.
- Apply a large fabric tapestry as your ‘base layer’ to cover institutional-looking walls and add immediate acoustic softening to the room.
- Overlay a wire grid organizer using clear adhesive hooks; this serves as your ‘active’ decor area for schedules, polaroids, and reminders.
- Arrange your prints in a ‘cloud’ formation, starting from the center and working outwards with uneven edges for a relaxed, organic feel.
- Clip your fairy lights across the top of the grid, ensuring the battery pack is hidden behind a larger print or tucked into a desk organizer.
How to Feature Mexican Wall Decor for a Vibrant Cultural Sanctuary
Why we love this
Mexican wall decor is an explosion of life, color, and heritage. It’s the tactile warmth of hand-painted Talavera tiles and the intricate shadows cast by punched tin mirrors. The air feels energized, smelling of dried chilies and citrus, while the vibrant blues, oranges, and pinks create a joyful sanctuary. This style is about celebrating craftsmanship and storytelling, turning your walls into a festive narrative that honors tradition while feeling modern and bold.
Essential Elements:
- Hand-painted Talavera ceramic tiles or plates
- Milagros (folk art charms) on wooden crosses
- Punched tin mirrors or ‘Hojalata’
- Hand-woven Otomi embroidery in frames
- Woven palm fans or baskets
How to make it
- Choose a focal point, like a large Hoajalta (tin) mirror, to serve as the ‘sun’ of your arrangement, reflecting light and adding metallic texture.
- Use heavy-duty plate hangers to mount ceramic Talavera plates in a circular orbit around the central mirror, mixing patterns for a festive look.
- If using tiles, apply them to a thin piece of plywood first using construction adhesive, then hang the plywood ‘mural’ to avoid permanent damage to your drywall.
- Incorporate ‘living color’ by hanging small terracotta wall pockets filled with succulents or air plants between the metallic and ceramic pieces.
- Balance the ‘hard’ materials (tin/ceramic) with ‘soft’ materials by hanging a framed piece of Otomi fabric, ensuring the frame is deep enough to preserve the embroidery texture.
- Space the items tightly—about 1-2 inches apart—to create a ‘maximalist’ feel that is characteristic of authentic Mexican interior design.
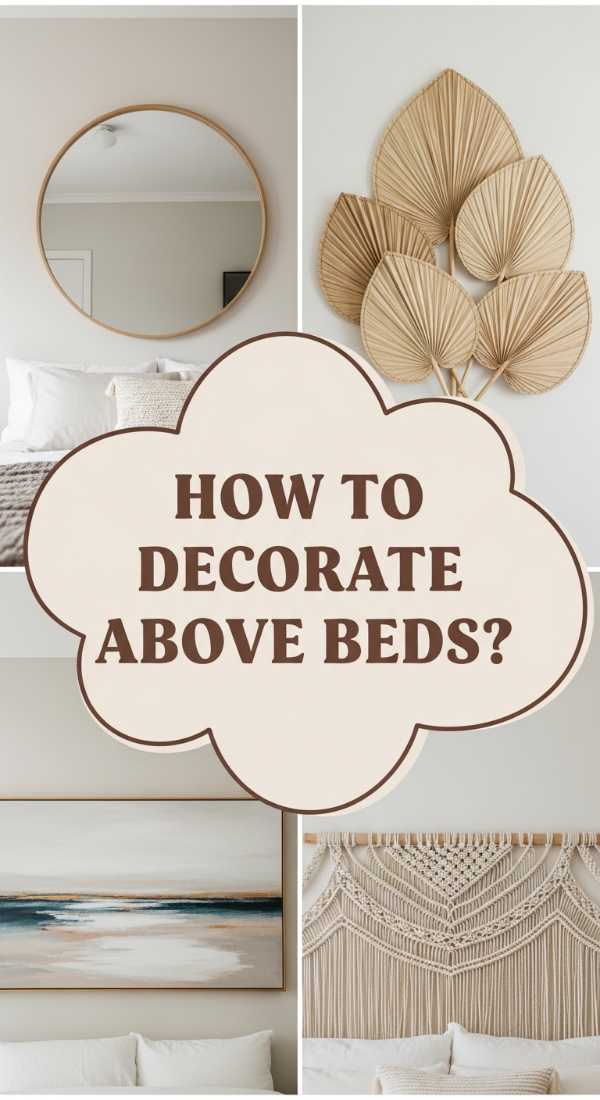
How to Design Above Bed Wall Decor for a Serene Sleep Sanctuary
Why we love this
The space above your bed is the final thing you see before closing your eyes, so it should radiate tranquility. We love this look because it uses soft, organic textures like woven grasses and muted linen to create a ‘visual hush.’ The feeling is airy and light, with the subtle aroma of lavender sachet nearby. It’s about creating a ‘halo’ effect that grounds the bed and makes the entire room feel like a high-end boutique hotel suite where sleep is the ultimate luxury.
Essential Elements:
- Large-scale triptych (3-piece) landscape art
- Over-sized woven seagrass baskets
- Soft-edged mirrors
- Carved wood headboard extensions
- Dimmable wall-mounted swing-arm lamps
How to make it
- Measure the width of your headboard; your decor should span roughly 2/3 to 3/4 of that width to maintain a balanced ‘weight’ distribution.
- For a serene look, hang your art exactly 8-10 inches above the top of the headboard—high enough to be seen, but low enough to feel connected to the bed.
- If using a triptych, ensure each panel is spaced exactly 2 inches apart; use a spacer block made of cardboard to keep this measurement consistent.
- Secure all items with ‘museum putty’ on the bottom corners, especially if you live in an earthquake zone, to prevent anything from falling during the night.
- Install wall-mounted sconces on either side of the art to frame the piece and provide ‘hotel-style’ reading light that eliminates the need for bulky bedside lamps.
- Keep the color palette monochromatic or analogous (colors next to each other on the wheel) to lower the visual ‘noise’ of the room.
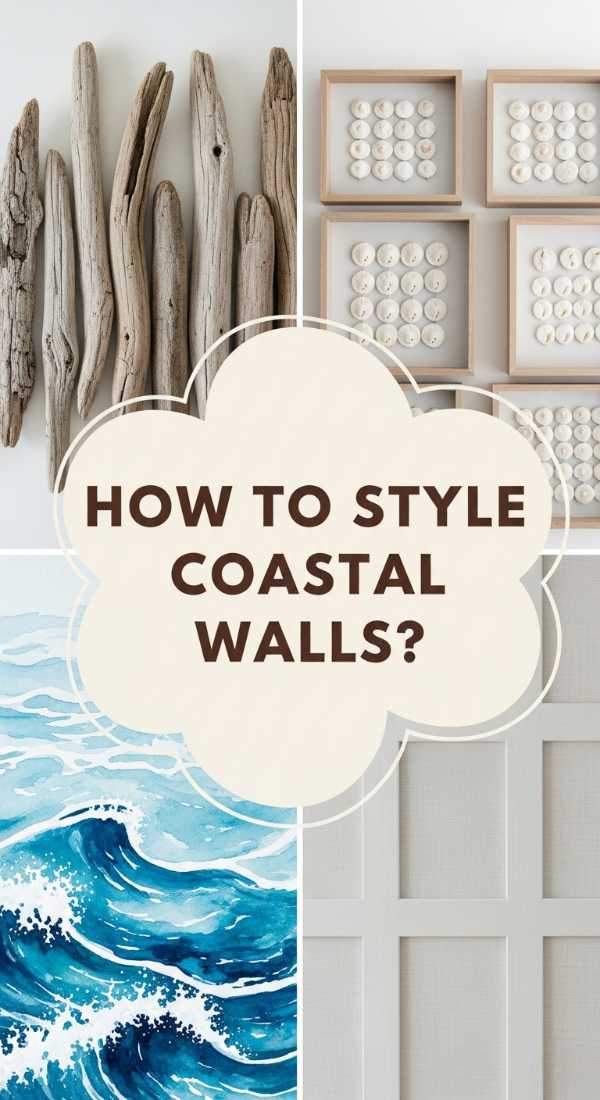
How to Master Coastal Wall Decor for a Breezy Seaside Escape

Why we love this
Coastal decor isn’t just about shells; it’s about capturing the essence of the shoreline—the salt-kissed air, the bleached driftwood, and the rhythmic sound of waves. We love this style for its ability to make a room feel instantly larger and more breathable. The textures are raw and honest: sun-bleached wood, coarse jute, and smooth glass. It creates a sanctuary where time slows down, and every day feels like a Sunday morning by the ocean.
Essential Elements:
- Distressed wood ‘shiplap’ accent panels
- Shadow boxes with preserved sea fans or coral
- Jute and sisal wall hangings
- Framed cyanotype prints (blue and white)
- Large-scale round mirrors to mimic portholes
How to make it
- Start with a ‘base’ of soft white or seafoam green paint to mimic the reflective quality of water and sky.
- Hang a large, round mirror opposite a window to ‘pull’ the outdoor light into the room and create a sense of vast, oceanic space.
- Layer your textures by placing a rough jute hanging behind a smooth, glass-framed print; the contrast is what gives the coastal look its ‘designer’ edge.
- When hanging ‘found’ objects like driftwood, use clear monofilament (fishing line) to suspend them from discrete hooks for a ‘floating’ ethereal effect.
- Group small coral-filled shadow boxes in a cluster of three (the ‘rule of three’) to create a focal point that looks curated rather than cluttered.
- Incorporate ‘sand’ tones through light-oak frames, ensuring all wood finishes have a matte, sun-aged look rather than a shiny, yellow-toned varnish.
How to Create Accent Wall Decor for a Bold Statement Room

Why we love this
An accent wall is where you get to be fearless. It’s the visual exclamation point of a room. Whether it’s a deep charcoal lime wash or a vibrant floral mural, an accent wall changes the entire ‘temperature’ of a space. We love the way it provides a backdrop that makes furniture pop and creates an immediate conversation piece. It’s bold, it’s dramatic, and it’s the ultimate way to showcase your personality without committing to an entire room of high-intensity design.
Essential Elements:
- Bold wallpaper or high-pigment matte paint
- Molding or ‘batten’ strips for architectural detail
- Oversized statement art (at least 36×48 inches)
- Contrast-colored shelving
- Integrated LED strip lighting
How to make it
- Identify the ‘natural’ accent wall—usually the one your eyes land on first or the one that holds the largest piece of furniture (like the sofa or bed).
- If painting, use a ‘cutting-in’ technique with a high-quality angled brush to create a razor-sharp line at the ceiling and baseboards; use FrogTape for the cleanest edge.
- For a ‘3D’ effect, install vertical batten strips every 12 inches across the wall using a nail gun and liquid nails, then paint over the entire thing for a high-end custom look.
- Hang your ‘hero’ piece of art in the dead center of the wall, ensuring the center of the piece is exactly 60 inches from the floor.
- Install floating shelves in a contrasting color (e.g., black shelves on a forest green wall) to add utility and ‘break up’ the flat surface.
- Point a spotlight or ‘wash’ light from the ceiling toward the wall to highlight the texture and color depth you’ve created.
How to Scale Apartment Wall Decor for a Spacious Urban Feel
[IMAGE_10]
Why we love this
In a small apartment, your walls are your best friends. Scaling decor correctly is the difference between a cramped closet and a spacious urban loft. We love this approach because it emphasizes verticality and light, making even the tiniest studio feel like a grand penthouse. The feeling is one of ‘organized air’—where every piece has a purpose and the floor remains clear for movement. It’s smart, chic, and maximizes every square inch of your urban sanctuary.
Essential Elements:
- Tall, vertical mirrors to ‘raise’ the ceiling
- Slim-profile floating ledges
- Acrylic (ghost) frames that don’t add visual weight
- Vertical herb gardens or hanging plants
- Multi-functional wall desks
How to make it
- Focus on ‘vertical real estate’—hang items higher than usual to draw the eye upward and create the illusion of taller ceilings.
- Use ‘ghost’ or thin-frame acrylic art displays to keep the wall looking light and ‘breathable’ rather than heavy and dark.
- Install long, thin floating ledges rather than deep shelves; these allow you to lean art and books without encroaching on your walking space.
- Mount your TV and all media components to the wall to free up floor space, using cord-hider tracks painted the same color as your wall to make the technology ‘disappear.’
- Group your decor in ‘vertical columns’ rather than horizontal rows; this leads the eye up and down, making the room feel more expansive.
- Use mirrors that are at least 3/4 the height of the wall for the most dramatic ‘space-doubling’ effect.
Conclusion: Your Home, Your Masterpiece
Styling your home is a journey, not a destination. It’s about layers, memories, and the willingness to experiment until a room feels ‘just right.’ Don’t be afraid to break the rules, mix the old with the new, and change things up as you grow. Your walls are the backdrop of your life—make sure they tell a story worth sharing.