
There is something inherently magical about the way a kitchen feels on a Sunday afternoon when the sunlight hits the flour-dusted counters. For me, baking has always been more than just following a recipe; it is a love language, a way to slow down the world and create something tangible and sweet. Whether it’s the rhythmic folding of dough or the citrusy scent of lemons filling the air, these moments are what turn a house into a home.
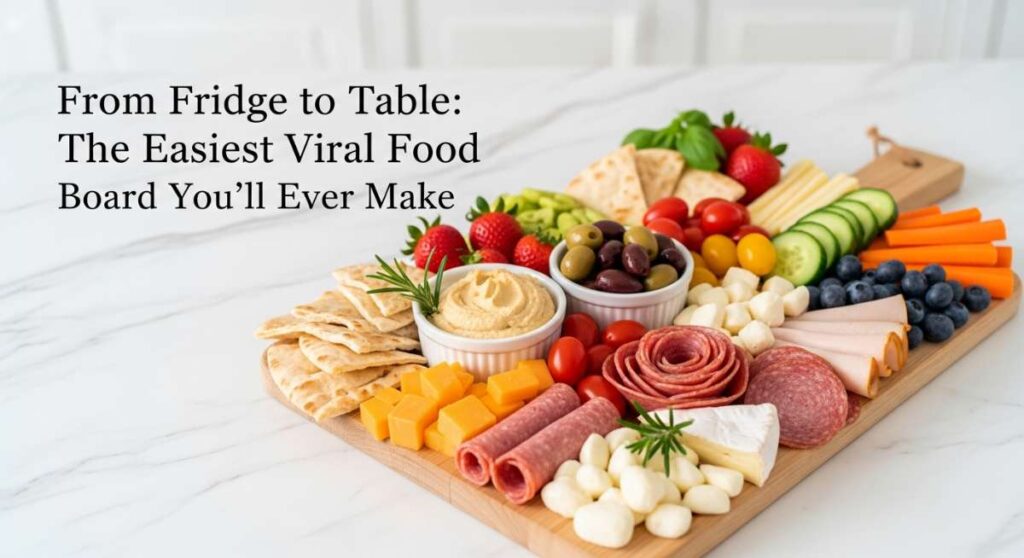
Lately, I’ve been obsessed with the idea of a ‘Dessert Grazing Board’—a viral trend that takes the stress out of hosting and puts the focus on variety and beauty. It’s about taking those pantry staples from your fridge to the table in a way that looks like a million bucks. In this guide, we are diving deep into the art of the perfect bake, from rustic cobblers to the business of branding your own sweet treats.
How to bake peach cobbler?
Why we love this
This peach cobbler is the ultimate comfort food, offering a symphony of textures that dance on the palate. Imagine biting into tender, syrupy peaches that have been caramelized to perfection, topped with a golden, biscuit-like crust that provides a satisfying crunch. The aroma of cinnamon and nutmeg wafting from the oven creates an atmosphere of pure nostalgia, reminding us of late summer evenings and family gatherings. When served warm with a melting scoop of vanilla bean ice cream, it becomes a decadent experience that warms you from the inside out.
Ingredients
- 6 cups fresh sliced peaches (peeled)
- 1 cup granulated sugar
- 1/2 cup brown sugar
- 1/4 teaspoon ground cinnamon
- 1/8 teaspoon ground nutmeg
- 1 teaspoon fresh lemon juice
- 2 teaspoons cornstarch
- 1 cup all-purpose flour
- 1 teaspoon baking powder
- 1/2 teaspoon salt
- 8 tablespoons cold unsalted butter, cubed
- 1/4 cup boiling water
How to make it
- Preheat your oven to 425°F (220°C). This high initial heat ensures the fruit starts bubbling quickly and the crust sets perfectly.
- In a large bowl, toss the sliced peaches with 1/4 cup white sugar, 1/4 cup brown sugar, cinnamon, nutmeg, lemon juice, and cornstarch. Ensure every slice is coated to create a thick, glossy sauce.
- Transfer the peach mixture into an 8×8 inch baking dish and bake for 10 minutes to soften the fruit before adding the topping.
- While peaches bake, combine the remaining flour, sugar, baking powder, and salt in a bowl. Blend in the cold butter using a pastry cutter or your fingers until the mixture resembles coarse crumbs.
- Stir in the boiling water until just combined, creating a thick, sticky dough.
- Remove the hot peaches from the oven and drop spoonfuls of the dough over the top. Do not spread it flat; the ‘cobbled’ look is essential for texture.
- Bake for another 25-30 minutes until the topping is golden brown and the peach juices are bubbling thick around the edges.
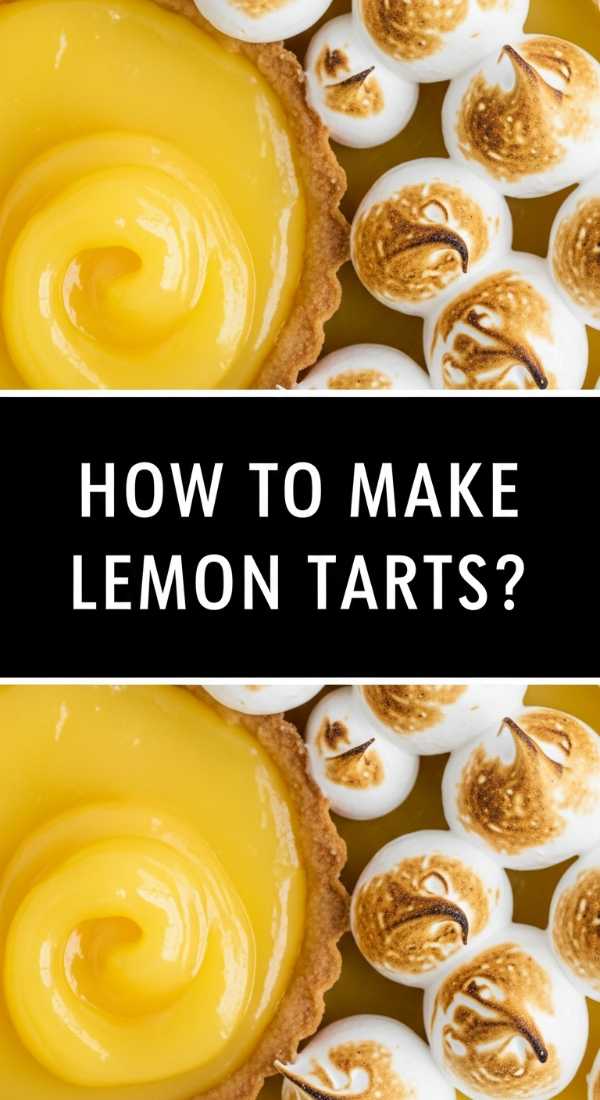
How to make lemon tarts?

Why we love this
Lemon tarts are the bright, sophisticated stars of any dessert board, offering a sharp, zesty contrast to heavier sweets. The crust is short and buttery, shattering delicately upon impact to reveal a silky-smooth, neon-bright lemon curd that strikes the perfect balance between tart and sweet. There is something incredibly refreshing about the clean, citrusy aroma that lingers after every bite, making it the perfect palate cleanser. Adorned with a simple dusting of powdered sugar or a tiny mint leaf, they look like jewels resting on your table.
Ingredients
- 1 1/2 cups all-purpose flour
- 1/2 cup powdered sugar
- 3/4 cup cold butter, cubed
- 4 large eggs
- 1 1/2 cups granulated sugar
- 3/4 cup fresh lemon juice
- 1 tablespoon lemon zest
- 1/2 cup flour (for filling)
How to make it
- Preheat oven to 350°F (175°C). Grease a tart pan or a 9-inch square baking dish.
- Pulse 1 1/2 cups flour, powdered sugar, and cold butter in a food processor until it forms a crumbly dough. Press this firmly into the bottom of your pan.
- Bake the crust for 18-20 minutes until the edges are just barely starting to turn a pale golden brown.
- In a separate bowl, whisk together the eggs, granulated sugar, lemon juice, lemon zest, and the remaining 1/2 cup of flour until completely smooth and free of lumps.
- Pour the lemon mixture over the hot crust and return to the oven immediately.
- Bake for an additional 20-25 minutes. The center should be set and not jiggly, but you don’t want the top to brown significantly.
- Let the tarts cool completely at room temperature, then refrigerate for at least 2 hours before slicing into sharp, clean squares.
How to sell luxury cookies?
Why we love this
Luxury cookies are more than just snacks; they are carefully curated experiences wrapped in beautiful packaging. We love the indulgence of using high-grade Valrhona chocolate, flaky Maldon sea salt, and brown butter that gives a deep, toffee-like flavor profile. The contrast between a soft, gooey center and a crisp, caramelized edge is what sets a premium cookie apart from the rest. Selling these allows you to share your passion for quality ingredients while creating a brand that stands for elegance and artisanal craftsmanship.
Ingredients
- High-quality European butter
- Organic dark chocolate chunks
- Vanilla bean paste
- Flaky sea salt
- Custom branded boxes
- Parchment paper liners
- Twine or silk ribbon
How to make it
- Develop a signature recipe that focuses on texture; use brown butter (cooked until foamy and amber) to provide a professional, complex flavor base.
- Chill your dough for at least 24-48 hours. This cold fermentation period is the secret to a professional cookie as it hydrates the flour and intensifies the flavor.
- Scale every cookie dough ball using a digital scale to ensure exact uniformity, which is a hallmark of luxury products.
- Bake on heavy-duty aluminum sheets to ensure even heat distribution and prevent burnt bottoms.
- Immediately after baking, use a circular cookie cutter to ‘scoot’ the cookies into perfect circles while they are still soft and hot.
- Once cooled, package the cookies in rigid, high-quality boxes with your logo displayed prominently to justify the premium price point.
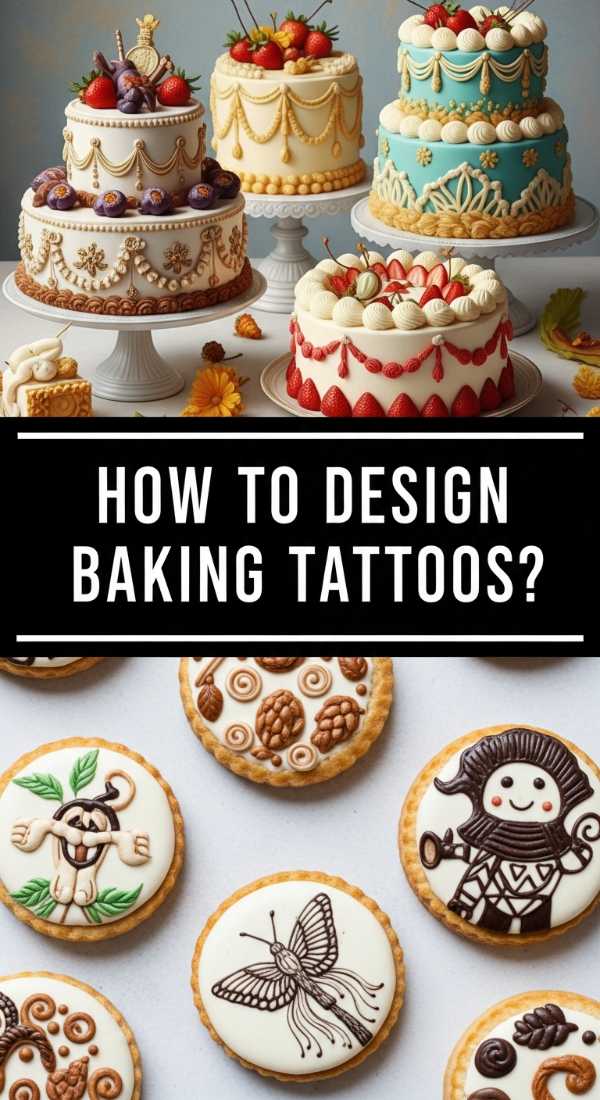
How to design baking tattoos?
Why we love this
Baking tattoos are the ultimate badge of honor for those who live their lives by the oven timer and the dusting of flour. They represent a permanent commitment to the craft, turning tools like whisks, rolling pins, and stalks of wheat into delicate works of art on the skin. We love the fine-line aesthetic that makes these designs look as light and airy as a well-made meringue. It’s a way to carry your passion with you everywhere, signaling to the world that you are a creator who finds beauty in the process of transformation.
Ingredients
- Reference photos of vintage kitchen tools
- Fine-line tattoo artist portfolio
- Sketches of botanical elements (wheat, vanilla orchids)
- Color palette (black ink or soft pastels)
- Aftercare balm
How to make it
- Identify the core symbols of your baking journey—perhaps a specific heirloom stand mixer or a favorite sprig of rosemary.
- Collaborate with an artist who specializes in ‘micro-realism’ or ‘fine-line’ work to ensure the details of the whisk wires or flour dust are captured accurately.
- Consider the placement; the inner forearm or wrist is popular for bakers as it is visible while you are working with dough or decorating.
- Review the stencil carefully to ensure the proportions are correct; a rolling pin that is too thick can lose its elegance.
- Keep the design minimal to ensure it ages well, focusing on clean lines rather than heavy shading which might blur over time in a hot kitchen environment.
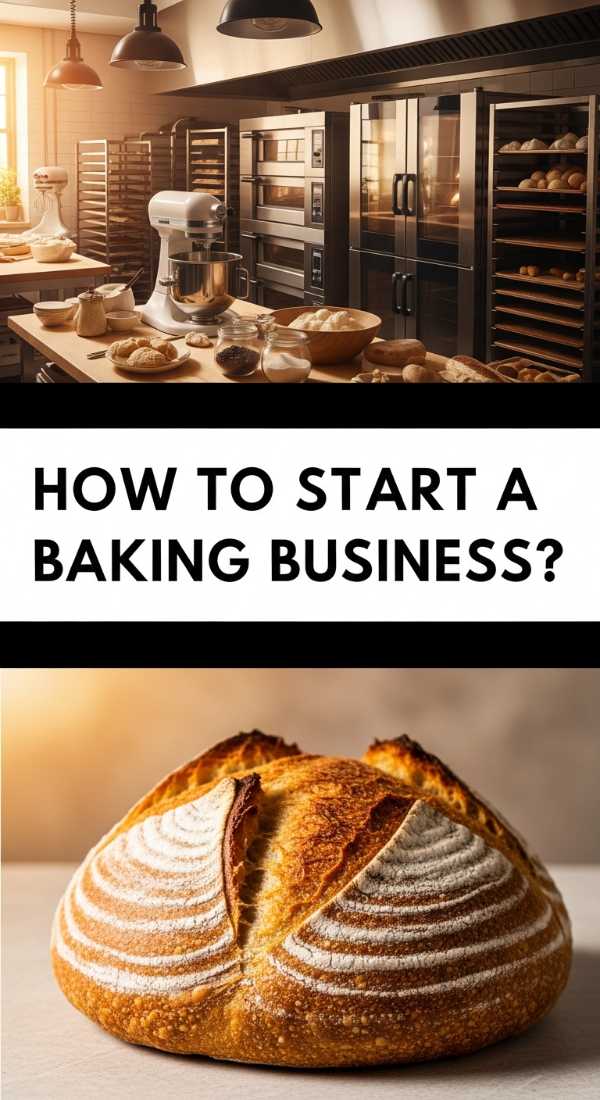
How to start baking business?
Why we love this
Starting a baking business is the dream of turning a personal sanctuary—the kitchen—into a thriving hub of productivity and profit. It allows for complete creative freedom, where you can decide exactly what goes on your menu and how you want to present your brand to the world. We love the hustle of the early mornings, the smell of fresh bread rising, and the immense satisfaction of seeing a customer’s face light up when they taste your creations. It’s a journey of self-discovery that blends the art of baking with the strategy of entrepreneurship.
Ingredients
- Certified home kitchen or commercial space
- Business license and permits
- Food handler’s certification
- A focused menu (3-5 star products)
- Professional accounting software
- Consistent ingredient suppliers
How to make it
- Research your local ‘Cottage Food Laws’ to understand exactly what you can sell from home and what labeling requirements are mandatory.
- Define your niche; rather than being a general baker, specialize in something specific like sourdough, vegan pastries, or custom celebration cakes.
- Calculate your ‘Cost of Goods Sold’ (COGS) meticulously, including ingredients, packaging, and your time, to ensure your pricing is sustainable.
- Set up a professional Instagram and Facebook page to showcase high-quality photos of your work, as baking is a highly visual industry.
- Start small at local farmers’ markets to test your products and get direct feedback from customers before investing in a brick-and-mortar shop.
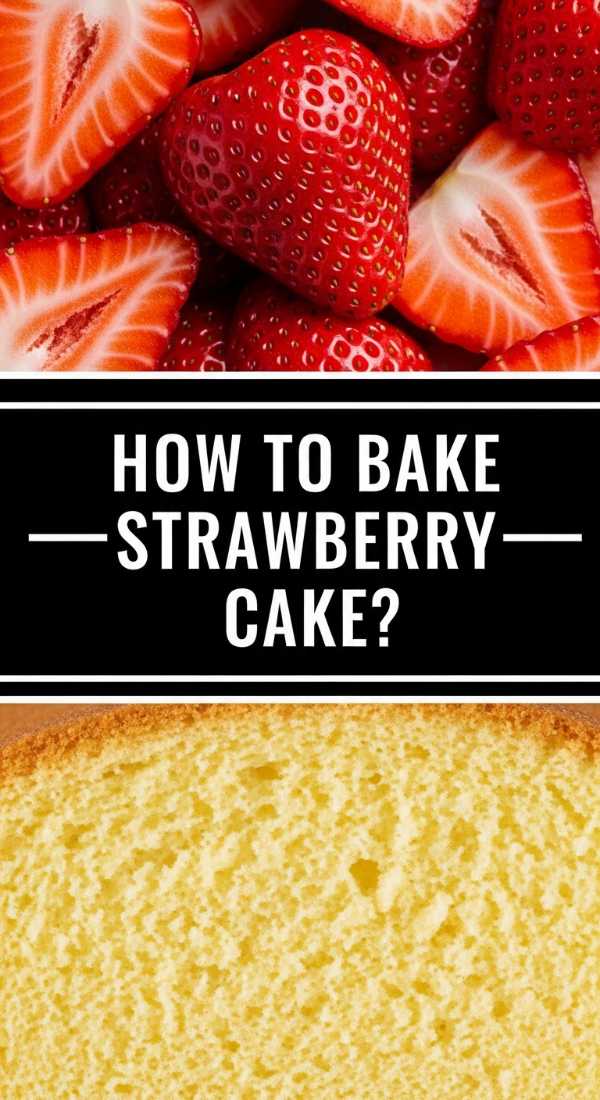
How to bake strawberry cake?

Why we love this
A fresh strawberry cake is the quintessential taste of summer, bursting with a natural sweetness that lab-made flavorings simply cannot replicate. The cake itself is incredibly moist and tender, with a fine crumb that holds the weight of fresh fruit purees and bits of macerated berries. We love the soft pink hue that comes naturally from the fruit, creating a visual that is as lovely as it is delicious. Topped with a cloud-like cream cheese frosting, every forkful feels like a celebration of garden-fresh ingredients and artisanal baking.
Ingredients
- 2 1/2 cups cake flour
- 1 1/2 cups granulated sugar
- 1 cup fresh strawberry puree (reduced)
- 1 cup unsalted butter, softened
- 4 large eggs
- 1/2 cup whole milk
- 1 teaspoon vanilla extract
- 2 teaspoons baking powder
How to make it
- Start by reducing 2 cups of fresh pureed strawberries in a saucepan over medium heat until it measures 1 cup. This concentrates the flavor and prevents the cake from becoming soggy.
- Preheat oven to 350°F (175°C) and grease two 8-inch cake pans.
- Cream the butter and sugar together for at least 5 minutes until the mixture is pale, fluffy, and significantly increased in volume.
- Add eggs one at a time, beating well after each addition to ensure the emulsion doesn’t break.
- Whisk the dry ingredients (flour, baking powder, salt) in a separate bowl.
- Alternate adding the dry ingredients and the milk/strawberry puree mixture to the butter, beginning and ending with the dry ingredients.
- Divide the batter evenly and bake for 25-30 minutes. Let the cakes cool in the pans for 10 minutes before transferring to a wire rack to prevent them from steaming themselves.
How to market your macarons?
Why we love this
Macarons are the pinnacle of pastry precision, and marketing them successfully is all about highlighting their status as a luxury, handcrafted item. We love the vibrant colors and the infinite flavor possibilities, from lavender honey to salted caramel. Because they are notoriously difficult to master, your marketing should emphasize the ‘expert’ nature of your work. They are the perfect ‘giftable’ item, making them ideal for social media content that focuses on aesthetic packaging and the satisfying ‘crunch’ of the shell.
Ingredients
- High-resolution photography
- Consistent brand color palette
- Instagram-ready packaging
- Engagement-focused captions
- Influencer partnership list
How to make it
- Focus on ‘Process Content’—film Reels of you macaronaging the batter or piping the perfect circles; people love the ‘oddly satisfying’ nature of macaron making.
- Highlight your unique flavors by telling a story; explain why you chose a specific tea or fruit for the ganache.
- Create ‘Limited Edition’ boxes for holidays or seasons to create a sense of urgency and FOMO (Fear Of Missing Out).
- Partner with local coffee shops for ‘Pop-Up’ events to get your product in front of a refined audience that already appreciates quality.
- Use professional lighting for your photos to capture the smooth ‘feet’ and shiny tops of the macarons, which are the visual cues of a perfect bake.
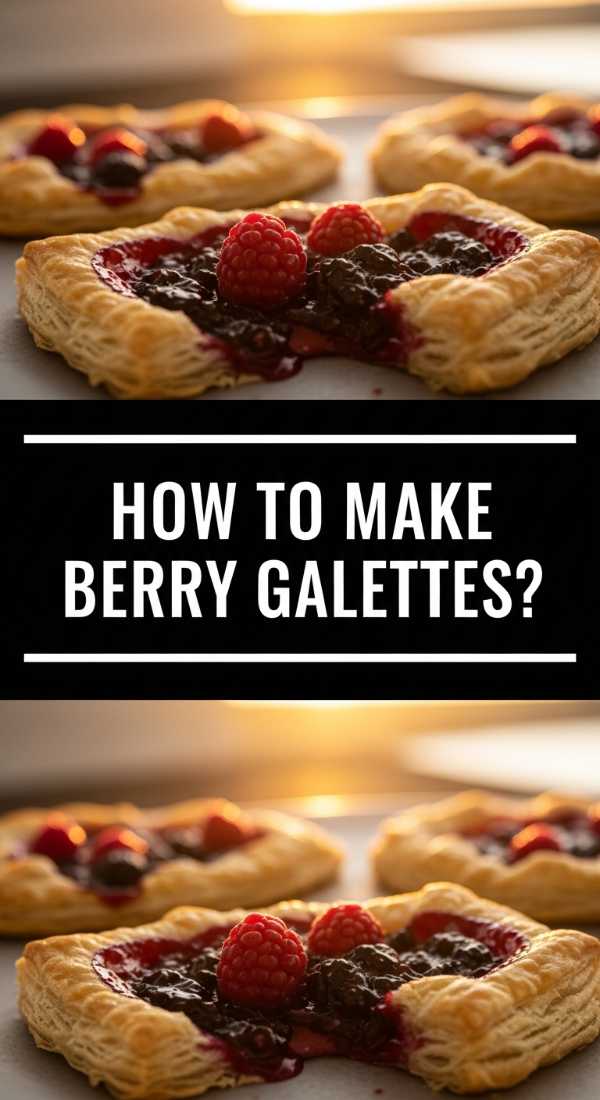
How to make berry galettes?
Why we love this
The berry galette is the ‘cool, effortless cousin’ of the traditional pie, offering a rustic charm that is impossible not to love. There is no fussing with crimping edges or perfect lattice work; instead, the pastry is simply folded over a heap of glistening, jammy berries. We love the way the edges of the crust become incredibly flaky and brown, almost like a croissant, while the center stays juicy and vibrant. It is the ultimate ‘fridge-to-table’ dessert, using whatever berries are in season to create a centerpiece that looks like it belongs in a French countryside kitchen.
Ingredients
- 1 1/4 cups all-purpose flour
- 1/2 cup very cold butter, grated
- 1 tablespoon sugar
- 3-4 tablespoons ice water
- 2 cups mixed berries (blueberries, raspberries, blackberries)
- 1 tablespoon cornstarch
- 1 egg (for wash)
- Coarse sanding sugar
How to make it
- Make the dough by mixing flour, sugar, and the grated cold butter. Grating the butter ensures even distribution and a flakier crust.
- Add ice water one tablespoon at a time until the dough just barely holds together. Wrap in plastic and chill for at least 1 hour.
- Preheat oven to 400°F (200°C). Roll out the dough into a rough 12-inch circle on a piece of parchment paper.
- Toss your berries with cornstarch and a little sugar to help thicken the natural juices as they bake.
- Pile the berries in the center of the dough, leaving a 2-inch border.
- Gently fold the edges of the dough over the berries, pleating as you go. It should look rustic and uneven!
- Brush the crust with an egg wash and sprinkle generously with sanding sugar. Bake for 30-35 minutes until the crust is a deep golden brown.
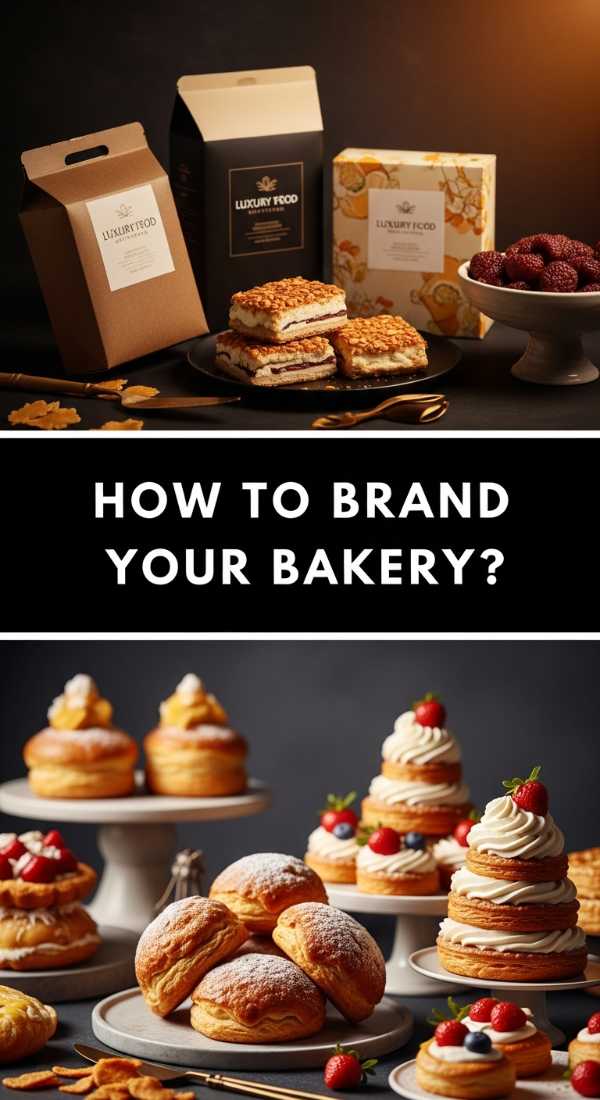
How to brand your bakery?
Why we love this
Branding is the soul of your bakery; it is what makes a customer choose your croissant over one from the supermarket. It’s about creating an emotional connection through colors, fonts, and a unique ‘voice’ that tells people your story. We love how a well-branded bakery feels like a world of its own—whether it’s a minimalist, modern shop or a cozy, vintage-inspired nook. Effective branding ensures that every touchpoint, from the logo on the napkin to the scent in the air, reinforces the quality and heart behind your baking.
Ingredients
- Brand mood board (Pinterest)
- Custom logo design
- Typography (Primary and secondary fonts)
- Voice and tone guide
- Unique packaging elements (stickers, custom tissue)
How to make it
- Identify your ‘Why’—are you baking because of family tradition, a love for French technique, or a desire for healthy alternatives? This is the core of your brand.
- Select a color palette that evokes the right emotion; warm earth tones suggest rustic comfort, while pastels suggest delicate sweetness.
- Develop a consistent ‘Brand Voice’ for your social media and website; are you witty and fun, or professional and educational?
- Apply your branding to everything—your apron, your window decals, and your digital presence—to create a cohesive ‘identity.’
- Solicit feedback on your brand’s visual appeal to ensure it resonates with your target demographic before printing large quantities of packaging.
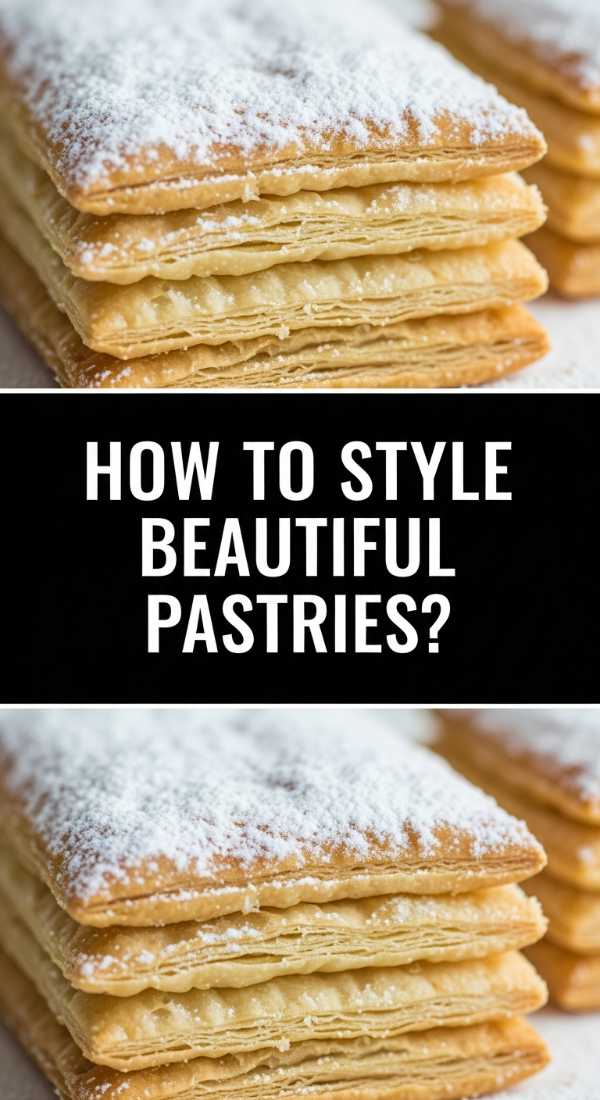
How to style beautiful pastries?
[IMAGE_10]
Why we love this
Styling pastries is where baking meets fine art, transforming a simple croissant or tart into a masterpiece that demands to be photographed. We love the play of light and shadow, the way a dusting of powdered sugar can add movement, or how a stray crumb can make a scene feel lived-in and authentic. It is about storytelling—placing a half-full cup of coffee or a linen napkin next to a plate to invite the viewer into the moment. When a pastry is styled correctly, it evokes a sense of desire and appreciation for the craftsmanship involved.
Ingredients
- Natural light source (window)
- Various props (linen, vintage spoons, cooling racks)
- Fresh garnishes (edible flowers, herbs, zest)
- Neutral-toned backgrounds (marble, wood)
- Tweezers for precision placement
How to make it
- Always use natural, indirect sunlight to avoid harsh shadows and keep colors looking true to life.
- Apply the ‘Rule of Thirds’—don’t place your pastry dead-center; instead, offset it slightly to create a more dynamic and interesting composition.
- Add ‘Action Elements’ like a dusting of sugar caught mid-air or a knife cutting through a layer of cake to create a sense of life.
- Use ‘Negative Space’ to give the eye a place to rest, making the pastry itself the undeniable hero of the shot.
- Don’t be afraid of imperfection; a few crumbs or a slightly oozing filling can actually make the food look more appetizing and real.
The Joy of a Shared Table
Creating a viral food board is about more than just the individual recipes; it’s about the curation of flavors and the joy of presentation. By combining these different elements—from the rustic galettes to the perfectly styled macarons—you create a landscape of sweets that invites everyone to dig in. Baking is a journey that starts in the fridge and ends with memories made around the table. So, grab your apron, preheat that oven, and start creating your own viral masterpiece today!