
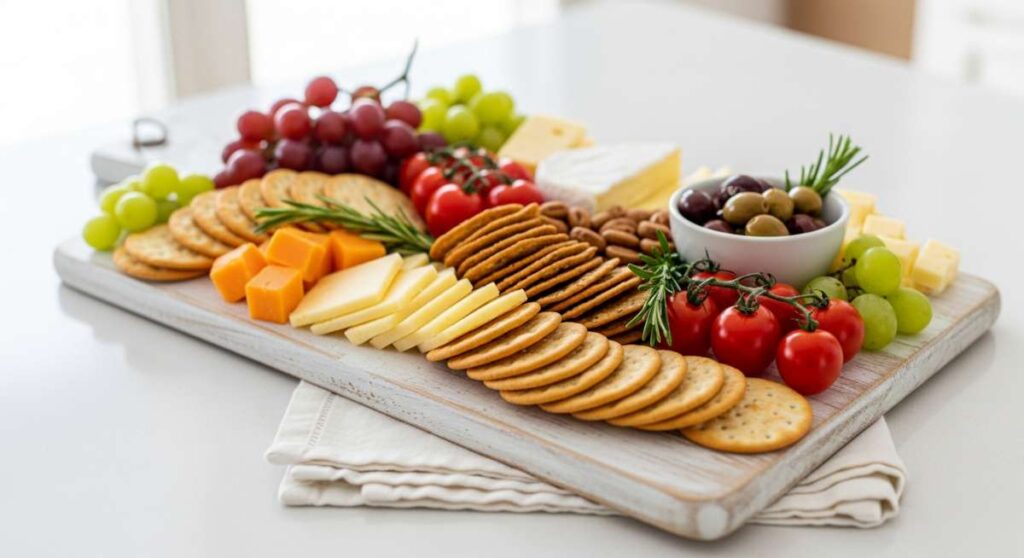
There is something magical about a table filled with food that doesn’t require a formal seating chart or a three-course menu. Lately, my social media feeds have been exploding with these stunning, effortless food boards that prioritize connection over perfection. I remember the first time I set one out for a simple Sunday afternoon with friends; the tension in the room just melted away as everyone gathered around the board, picking and choosing their favorite bites while the conversation flowed naturally. It’s more than just a meal; it’s a lifestyle shift toward intentional, low-stress hosting.
We are living in the era of the ‘Viral Simple Food Board,’ and I am here for it! Whether you’re a seasoned pro in the kitchen or someone who considers boiling water a culinary feat, these components are designed to be approachable, vibrant, and absolutely delicious. Each element brings its own texture and flavor to the table, creating a mosaic of summer freshness and comforting classics that look like they belong in a high-end magazine, even if they only took you minutes to prep.
Let’s dive into the components that will make your next gathering the talk of the neighborhood. From the zesty crunch of a cucumber salad to the warm, soul-soothing aroma of fresh banana bread, these recipes are the building blocks of the easiest food board you’ll ever create. Trust me, once you start building these boards, you’ll never want to go back to traditional dinner parties again.
How to make Rotel dip?
Why we love this
There is something inherently nostalgic and comforting about a warm bowl of Rotel dip sitting in the center of a gathering. As you dip a salty, crunchy tortilla chip into the velvety, melted cheese, you’re met with the perfect balance of savory ground beef and the subtle heat of diced green chilies. The aroma of toasted spices and molten cheese fills the room, instantly making everyone feel at home. It’s a texture that is both smooth and hearty, providing a satisfying bite that keeps you coming back for more until the bowl is scraped clean.
Ingredients
- 1 lb lean ground beef
- 1 block (32 oz) Velveeta cheese, cubed
- 2 cans (10 oz) Rotel Original Diced Tomatoes and Green Chilies
- 1 tsp taco seasoning
- Tortilla chips for serving
How to make it
- Place a large skillet over medium-high heat and add one pound of lean ground beef. Break it apart with a wooden spoon as it browns, cooking for 7-9 minutes until no pink remains.
- Drain the excess fat into a heat-safe container to ensure the dip isn’t greasy.
- Return the skillet to medium-low heat and add the 32-ounce block of Velveeta cheese that has been cut into one-inch cubes to help it melt evenly.
- Pour in two cans of undrained Rotel tomatoes with green chilies, allowing the juices to thin the cheese slightly.
- Stir constantly with a heat-resistant spatula until the cheese is completely smooth and glossy, which usually takes about 5 to 7 minutes.
- Once melted, transfer to a slow cooker on the ‘warm’ setting to maintain that perfect dipping consistency throughout your party.
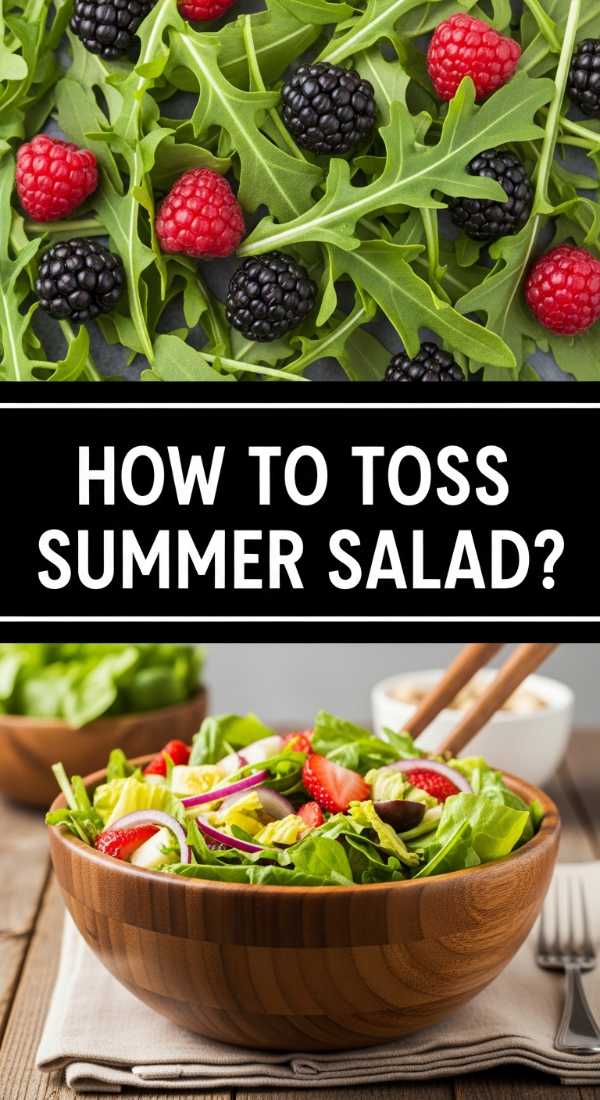
How to toss summer salad?
Why we love this
A true summer salad is a celebration of the season’s bounty, offering a refreshing explosion of flavors that dance across the palate. We love how the crisp, peppery notes of fresh greens contrast with the sweet, sun-ripened juiciness of seasonal fruits like peaches or berries. The scent of fresh-torn basil and the bright tang of a citrus-based dressing provide an olfactory experience that feels like a warm breeze on a July afternoon. It is light, vibrant, and incredibly satisfying, offering a clean crunch that balances out the richer items on your food board.
Ingredients
- 5 oz mixed spring greens or arugula
- 2 ripe peaches, sliced
- 1/2 cup blueberries
- 1/4 cup crumbled goat cheese
- 1/4 cup toasted pecans
- Balsamic glaze and olive oil
How to make it
- Begin by washing your greens in ice-cold water and spinning them completely dry; moisture is the enemy of a crisp salad.
- Place the dried greens in a very large wooden bowl to allow plenty of room for movement during the tossing phase.
- Scatter the sliced peaches and blueberries across the top of the greens, ensuring even distribution.
- In a small jar, whisk together 3 tablespoons of extra virgin olive oil and 1 tablespoon of honey until emulsified, then drizzle lightly over the salad.
- Using two large salad servers, reach to the bottom of the bowl and lift the greens upward and over, repeating this ‘fold’ motion 4-5 times to coat every leaf without bruising the delicate fruit.
- Top with the goat cheese and pecans just before serving to maintain their distinct textures.
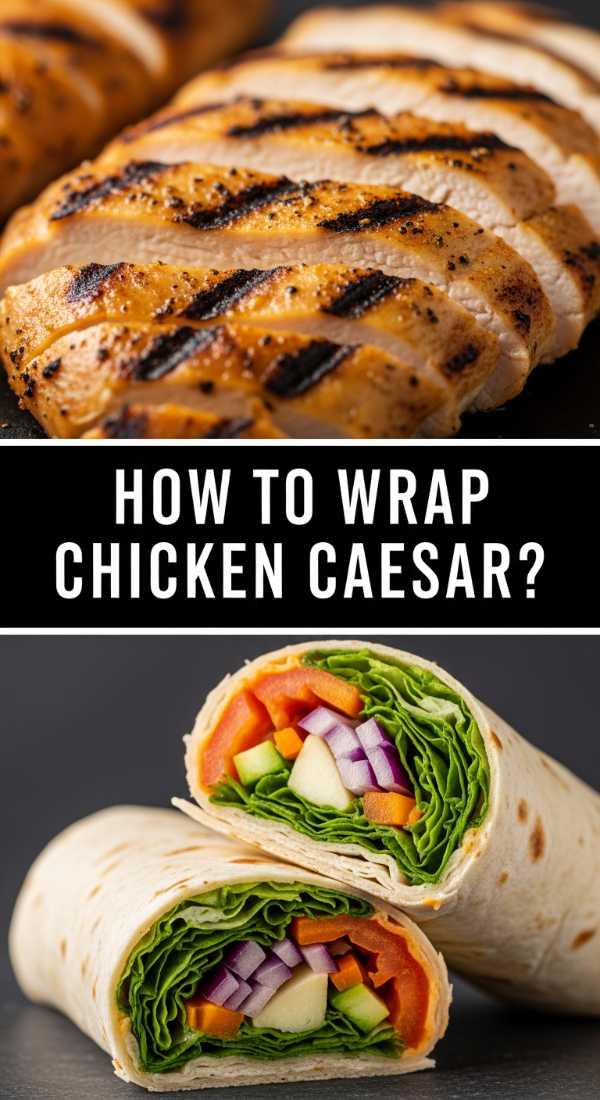
How to wrap chicken caesar?

Why we love this
The Chicken Caesar wrap is a classic for a reason, providing a portable version of the beloved salad that hits every sensory note. We adore the contrast between the warm, tender grilled chicken and the ice-cold, snappy romaine lettuce. Each bite is smothered in a creamy, garlic-heavy dressing that offers a sharp, salty kick from the parmesan cheese. It’s a handheld comfort food that manages to feel both indulgent and fresh, with a chewy tortilla holding all those bold flavors in one perfect, cohesive package.
Ingredients
- 2 large flour tortillas
- 1 cup grilled chicken breast, sliced
- 2 cups chopped romaine lettuce
- 1/4 cup Caesar dressing
- 1/4 cup shaved parmesan cheese
- 1/2 cup crushed croutons
How to make it
- Warm the flour tortillas in a dry skillet over medium heat for about 15 seconds per side to make them pliable and prevent cracking.
- Lay the tortilla flat and spread a thin layer of Caesar dressing across the center, leaving a 2-inch border at the edges.
- Place a generous heap of romaine lettuce in a horizontal line across the center, then top with the sliced chicken.
- Sprinkle the parmesan and crushed croutons over the chicken to ensure a bit of crunch in every single bite.
- Fold the left and right sides of the tortilla inward toward the center by about 1 inch.
- While holding the sides, use your thumbs to lift the bottom edge of the tortilla up and over the filling, tucking it tightly as you roll it forward into a firm cylinder.
How to bake strawberry pie?
Why we love this
Baking a strawberry pie is like capturing the very essence of summer in a buttery, flaky crust. As it bakes, the kitchen is filled with the sweet, jammy aroma of softening berries, and the sight of the ruby-red filling bubbling through the lattice crust is absolutely mouth-watering. The texture is a delightful mix of a crisp, salty pastry and a thick, luscious fruit center that isn’t too sugary. It’s a dessert that feels deeply traditional and rustic, making it the perfect focal point for any food board meant for sharing.
Ingredients
- 2 deep-dish pie crusts (store-bought or homemade)
- 2 lbs fresh strawberries, hulled and halved
- 3/4 cup granulated sugar
- 1/4 cup cornstarch
- 1 tbsp lemon juice
- 1 egg (for egg wash)
How to make it
- Preheat your oven to 425°F (220°C) and place a baking sheet on the bottom rack to catch any potential drips.
- In a large mixing bowl, toss the halved strawberries with sugar, cornstarch, and lemon juice until the berries are well-coated; let them sit for 15 minutes to macerate.
- Fit one pie crust into a 9-inch pie plate, pressing it firmly against the bottom and sides.
- Pour the strawberry mixture into the crust, piling them slightly higher in the center.
- Top with the second crust, either as a solid sheet with steam vents or cut into strips for a lattice design.
- Crimp the edges to seal, brush the top with a beaten egg for a golden finish, and bake for 45-50 minutes until the crust is browned and the filling is thick and bubbling.
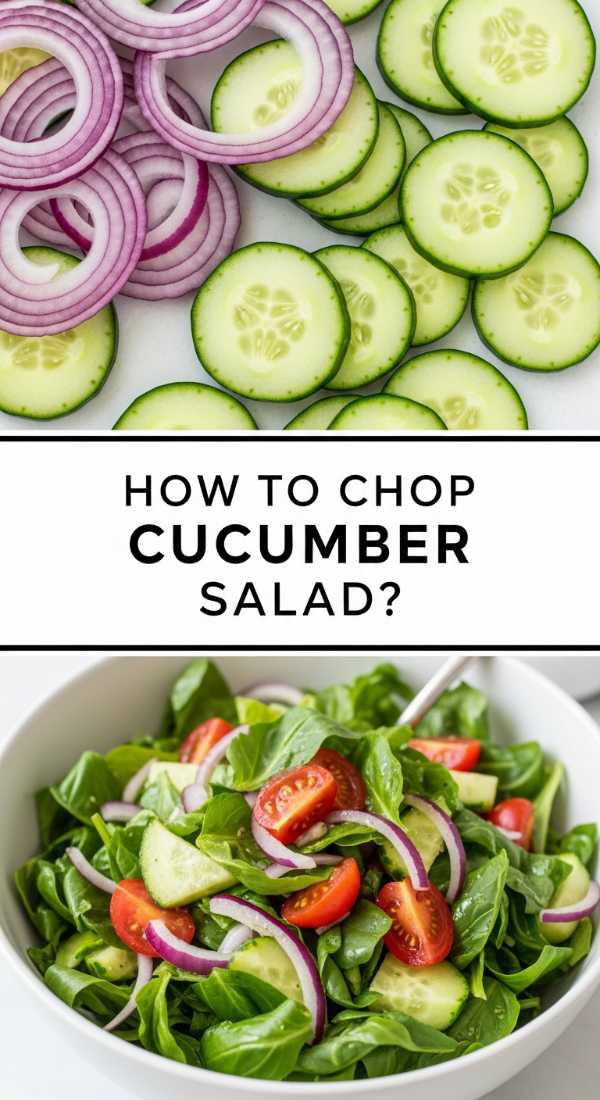
How to chop cucumber salad?

Why we love this
There is nothing more refreshing on a hot afternoon than a crisp cucumber salad. We love the clean, watery snap of the cucumbers paired with the sharp, acidic bite of a vinegar-based brine. The scent of fresh dill adds an earthy, herbal top note that perfectly complements the mild sweetness of red onions. It’s a visually stunning dish, with the translucent green slices and purple onion rings providing a bright pop of color to your food board, and its cooling properties make it the ultimate palate cleanser between bites.
Ingredients
- 2 English cucumbers
- 1/2 small red onion, thinly sliced
- 1/2 cup white vinegar
- 2 tbsp sugar
- 1 tsp salt
- 2 tbsp fresh dill, chopped
How to make it
- Using a sharp chef’s knife or a mandoline set to 1/8-inch thickness, slice the English cucumbers into uniform rounds.
- Thinly slice the red onion into half-moons and place both vegetables into a large glass bowl.
- In a separate small bowl, whisk together the white vinegar, sugar, and salt until the sugar crystals have completely dissolved into the liquid.
- Pour the vinegar mixture over the cucumbers and onions, ensuring everything is submerged.
- Add the fresh chopped dill and toss gently with tongs to distribute the herbs.
- Cover and refrigerate for at least 30 minutes before serving; this allows the cucumbers to slightly soften while absorbing the tangy brine.
How to top pound cake?
Why we love this
Pound cake serves as the ultimate canvas for sweet toppings, and we love the decadent, buttery density it brings to the dessert portion of a board. When you top it correctly, you get a beautiful play of textures: the soft, tight crumb of the cake, the airy lightness of whipped cream, and the slight macerated syrup from fresh fruit. The aroma of vanilla and sugar is irresistible, making it a crowd favorite. It turns a simple store-bought cake into a gourmet masterpiece with just a few thoughtful additions.
Ingredients
- 1 loaf of pound cake (pre-baked)
- 2 cups strawberries or peaches, sliced
- 2 tbsp sugar
- 1 cup heavy whipping cream
- 1 tsp vanilla extract
- Fresh mint for garnish
How to make it
- Slice the pound cake into thick, 1.5-inch slabs; for an extra touch, you can lightly toast them in a pan with a smear of butter for a golden exterior.
- In a small bowl, toss your sliced fruit with 2 tablespoons of sugar and let it sit for 20 minutes until a natural syrup forms.
- In a cold mixing bowl, beat the heavy cream and vanilla extract until stiff peaks form, being careful not to over-beat into butter.
- Place a slice of cake on a plate and spoon a generous amount of the macerated fruit and its syrup over the top, allowing the cake to soak up the juices.
- Add a large dollop of the fresh whipped cream right in the center.
- Finish with a sprig of fresh mint for a professional, high-end look.
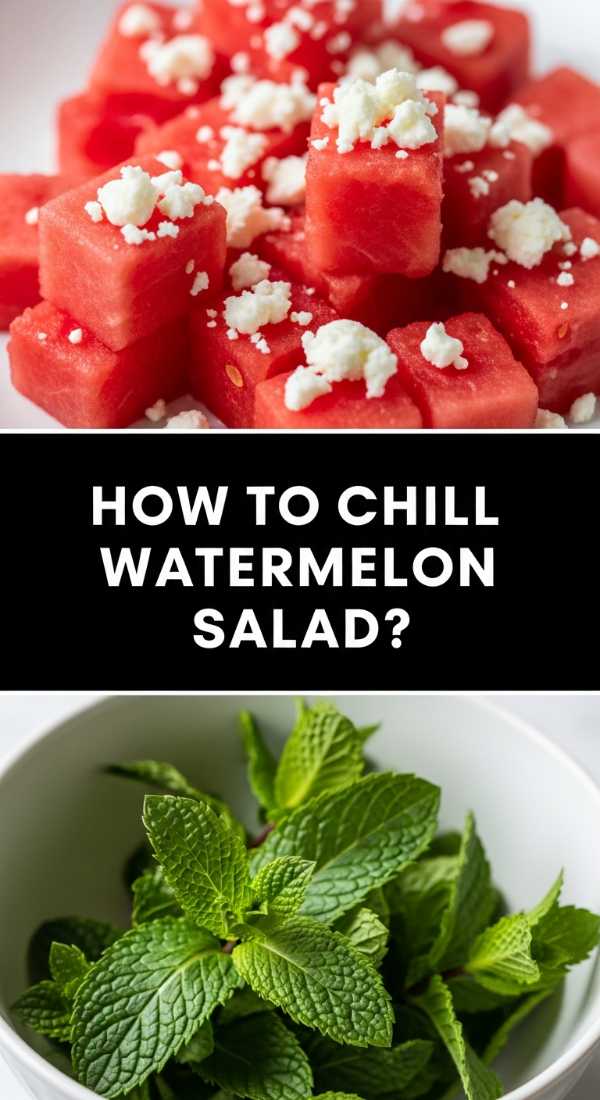
How to chill watermelon salad?

Why we love this
Watermelon salad is the ultimate ‘cool’ factor for a summer food board, offering an unexpected but delightful mix of sweet and savory. We love how the ice-cold, hydrating cubes of melon explode with juice, only to be met by the salty, creamy crumble of feta cheese. The addition of lime juice adds a zesty brightness that wakes up the senses, while the mint provides a cooling finish that lingers. It is a light, elegant, and incredibly photogenic dish that feels sophisticated yet takes almost no time to assemble.
Ingredients
- 1 small seedless watermelon, cubed
- 1/2 cup crumbled feta cheese
- 1/4 cup fresh mint leaves, torn
- 1 lime, juiced
- A drizzle of extra virgin olive oil
How to make it
- Start by dicing your watermelon into uniform 1-inch cubes, removing any rind carefully.
- Place the watermelon cubes in a large metal or glass bowl and put it in the freezer for exactly 10 minutes to get it exceptionally cold without freezing it through.
- Remove from the freezer and drizzle with the juice of one fresh lime and a light stream of high-quality olive oil.
- Toss very gently with your hands or a large spoon to avoid breaking the cubes.
- Sprinkle the crumbled feta and the torn mint leaves over the top just before serving.
- Serve immediately while the temperature contrast between the ice-cold fruit and the room-temperature cheese is at its peak.
How to marinate grilled chicken?
Why we love this
Grilled chicken is the protein powerhouse of any food board, and a proper marinade is what transforms it from bland to grand. We love the smoky, charred aroma that develops as the sugars in the marinade caramelize over the flame. The texture remains incredibly juicy and tender on the inside, while the outside gains a beautiful, savory crust infused with garlic and herbs. It provides a satisfying, grounding element to the board that pairs perfectly with both the fresh salads and the rich dips.
Ingredients
- 1.5 lbs chicken breasts or thighs
- 1/4 cup olive oil
- 3 cloves garlic, minced
- 1 tbsp fresh rosemary, chopped
- 1 lemon, zested and juiced
- 1 tsp salt and 1/2 tsp black pepper
How to make it
- In a gallon-sized resealable bag, whisk together the olive oil, minced garlic, rosemary, lemon zest, lemon juice, salt, and pepper.
- Place the chicken pieces into the bag, seal it while removing as much air as possible, and massage the marinade into the meat.
- Refrigerate for at least 30 minutes, though 2-4 hours is ideal for maximum flavor penetration.
- Preheat your grill to medium-high heat (about 400°F) and lightly oil the grates.
- Grill the chicken for 6-8 minutes per side, depending on thickness, until the internal temperature reaches 165°F (74°C).
- Crucially, let the chicken rest for 5 minutes on a cutting board before slicing; this allows the juices to redistribute so the meat stays moist.
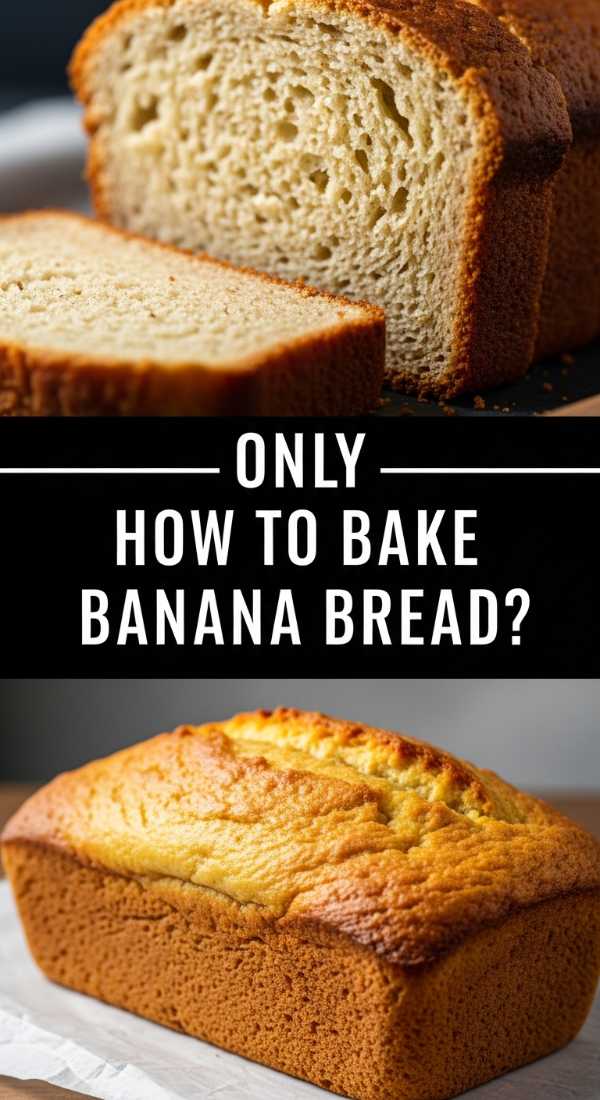
How to bake banana bread?
Why we love this
There is no scent quite as inviting as fresh banana bread wafting through a home. We love the dense, moist crumb and the deep, caramelized sweetness that comes from using overripe bananas. It’s a comforting, rustic bread that feels like a warm hug, especially when served slightly warm with a smear of salted butter. Its golden-brown crust and tender interior provide a lovely texture that sits beautifully on a food board, acting as both a snack and a semi-sweet treat that guests can nibble on throughout the day.
Ingredients
- 3 very ripe bananas, mashed
- 1/3 cup melted butter
- 3/4 cup sugar
- 1 egg, beaten
- 1 tsp vanilla extract
- 1.5 cups all-purpose flour
- 1 tsp baking soda
How to make it
- Preheat your oven to 350°F (175°C) and grease a 4×8-inch loaf pan thoroughly.
- In a large bowl, mash the ripe bananas with a fork until they are almost liquid with only small chunks remaining.
- Stir the melted butter into the mashed bananas until fully combined.
- Mix in the sugar, beaten egg, and vanilla extract, whisking until the mixture is smooth.
- Sprinkle the baking soda and flour over the wet ingredients, and use a spatula to fold them in gently; stop as soon as no more white streaks of flour are visible to keep the bread tender.
- Pour the batter into the prepared pan and bake for 50-60 minutes, or until a toothpick inserted into the center comes out clean.
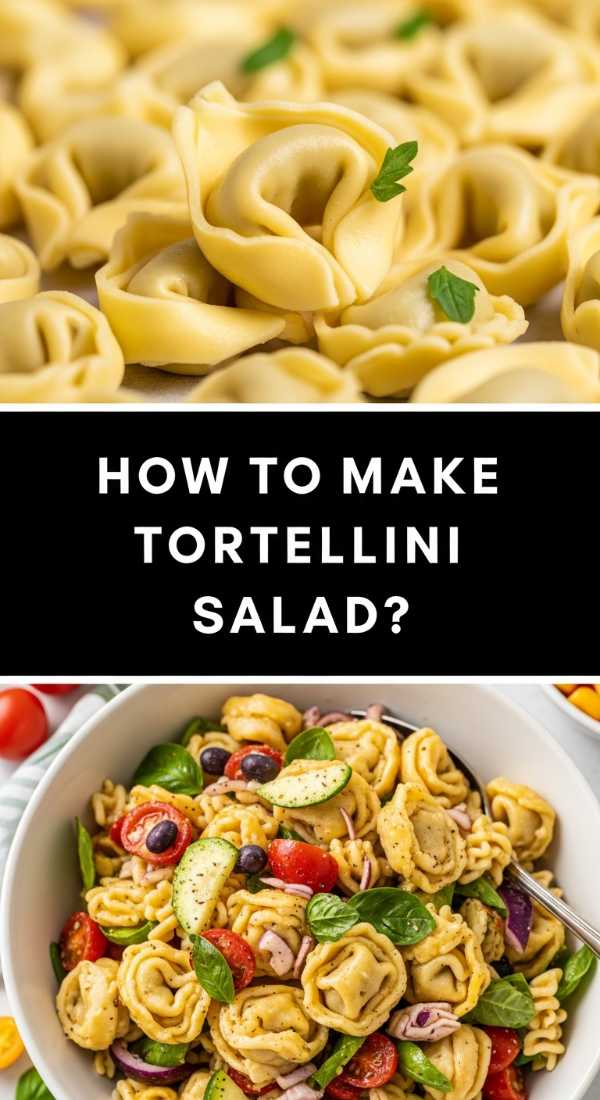
How to make tortellini salad?
[IMAGE_10]
Why we love this
Tortellini salad is the hearty, pasta-lover’s answer to a traditional green salad, and we love how substantial it feels on a food board. The chewy, cheese-filled pasta acts as a wonderful vessel for savory pesto and tangy sun-dried tomatoes. Every bite is a Mediterranean-inspired journey, featuring the salty pop of pine nuts and the fresh wilt of baby spinach. It’s a dish that actually tastes better as it sits, making it a stress-free addition to your gathering as the flavors deepen and meld over time.
Ingredients
- 1 package (20 oz) refrigerated cheese tortellini
- 1/2 cup basil pesto
- 1/2 cup sun-dried tomatoes, chopped
- 2 cups fresh baby spinach
- 1/4 cup toasted pine nuts
- Shaved parmesan for garnish
How to make it
- Bring a large pot of salted water to a rolling boil and cook the tortellini according to the package directions—usually just 2-3 minutes.
- Immediately drain the pasta and plunge it into a bowl of ice water to stop the cooking process; this ensures the pasta stays ‘al dente’ and doesn’t get mushy.
- Drain the chilled pasta again and pat it dry with a clean kitchen towel.
- In a large bowl, combine the tortellini with the basil pesto, sun-dried tomatoes, and baby spinach.
- Toss thoroughly until every piece of pasta is coated in green pesto and the spinach has slightly softened from the residual moisture.
- Top with toasted pine nuts and shaved parmesan before chilling in the fridge for at least one hour to allow the flavors to harmonize.
The Art of the Stress-Free Gathering
Building a food board like this is a reminder that the best parts of life happen when we simplify. You don’t need a massive kitchen or a culinary degree to create a spread that makes people feel loved and fed. By focusing on these viral, simple recipes, you’re giving yourself the gift of time—time to actually sit down, grab a glass of wine, and enjoy the company of your favorite people. So go ahead, clear off your biggest cutting board, and start layering these delicious bites. Your guests will be impressed, and you’ll actually be relaxed enough to enjoy the party!