
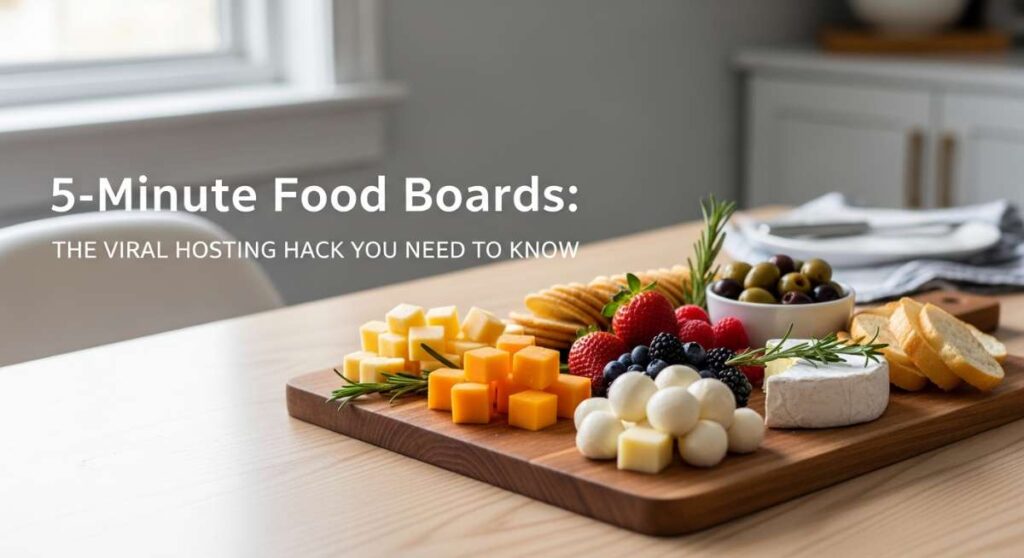
5-Minute Food Boards: The Viral Hosting Hack You Need to Know
We’ve all been there—the doorbell rings in fifteen minutes, the house is a semi-controlled disaster, and you realize you haven’t even thought about what to feed your guests. In the past, this would have been a moment of pure panic, but the viral ‘5-Minute Food Board’ trend has completely changed the game for those of us who love hosting but hate the stress of elaborate catering. It’s about more than just food; it’s about creating a centerpiece that invites people to gather, linger, and snack while the conversation flows effortlessly.
The secret to a truly viral board isn’t spending hours in the kitchen; it’s about assembling high-impact, bite-sized elements that look like they took all afternoon. By focusing on colorful, textured finger foods that can be prepped quickly or roasted in a single batch, you create a visual feast that is as Instagram-worthy as it is delicious. Let’s dive into the ultimate components that will make your next food board the talk of the neighborhood.
Easy Turmeric Roasted Cauliflower Bites

Why we love this
There is something deeply comforting about the way turmeric transforms humble cauliflower into golden, glowing nuggets of joy. As they roast, the kitchen fills with an earthy, slightly peppery aroma that promises a satisfying depth of flavor. Each bite offers a beautiful contrast between the crisp, caramelized exterior and the buttery, tender heart of the floret, making it an addictive snack that feels both indulgent and incredibly nourishing. The vibrant yellow hue adds an instant pop of sunshine to any board, making it a visual and sensory standout.
Ingredients
- 1 large head of cauliflower, cut into small florets
- 2 tablespoons extra virgin olive oil
- 1 teaspoon ground turmeric
- 1/2 teaspoon ground cumin
- 1/2 teaspoon garlic powder
- Sea salt and cracked black pepper to taste
- Fresh parsley for garnish
How to make it
- Preheat your oven to 425°F (220°C). A high temperature is crucial for achieving those crispy, charred edges without overcooking the center into mush.
- In a large mixing bowl, toss the cauliflower florets with olive oil until they are evenly coated; this ensures the spices adhere to every crevice.
- Sprinkle the turmeric, cumin, garlic powder, salt, and pepper over the cauliflower. Use your hands or a large spoon to massage the spices in until every piece is a vibrant, uniform yellow.
- Spread the florets in a single layer on a parchment-lined baking sheet. Do not crowd the pan; if the pieces are too close, they will steam instead of roast, losing that coveted crunch.
- Roast for 20-25 minutes, tossing halfway through. You are looking for deep golden edges and a tender fork-feel. Serve warm with a sprinkle of fresh parsley for a burst of green.
Zesty Garlic Salmon Bites Recipe

Why we love this
These salmon bites are the definition of sophisticated snacking, offering a luxurious mouthfeel that melts away with every bite. The bright, acidic zing of lemon cuts through the richness of the fish, while the garlic provides a savory backbone that lingers beautifully on the palate. When seared correctly, the salmon develops a gorgeous, slightly sweet crust that gives way to a flaky, moist interior, releasing a heavenly aroma of fresh herbs and butter. It’s a high-protein addition that feels light yet satisfyingly decadent for a party setting.
Ingredients
- 1 lb fresh salmon fillet, skin removed and cubed
- 3 cloves garlic, minced
- Zest and juice of 1 lemon
- 1 tablespoon fresh dill, chopped
- 2 tablespoons avocado oil
- A pinch of red pepper flakes
How to make it
- Pat the salmon cubes dry with a paper towel. Removing surface moisture is the professional secret to getting a perfect golden sear rather than steaming the fish.
- In a medium bowl, whisk together the minced garlic, lemon zest, lemon juice, dill, and red pepper flakes. Toss the salmon cubes in this mixture and let marinate for exactly 10 minutes—any longer and the acid will start to ‘cook’ the fish like a ceviche.
- Heat a cast-iron skillet or heavy-bottomed pan over medium-high heat. Add the avocado oil and wait until it shimmers.
- Place the salmon cubes in the pan, ensuring they aren’t touching. Sear for 2-3 minutes per side. Resist the urge to move them too early; let the crust form naturally until they release easily from the pan.
- Once opaque and slightly firm to the touch, remove from heat immediately. Overcooking salmon happens in seconds, so watch for that slight flakiness.
Crispy Sweet Potato Finger Foods

Why we love this
Sweet potatoes bring a natural, earthy sweetness that becomes deeply caramelized and intense when roasted to a crisp. These finger foods offer a delightful textural journey, moving from a crunchy, herb-scented outer shell to a soft, pillowy center that feels like a warm hug. The scent of roasted rosemary mingling with the natural sugars of the potato creates an irresistible fragrance that draws guests to the board immediately. They are the ultimate crowd-pleaser, providing a hearty, gluten-free base that pairs perfectly with both creamy dips and spicy accompaniments.
Ingredients
- 2 large sweet potatoes, cut into 1/2 inch rounds or wedges
- 1 tablespoon cornstarch (the secret for extra crunch)
- 2 tablespoons olive oil
- 1 tablespoon fresh rosemary, finely chopped
- 1/2 teaspoon smoked paprika
- Coarse sea salt
How to make it
- Preheat your oven to 400°F (200°C). While the oven heats, soak your cut sweet potatoes in cold water for 10 minutes to remove excess starch, then pat them bone-dry.
- In a large zip-top bag or bowl, toss the dry potatoes with cornstarch until a thin, dusty film covers them. This is the pro trick for that shatteringly crisp exterior.
- Add the olive oil, rosemary, smoked paprika, and salt. Toss vigorously to ensure the oil and herbs are distributed evenly across the starch coating.
- Arrange the pieces on a wire rack set over a baking sheet. This allows hot air to circulate under the potatoes, ensuring they crisp up on all sides without needing to be flipped constantly.
- Roast for 25-30 minutes. The visual cue for doneness is deep browning on the edges and a slightly puffed appearance.
Spiced Chickpea Party Snack

Why we love this
There is something incredibly addictive about the rhythmic ‘crunch’ of a perfectly roasted chickpea, making them the ultimate social snack. These little gems are tossed in a smoky, spicy blend that awakens the senses and keeps you reaching back for more. The aroma of toasted cumin and smoked paprika is warm and inviting, evoking the feeling of a sun-drenched spice market. They provide a fantastic salty-savory element to your food board, acting as the perfect palate cleanser between richer, creamier bites.
Ingredients
- 2 cans (15 oz) chickpeas, rinsed and thoroughly dried
- 2 tablespoons olive oil
- 1 teaspoon smoked paprika
- 1/2 teaspoon garlic powder
- 1/4 teaspoon cayenne pepper (optional)
- 1 teaspoon sea salt
How to make it
- Preheat the oven to 400°F (200°C). This is a ‘dry’ roast process, so your chickpeas must be as dry as possible; roll them between two kitchen towels to remove all moisture and any loose skins.
- Spread the chickpeas on a bare baking sheet (no oil yet!) and roast for 15 minutes. This pre-roast removes the internal moisture, ensuring a better crunch later.
- Remove the pan and drizzle with olive oil, then sprinkle the paprika, garlic powder, and cayenne. Toss them directly on the hot pan to toast the spices.
- Return to the oven for another 15-20 minutes. Shake the pan every 5 minutes to prevent burning and ensure an even toast.
- Crucial Tip: Turn off the oven and crack the door open, letting the chickpeas cool inside for 10 minutes. This ‘sets’ the crunch so they don’t turn soft as they hit room temperature.
Honey Ginger Glazed Carrots
Why we love this
These carrots are a masterclass in balance, combining the bright, sharp heat of ginger with the mellow, floral sweetness of honey. As they roast, the glaze reduces into a sticky, lacquered finish that makes the vegetables shimmer like jewels on your board. The texture is ‘tender-crisp’—yielding to the tooth but still retaining a fresh, snappy integrity. The scent of warm ginger and caramelizing honey is absolutely intoxicating, providing a sophisticated sweetness that bridges the gap between the savory and salty elements of your spread.
Ingredients
- 1 lb baby carrots (with tops for a rustic look)
- 2 tablespoons honey
- 1 tablespoon freshly grated ginger
- 1 tablespoon melted butter
- A squeeze of lime juice
- Fresh cilantro for garnish
How to make it
- Preheat your oven to 400°F (200°C). If using carrots with tops, trim them down to one inch for a beautiful, professional presentation.
- In a small bowl, whisk together the honey, grated ginger, melted butter, and lime juice. The lime juice provides the necessary acidity to keep the glaze from being cloying.
- Place the carrots on a baking sheet and pour the glaze over them. Use your hands to ensure every carrot is fully submerged in the mixture.
- Roast for 20 minutes. At the 10-minute mark, use tongs to roll the carrots in the pooling glaze on the bottom of the pan to ensure they are fully coated as the sugars concentrate.
- The carrots are done when they are tender and the glaze has thickened into a sticky coating. Garnish with cilantro while hot so the herb fragrance is released.
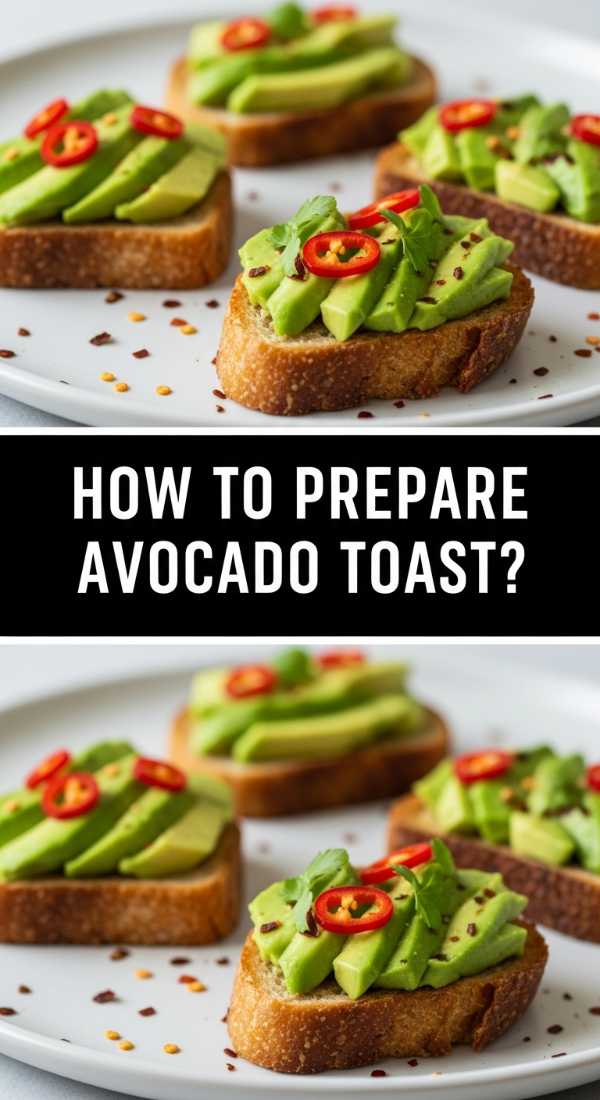
Avocado Crostini Finger Foods

Why we love this
This is a viral classic for a reason: the combination of buttery, cool avocado and the sharp, shattering crunch of a toasted baguette is perfection. Each bite is elevated by the citrusy zing of lime and a lingering heat from chili flakes that dances on the tongue. It feels fresh, modern, and incredibly vibrant, offering a creamy textural element that balances the roasted items on the board. The bright green color is a visual highlight, signaling health and freshness to your guests the moment they look at the spread.
Ingredients
- 1 French baguette, sliced into 1/2 inch rounds
- 2 ripe avocados
- Juice of 1 lime
- 1/2 teaspoon red pepper flakes
- Thinly sliced radishes for crunch
- Extra virgin olive oil for drizzling
How to make it
- Brush the baguette slices lightly with olive oil and toast them under a broiler for 1-2 minutes until they are a pale golden brown. Watch them like a hawk; bread burns in the blink of an eye.
- In a small bowl, mash the avocados with lime juice and a pinch of salt. Don’t over-mash; you want some small chunks for texture and visual interest.
- Spread a generous tablespoon of the avocado mixture onto each toasted crostini, creating a slightly domed shape.
- Top with a few thin slices of radish, which provides a peppery bite and a beautiful pink contrast to the green avocado.
- Finish with a sprinkle of red pepper flakes and a final, tiny drizzle of high-quality olive oil to make the colors pop.
Spinach Stuffed Mushroom Appetizers

Why we love this
These mushrooms are tiny umami bombs, bursting with the savory richness of melted parmesan and earthy spinach. The mushroom cap acts as a natural vessel, holding a creamy, garlic-infused filling that becomes beautifully bubbly and golden in the oven. As you take a bite, the juice from the mushroom mingles with the velvety cheese, creating a luxurious sensation that feels far more complex than it is. The aroma of roasting garlic and browning cheese is a classic ‘welcome home’ scent that instantly puts guests at ease.
Ingredients
- 20 medium cremini or white button mushrooms
- 2 cups fresh spinach, finely chopped
- 4 oz cream cheese, softened
- 1/4 cup grated parmesan cheese
- 2 cloves garlic, minced
- 1/4 cup panko breadcrumbs for topping
How to make it
- Preheat your oven to 375°F (190°C). Clean the mushrooms with a damp paper towel (never soak them!) and carefully pop out the stems to create a hollow cavity.
- In a skillet over medium heat, sauté the minced garlic and spinach until the spinach is fully wilted. Squeeze out any excess liquid from the spinach—this prevents the mushrooms from becoming watery.
- In a bowl, mix the sautéed spinach and garlic with the cream cheese and half of the parmesan.
- Use a small spoon to mound the filling into each mushroom cap. Press a small amount of panko breadcrumbs and the remaining parmesan onto the top of each mound.
- Bake for 18-20 minutes. You’ll know they’re ready when the mushroom caps look slightly shriveled and dark, and the cheese topping is a gorgeous, crispy brown.
Walnut Crusted Chicken Bites
Why we love this
This dish reimagines the classic chicken nugget with a sophisticated, nutty twist that is absolutely irresistible. The walnuts provide a deep, toasted flavor and a distinct crunch that is far more interesting than standard breading. Inside, the chicken remains incredibly juicy and tender, creating a satisfying contrast that feels both wholesome and gourmet. The scent of toasted nuts and savory chicken is warm and inviting, making these the star ‘heavy’ snack on a food board that ensures no one leaves the party feeling hungry.
Ingredients
- 1 lb chicken breast, cut into 1-inch cubes
- 1 cup walnuts, finely crushed (almost a coarse meal)
- 1/2 cup panko breadcrumbs
- 1 egg, beaten
- 1 teaspoon onion powder
- Salt and pepper to taste
How to make it
- Preheat your oven to 400°F (200°C). Prepare a baking sheet with a light coating of oil or parchment paper.
- Set up a dredging station: one bowl with the beaten egg, and a second bowl with the crushed walnuts, panko, onion powder, salt, and pepper mixed together.
- Dip each chicken cube into the egg, allowing excess to drip off, then press firmly into the walnut mixture. You want a thick, even coating on all sides.
- Place the bites on the baking sheet, ensuring they don’t touch. For maximum crispiness, spray the tops lightly with a bit of cooking oil.
- Bake for 15-18 minutes, flipping halfway through. Check for an internal temperature of 165°F (74°C). The crust should be dark golden and smell intensely nutty.
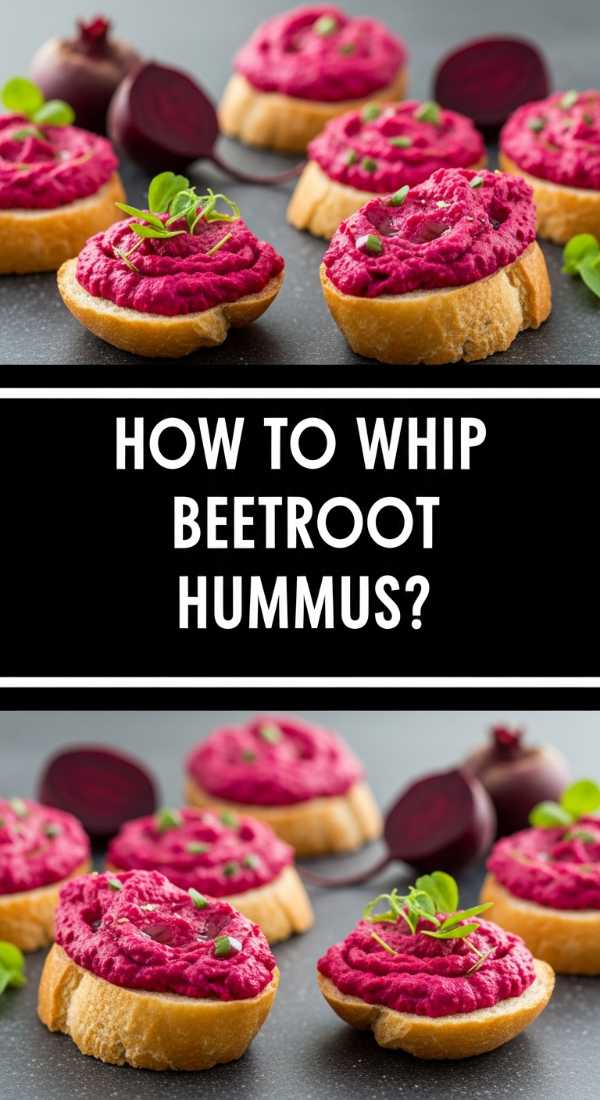
Beetroot Hummus Party Crostini

Why we love this
Nothing commands attention on a food board quite like the electric pink hue of beetroot hummus. Beyond its stunning appearance, it offers a complex flavor profile that is earthy, sweet, and tangy all at once. When spread over a crunchy crostini, it provides a silky-smooth texture that is incredibly satisfying. The aroma is fresh and slightly lemony, making it a perfect light bite for mid-afternoon gatherings. It’s a conversation starter that tastes even better than it looks, bringing a modern, artisanal vibe to your hosting game.
Ingredients
- 1 large roasted beet (peeled)
- 1 can (15 oz) chickpeas, drained
- 2 tablespoons tahini
- Juice of 1 lemon
- 1 clove garlic
- Crostini or pita crackers for serving
- Crumbled feta for garnish
How to make it
- Place the roasted beet, chickpeas, tahini, lemon juice, and garlic into a food processor.
- Process on high until the mixture is completely smooth. If it’s too thick, add a tablespoon of ice water; this is a professional tip for achieving a light, airy, and whipped texture.
- Taste and adjust the seasoning with salt. The sweetness of the beet varies, so you might need an extra squeeze of lemon to balance it out.
- Spread a thick layer of the hummus onto your crostini. Use the back of a spoon to create a little ‘swirl’ in the center.
- Garnish with a sprinkle of crumbled feta and perhaps a small mint leaf. The white cheese against the magenta hummus is visually striking.
Mini Zucchini Pizza Rounds
[IMAGE_10]
Why we love this
These mini pizzas are a whimsical, low-carb take on a classic favorite, offering all the nostalgic flavors of bubbling cheese and savory tomato sauce in a fresh, bite-sized format. The zucchini provides a mild, tender base that lets the herbs and mozzarella shine. There’s something so satisfying about the way the cheese stretches and the edges of the zucchini caramelize under the broiler. They are light, flavorful, and smell exactly like a traditional pizzeria, making them an instant hit with guests of all ages who are looking for a guilt-free indulgence.
Ingredients
- 2 large zucchinis, cut into 1/2 inch thick rounds
- 1/2 cup marinara sauce
- 1 cup shredded mozzarella cheese
- 1 teaspoon dried oregano
- Mini pepperoni slices (optional)
- Fresh basil for garnish
How to make it
- Preheat your oven to 400°F (200°C). Place the zucchini rounds on a baking sheet and bake them for 5 minutes without any toppings to draw out a bit of moisture.
- Remove the pan and blot any liquid off the zucchini with a paper towel. This ensures your ‘crust’ isn’t soggy.
- Top each round with a small spoonful of marinara sauce, a pinch of oregano, and a generous sprinkle of mozzarella. Add a mini pepperoni if you’re going for the full pizza experience.
- Switch your oven to the ‘Broil’ setting. Place the pan back in on the top rack for 2-3 minutes.
- Stay by the oven! You want the cheese to bubble and develop small brown spots, but because the rounds are small, they can go from perfect to burnt very quickly. Garnish with fresh basil before serving.
The Art of the Stress-Free Spread
Hosting doesn’t have to mean spending your entire evening in the kitchen while the party happens without you. By mastering these 5-minute components, you can assemble a food board that looks like a work of art but feels as effortless as a casual chat with friends. The key is to mix textures, colors, and temperatures to keep your guests engaged and satisfied. So, next time you feel the hosting itch, don’t overthink it—just grab a board, pick a few of these recipes, and enjoy the magic of good food and even better company.