
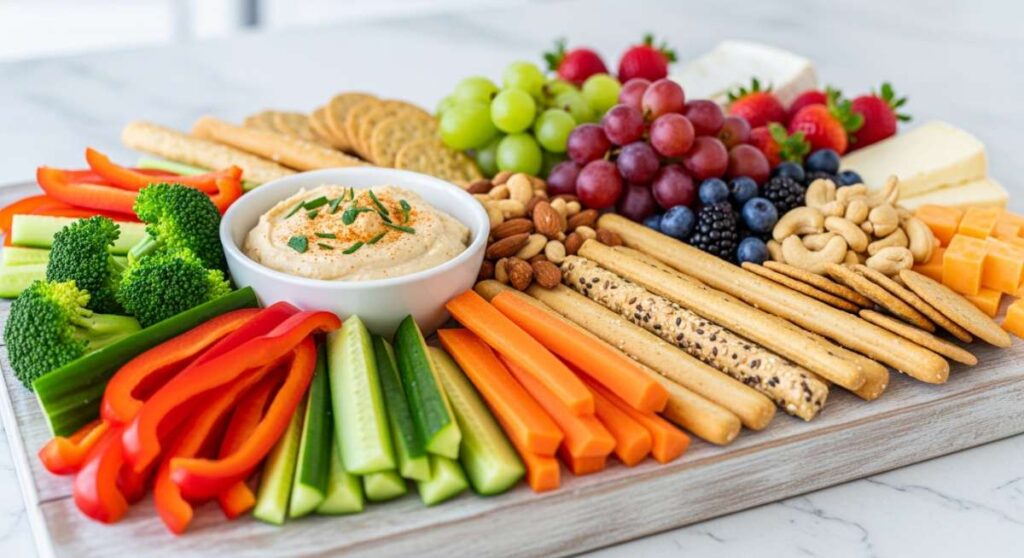
Why This Easy Snack Board Is the Only Recipe You Need This Season
There is something inherently magical about that golden hour light hitting a table filled with abundance. I used to spend hours in the kitchen, sweating over complicated five-course meals while my guests laughed in the other room, but I finally realized that the best memories aren’t made over stiff dinner plates. They happen around a shared board, where hands reach for crisp crackers and laughter flows as easily as the chilled wine. This season, I’ve embraced the art of the ‘Simple Food Board’—a curated collection of flavors that feels fancy but takes half the effort.
This viral approach to entertaining is more than just cheese and crackers; it is an invitation to slow down. Whether you’re hosting a backyard movie night or a casual Sunday brunch, these components create a tapestry of seasonal flavors that satisfy every craving. From the savory pull of a warm dip to the sweet finish of a fresh fruit pie, this guide covers every essential element to make your spread the talk of the neighborhood.
How to make strawberry pie?

Why we love this
There is nothing quite like the scent of macerated strawberries wafting through a sun-drenched kitchen. This pie is the quintessential taste of summer, offering a vibrant, ruby-red filling that strikes the perfect balance between tart and sugary sweet. The crust provides a buttery, flaky contrast to the luscious, jammy interior, making every bite feel like a celebration of the harvest. It’s the kind of dessert that demands a dollop of cold whipped cream and a seat on the porch during a warm evening.
Ingredients
- 2 pints fresh strawberries, hulled and sliced
- 1 cup granulated sugar
- 3 tablespoons cornstarch
- 1 tablespoon lemon juice
- 1/4 teaspoon salt
- Double pie crust (homemade or store-bought)
- 1 egg (for egg wash)
- 1 tablespoon coarse sugar
How to make it
- Begin by preheating your oven to 425°F (218°C). This high initial heat ensures the bottom crust sets quickly, preventing sogginess.
- In a large mixing bowl, gently toss the sliced strawberries with granulated sugar, cornstarch, lemon juice, and salt. Let this mixture sit for about 15 minutes to allow the juices to release and the starch to begin thickening.
- Roll out your bottom crust and fit it into a 9-inch pie plate. Trim the edges so there is a 1/2-inch overhang.
- Pour the strawberry mixture into the crust, piling the fruit slightly higher in the center.
- Top with the second crust, either as a solid sheet with vents or a beautiful lattice pattern for a professional look. Crimp the edges tightly to seal.
- Brush the top with a beaten egg wash and sprinkle generously with coarse sugar for a sparkling, crunchy finish.
- Bake at 425°F for 15 minutes, then reduce the heat to 375°F (190°C) and continue baking for 35-45 minutes until the crust is deep golden brown and the filling is bubbling through the vents. Cool completely for at least 3 hours to let the filling set.
How to make rotel dip?

Why we love this
Rotel dip is the undisputed king of the snack board, bringing a nostalgic, creamy, and spicy kick that guests simply cannot resist. The way the melted cheese envelopes the savory, seasoned meat and the tangy kick of diced tomatoes and green chilies is pure comfort in a bowl. It’s warm, gooey, and has that perfect dip-ability that keeps everyone hovering around the snack table for ‘just one more’ scoop. The aroma of browned beef mixed with melted cheese is enough to make any house feel like a party.
Ingredients
- 1 lb ground beef or breakfast sausage
- 1 block (16 oz) processed cheese (Velveeta), cubed
- 1 can (10 oz) Ro-Tel Diced Tomatoes and Green Chilies
- 1/2 teaspoon taco seasoning
- Fresh cilantro and sliced jalapeños for garnish
How to make it
- Place a large skillet over medium-high heat. Add the ground beef or sausage, breaking it up with a wooden spoon into small, uniform crumbles.
- Cook the meat until it is thoroughly browned and no pink remains, which usually takes about 7-10 minutes. Ensure you drain the excess fat carefully to keep the dip from becoming oily.
- Lower the heat to medium-low. Add the cubed processed cheese to the skillet, stirring constantly. Cubing the cheese first is vital as it ensures even melting without burning.
- Pour in the can of Ro-Tel (including the juices for extra flavor). Stir in the taco seasoning.
- Continue to stir gently until the cheese is completely melted and the mixture is smooth and velvety. If it feels too thick, you can add a splash of milk to reach your desired consistency.
- Transfer immediately to a pre-warmed serving bowl or a small slow cooker on the ‘warm’ setting to keep it liquid throughout the event.
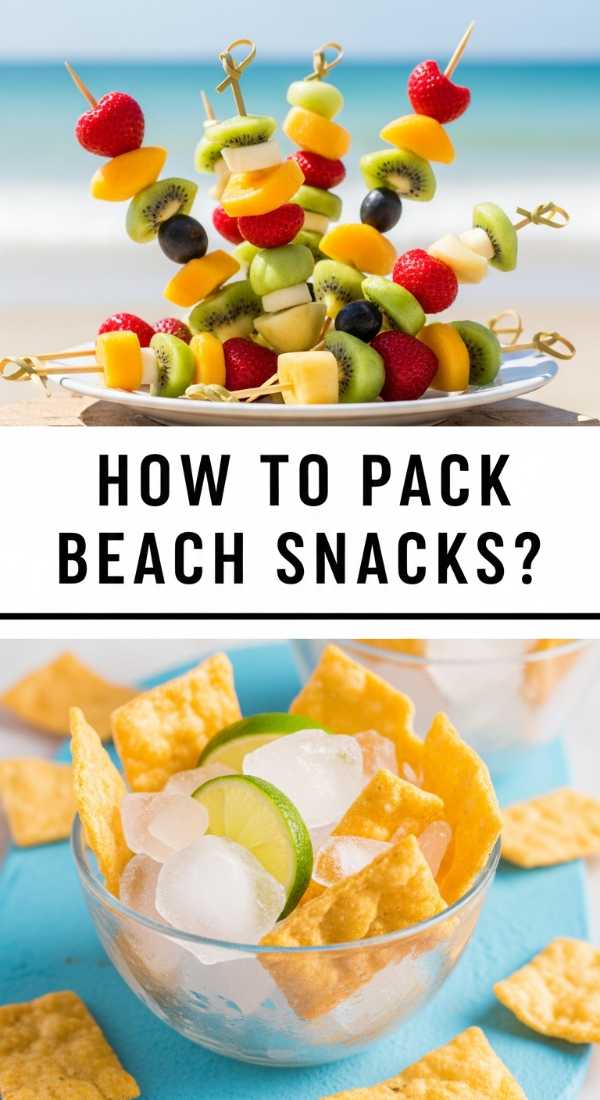
How to pack beach snacks?
Why we love this
Packing snacks for the beach is an art form that balances nutrition with the sheer joy of seaside lounging. There’s something incredibly satisfying about opening a cooler to find perfectly organized, sand-free treats that keep your energy up under the hot sun. The contrast of cold, crisp grapes or crunchy pretzels against the salt-tinged air makes everything taste better. It’s about being prepared so you can spend more time in the waves and less time worrying about soggy sandwiches or crushed chips.
Ingredients
- Hard-sided cooler or insulated bag
- Ice packs (frozen water bottles work great)
- Airtight plastic containers or silicone bags
- Pre-cut vegetables (carrots, peppers, cucumbers)
- Individual hummus or dip cups
- Frozen fruit (grapes or berries)
- Salty snacks (pretzels or pita chips)
How to make it
- Start by choosing the right containers. Rigid, airtight plastic containers are essential to prevent the weight of the ice from crushing your food and to keep sand out.
- Freeze water bottles overnight. These act as ice packs to keep things cold and provide a refreshing drink as they melt throughout the day.
- Layer the bottom of your cooler with the heaviest items and the coldest ice packs. Place drinks at the very bottom.
- Place your prepared veggies and dips in the middle layer. Individual portions prevent cross-contamination and make it easy for people to grab and go without a mess.
- Put your most delicate items, like sandwiches or fruit, on the very top. Ensure they are in completely sealed bags to prevent moisture from the melting ice (sweat) from getting inside.
- Keep a separate small dry bag for items that don’t need cooling, like chips or crackers, to ensure they stay perfectly crunchy.
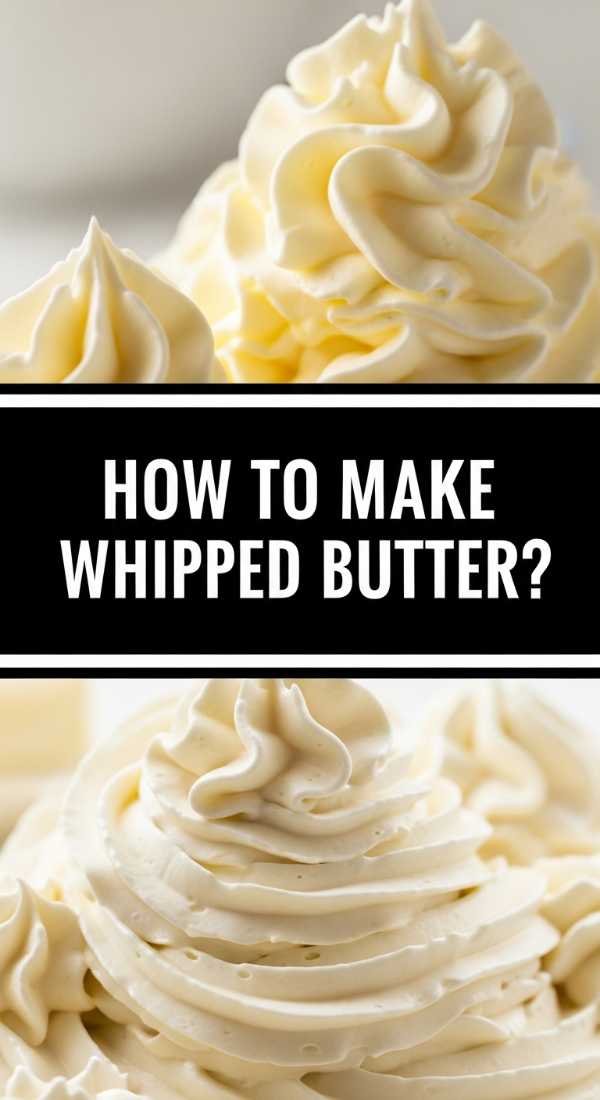
How to make whipped butter?
Why we love this
Whipped butter is a simple luxury that elevates a humble piece of bread into a gourmet experience. By incorporating air into the fat, you create a cloud-like texture that spreads effortlessly and melts instantly on the tongue. It feels indulgent and sophisticated, yet it is one of the easiest ways to impress guests. The addition of sea salt or honey can transform it into a signature component of your board, providing a silky, rich mouthfeel that plain butter just can’t match.
Ingredients
- 1 cup (2 sticks) high-quality unsalted butter, softened to room temperature
- 2 tablespoons milk or heavy cream
- 1/2 teaspoon flaky sea salt (optional)
- 1 tablespoon honey or herbs (optional for flavor)
How to make it
- Ensure your butter is truly at room temperature. It should be soft enough that your finger leaves a deep indent, but not so soft that it is oily or melting.
- Place the butter in the bowl of a stand mixer fitted with the whisk attachment (or use a hand mixer).
- Begin whipping on low speed for 1 minute to break up the butter, then increase the speed to medium-high.
- Whip for about 3-5 minutes. You will see the butter change from a yellow hue to a pale, almost white color, and its volume will nearly double.
- Add the milk or heavy cream one tablespoon at a time while the mixer is running. This helps achieve that ultra-light, spreadable consistency.
- Stop the mixer and fold in any salt, honey, or chopped herbs by hand to ensure even distribution without deflating the air you’ve worked in.
- Transfer to a small ramekin and serve immediately at room temperature for the best texture.
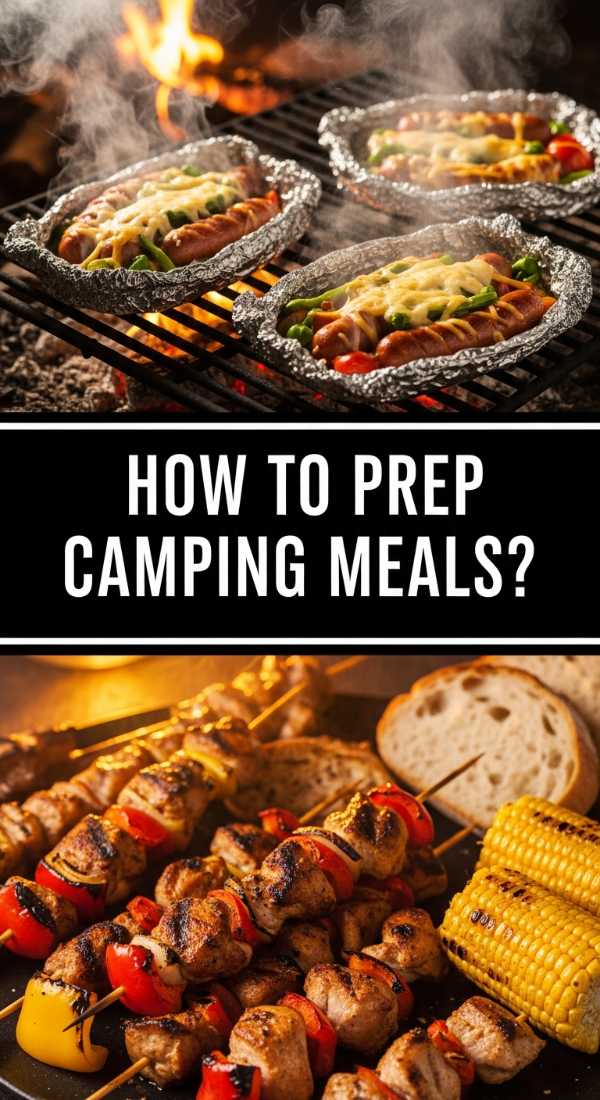
How to prep camping meals?
Why we love this
Meal prepping for a camping trip is the ultimate gift to your future self. There is a deep sense of peace that comes with knowing dinner is already sorted while you’re sitting by the crackling fire, watching the stars come out. Prepping ahead means less cleaning at the campsite and more time for hiking and relaxation. It turns the logistical challenge of outdoor cooking into a seamless, delicious experience where the smoky aroma of the grill meets the freshness of pre-chopped ingredients.
Ingredients
- Gallon-sized freezer bags or vacuum seal bags
- Pre-marinated proteins (chicken, steak, or tofu)
- Pre-chopped sturdy vegetables (onions, peppers, potatoes)
- Aluminum foil
- Pre-mixed spice blends in small jars
- Pre-cooked grains (like quinoa or rice)
How to make it
- Plan your menu based on perishability. Eat the freshest items (like fish or steak) on the first night and save sturdier items (like sausages or pre-cooked stews) for the second or third.
- Chop all vegetables at home. Store them in airtight bags or containers. Sturdier veggies like carrots and potatoes can be kept together, while watery veggies like tomatoes should be separate.
- Marinate your meats in leak-proof bags. This not only saves space but allows the flavor to penetrate the meat as it thaws in the cooler. Freeze these bags before putting them in the cooler to act as extra ice.
- Assemble foil packets ahead of time. Place a protein, some veggies, and a knob of butter or splash of oil inside, then fold the foil tightly. These can be placed directly on the grill or coals.
- Pre-crack eggs into a clean mason jar or plastic bottle. This prevents shells from breaking in the cooler and makes breakfast scrambles a breeze.
- Label every bag with the meal name and date to avoid confusion when digging through a cold cooler.
How to make cucumber salad?
Why we love this
This cucumber salad is the ultimate palate cleanser, offering a crisp, cool crunch that balances the heavier items on a snack board. Its bright, vinegary dressing penetrates the thin slices of cucumber, creating a tangy and refreshing profile that wakes up the taste buds. The inclusion of red onion adds a subtle bite, while fresh dill brings a garden-fresh aroma that makes the whole dish feel light and airy. It is the definition of a ‘clean’ side dish that feels like a breath of fresh air on a hot afternoon.
Ingredients
- 2 large English cucumbers (seedless)
- 1/2 small red onion, thinly sliced
- 1/2 cup white wine vinegar or apple cider vinegar
- 2 tablespoons granulated sugar
- 1 teaspoon salt
- 1/4 cup fresh dill, chopped
- 1/2 teaspoon black pepper
How to make it
- Wash the cucumbers thoroughly. You can peel them in stripes for a decorative look or leave the skin on for extra crunch and nutrition.
- Use a mandoline or a very sharp knife to slice the cucumbers into paper-thin rounds. Consistency is key here for even marination.
- Thinly slice the red onion. If you find raw onion too sharp, soak the slices in ice water for 10 minutes, then drain before adding to the salad.
- In a small bowl, whisk together the vinegar, sugar, salt, and pepper until the sugar and salt have completely dissolved.
- Place the cucumbers and onions in a large glass bowl. Pour the dressing over them and toss gently to ensure every slice is coated.
- Fold in the fresh dill. Cover the bowl and refrigerate for at least 30 minutes before serving. This allows the cucumbers to release some moisture and absorb the flavors of the dressing. Give it one last toss before putting it on the board.
How to grill fresh vegetables?

Why we love this
Grilling vegetables transforms them from simple produce into charred, caramelized stars of the show. The high heat of the grill intensifies their natural sugars, creating a smoky sweetness and a tender-crisp texture that is impossible to achieve in an oven. The visual of those dark grill marks against vibrant greens, yellows, and reds adds an artisanal touch to any spread. The aroma of singed herbs and roasting peppers creates an immediate ‘cookout’ atmosphere that draws everyone toward the kitchen.
Ingredients
- Assorted vegetables (bell peppers, zucchini, asparagus, corn, red onion)
- 3 tablespoons olive oil
- 2 cloves garlic, minced
- 1 teaspoon dried oregano or thyme
- Salt and cracked black pepper
- Balsamic glaze for drizzling
How to make it
- Prepare your grill by cleaning the grates and preheating to medium-high heat (about 400°F/200°C).
- Cut vegetables into large, flat pieces to prevent them from falling through the grates. Zucchini should be sliced into planks, and peppers into large quarters.
- In a large bowl, whisk together olive oil, minced garlic, herbs, salt, and pepper. Toss the vegetables in this mixture until they are thinly and evenly coated. Do not over-oil, or you’ll cause flare-ups on the grill.
- Place the sturdier vegetables (like corn and onions) on the grill first, as they take longer to cook.
- Add the softer veggies (like zucchini and asparagus) a few minutes later. Grill for about 3-5 minutes per side.
- Look for clear grill marks and a slight softening of the texture. Use tongs to flip carefully. Once charred and tender, remove them to a platter.
- Drizzle with a bit of balsamic glaze while still warm to add a layer of sweet acidity.
How to cook summer meals?

Why we love this
Summer cooking is all about minimalism and letting the ingredients speak for themselves. We love it because it moves the focus from the stove to the table, emphasizing fresh produce, light proteins, and vibrant herbs. It’s a style of eating that feels nourishing rather than heavy, leaving you energized for evening walks or lawn games. There is a specific joy in assembling a meal that requires very little ‘cooking’ in the traditional sense—just assembly, a quick sear, and a lot of fresh, seasonal love.
Ingredients
- Fresh seasonal produce (tomatoes, corn, peaches)
- Light proteins (shrimp, chicken breast, or chickpeas)
- Vibrant herbs (basil, mint, cilantro)
- High-quality olive oil and citrus (lemon/lime)
- Quick-cooking grains (couscous or orzo)
How to make it
- Focus on the ‘no-cook’ or ‘low-cook’ philosophy. Use the grill or a single pan to avoid heating up the whole house.
- Start with a base of greens or a light grain like orzo. Cook the grains in vegetable broth for added depth of flavor.
- Incorporate raw elements. A summer meal is elevated by a raw tomato-and-basil garnish or a peach salsa that adds a burst of freshness to grilled chicken.
- Keep seasonings bright. Use plenty of citrus zest and juice rather than heavy creams or thick gravies.
- Balance your textures. Ensure every plate has something crunchy (like toasted nuts or raw radish), something creamy (like avocado or goat cheese), and something acidic (like a vinaigrette).
- Serve family-style. Part of the summer meal experience is the shared platter, allowing everyone to scoop up exactly what they want in the fading evening light.
How to bake fruit pie?

Why we love this
A classic fruit pie is the ultimate comfort food, a warm embrace in dessert form. The way the fruit breaks down into a thick, bubbling syrup inside a golden, flaky crust is nothing short of culinary art. It fills the house with the scent of cinnamon, butter, and cooked fruit—a smell that signals ‘home’ to anyone who walks through the door. Whether it’s apple, berry, or peach, a fruit pie represents the peak of the season’s bounty, preserved in a buttery pastry shell.
Ingredients
- 5-6 cups fresh fruit (peeled/sliced as needed)
- 3/4 cup sugar (adjust based on fruit sweetness)
- 1/4 cup flour or 3 tbsp cornstarch
- 1 teaspoon cinnamon
- 1 tablespoon butter, cubed
- Pastry for a 9-inch double-crust pie
How to make it
- Preheat your oven to 400°F (200°C). Prepare your pie crust and chill it until you are ready to fill it; cold fat is the secret to a flaky crust.
- In a large bowl, mix the fruit with sugar, thickener (flour or starch), and spices. Stir gently so you don’t crush the fruit.
- Fit the bottom crust into the pie plate. Pour the fruit mixture in, ensuring it’s evenly distributed.
- Dot the top of the fruit with the small cubes of butter. This adds a rich silkiness to the internal syrup as it bakes.
- Cover with the top crust. You can do a full cover with steam vents, a lattice, or even use cookie cutters to make decorative shapes for the top.
- Seal the edges by pressing them together with a fork or pinching them with your fingers.
- Bake for 45-55 minutes. If the edges are browning too fast, cover them with a strip of aluminum foil. The pie is done when the crust is golden and the fruit juices are bubbling vigorously. Cool on a wire rack for at least 4 hours before slicing.
How to serve party dip?

Why we love this
Serving a party dip is about more than just putting a bowl on a table; it’s about creating a focal point for social interaction. We love how a well-presented dip invites people to gather, dip, and chat, acting as the ‘water cooler’ of the party. When served with a thoughtful variety of dippers—from salty chips to crisp celery—it becomes a versatile centerpiece that caters to all textures and tastes. The presentation, with pops of color from garnishes, makes the dip look as good as it tastes, turning a simple appetizer into a statement piece.
Ingredients
- Your choice of dip (Rotel, hummus, spinach artichoke)
- Assorted dippers (tortilla chips, pita bread, carrot sticks, sliced baguette)
- Garnishes (chopped herbs, red pepper flakes, extra virgin olive oil)
- Serving vessel (ceramic bowl, hollowed-out bread bowl, or mini slow cooker)
How to make it
- Choose the right temperature vessel. If serving a cold dip, chill the bowl in the freezer for 10 minutes beforehand. For hot dips, use a ceramic dish that retains heat or a small crockpot.
- Create a ‘well’ in the center of the dip using the back of a spoon. This is the perfect place to pour a little extra olive oil or nestle some extra cheese.
- Add a pop of color. Never serve a dip ‘naked.’ Sprinkle with fresh parsley, chives, or a dash of paprika to make it visually appealing.
- Arrange the dippers in a fan shape or in clusters around the bowl. Use a mix of colors and shapes—yellow chips, orange carrots, and green cucumber slices create a beautiful palette.
- Provide a small ‘trash’ bowl nearby if your dippers have tails (like shrimp) or if guests might need napkins.
- Ensure there is a dedicated serving spoon for the dip to discourage double-dipping and keep things hygienic for all your guests.
Conclusion
Building the perfect snack board is less about following strict rules and more about embracing the spirit of the season. By combining these different elements—from the warmth of a grilled veggie platter to the sweet nostalgia of a strawberry pie—you create an experience that feels abundant and intentional. So, clear off the coffee table, put on your favorite playlist, and let the food do the talking. Here’s to a season of easy entertaining and even better memories!