
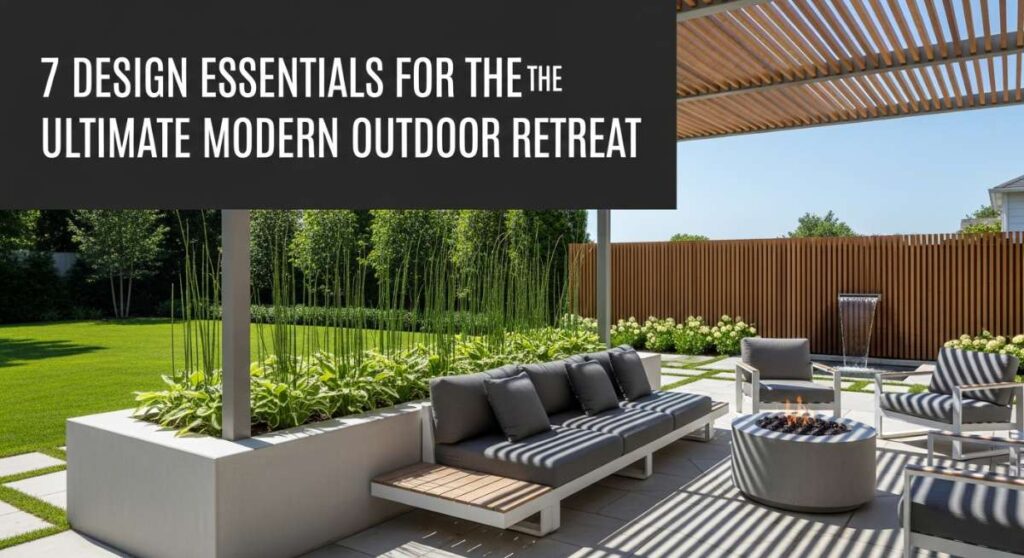
There is a specific kind of magic that happens when you step out of your back door and into a space that feels entirely your own. It’s that first deep breath of crisp air, the way the morning light filters through the leaves of a Japanese maple, and the immediate sense that the chaos of the digital world has finally been muted. We all crave that sanctuary—a place where the boundaries between indoors and out blur into a seamless, soulful retreat.
Creating a modern garden sanctuary isn’t just about choosing the right plants; it’s about designing an experience that nourishes your spirit. Whether you have a sprawling suburban lawn or a tiny urban balcony, the goal is to cultivate a space that invites you to linger, to observe, and to breathe. Today, we’re diving into the essential design elements that transform a patch of dirt into a living masterpiece that reflects your personal style and need for peace.
How to Foster Little Explorers With Fun Backyard Garden Projects

Why we love this
There is nothing quite as rewarding as watching a child’s eyes light up when they discover a wriggling earthworm or the first sprout of a sunflower. This project is about more than just gardening; it is about tactile discovery, the scent of damp soil under tiny fingernails, and the gentle rustle of leaves as kids build their own secret forts. By creating a space specifically for exploration, you are gifting them a lifelong connection to the rhythm of nature, fostering a sense of wonder that can only be found in the mud and the sun.
Essential Elements:
- Kid-sized ergonomic hand trowels and rakes
- Quick-growing seeds like Sunflowers, Radishes, or Snap Peas
- A designated “mud kitchen” or digging zone
- Colorful plant markers made from smooth river stones
- Magnifying glasses for insect observation
How to make it
- Identify a low-traffic corner of the garden that receives at least 6 hours of sunlight; this will be the primary “exploration zone” where children can dig freely without disturbing delicate perennials.
- Prepare the soil by tilling it to a depth of 6 inches, ensuring the “heat level” of the earth is warm to the touch (ideally above 60°F) which indicates it is ready for germination.
- Introduce the “seed scattering” technique: teach children to pinch seeds between two fingers and drop them at the specific depth indicated on the packet, usually about twice the seed’s width.
- Maintain a consistent hydration schedule using a gentle misting setting on the hose; the visual cue for “doneness” or proper saturation is when the soil looks like a dark brownie but doesn’t have standing puddles.
- Set up a “Nature Observation Station” with a magnifying glass; explain the timing of the garden by checking for the visual cue of “true leaves”—the second set of leaves that appear—which signals the plant is successfully established.
How to Transform Your Balcony Into A Lush Sanctuary Using Simple Pots
![]()
Why we love this
Turning a concrete balcony into a green escape is the ultimate urban alchemy. We love the way the breeze catches the fronds of a fern and the intoxicating fragrance of star jasmine trailing up a railing, masking the city sounds below. The texture of terracotta against cool metal creates a sophisticated, layered look that feels both grounded and ethereal. It’s about creating a private cocoon where you can sip your morning coffee surrounded by life, even when you’re stories above the street.
Essential Elements:
- Various sized ceramic, terracotta, or lightweight resin pots
- High-quality organic potting mix with perlite for drainage
- Vertical trellises or wall-mounted planters
- A mix of “thriller, filler, and spiller” plants
- Soft outdoor lighting or fairy lights
How to make it
- Assess the light levels of your balcony throughout the day; full sun (6+ hours) requires heat-tolerant succulents or lavender, while shade (less than 4 hours) is better for lush ferns and hostas.
- Ensure every pot has a drainage hole at the bottom; use a mesh screen over the hole to prevent soil loss while allowing water to flow freely.
- Fill the pots with soil up to 2 inches below the rim; this “headspace” is crucial for watering without overflow.
- Plant your “thriller” (the tall centerpiece) first, then tuck in “fillers” around the base, and finally the “spillers” (trailing plants) at the edge; the visual cue for a perfect density is when no bare soil is visible from the top.
- Water deeply until you see liquid exiting the drainage holes at the bottom; the timing for the next watering is when the top inch of soil feels bone-dry to the finger test.
How to Choose The Perfect Gardening Ensemble For Style And Practicality

Why we love this
There is a profound psychological shift that happens when you put on your “gardening armor.” We love the rugged elegance of a waxed cotton apron and the buttery softness of high-quality leather gloves that protect your hands while still allowing you to feel the earth’s texture. It’s the intersection of fashion and utility—feeling stylish while being prepared for the grit and sweat of garden work makes the entire experience feel like a curated ritual rather than a chore.
Essential Elements:
- Breathable linen or heavy-duty cotton utility shirt
- A wide-brimmed straw or felt hat for UV protection
- Reinforced denim or canvas work pants
- Waterproof rubber boots or leather clogs
- A multi-pocketed gardening apron
How to make it
- Select fabrics based on breathability and durability; linen is excellent for high-heat summer days to wick moisture away from the skin, while waxed canvas provides a visual cue of water resistance for spring planting.
- Choose footwear with a deep tread pattern; the technique for safety involves ensuring you have a firm grip on damp grass or muddy paths to prevent slips.
- Adjust your hat brim to ensure it covers the nape of your neck; the “timing” for this is whenever the sun is at its peak between 10 AM and 4 PM.
- Equip your apron with the essentials: shears in the right pocket, twine in the left, and a phone for photos in the chest pocket; the weight should be balanced across your shoulders to prevent strain.
- After use, clean your ensemble by brushing off dry mud; if the fabric looks “thirsty” or faded, apply a fresh coat of fabric wax to restore its protective sheen and deep color.
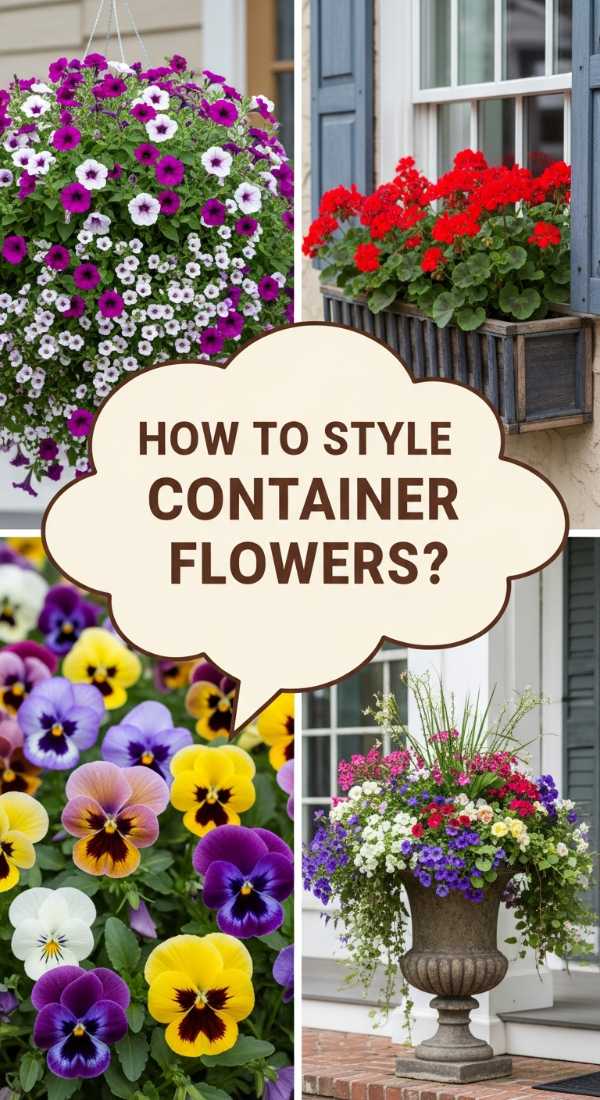
How to Create Radiant Floral Displays Using Seasonal Potted Blooms
Why we love this
A pot overflowing with blooms is like a living bouquet that lasts for weeks. We are obsessed with the way seasonal flowers capture the essence of the moment—the fiery oranges of autumn marigolds or the soft, pillowy pastels of spring ranunculus. The scent is often the first thing that hits you: a sweet, heady perfume that follows you as you walk by. It’s an instant mood lifter, providing a concentrated burst of color that draws the eye and invites pollinators to dance through your space.
Essential Elements:
- Complementary color palette (monochromatic or high contrast)
- Slow-release organic flower fertilizer
- Varying heights of flowering plants
- A focal point vessel (vintage urn or modern stone pot)
- Sharp deadheading snips
How to make it
- Select a color theme; for a “warm” look, use reds and yellows, or for a “cool” sanctuary, use blues and whites. Ensure the plants have similar “heat” requirements for sun exposure.
- Loosen the root balls of your nursery plants gently; the technique is to massage the roots so they can spread easily into the new potting medium.
- Incorporate a tablespoon of slow-release fertilizer into the top layer of soil; this provides the “fuel” for consistent blooming over the next 3 months.
- Deadhead spent blooms daily; the visual cue for this is when the petals begin to shrivel and lose their vibrant color. Snipping just above the first set of leaves encourages the plant to “cook up” new buds.
- Monitor for “doneness” of hydration; during peak summer, potted florals may need watering twice daily. The visual cue is slight wilting of the leaves, which should be addressed immediately.
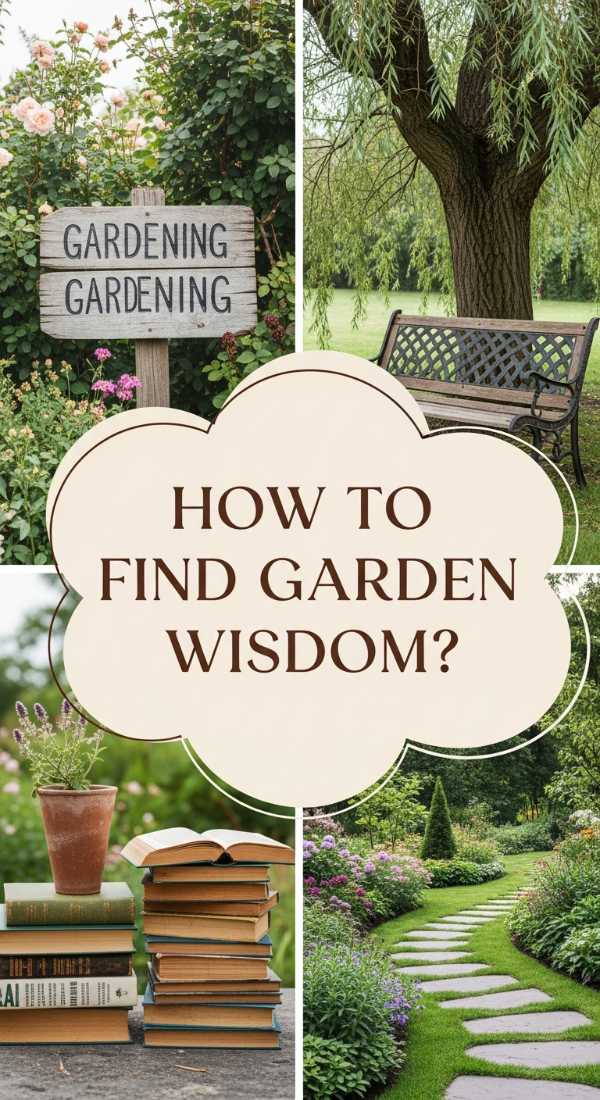
How to Cultivate Daily Inspiration With Meaningful Nature Wisdom
Why we love this
A garden is the ultimate teacher of patience and resilience. We love incorporating “wisdom corners”—a simple bench, a weathered stone with an inscription, or just a quiet spot to observe the cycle of growth and decay. It’s about the sensory details: the cooling sensation of a stone seat, the rhythmic sound of a bamboo water feature, and the realization that everything in nature has a season. This design element turns your garden from a physical space into a mental refuge where you can find clarity and daily inspiration.
Essential Elements:
- A comfortable outdoor seating option (bench, hammock, or floor cushion)
- A journal and weatherproof pen
- Wind chimes or a small solar-powered fountain
- Books on botany or philosophy
- A clear “threshold” (like a gate or archway)
How to make it
- Position your “reflection zone” in a spot that offers a “framed view” of the garden; the visual cue is a sightline that feels balanced and peaceful to your eyes.
- Implement a “digital-free” rule for this space; the technique is to leave all electronics inside to allow your ears to tune into the natural “timing” of the birds and wind.
- Set a daily ritual of spending 10 minutes in the space; use this time to observe the subtle changes in plant growth or the “heat” of the sun as it moves across the yard.
- Keep a garden journal nearby to record visual cues of the changing seasons, such as the date the first rose opened or the day the leaves began to turn.
- Maintain the space by keeping it free of clutter; a clean, minimal area serves as a “cool” palette for a busy mind to reset.
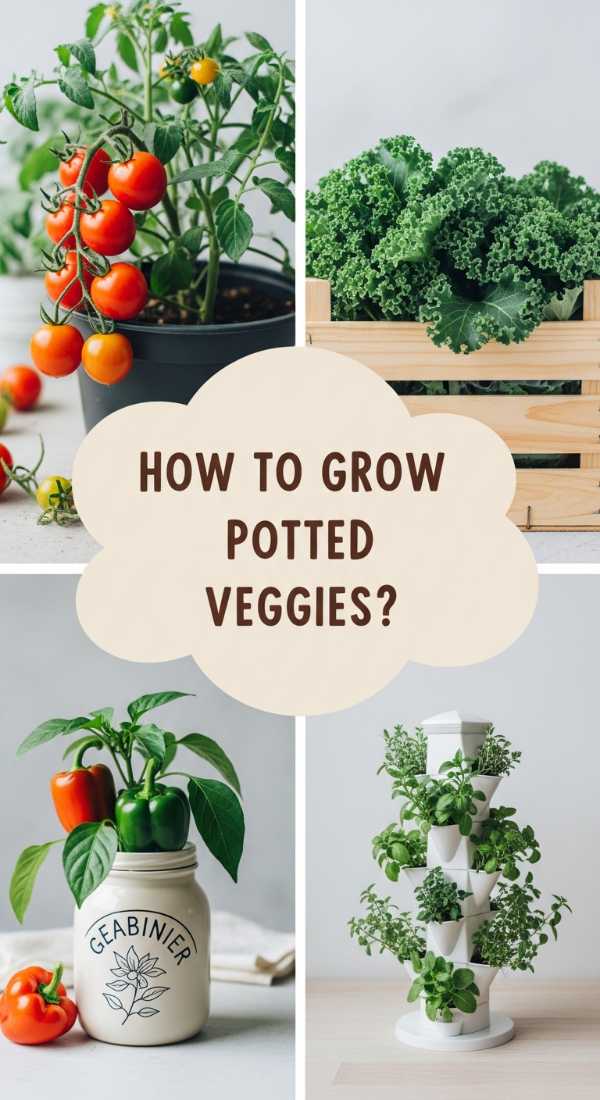
How to Harvest Fresh Homegrown Produce From Your Very Own Containers
Why we love this
There is an incomparable satisfaction in eating something you grew with your own two hands. We love the “garden-to-table” ritual: the snapping sound of a fresh green bean, the earthy aroma of basil leaves crushed between fingers, and the burst of sweetness from a sun-warmed cherry tomato. Container gardening for food is brilliant because it makes the harvest accessible and manageable, allowing you to create a tiny, edible landscape that tastes as good as it looks.
Essential Elements:
- Food-grade containers (minimum 5-gallon for larger vegetables)
- High-nitrogen organic compost
- Vegetable starts (Tomatoes, Peppers, Herbs, or Kale)
- Support structures like tomato cages or bamboo stakes
- A harvesting basket
How to make it
- Fill your containers with a mix of potting soil and 20% organic compost; the visual cue for rich soil is a dark, chocolate-brown color and a crumbly texture.
- Plant your vegetables at the appropriate depth; for tomatoes, the technique is to bury the stem up to the first set of leaves to encourage a massive root system.
- Monitor the “heat levels” of the soil; most summer vegetables require soil temperatures to stay between 70-85°F for peak fruit production.
- Provide consistent moisture; the timing is critical during fruiting. If the soil dries out completely while fruit is ripening, it can lead to “blossom end rot.”
- Harvest based on visual and tactile cues: tomatoes should be deeply colored and slightly soft to a gentle squeeze, while herbs should be harvested just before they flower for the highest essential oil content.
How to Select Essential Equipment For A Thriving Green Space
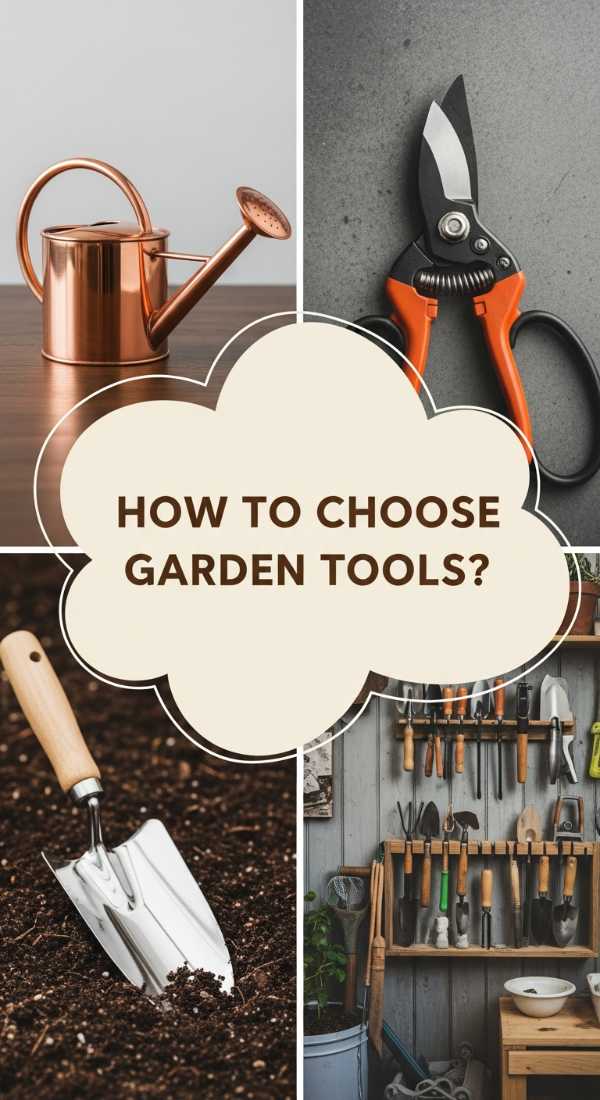
Why we love this
High-quality tools are the unsung heroes of a beautiful garden. We love the feel of a well-balanced hori-hori knife in the hand, the precision of bypass pruners that cut through stems like butter, and the gleaming copper of a watering can that doubles as garden art. Investing in essential equipment isn’t just about making the work easier; it’s about the tactile pleasure of using objects that are built to last a lifetime, turning every task into a deliberate, satisfying motion.
Essential Elements:
- High-carbon steel bypass pruners
- A multi-purpose Hori-Hori garden knife
- A sturdy, ergonomic digging spade
- A high-quality 50ft hose with solid brass fittings
- A durable tool roll or caddy for organization
How to make it
- Select tools with wooden or ergonomic handles; the technique for testing fit is to hold the tool and ensure your wrist remains in a neutral, straight position to prevent repetitive strain.
- Sharpen your blades regularly using a whetstone; the visual cue for a “sharp” edge is a bright, thin line along the blade that effortlessly slices through a piece of paper.
- Oil your tools after cleaning to prevent rust; the technique involves wiping a thin layer of linseed or mineral oil over the metal parts after the “doneness” of the cleaning phase (removing all dirt).
- Store tools in a dry, ventilated area; the timing for this is immediately after every use to ensure the metal doesn’t react with moisture in the air.
- Check the tension on your pruners; the visual cue for a perfect adjustment is that the blades pass each other closely without rubbing, allowing for a “clean cook” on the plant stem (a sharp, flat cut that heals quickly).
Conclusion
Creating the ultimate modern outdoor retreat is a journey of small, intentional choices. By focusing on these seven design essentials, you aren’t just decorating a yard; you are building a sanctuary that evolves with you. From the practical joy of homegrown produce to the quiet wisdom found in a morning moment of reflection, your garden is a testament to the beauty of slow living. So, grab your gloves, step outside, and start cultivating the retreat you’ve always dreamed of. Your sanctuary is waiting.