

There is something truly magical about the way food brings us together, especially when it’s laid out in a way that feels both effortless and abundant. We’ve all been there—trying to host the perfect gathering while secretly stressing in the kitchen, missing out on the laughter and the stories. But what if I told you that the secret to a viral-worthy spread isn’t hours of labor, but the art of the ‘Simple Food Board’? It’s about textures, colors, and those classic recipes that make everyone reach for seconds.
Today, I’m sharing my ultimate guide to creating a food board that looks like it belongs on a high-end Pinterest feed but takes only minutes to assemble. We are diving into ten versatile, crowd-pleasing components that transform a plain table into a feast for the senses. From the sizzle of the grill to the refreshing clink of ice in a glass, let’s build something beautiful together that celebrates the joy of slow afternoons and good company.
How to make creamy rotel dip?

Why we love this
This dip is the ultimate soul-warming comfort food, offering a velvety, molten texture that clings perfectly to every chip. The aroma of melted cheese mingling with the zesty kick of diced tomatoes and green chilies creates an irresistible scent that fills the room instantly. Each bite is a harmonious blend of creamy richness and a subtle, lingering heat that keeps you coming back for just one more scoop. It’s the kind of dish that disappears in minutes because it feels like a warm hug for your taste buds.
Ingredients
- 16 oz block of processed cheese (like Velveeta), cubed
- 1 can (10 oz) Ro-Tel Diced Tomatoes and Green Chilies, undrained
- 1/2 lb ground breakfast sausage or lean ground beef
- 1/2 tsp taco seasoning
- Fresh cilantro for garnish
- Sturdy tortilla chips for serving
How to make it
- Begin by browning your choice of protein in a medium skillet over medium-high heat. Use a wooden spoon to crumble the meat into small, uniform pieces, ensuring even cooking and a better texture in the final dip.
- Cook the meat until it is deeply browned and no longer pink, then carefully drain the excess grease into a heat-safe container to ensure your dip remains creamy rather than oily.
- In a slow cooker or a heavy-bottomed saucepan over low heat, combine the cubed cheese and the entire can of Ro-Tel (including the juice, which provides essential acidity and flavor).
- Stir the mixture frequently with a silicone spatula to prevent the cheese from scorching on the bottom of the pan; you want a slow, gentle melt until the consistency is completely smooth and glossy.
- Fold in the browned meat and taco seasoning, stirring until fully incorporated and heated through. Serve immediately in a warmed bowl, garnished with fresh cilantro for a pop of color.
How to cook fresh summer pasta?

Why we love this
Nothing captures the essence of a sun-drenched afternoon quite like a bowl of fresh summer pasta, bursting with the brightness of garden-picked ingredients. The silky strands of pasta are coated in a light, fragrant veil of olive oil and garlic, allowing the natural sweetness of blistered cherry tomatoes to take center stage. As you toss the hot pasta with fresh basil, the herb releases an intoxicating, peppery aroma that signals a meal made with love. It feels light and nourishing, leaving you satisfied without that heavy, weighed-down feeling of winter sauces.
Ingredients
- 1 lb spaghetti or linguine
- 2 cups cherry tomatoes, halved
- 4 cloves garlic, thinly sliced
- 1/4 cup high-quality extra virgin olive oil
- 1/2 cup fresh basil leaves, torn
- 1/2 cup grated Parmesan cheese
- Red pepper flakes, salt, and black pepper to taste
How to make it
- Bring a large pot of heavily salted water to a rolling boil; the water should taste like the sea to properly season the pasta from the inside out.
- Add the pasta and cook until it is ‘al dente’—firm to the bite—usually about 1-2 minutes less than the package instructions. Reserve one cup of the starchy pasta water before draining.
- While the pasta cooks, heat olive oil in a wide skillet over medium heat. Add the sliced garlic and red pepper flakes, sautéing for about 1 minute until the garlic is golden and fragrant but not burnt.
- Toss in the cherry tomatoes and increase the heat slightly. Cook for 4-5 minutes, stirring occasionally, until the tomatoes begin to burst and release their juices, creating a rustic, natural sauce.
- Transfer the cooked pasta directly into the skillet. Add a splash of the reserved pasta water and the Parmesan cheese, tossing vigorously over low heat to emulsify the oil and water into a silky coating. Finish by folding in the fresh basil and serving immediately.
How to make refreshing lemonade?

Why we love this
There is a nostalgic, crisp satisfaction in a glass of truly homemade lemonade that bottled versions simply cannot replicate. The sharp, tongue-tingling acidity of freshly squeezed lemons is balanced by a smooth sweetness, creating a drink that is as beautiful to look at as it is to sip. Imagine the condensation beading on a cold glass while the scent of citrus oils from the zest invigorates your senses on a humid day. It is the ultimate palate cleanser and the golden highlight of any outdoor food board.
Ingredients
- 1 cup freshly squeezed lemon juice (about 6-8 lemons)
- 3/4 cup granulated sugar (adjust to taste)
- 1 cup hot water (for simple syrup)
- 4 cups cold filtered water
- Fresh mint sprigs and lemon slices for garnish
- Plenty of ice
How to make it
- Start by making a simple syrup, which ensures the sugar dissolves completely and doesn’t settle at the bottom of the pitcher. Combine the sugar and 1 cup of hot water in a small bowl, stirring until the liquid is perfectly clear.
- Juice your lemons until you have a full cup of juice. For maximum yield, roll the lemons on the counter with firm pressure before cutting to break the internal membranes.
- In a large glass pitcher, combine the freshly squeezed lemon juice and the prepared simple syrup. Stir well to integrate the flavors.
- Add 4 cups of cold filtered water to the pitcher. Taste the mixture; if it is too tart, add a tablespoon more sugar; if too sweet, add a squeeze more lemon.
- Chill the lemonade in the refrigerator for at least one hour. When ready to serve, fill glasses with ice first, pour the lemonade over, and garnish with a sprig of mint and a thin lemon wheel for that viral aesthetic.
How to grill perfect kabobs?

Why we love this
Grilling kabobs is an exercise in sensory delight, from the rhythmic chopping of vibrant vegetables to the sizzle of marinated meat hitting the hot grates. The smoky char from the grill adds a layer of complexity to the sweetness of bell peppers and red onions, creating a charred-yet-tender texture that is incredibly satisfying. Each skewer is like a miniature work of art, offering a rainbow of colors that instantly elevates the visual appeal of your food board. The aroma of caramelizing proteins and toasted spices wafting through the air is the ultimate invitation to eat.
Ingredients
- 1.5 lbs sirloin steak or chicken breast, cut into 1-inch cubes
- 2 bell peppers (different colors), cut into chunks
- 1 large red onion, cut into wedges
- 1 cup zucchini rounds
- 1/4 cup olive oil mixed with 2 tbsp soy sauce and 1 tbsp honey
- Wooden or metal skewers
How to make it
- If using wooden skewers, soak them in water for at least 30 minutes prior to grilling to prevent them from catching fire or splintering.
- Prepare your marinade by whisking olive oil, soy sauce, honey, and any preferred spices in a bowl. Toss the meat cubes in the marinade and let them sit for at least 20 minutes to tenderize.
- Thread the ingredients onto the skewers, alternating between meat and vegetables. Do not pack them too tightly; leaving a tiny bit of space between items allows the heat to circulate and cook everything evenly.
- Preheat your grill to medium-high heat (about 400°F). Lightly oil the grates to ensure the kabobs don’t stick when you try to flip them.
- Place the skewers on the grill and cook for 8-12 minutes, turning a quarter-turn every 3 minutes. Look for clear grill marks and an internal temperature of 145°F for steak or 165°F for chicken. Let them rest for 5 minutes before placing on the board.
How to make crunchy salad?
Why we love this
A truly great salad is all about the ‘crunch factor’—that satisfying snap that makes every forkful feel vibrant and alive. This isn’t just a side dish; it’s a textural masterpiece where crisp greens meet the snap of fresh cucumbers and the nutty toasted notes of seeds or nuts. The dressing should be sharp and acidic, cutting through the richness of other board components and refreshing the palate with every bite. It brings a necessary brightness and a cool, garden-fresh element that balances the heavier grilled items on your spread.
Ingredients
- 1 head of Romaine lettuce, chopped
- 1 English cucumber, sliced into half-moons
- 1/2 cup radishes, thinly sliced
- 1/4 cup toasted sunflower seeds or slivered almonds
- 1/2 cup crumbled feta cheese
- Dressing: 3 tbsp olive oil, 1 tbsp lemon juice, 1 tsp Dijon mustard
How to make it
- Wash your lettuce in very cold water and use a salad spinner to get it as dry as possible. Excess water is the enemy of crunch, as it dilutes the dressing and makes leaves soggy.
- In a large wooden bowl, whisk together the olive oil, lemon juice, and Dijon mustard until the dressing is emulsified and thickened slightly. Season with a pinch of sea salt.
- Add the chopped Romaine, cucumbers, and radishes to the bowl. Use salad tongs to gently toss the vegetables, ensuring every leaf is lightly and evenly coated in the vinaigrette.
- Top the salad with the feta cheese and the toasted seeds or nuts just before serving to maintain their maximum crispness.
- For a professional touch, chill the serving bowl in the freezer for ten minutes before assembling to keep the salad ultra-crisp during the party.
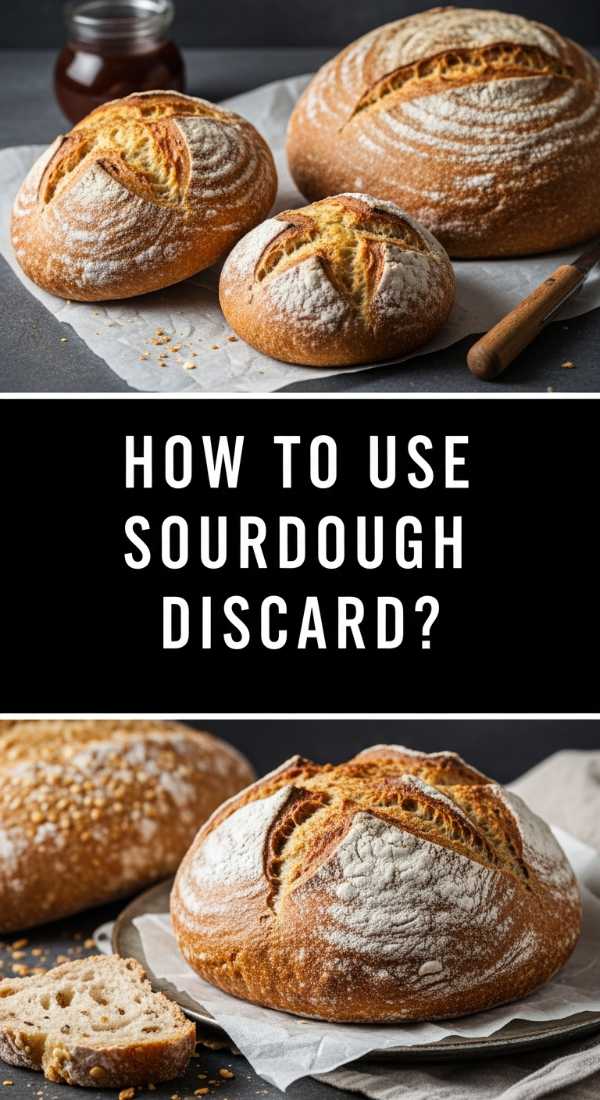
How to use sourdough discard?

Why we love this
There is a rustic, artisanal charm to using sourdough discard that feels both sustainable and deeply flavorful. The discard adds a subtle, sophisticated tang and a beautiful fermented depth to baked goods that regular flour just can’t match. When fried into simple crackers or flatbreads for a food board, it develops a bubbly, golden-brown crust that shatters perfectly when bitten. It smells like a traditional bakery, bringing an element of ‘slow food’ craft to your table with minimal effort.
Ingredients
- 1 cup sourdough discard (unfed)
- 2 tbsp melted butter or olive oil
- 1/2 tsp sea salt
- 1 tsp dried herbs (like rosemary or thyme)
- Flaky salt for topping
How to make it
- Preheat your oven to 325°F (165°C) and line a large baking sheet with parchment paper or a silicone baking mat.
- In a medium bowl, mix the sourdough discard with the melted butter or oil and the dried herbs until the mixture is smooth and spreadable.
- Pour the mixture onto the prepared baking sheet and use an offset spatula to spread it as thinly and evenly as possible. The thinner the layer, the crispier the final cracker will be.
- Bake for 10 minutes, then remove from the oven and use a pizza cutter to score the dough into squares or diamonds. This ensures clean breaks once fully baked.
- Return to the oven for another 15-20 minutes until the edges are golden brown and the center is firm. Let them cool completely on the pan to reach maximum crunch before snapping them apart for the board.
How to brew tasty sun tea?

Why we love this
Sun tea is the ultimate low-energy, high-reward beverage that feels like a science experiment and a summer ritual all in one. By letting the gentle heat of the sun slowly extract the tea’s essence, you avoid the bitterness that can sometimes come from boiling water. The result is a smooth, mellow amber liquid that tastes like pure sunshine and memories of childhood summers. It’s a slow-steeped luxury that adds a beautiful, translucent glow to your drink station when served in a clear glass dispenser.
Ingredients
- 8 black or herbal tea bags (tags removed)
- 1 gallon of cold filtered water
- 1 large glass jar with a tight-fitting lid
- Optional: Fresh peach slices or sprigs of mint
- Honey or agave for sweetening
How to make it
- Fill a thoroughly cleaned one-gallon glass jar with cold filtered water. It is important to use glass rather than plastic to avoid any chemical leaching from the heat of the sun.
- Place the tea bags into the water, draped over the edge so the strings stay outside, and secure the lid tightly to keep out any debris.
- Place the jar in a spot that receives direct, uninterrupted sunlight for at least 3 to 5 hours. You will see the color slowly deepen from clear to a rich, dark amber.
- Once the tea has reached your desired strength, remove the tea bags immediately. Do not leave them in for more than 5 hours to prevent bacterial growth.
- Stir in your sweetener while the tea is still slightly warm from the sun, then refrigerate immediately. Serve over ice with fresh fruit garnishes for a viral-ready look.
How to make summer dips?

Why we love this
Summer dips are the social glue of any food board, providing a variety of flavors and textures that encourage guests to linger and graze. Whether it’s a cool, garlicky tzatziki or a bright, zesty mango salsa, these dips offer a refreshing contrast to the warmth of the outdoors. They are visually stunning when placed in small, colorful ceramic bowls, nestled among piles of crunchy veggies and toasted breads. The variety ensures there is something for everyone, making the board feel inclusive and thoughtfully curated.
Ingredients
- 1 cup Greek yogurt (for Tzatziki base)
- 1/2 cucumber, grated and squeezed dry
- 2 cloves garlic, minced
- 1 tbsp fresh dill, chopped
- 1 ripe mango, diced (for Salsa base)
- 1/4 red onion, finely minced
- 1 jalapeño, seeded and minced
- Juice of 1 lime
How to make it
- For the Tzatziki: Combine the Greek yogurt, minced garlic, and dill in a bowl. It is crucial to squeeze the grated cucumber in a kitchen towel to remove all liquid before adding it, otherwise, the dip will become watery. Stir and chill for 30 minutes.
- For the Mango Salsa: Combine the diced mango, red onion, jalapeño, and lime juice in a separate bowl. Let the mixture sit at room temperature for 15 minutes to allow the lime juice to macerate the onions and soften their bite.
- Season both dips with a pinch of salt to taste, which helps to marry the disparate flavors.
- Choose small, decorative ramekins to hold the dips, ensuring they are shallow enough for easy dipping.
- Arrange the bowls on the board first, then build the rest of your ingredients around them to create a full, abundant appearance.
How to pack picnic snacks?
Why we love this
There is a specific joy in unpacking a perfectly curated picnic basket to find a treasure trove of bite-sized treats. The key is portability without sacrificing style—think individual portions that look like miniature versions of your main board. These snacks are designed to be eaten with your fingers while sitting on a blanket, combining convenience with gourmet flair. The mix of salty nuts, sweet dried fruits, and robust cheeses creates a complex flavor profile that makes even a simple park visit feel like a special occasion.
Ingredients
- Hard cheeses (like Manchego or sharp Cheddar), pre-cubed
- Dry salami or prosciutto rosettes
- Marinated olives (drained)
- Handful of Marcona almonds
- Dried apricots or figs
- Small baguette slices or sturdy crackers
How to make it
- Select a container with compartments or use small reusable silicone cups to keep different textures separate, preventing crackers from getting soft.
- Slice your hard cheeses into uniform cubes or triangles, making them easy to grab without needing a knife on site.
- Fold pieces of prosciutto into ‘rosettes’ or roll salami tightly; this not only looks beautiful but prevents the meat from sticking together in a large clump.
- Place wet items like olives or pickles in a small, leak-proof jar with a tight seal to ensure the rest of your snacks stay dry and crisp.
- Pack the heaviest items at the bottom of your basket or cooler bag and place the crackers/bread on top to avoid crushing. Always include a small cloth napkin for easy cleanup.
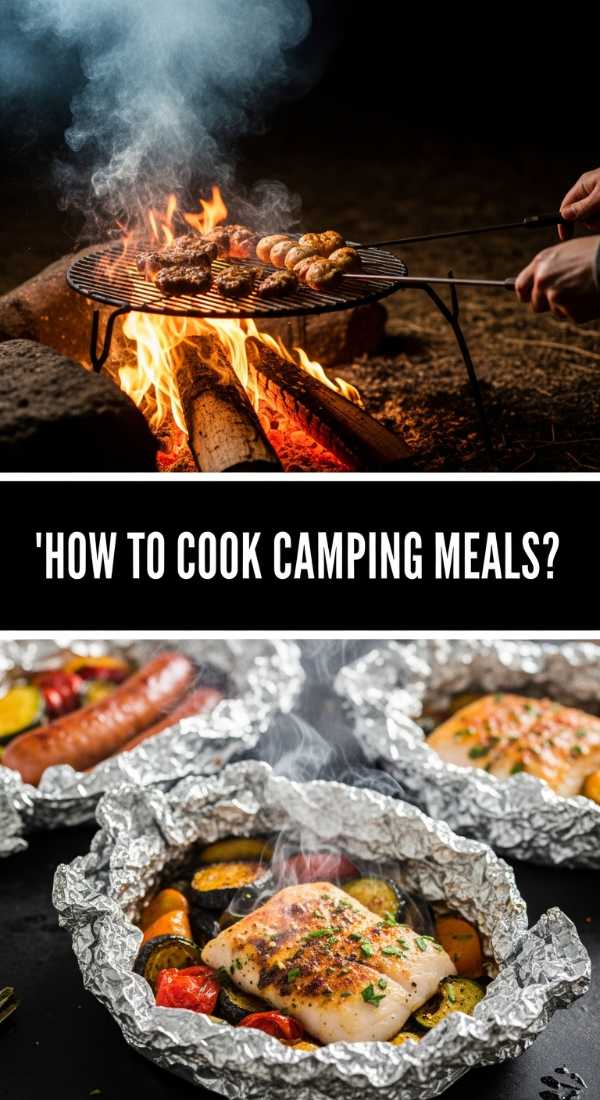
How to cook camping meals?
[IMAGE_10]
Why we love this
Cooking over an open flame adds a primal, smoky depth of flavor that a kitchen stove simply can’t replicate. Camping meals are all about simplicity and the rugged beauty of the outdoors, where the scent of pine needles meets the aroma of sizzling bacon or charring vegetables. There is a profound sense of satisfaction in preparing a meal with limited tools, focusing on high-quality ingredients and the steady heat of the coals. It turns dinner into an event, a shared experience that tastes better simply because you’re under the stars.
Ingredients
- 4 large sheets of heavy-duty aluminum foil
- 1 lb smoked sausage, sliced
- 2 large potatoes, diced small
- 1 cup green beans, trimmed
- 2 tbsp butter or oil
- 1 tbsp ‘Everything’ seasoning or Cajun spice
How to make it
- Prepare four large squares of heavy-duty foil. It must be heavy-duty to withstand the direct heat of the coals without tearing.
- In a large bowl, toss the sliced sausage, diced potatoes, and green beans with the oil and spices until everything is well-coated. Cutting the potatoes small is vital so they cook at the same rate as the sausage.
- Divide the mixture evenly between the foil sheets. Top each portion with a small pat of butter for extra richness and moisture.
- Fold the foil over the food and crimp the edges tightly to create a sealed pouch. This ‘hobo pack’ style allows the food to steam in its own juices while the exterior gets slightly charred.
- Place the pouches on a grate over hot coals (not active flames) and cook for 20-25 minutes, flipping once halfway through. Carefully open a corner to check the potatoes for tenderness before removing from the heat.
Conclusion
Building a viral-worthy food board is less about professional culinary skills and more about the love you put into the presentation and the freshness of your ingredients. By combining these ten elements—from the creamy dip to the campfire foil packs—you create a tapestry of flavors that invites people to slow down and enjoy the moment. Remember, the best boards are the ones that get a little messy as friends dig in, so don’t worry about perfection. Grab a board, pick a few of these recipes, and start creating your own delicious memories today!