
Why Everyone Is Obsessed With These 10-Minute Appetizer Boards
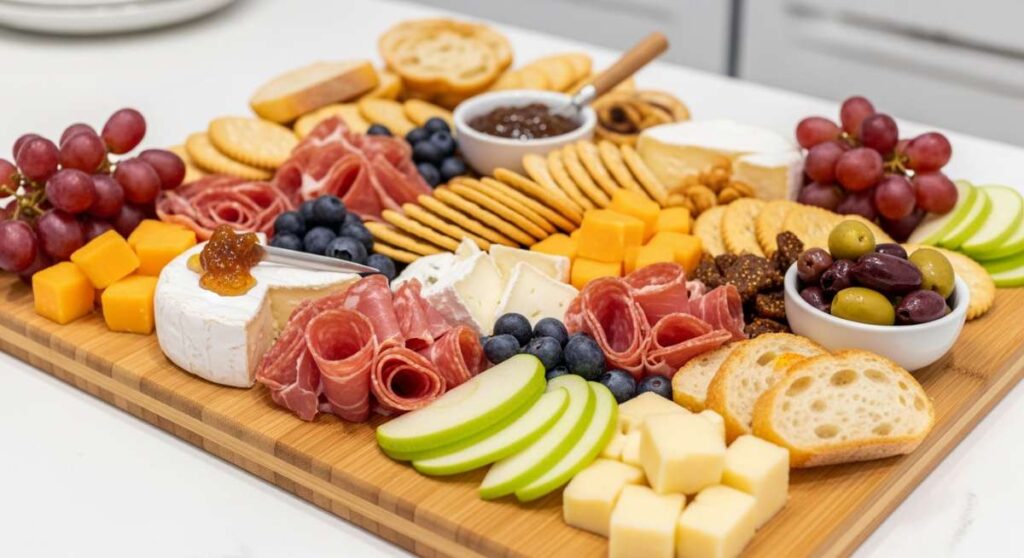
There is something inherently magical about a gathering that feels effortless, where the food looks like a work of art but doesn’t require you to spend your entire evening tucked away in the kitchen. We have all been there—trying to balance a glass of wine in one hand while frantically checking the oven with the other. But the viral rise of the ’10-minute appetizer board’ has changed the game, turning simple ingredients into a communal feast that invites everyone to dig in and stay a while.
These boards aren’t just about eating; they are about the experience of sharing. They represent a shift toward slow living and intentional hosting, where the focus is on vibrant colors, fresh spring flavors, and the joy of a table filled with variety. Whether you are hosting a breezy backyard brunch or a cozy sunset dinner, these quick-prep elements bring a touch of gourmet flair to your spread without the stress of a traditional three-course meal.
How to make lemon chicken

Why we love this
This lemon chicken is the ultimate bright and zesty centerpiece for any board, offering a tender bite that practically melts in your mouth. The aroma of sizzling citrus and toasted garlic wafts through the air as the chicken develops a beautiful golden-brown crust, locking in all those savory juices. It feels incredibly light yet satisfying, providing a protein-packed punch that pairs beautifully with crisp greens or salty cheeses. Every bite is a refreshing burst of sunshine that elevates the entire spread with its vibrant, tangy profile.
Ingredients
- 2 large chicken breasts, thinly sliced into strips
- 2 tablespoons olive oil
- 1 large lemon, zested and juiced
- 3 cloves garlic, minced
- 1 teaspoon dried oregano
- Salt and cracked black pepper to taste
- Fresh parsley for garnish
How to make it
- Begin by patting your chicken strips completely dry with a paper towel; this is the secret to achieving that perfect golden-brown sear rather than steaming the meat.
- In a medium glass bowl, whisk together the olive oil, lemon juice, lemon zest, minced garlic, oregano, salt, and pepper to create a quick, punchy marinade.
- Toss the chicken strips in the marinade, ensuring every piece is thoroughly coated, and let it sit at room temperature for about 10 minutes to absorb the flavors.
- Heat a large cast-iron or heavy-bottomed skillet over medium-high heat until a drop of water sizzles instantly upon contact.
- Place the chicken strips in the pan in a single layer, making sure not to crowd them; cook for 3-4 minutes on the first side without moving them until a deep golden crust forms.
- Flip the strips and cook for another 2-3 minutes until the internal temperature reaches 165°F (74°C) and the chicken is firm to the touch.
- Remove from the heat immediately and garnish with a sprinkle of fresh parsley and an extra squeeze of lemon before arranging on your board.
How to grill spring salmon

Why we love this
Nothing says ‘spring’ quite like the sight of a perfectly grilled piece of salmon, its pink flesh flaking gently under the pressure of a fork. The smokiness from the grill creates a sophisticated contrast against the rich, buttery fat of the fish, while the fresh herbs add a layer of earthy complexity. It’s a dish that looks incredibly expensive and high-effort but actually relies on the natural quality of the seafood and just a few minutes of high heat. It adds a luxurious, velvety texture to your appetizer board that guests will gravitate toward instantly.
Ingredients
- 1 lb salmon fillet, skin-on
- 1 tablespoon olive oil
- 1 tablespoon fresh dill, chopped
- 1 teaspoon sea salt
- 1/2 teaspoon black pepper
- 1 lemon, sliced into rounds
How to make it
- Preheat your grill to a steady medium-high heat (about 400°F) and ensure the grates are meticulously cleaned and lightly oiled to prevent the delicate fish from sticking.
- Brush the flesh side of the salmon fillet with olive oil and season generously with sea salt, cracked pepper, and half of the fresh dill.
- Place the salmon onto the grill grates skin-side down; this skin acts as a protective barrier that keeps the flesh moist while it renders into a crispy, delicious layer.
- Close the grill lid and cook for approximately 6-8 minutes, watching for the color to change from translucent pink to an opaque, pale pink about halfway up the side of the fillet.
- Carefully flip the salmon using a wide spatula and grill for an additional 2-3 minutes if you prefer a charred finish on the top, or simply leave it skin-side down until cooked through.
- Check for doneness by pressing the thickest part of the fish; it should feel slightly firm but give way to flakes easily.
- Remove from the grill, let it rest for 2 minutes to allow the juices to redistribute, and top with fresh lemon rounds and the remaining dill.
How to make spring salad
Why we love this
This spring salad is a masterclass in textures, combining the delicate crunch of butter lettuce with the sharp snap of fresh radishes and the sweetness of young peas. It acts as the palate cleanser for your board, providing a cool, refreshing break between the richer, grilled elements. The vibrant green hues make the board pop visually, signaling the arrival of warmer weather and fresh harvests. It’s light, airy, and dressed in a simple vinaigrette that enhances rather than masks the natural, grassy sweetness of the seasonal vegetables.
Ingredients
- 4 cups mixed spring greens (mache, arugula, butter lettuce)
- 1/2 cup fresh peas (blanched or raw)
- 3 radishes, thinly sliced
- 1/4 cup crumbled goat cheese
- 3 tablespoons extra virgin olive oil
- 1 tablespoon white balsamic vinegar
- 1 teaspoon honey
- Salt and pepper
How to make it
- Wash your greens in ice-cold water and use a salad spinner to get them bone-dry; wet leaves will cause the dressing to slide off and result in a soggy salad.
- In a small jar, combine the olive oil, white balsamic vinegar, honey, salt, and pepper, shaking vigorously until the mixture is fully emulsified and thickened.
- Place the dried greens into a large, shallow wooden bowl that allows for easy tossing without bruising the leaves.
- Add the thinly sliced radishes and fresh peas to the greens, distributing them evenly for a consistent crunch in every bite.
- Drizzle about half of the dressing over the vegetables and use your hands or light tongs to gently lift and turn the salad until every leaf has a faint, glistening coat.
- Taste a leaf and add more dressing or a pinch of salt if needed, ensuring the balance of acid and sweetness is just right.
- Transfer the salad to your board and top with the crumbled goat cheese right before serving to maintain its creamy texture.
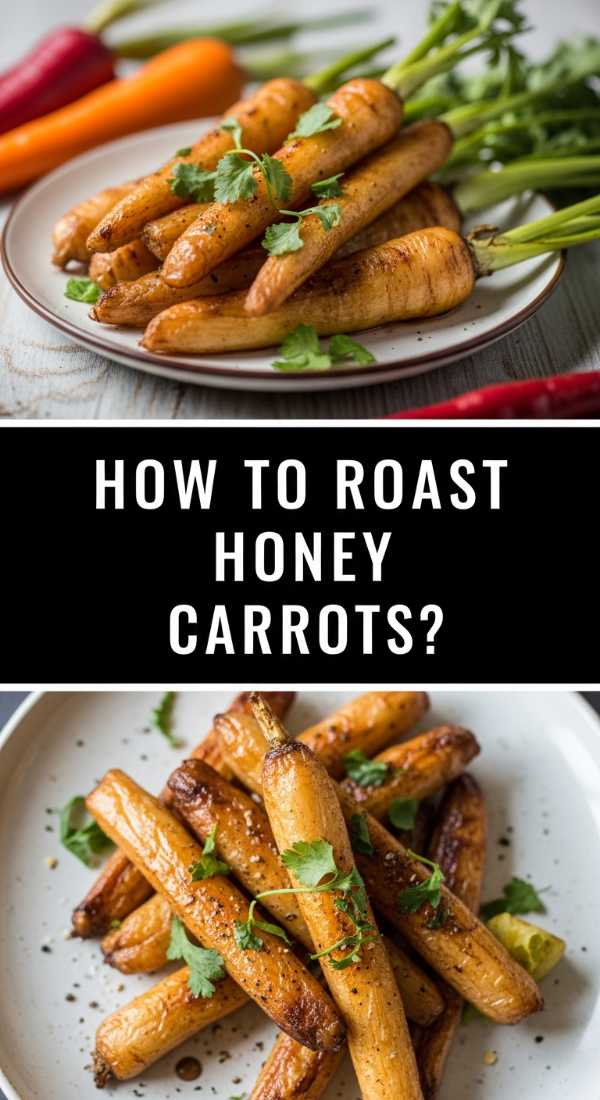
How to roast honey carrots

Why we love this
Roasting carrots with a touch of honey transforms them from a humble root vegetable into a candy-like treat that adds a deep, caramelized warmth to your board. The edges become slightly charred and chewy, while the centers remain tender and bursting with concentrated earthy sweetness. The aroma of bubbling honey and toasted thyme is intoxicating, drawing everyone to the table before the board is even finished. These carrots provide a beautiful structural element to the platter, with their long, elegant shapes and vibrant orange glow.
Ingredients
- 1 bunch heirloom or baby carrots, tops trimmed to 1 inch
- 2 tablespoons honey
- 1 tablespoon melted butter
- 1/2 teaspoon cumin
- Fresh thyme sprigs
- Flaky sea salt
How to make it
- Preheat your oven to 400°F (200°C) and line a rimmed baking sheet with parchment paper to catch any honey drips that might burn.
- Scrub the carrots thoroughly but avoid peeling them if they are young and tender, as the skin adds a rustic texture and holds the glaze better.
- In a small bowl, whisk together the melted butter, honey, and cumin until smooth and pourable.
- Place the carrots on the prepared baking sheet and pour the honey mixture over them, using your hands to roll them around until they are completely lacquered.
- Spread the carrots out so they aren’t touching; this ensures the hot air can circulate around each carrot to caramelize the sugars evenly.
- Roast for 18-22 minutes, tossing them halfway through the cooking time, until they are tender when pierced with a fork and the honey has turned into a sticky glaze.
- Remove from the oven and immediately sprinkle with flaky sea salt and fresh thyme leaves while the glaze is still hot and tacky.
How to cook garlic shrimp

Why we love this
Garlic shrimp is the ultimate crowd-pleaser, offering a succulent, snappy texture and a flavor profile that is punchy, savory, and undeniably addictive. The sight of large, pink shrimp swimming in a pool of golden, garlic-infused butter is enough to make anyone’s mouth water instantly. It adds a Mediterranean flair to the board, making it feel like an upscale seaside escape. The richness of the butter is perfectly balanced by a sharp hit of lemon and the freshness of flat-leaf parsley, creating a balanced bite every time.
Ingredients
- 1 lb large shrimp, peeled and deveined
- 4 tablespoons unsalted butter
- 5 cloves garlic, smashed and minced
- 1/2 teaspoon red pepper flakes (optional)
- Juice of half a lemon
- Fresh parsley, finely chopped
How to make it
- Start with shrimp that are completely thawed and patted dry; moisture is the enemy of a good sear and will cause the shrimp to boil in their own juices.
- Place a large skillet over medium heat and melt the butter until it begins to foam and turn slightly golden.
- Add the minced garlic and red pepper flakes to the butter, stirring constantly for about 1 minute until the garlic is fragrant but not browned; burnt garlic will turn the entire dish bitter.
- Increase the heat to medium-high and add the shrimp to the pan in a single layer.
- Cook for 2 minutes on the first side until the edges turn pink and opaque, then flip each shrimp individually.
- Cook for another 1-2 minutes on the second side just until the shrimp form a ‘C’ shape; if they curl into an ‘O’ shape, they are overcooked and will be rubbery.
- Turn off the heat, stir in the lemon juice and fresh parsley, and toss the shrimp in the garlic butter before piling them into a small bowl on your board.
How to make creamy pesto

Why we love this
This creamy pesto is a velvety, herbaceous dream that serves as the perfect dipping sauce or spread for everything else on your appetizer board. It combines the bright, peppery bite of fresh basil with the rich, nutty undertone of toasted pine nuts and the salty depth of aged parmesan. The addition of a little cream or greek yogurt softens the sharp edges of the garlic, creating a smooth finish that feels incredibly indulgent. It adds a lush green color to your setup and a fragrant aroma that ties all the spring flavors together.
Ingredients
- 2 cups fresh basil leaves, packed
- 1/2 cup grated Parmesan cheese
- 1/3 cup toasted pine nuts
- 2 cloves garlic
- 1/2 cup extra virgin olive oil
- 2 tablespoons heavy cream or Greek yogurt
- Pinch of salt
How to make it
- Place your pine nuts in a dry pan over medium heat for 2-3 minutes, shaking constantly until they are golden and smell nutty; this step is crucial for depth of flavor.
- In a food processor, pulse the garlic and toasted pine nuts until they are finely minced but not yet a paste.
- Add the fresh basil leaves and the Parmesan cheese, pulsing again until the basil is chopped into tiny fragments.
- With the processor running on low, slowly drizzle in the olive oil in a thin, steady stream to emulsify the sauce into a vibrant green paste.
- Transfer the mixture to a bowl and gently fold in the heavy cream or Greek yogurt by hand; this maintains a thick, luxurious texture rather than making it too thin.
- Season with a pinch of salt to taste, bearing in mind that the Parmesan is already quite salty.
- Store in a small ramekin with a thin layer of olive oil on top to prevent oxidation until you are ready to place it on the board.
How to grill spring steak

Why we love this
Adding grilled steak to your board brings a sense of hearty luxury and a robust flavor profile that anchors the lighter vegetable elements. The contrast between the deeply charred, salty crust and the tender, ruby-red center is visually stunning and incredibly satisfying to the palate. When sliced thinly against the grain, it becomes a perfect finger food that pairs wonderfully with the creamy pesto or roasted potatoes. It transforms the appetizer board into a substantial meal that feels like a celebration of high-quality ingredients and simple techniques.
Ingredients
- 1 lb skirt steak or flank steak
- 2 tablespoons olive oil
- 1 tablespoon coarse sea salt
- 1 teaspoon cracked black pepper
- 2 cloves garlic, crushed
- 1 tablespoon butter (for finishing)
How to make it
- Remove the steak from the refrigerator at least 30 minutes before cooking to bring it to room temperature; this ensures even cooking from the edges to the center.
- Pat the meat dry and rub both sides with olive oil, coarse salt, and cracked pepper, pressing the seasoning into the fibers of the meat.
- Preheat your grill to high heat (around 450°F) until the grates are screaming hot, which is necessary for a proper crust.
- Place the steak on the grill and sear for 3-5 minutes per side, depending on the thickness; for skirt steak, a total of 6-8 minutes usually results in a perfect medium-rare.
- During the last minute of grilling, place a pat of butter and the crushed garlic on top of the steak to let it melt and infuse into the crust.
- Transfer the steak to a cutting board and let it rest, tented loosely with foil, for at least 10 minutes; skipping this step will cause all the delicious juices to run out.
- Slice the steak very thinly across the grain at a slight diagonal to ensure the most tender bite, and fan the slices out on your board.
How to make crispy potatoes

Why we love this
Crispy potatoes are the ultimate comfort food, providing a satisfying, salty crunch that everyone reaches for first. These aren’t just any roasted potatoes; they have a glass-like outer shell that shatters to reveal a fluffy, cloud-like interior that practically melts. The infusion of rosemary and sea salt creates a rustic, Mediterranean vibe that feels both sophisticated and deeply nostalgic. They serve as the perfect vessel for dipping into sauces, making them an essential, interactive component of any well-rounded appetizer board.
Ingredients
- 1 lb Yukon Gold potatoes, halved or quartered
- 3 tablespoons olive oil
- 1 teaspoon dried rosemary
- 1 teaspoon garlic powder
- 1 teaspoon sea salt
- 1/2 teaspoon black pepper
How to make it
- Place the cut potatoes in a large pot of cold, salted water and bring to a boil; cook for about 8-10 minutes until the edges are just softening but the centers are still firm.
- Drain the potatoes and let them steam in the colander for 2 minutes, then give them a vigorous shake to ‘rough up’ the edges; those starchy bits are what create the maximum crunch.
- Preheat your oven to 425°F (220°C) and place a baking sheet inside to heat up.
- In a bowl, toss the parboiled potatoes with olive oil, rosemary, garlic powder, salt, and pepper until they are thickly coated.
- Carefully spread the potatoes onto the hot baking sheet, ensuring the cut sides are face-down for the best caramelization.
- Roast for 20-25 minutes, flipping them once halfway through, until they are deep golden brown and sound hollow when tapped.
- Serve them hot and crispy, perhaps with a small sprinkle of fresh herbs to brighten the look on the board.
How to roast spring veggies
Why we love this
Roasting spring vegetables like asparagus and leeks brings out a concentrated, nutty sweetness that you just don’t get from steaming or boiling. The tips of the asparagus become wonderfully charred and crisp, while the tender stalks remain juicy and vibrant green. It’s a celebration of the season’s best offerings, arranged in a way that looks elegant and effortless. These veggies add a necessary dose of fiber and freshness to the board, balancing out the richer meats and cheeses with their clean, earthy flavors and light textures.
Ingredients
- 1 bunch thin asparagus, woody ends trimmed
- 2 leeks, white and light green parts only, sliced into rounds
- 1 cup sugar snap peas
- 2 tablespoons olive oil
- 1 tablespoon lemon juice
- Salt and pepper
How to make it
- Preheat your oven to 425°F (220°C); a high temperature is essential to roast the veggies quickly so they stay tender-crisp rather than becoming mushy.
- Thoroughly wash the leeks to remove any grit trapped in the layers and pat all the vegetables dry with a kitchen towel.
- On a large sheet pan, toss the asparagus, leeks, and snap peas with olive oil, salt, and pepper, spreading them out into a single, even layer.
- Roast the vegetables for 10-12 minutes, watching closely as thin spring vegetables can go from perfect to overdone very quickly.
- The leeks should be softened and slightly browned, while the asparagus should have a slight char on the delicate tips.
- Remove from the oven and immediately drizzle with a fresh squeeze of lemon juice to brighten the flavors and preserve the green color.
- Arrange them in clusters on the board to create visual interest and easy grabbing for your guests.
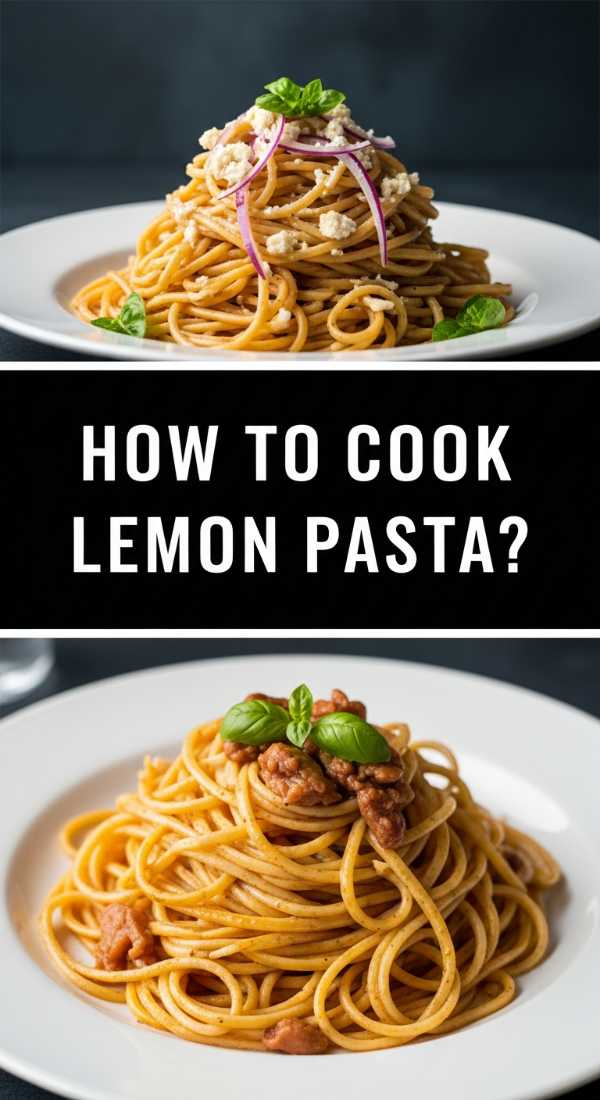
How to cook lemon pasta
[IMAGE_10]
Why we love this
Lemon pasta is the ultimate ‘elegant comfort’ dish, featuring silky strands of noodles coated in a bright, buttery sauce that feels surprisingly light. The aroma of fresh lemon zest and warm butter is incredibly inviting, promising a bite that is both refreshing and deeply satisfying. It provides a beautiful, swirling texture to your appetizer board, acting as a base that guests can pair with the garlic shrimp or lemon chicken. It’s a simple, five-ingredient wonder that proves you don’t need a long list of components to create a dish that feels like a gourmet treat.
Ingredients
- 8 oz linguine or spaghetti
- 4 tablespoons unsalted butter
- 1 large lemon, zested and juiced
- 1/2 cup grated Parmesan cheese
- 1/2 cup reserved pasta water
- Salt and fresh cracked pepper
How to make it
- Bring a large pot of heavily salted water to a rolling boil—it should taste like the sea—and cook the pasta for 1-2 minutes less than the package instructions for a true al dente texture.
- Before draining the pasta, carefully scoop out at least one cup of the starchy pasta water; this liquid gold is the secret to a silky, emulsified sauce.
- In a large skillet over low heat, melt the butter and stir in the lemon zest and lemon juice, being careful not to let the butter brown.
- Add the hot, drained pasta directly into the skillet with the lemon butter and toss vigorously with tongs to coat every strand.
- Add the Parmesan cheese and about 1/4 cup of the reserved pasta water, stirring and tossing constantly as the cheese melts into the liquid to create a creamy, clinging sauce.
- If the pasta looks dry, add a bit more pasta water one tablespoon at a time until the desired consistency is reached.
- Season with plenty of fresh cracked pepper and a pinch of salt, then twirl into small nests to place on your board for easy serving.
Conclusion
Creating a viral-worthy appetizer board isn’t about perfection; it’s about the abundance of flavors and the joy of a shared meal. By focusing on these simple, high-impact spring dishes, you can assemble a spread that is as beautiful as it is delicious. The beauty of the board lies in its versatility—mix and match these recipes to suit your guests, and watch as the 10-minute prep turns into hours of wonderful conversation. Happy hosting!
Frequently Asked Questions
Can I make these components ahead of time? Yes! Most of the roasted vegetables and the pesto can be prepared an hour or two in advance. However, for the best texture, we recommend grilling the steak and salmon right before serving.
How do I keep the board looking fresh? Use small ramekins for sauces like the creamy pesto to keep them from spreading, and add a few sprigs of fresh herbs or edible flowers as a final garnish to maintain that vibrant, ‘just-made’ look.
What is the best board to use? A large wooden cutting board or a marble slab works best. If you don’t have one, you can even use a clean parchment paper sheet spread directly across your table for a rustic ‘grazing table’ effect.