
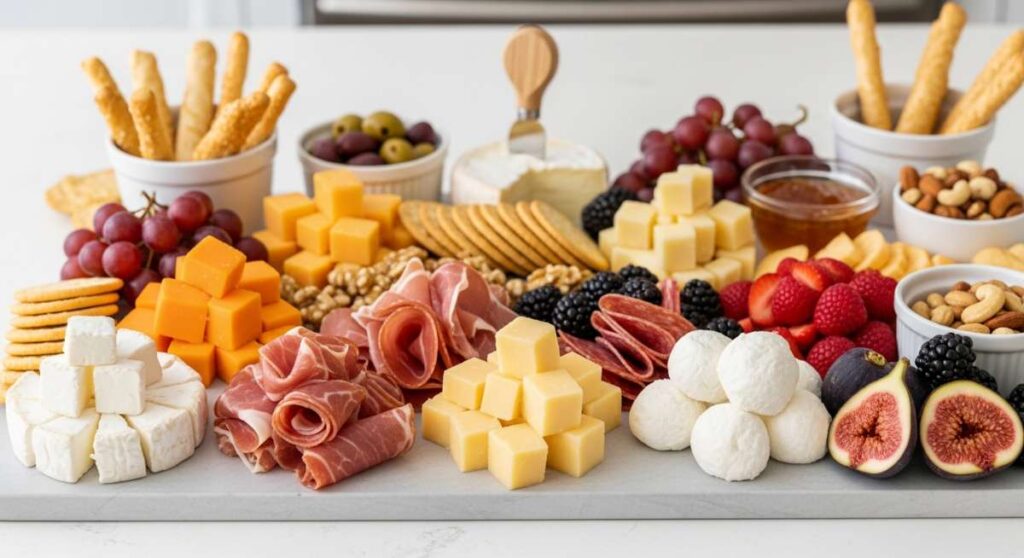
How to Master the Simple Food Board Trend (No Cooking Required!)
There is something inherently magical about a meal that looks like a work of art but requires absolutely zero time hovering over a hot stove. In a world that feels increasingly rushed, the rise of the ‘Simple Food Board’ isn’t just a trend; it’s a lifestyle shift toward intentional grazing and beautiful, stress-free gatherings. Whether you are hosting a backyard sunset session or just trying to survive a Tuesday night, these boards celebrate the beauty of raw ingredients, clever pairings, and the joy of sharing a platter.
I remember the first time I ditched the traditional dinner plates for a massive wooden board. The atmosphere in the room changed instantly. Instead of everyone being hunched over their own portions, my family was reaching, laughing, and building their own perfect bites. It turned a mundane Tuesday into a memory. This guide is designed to help you reclaim your kitchen time without sacrificing the ‘wow’ factor that makes a meal feel special.
How to make golden dandelion jelly
Why we love this
This jelly is like capturing liquid sunshine in a glass jar. The aroma is unexpectedly floral and honey-like, filling your kitchen with the scent of a wild meadow in mid-July. When spread over a warm piece of crusty sourdough, the texture is silky and smooth, offering a delicate sweetness that pairs perfectly with sharp white cheddar on a food board. It’s a conversation starter that brings a touch of whimsical foraging to your table, reminding everyone of the simple beauty found right in our own backyards.
Ingredients
- 2 cups dandelion petals (yellow parts only)
- 4 cups boiling water
- 1/4 cup lemon juice
- 1 package powdered pectin
- 4 cups granulated sugar
How to make it
- Carefully separate the yellow petals from the green base of the dandelions; the green parts are bitter, so you want pure gold.
- Place the petals in a heat-proof bowl and pour 4 cups of boiling water over them. Let this steep overnight in the fridge to create a deep, floral tea.
- The next day, strain the liquid through a fine-mesh sieve or cheesecloth, squeezing every drop of flavor out.
- In a large pot, combine the dandelion tea with lemon juice and pectin. Bring the mixture to a rolling boil over high heat, stirring constantly to prevent scorching.
- Add the sugar all at once and return to a full boil that cannot be stirred down. Boil hard for exactly one minute.
- Skim off any foam from the surface, then ladle the hot jelly into sterilized jars, leaving a 1/4-inch headspace. Process in a water bath for 10 minutes for a shelf-stable finish.
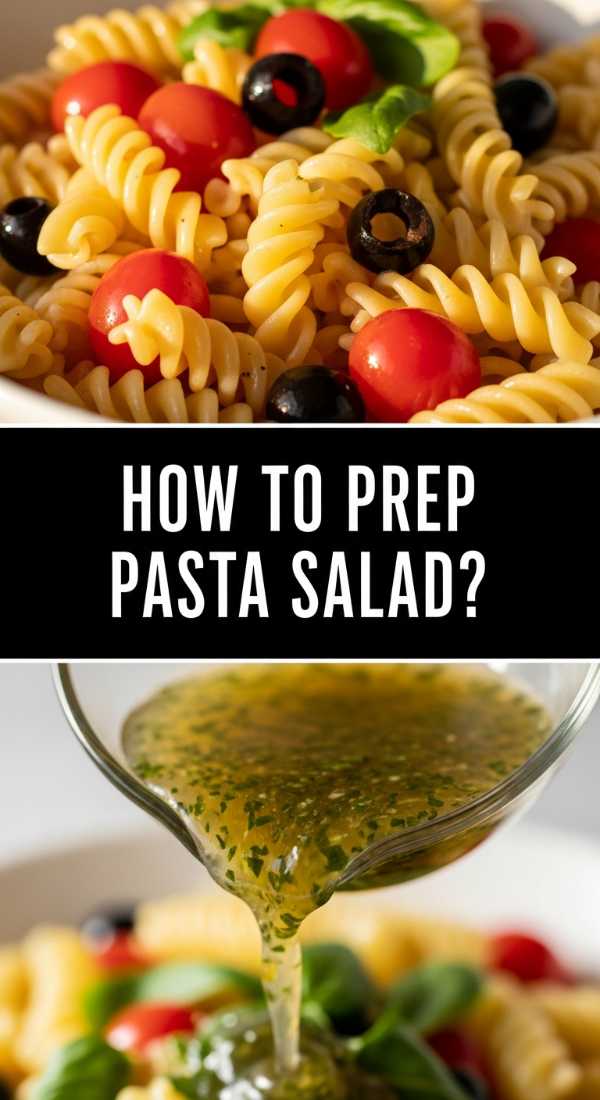
How to prep easy pasta salad
Why we love this
A great pasta salad is the backbone of any successful food board, providing a hearty, zesty base that satisfies everyone. We love the contrast between the tender, al dente pasta and the sharp crunch of fresh bell peppers and red onions. The aroma of dried oregano and garlic infused in olive oil creates a Mediterranean vibe that feels both refreshing and indulgent. It’s the ultimate make-ahead dish that actually tastes better as it sits, allowing the flavors to meld into a harmonious, tangy delight.
Ingredients
- 1 lb rotini or fusilli pasta
- 1 cup cherry tomatoes, halved
- 1/2 cup cucumber, diced
- 1/4 cup red onion, finely minced
- 1/2 cup Italian vinaigrette
- 1/2 cup feta cheese crumbles
- Fresh parsley for garnish
How to make it
- Boil a large pot of heavily salted water. Cook the pasta according to package directions, but aim for ‘al dente’—usually 1-2 minutes less than the box suggests. This ensures it doesn’t get mushy when dressed.
- Drain the pasta and immediately rinse it under cold running water. This stops the cooking process and removes excess starch, preventing the noodles from sticking together.
- In a large mixing bowl, toss the cooled pasta with half of the Italian vinaigrette while the noodles are still slightly damp; this allows the flavor to penetrate the pasta.
- Add your chopped tomatoes, cucumbers, and onions. Toss gently with a large spatula to ensure even distribution without breaking the vegetables.
- Add the remaining dressing and the feta cheese. Cover and refrigerate for at least two hours before serving. Just before placing on the board, give it one final toss and sprinkle with fresh parsley.
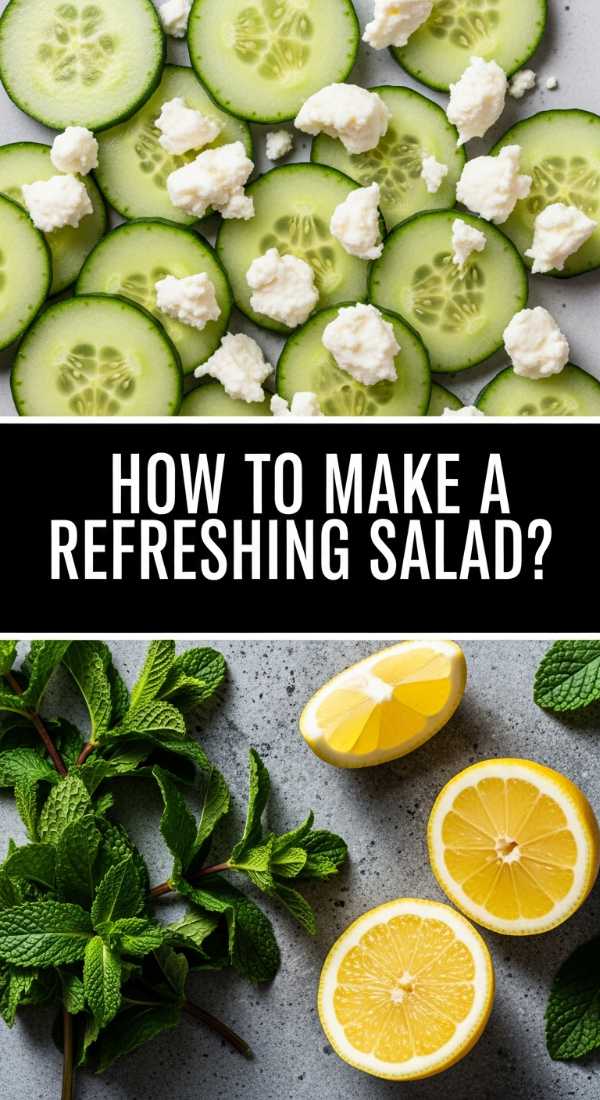
How to make refreshing salad
Why we love this
This salad is a breath of fresh air, designed to cleanse the palate between richer bites of cheese and charcuterie. The crunch of baby gems or romaine hearts provides a satisfying snap, while the addition of thin radish slices adds a peppery kick. It smells of fresh-cut grass and lemon zest, making it the perfect centerpiece for a summer food board. It’s light, vibrant, and looks absolutely stunning when nestled in a wooden bowl with a drizzle of translucent dressing catching the light.
Ingredients
- 2 heads of Little Gem lettuce
- 3 radishes, thinly sliced
- 1/4 cup pumpkin seeds (pepitas)
- 1 tablespoon fresh chives, snipped
- 3 tablespoons extra virgin olive oil
- 1 tablespoon lemon juice
- Flaky sea salt
How to make it
- Wash the lettuce leaves thoroughly in ice-cold water. This step is crucial for maximum crispness. Pat them dry individually or use a salad spinner until they are completely moisture-free.
- Tear the leaves into bite-sized pieces rather than cutting them with a knife; this prevents the edges from browning and creates a more rustic, inviting texture.
- Use a mandoline to slice the radishes into paper-thin rounds. If you don’t have one, use your sharpest chef’s knife and take your time to get them as thin as possible.
- In a small jar, shake the olive oil, lemon juice, and a pinch of salt until emulsified. The mixture should look cloudy and thick.
- Arrange the leaves in a shallow bowl. Layer the radish slices and pumpkin seeds on top. Drizzle the dressing just before serving to keep the leaves from wilting, and finish with a generous sprinkle of chives and flaky salt.
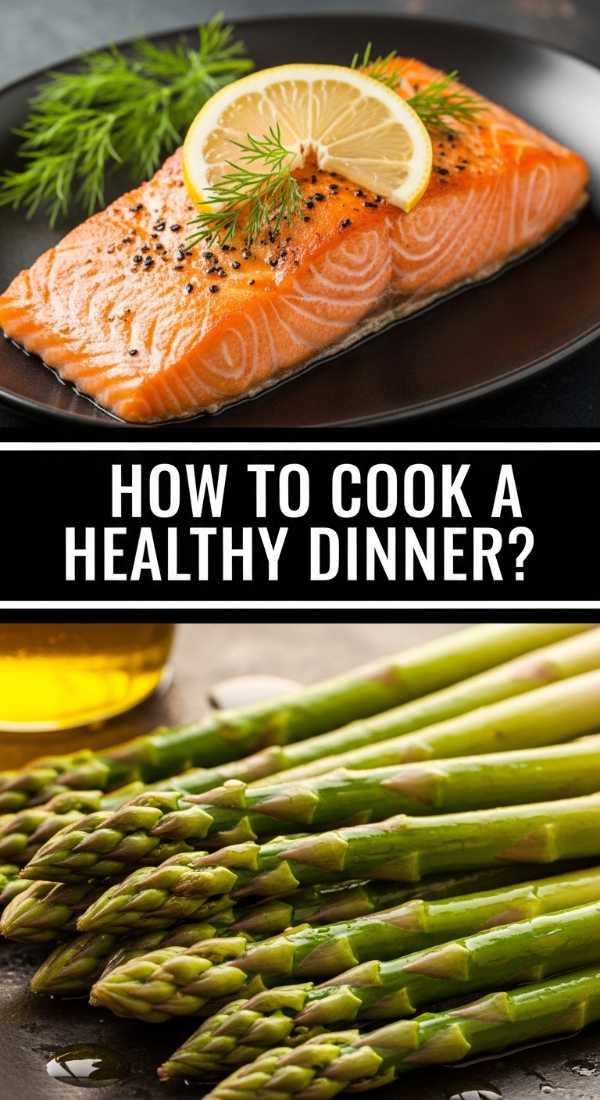
How to cook healthy dinner

Why we love this
Healthy cooking doesn’t have to be bland, and this vibrant salmon and asparagus board proves it. The scent of roasting lemon and garlic cloves creates an inviting aroma that draws everyone to the kitchen. We love the flaky, buttery texture of the fish contrasted with the char of tender-crisp asparagus tips. It’s a meal that feels nourishing and high-end, yet it comes together on a single pan, making the cleanup as easy as the preparation.
Ingredients
- 2 large salmon fillets
- 1 bunch thin asparagus, trimmed
- 1 lemon, sliced into rounds
- 2 tablespoons olive oil
- 2 cloves garlic, minced
- Salt and cracked black pepper
How to make it
- Preheat your oven to 400°F (200°C). Line a large baking sheet with parchment paper to ensure the salmon skin doesn’t stick and for easy disposal later.
- Pat the salmon fillets completely dry with a paper towel. This is the secret to getting a slightly crisp exterior while keeping the inside moist.
- Place the salmon in the center of the tray and surround it with the asparagus. Drizzle everything with olive oil and rub the minced garlic onto the salmon.
- Season generously with salt and pepper. Place lemon slices directly on top of the salmon and scattered among the asparagus to infuse them with bright acidity.
- Roast for 12-15 minutes. Check for doneness by pressing a fork into the thickest part of the fish; it should flake easily and look opaque. The asparagus should be bright green with slightly browned tips.
- Let the tray rest for 5 minutes before transferring the components to your large food board, serving with a side of Greek yogurt or tzatziki.
How to prep camping meals
Why we love this
There is nothing quite like the smell of woodsmoke combined with a hearty, pre-prepped meal under the stars. We love the rugged simplicity of these foil-pack meals, which allow you to enjoy a ‘board-style’ experience even in the wilderness. The texture of soft potatoes soaked in butter and savory juices is the ultimate comfort food after a long hike. It turns outdoor dining into a gourmet experience without the need for a full kitchen setup or heavy cleaning supplies.
Ingredients
- 1 lb smoked sausage, sliced
- 2 cups baby potatoes, quartered
- 1 bell pepper, chopped
- 1/2 red onion, sliced
- 2 tablespoons butter, cubed
- Cajun seasoning
How to make it
- At home, chop all your vegetables and the sausage. Keeping the potato pieces small (about 1/2 inch) ensures they cook at the same rate as the sausage.
- In a large bowl, toss all the ingredients with the Cajun seasoning until every piece is coated in spices.
- Divide the mixture into four large sheets of heavy-duty aluminum foil. Add a small cube of butter to the center of each pile for moisture and richness.
- Fold the foil tightly to create a sealed packet, leaving a little room for steam to circulate inside. Store these in your cooler until you’re ready to eat.
- Place the packets directly on a grill grate over a campfire or on a portable camping stove. Cook for about 20-25 minutes, flipping halfway through.
- Carefully open the packets (watch out for the steam!) and serve them right out of the foil or empty them onto a shared portable platter for a communal camp feast.
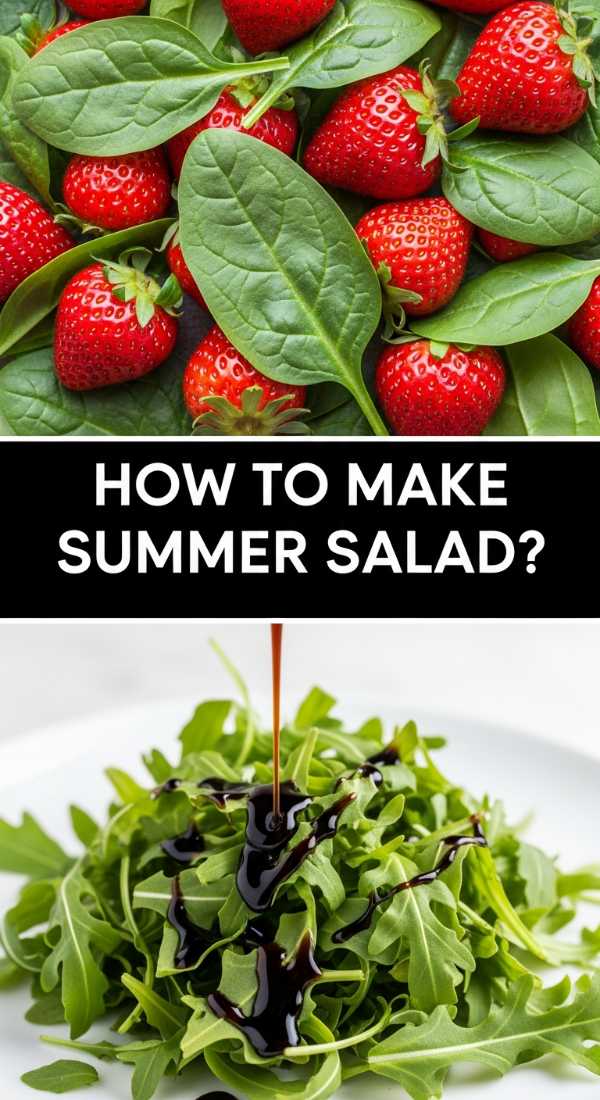
How to make summer salad
Why we love this
This salad is the embodiment of a sunny afternoon, mixing the juicy sweetness of peaches with the creamy richness of fresh mozzarella. The aroma of torn basil leaves is intoxicating, instantly transporting you to a Mediterranean terrace. We love how the balsamic glaze clings to the fruit, creating a beautiful visual contrast of dark streaks against golden peaches. It’s a sophisticated addition to any food board that balances sweet and savory notes with effortless grace.
Ingredients
- 3 ripe peaches, sliced
- 1 ball of fresh mozzarella, torn
- 1/4 cup fresh basil leaves
- 2 tablespoons balsamic glaze
- 1 tablespoon extra virgin olive oil
- Handful of arugula
How to make it
- Select peaches that are slightly soft to the touch but still hold their shape. Slice them into thick wedges to ensure they stand out on the board.
- Instead of slicing the mozzarella with a knife, tear it by hand. This creates craggy edges that are perfect for catching the oil and balsamic glaze.
- On a flat platter or a section of your food board, lay down a light bed of arugula to provide a peppery base.
- Layer the peach slices and mozzarella pieces over the arugula in an alternating pattern for the best visual appeal.
- Tear the basil leaves just before serving to prevent them from bruising and browning. Scatter them generously over the top.
- Drizzle with the olive oil first, followed by a decorative zig-zag of the thick balsamic glaze. Finish with a tiny pinch of sea salt to make the fruit flavors pop.
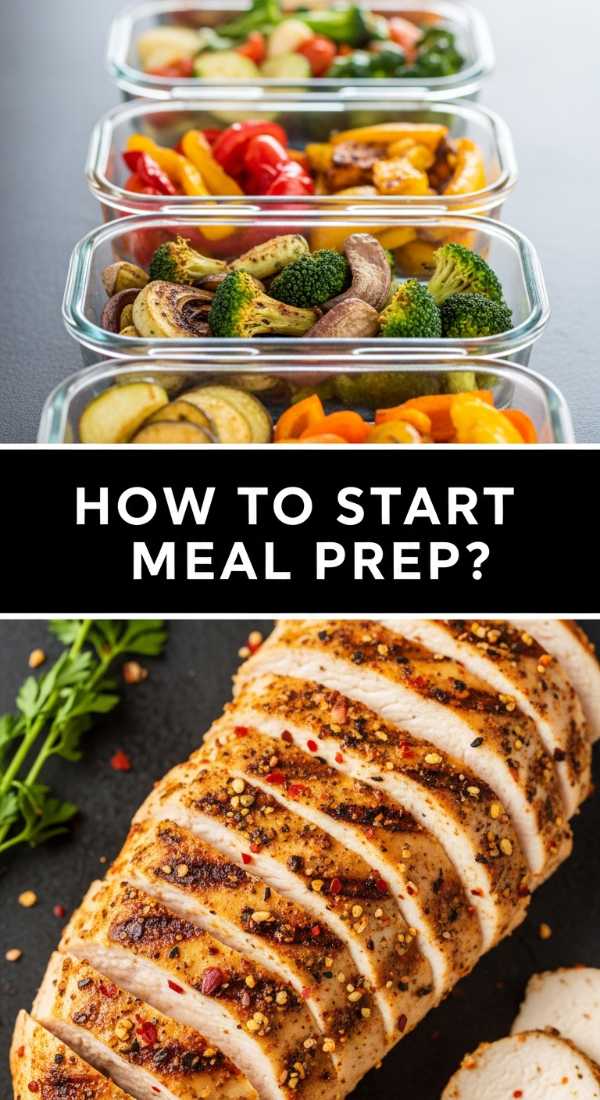
How to start meal prep
Why we love this
Starting a meal prep routine is like giving a gift to your future self. We love the organized, clean look of glass containers filled with colorful, prepped ingredients ready to be assembled into a board at a moment’s notice. The smell of roasted vegetables and fresh herbs waiting in the fridge creates a sense of calm during a busy week. It transforms ‘what’s for dinner?’ from a stressful question into a creative opportunity to build a beautiful, balanced meal in minutes.
Ingredients
- 3-4 types of seasonal vegetables (carrots, peppers, broccoli)
- 2 types of grains (quinoa, farro, or brown rice)
- 2 protein sources (boiled eggs, grilled chicken, or chickpeas)
- 1 signature dressing or sauce
How to make it
- Dedicate 90 minutes on a Sunday afternoon to ‘The Big Chop.’ Wash, peel, and slice all your raw vegetables so they are ready for snacking or salads.
- Cook a large batch of your chosen grain. Professional tip: use chicken or vegetable broth instead of water for the cooking liquid to add layers of flavor.
- Prepare your proteins. Hard-boil eggs (6 minutes for jammy, 9 minutes for firm) or roast a tray of seasoned chickpeas until crunchy.
- Make one versatile dressing, like a lemon-tahini or a honey-mustard, and store it in a glass jar. Home-made dressings last about 5 days and taste significantly better than store-bought.
- Store each component in its own airtight glass container. This prevents flavors from bleeding and keeps ingredients fresher for longer.
- When it’s time to eat, simply pull out 3-4 containers and arrange the contents on a board or plate. This ‘modular’ approach keeps mealtime exciting and visually stunning.
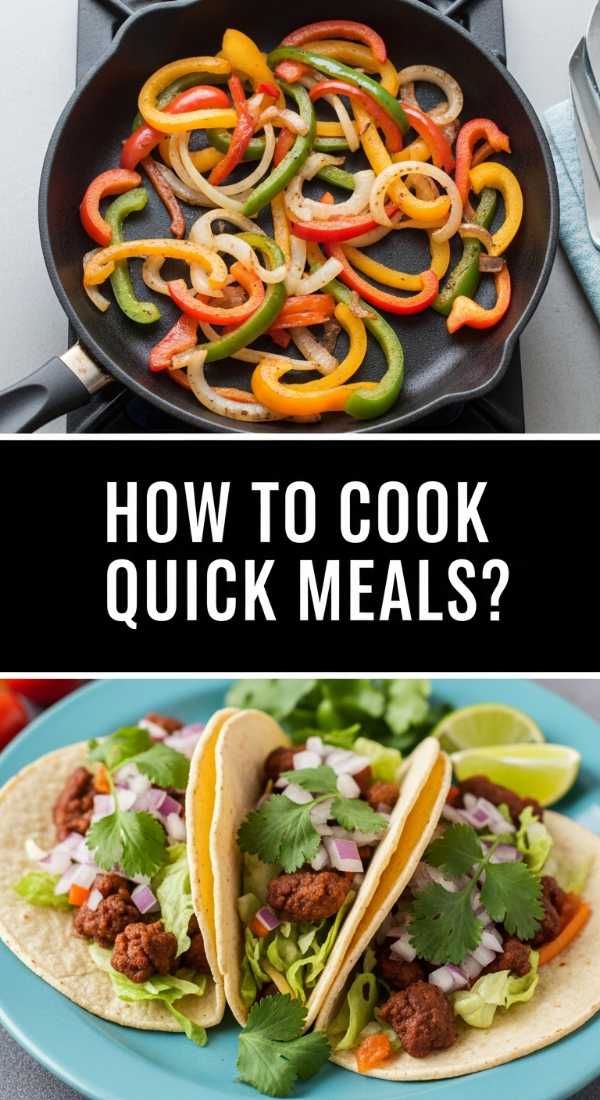
How to cook quick meals
Why we love this
Quick meals are all about high-impact flavors with minimal effort, and a Mediterranean shrimp board is the gold standard. The aroma of sizzling garlic and lemon butter is enough to make anyone’s mouth water. We love the snap of perfectly cooked shrimp against the softness of warm pita bread. It’s a meal that looks like you spent hours in the kitchen but actually comes together in less than fifteen minutes, making it the perfect ‘viral’ solution for busy weeknights.
Ingredients
- 1 lb large shrimp, peeled and deveined
- 2 tablespoons butter
- 1 tablespoon olive oil
- 3 cloves garlic, smashed
- 1 teaspoon red pepper flakes
- Fresh lemon wedges and parsley
How to make it
- Ensure your shrimp are completely thawed and patted dry with a paper towel. Excess moisture will cause them to steam rather than sear.
- In a large skillet, heat the olive oil and butter over medium-high heat until the butter starts to foam and turn slightly golden.
- Add the smashed garlic cloves and red pepper flakes. Sauté for about 1 minute until the garlic is fragrant but not browned.
- Add the shrimp to the pan in a single layer. Do not overcrowd the pan; cook in two batches if necessary. Cook for 2 minutes per side until they turn pink and opaque.
- As soon as the shrimp curl into a ‘C’ shape, they are done. Remove them from the heat immediately to prevent them from becoming rubbery.
- Toss with fresh parsley and a squeeze of lemon. Serve the skillet contents directly on a wooden board surrounded by olives, hummus, and pita points.
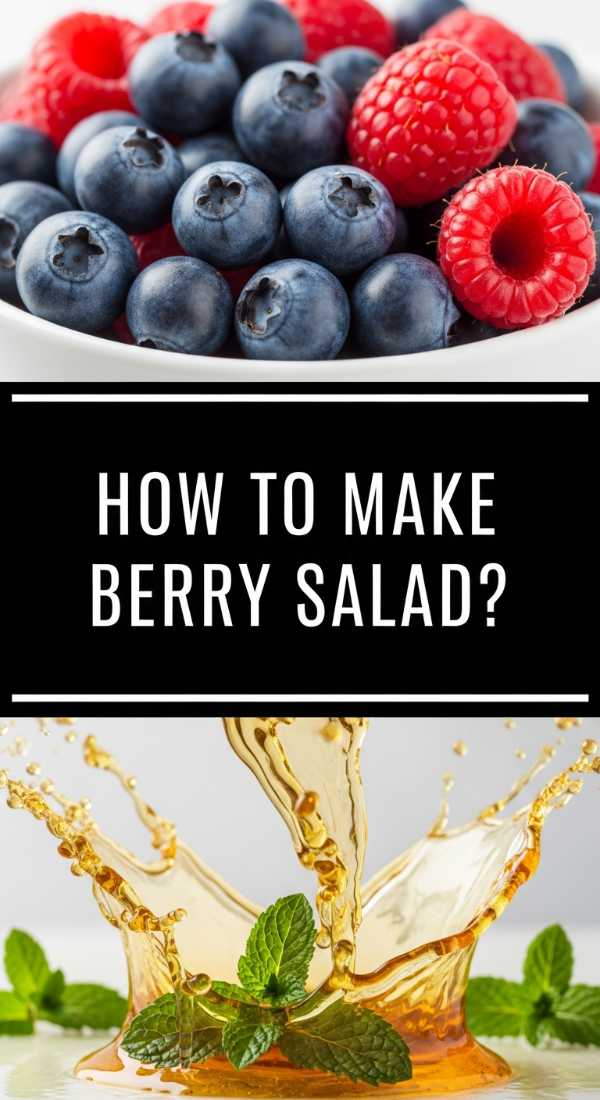
How to make berry salad
Why we love this
This berry salad is a jewel-toned masterpiece that adds a burst of tartness and vibrant color to any food spread. The texture is a delightful mix of soft, juicy berries and the slight crunch of poppy seeds. We love the sweet, earthy aroma of fresh mint leaves combined with the zing of lime zest. It functions as both a side dish and a healthy dessert, making it incredibly versatile for brunch boards or evening grazing platters alike.
Ingredients
- 1 cup strawberries, hulled and quartered
- 1 cup blueberries
- 1 cup raspberries
- 1 tablespoon honey or agave
- 1 lime (zest and juice)
- Fresh mint leaves, chiffonade
How to make it
- Rinse your berries gently in a colander and spread them out on a clean kitchen towel to dry. Water is the enemy of a good fruit salad dressing.
- In a small bowl, whisk together the lime juice, lime zest, and honey until the honey is completely dissolved and the mixture is slightly syrupy.
- Place the dried berries in a large glass bowl. Pour the dressing over them and use a soft silicone spatula to fold the berries gently, being careful not to crush the delicate raspberries.
- Let the salad sit at room temperature for about 15 minutes. This allows the honey and lime to draw out a little bit of the natural berry juices, creating a light sauce.
- Just before serving, stack the mint leaves, roll them tightly like a cigar, and slice thin ribbons (chiffonade).
- Garnish the salad with the mint and serve it in a small bowl nestled within your larger food board, perhaps near some creamy brie or mascarpone.
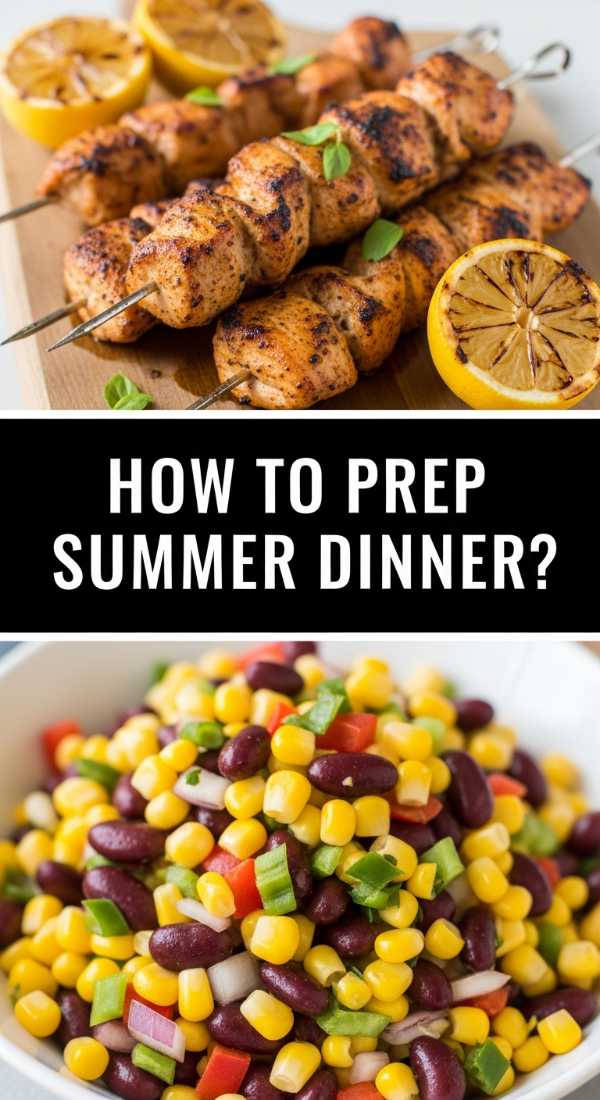
How to prep summer dinner
[IMAGE_10]
Why we love this
Summer dinner is all about ease, and this ‘No-Cook’ Mezze board is the ultimate expression of that philosophy. We love the variety of textures, from the creamy swirl of hummus to the salty bite of kalamata olives and the snap of fresh cucumbers. The smell of dried za’atar and toasted pine nuts adds a sophisticated, nutty layer to the spread. It’s a meal that encourages slow eating and long conversations, perfect for those warm evenings when the sun refuses to set.
Ingredients
- 1 container high-quality hummus
- 1 cup assorted olives
- 1 cucumber, sliced into spears
- 1/2 cup roasted red peppers (from a jar)
- 4-5 falafel balls (store-bought or pre-made)
- Warm pita bread or crackers
How to make it
- Start with your largest wooden board or a clean slate slab. Place the ‘anchor’ items first—usually the hummus and any other dips in small, decorative bowls.
- Using the back of a spoon, create a deep swirl in the hummus and fill it with a pool of olive oil and a sprinkle of paprika or za’atar for a professional look.
- Arrange the heavier items like falafel and pita bread in opposite corners to balance the weight of the board.
- Fill the gaps with ‘flow’ items like cucumber spears and roasted peppers, letting them curve around the bowls to create a sense of abundance.
- Scatter the olives and any small nuts or seeds in the remaining tiny spaces. This ‘fill everything’ approach is what makes a board look viral-worthy.
- Serve at room temperature, which allows the flavors of the oils and dips to be more pronounced and the pita to stay soft.
Conclusion
Mastering the simple food board is about more than just the ingredients; it is about the philosophy of gathering. By focusing on high-quality components, thoughtful arrangement, and the textures that make eating an experience, you turn a meal into an event. Whether you chose the floral sweetness of dandelion jelly or the zesty crunch of a quick pasta salad, remember that the best boards are the ones shared with the people you love. So, put down the frying pan, grab your largest wooden platter, and start building your own masterpiece today.