

The Easiest Viral Food Board Ever (Only 4 Ingredients!)
There is something truly magical about the moment your friends gather around the kitchen island, wine glasses in hand, as the golden afternoon light spills across the counter. For years, I used to stress myself into a frenzy over hosting, worrying if the appetizers were fancy enough or if the flavors were complex enough to impress. I would spend hours prepping, only to be too exhausted to actually enjoy the conversation. But then, I discovered the secret to viral hosting: the ‘4-ingredient board’ philosophy.
This isn’t just about food; it’s about reclaiming your time and focusing on high-quality ingredients that speak for themselves. By choosing a few powerhouse components—like a perfectly seared protein, a crisp vegetable, and a decadent starch—you create a spread that looks like a masterpiece but feels like a breeze. The secret lies in the technique, turning simple pantry staples into the stars of the show. Let’s dive into the ultimate components that make this board a viral sensation every single time.
How to make crispy chicken?

Why we love this
There is nothing quite like the auditory satisfaction of a perfectly crisped chicken skin shattering under a fork, followed by the release of steaming, succulent juices. The aroma of rendered fat and toasted seasonings creates a nostalgic warmth that fills the entire kitchen, promising a comfort-food experience that is both rustic and refined. When you bite into it, the contrast between the salty, brittle exterior and the tender, buttery meat creates a sensory symphony that leaves everyone reaching for seconds before the first piece is even finished.
Ingredients
- 4 Bone-in, skin-on chicken thighs
- 2 tablespoons High-smoke point oil (like avocado oil)
- 1 tablespoon Coarse sea salt
- 1 teaspoon Freshly cracked black pepper
How to make it
- Preparation is the key to crispiness: Remove the chicken from the refrigerator 20 minutes before cooking to bring it to room temperature. Use paper towels to pat the skin extremely dry; any moisture will create steam instead of a crunch.
- Season aggressively: Rub the sea salt and black pepper onto both sides of the chicken, ensuring you get under the skin folds where the flavor can penetrate the meat.
- The cold pan method: Place the chicken thighs skin-side down in a cold, heavy-bottomed skillet (cast iron is best). Turn the heat to medium. This allows the fat to render slowly, resulting in a deeper, more even gold.
- The sear: Let the chicken cook undisturbed for 12-15 minutes. Resist the urge to flip it! You are looking for a deep mahogany color and a skin that releases easily from the pan.
- The finish: Once the skin is crisp, flip the thighs and cook for another 8-10 minutes until the internal temperature reaches 165°F. Rest the meat for 5 minutes before serving to lock in the juices.
How to cook tender beef?

Why we love this
Tender beef is the hallmark of a sophisticated palate, offering a melt-in-your-mouth texture that feels like pure luxury. The deep, umami-rich scent of slow-simmered beef combined with the sweetness of caramelized aromatics creates an inviting atmosphere that whispers of home-cooked elegance. Every forkful delivers a rich, savory depth that lingers on the tongue, making it the perfect centerpiece for a board that aims to satisfy the most carnivorous of cravings while maintaining an air of effortless grace.
Ingredients
- 2 lbs Beef chuck roast, cubed
- 2 cups Beef bone broth
- 2 Large yellow onions, sliced
- 1 tablespoon Kosher salt
How to make it
- The sear for depth: In a Dutch oven over medium-high heat, sear the beef cubes in small batches. Do not crowd the pan, as this lowers the temperature and prevents the Maillard reaction. Look for a dark brown crust on all sides.
- Deglaze the flavors: Remove the beef and add the sliced onions. Cook until translucent, using the moisture from the onions to scrape up the brown bits (fond) from the bottom of the pot—this is where all the flavor lives.
- The low and slow braise: Return the beef to the pot and pour in the bone broth until the meat is three-quarters submerged. Cover with a tight-fitting lid.
- Timing and temperature: Place in a 300°F oven for 3 to 4 hours. You will know it is ready when the meat fibers separate effortlessly with the slight pressure of a fork.
- The rest: Allow the beef to sit in its juices for 15 minutes before serving. This ensures the fibers reabsorb the savory liquid, making every bite incredibly succulent.
How to bake cheesy bread?

Why we love this
Cheesy bread is the ultimate crowd-pleaser, a warm and gooey masterpiece that brings a sense of communal joy to any food board. The sight of bubbling, toasted cheese stretching into long, golden threads as a slice is pulled away is visually hypnotic and instantly appetizing. The scent of toasted yeast and roasted garlic butter provides an intoxicating backdrop, while the crunch of the crust paired with the pillowy, cheese-soaked interior offers a textural variety that is impossible to resist.
Ingredients
- 1 Large French baguette
- 2 cups Low-moisture shredded mozzarella
- 1/2 cup Unsalted butter, softened
- 3 cloves Garlic, minced
How to make it
- Prep the base: Preheat your oven to 375°F. Slice the baguette lengthwise, creating two long halves. Place them on a parchment-lined baking sheet to catch any rogue cheese.
- The garlic infusion: In a small bowl, cream together the softened butter and minced garlic. Spread this mixture generously from edge to edge on the cut sides of the bread, ensuring the butter soaks into the crevices.
- The cheese layer: Pile the mozzarella high on top of the buttered bread. Press down slightly so the cheese adheres to the surface and doesn’t roll off during the bake.
- The bake: Slide the sheet into the center rack of the oven. Bake for 10-12 minutes until the cheese is melted and the edges of the bread are starting to turn a light golden brown.
- The broil finish: Switch the oven to broil for the final 60-90 seconds. Watch closely! You want the cheese to develop brown, caramelized spots without burning the crust. Slice into 2-inch strips while hot.
How to roast herb potatoes?
Why we love this
Roast potatoes are the humble heroes of the food board, providing a starchy, satisfying crunch that balances out richer proteins. When tossed in fresh herbs and olive oil, they transform into fragrant jewels with a vibrant, earthy aroma that signals a wholesome, farm-to-table vibe. The contrast between the glass-like, crispy exterior and the fluffy, cloud-like center is a culinary triumph, making them the perfect vessel for soaking up sauces or simply enjoying as a savory, salty snack.
Ingredients
- 1.5 lbs Baby Yukon Gold potatoes, halved
- 3 tablespoons Extra virgin olive oil
- 2 sprigs Fresh rosemary, minced
- 1 teaspoon Flaky sea salt
How to make it
- The parboil trick: Place the halved potatoes in a pot of cold salted water. Bring to a boil and cook for only 5 minutes. This softens the outer starch, which is the secret to a super-crunchy exterior.
- Rough them up: Drain the potatoes and give them a vigorous shake in the colander. This scuffs up the edges, creating more surface area for crisping.
- The seasoning: Toss the warm potatoes with olive oil, minced rosemary, and sea salt in a large bowl until every piece is evenly coated and glistening.
- High-heat roasting: Spread the potatoes on a preheated baking sheet (the sizzle when they hit the pan is a good sign!). Roast at 425°F for 25-30 minutes.
- The flip: Halfway through, use a spatula to flip the potatoes. They are finished when they are a deep golden amber and sound hollow when tapped with a fork.
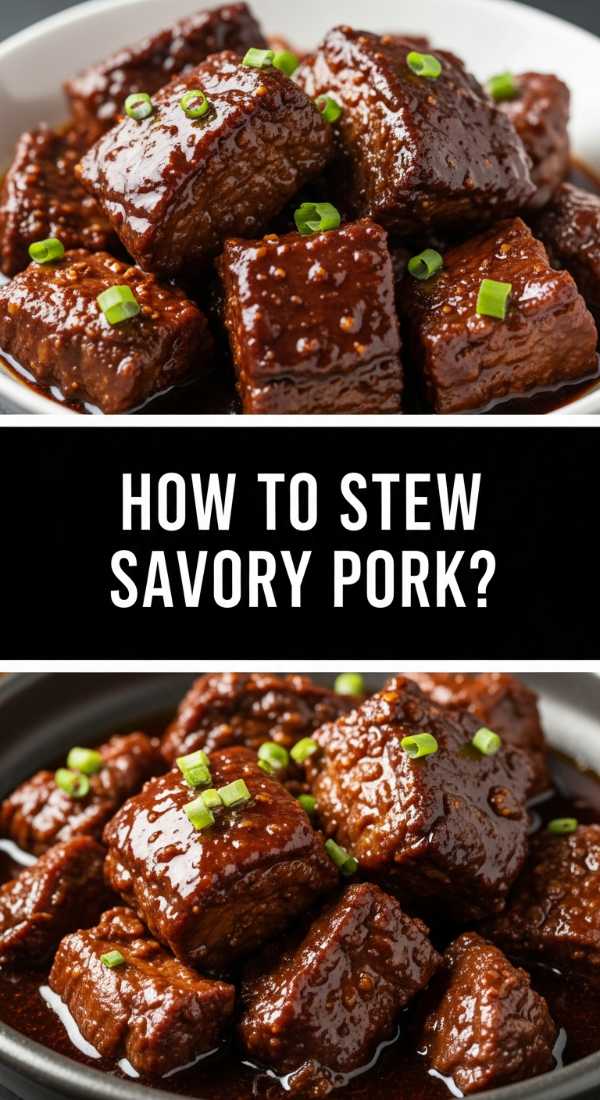
How to stew savory pork?
Why we love this
Savory stewed pork brings a rustic, heart-warming depth to a board that feels both traditional and incredibly indulgent. The way the meat gently falls apart into silky ribbons after hours of slow cooking is a testament to the beauty of patience in the kitchen. Infused with its own natural fats and the subtle sweetness of a well-balanced braise, the pork carries a rich, dark aroma that creates an immediate sense of fullness and satisfaction, inviting guests to linger longer and enjoy every tender morsel.
Ingredients
- 3 lbs Pork shoulder, cut into large chunks
- 1 cup Apple cider vinegar
- 2 tablespoons Brown sugar
- 1 tablespoon Coarse salt
How to make it
- The initial seasoning: Rub the pork chunks thoroughly with the coarse salt and brown sugar. Let them sit for 15 minutes to allow the sugar to begin drawing out the juices, which creates a better crust.
- The browning phase: In a heavy pot, brown the pork in batches over medium-high heat. You want a consistent dark color on all sides to lock in the moisture and build a base of flavor.
- The liquid addition: Pour in the apple cider vinegar. The acidity of the vinegar is crucial as it breaks down the tough connective tissues of the pork shoulder, turning it into butter-soft meat.
- The slow simmer: Reduce the heat to the lowest setting possible. Cover and let the pork gently bubble for 2.5 to 3 hours. Do not rush this; the low heat ensures the fat renders without drying out the meat.
- The shred and glaze: Once tender, remove the lid and increase the heat slightly for 10 minutes to reduce the liquid into a thick, glossy glaze that coats the meat.
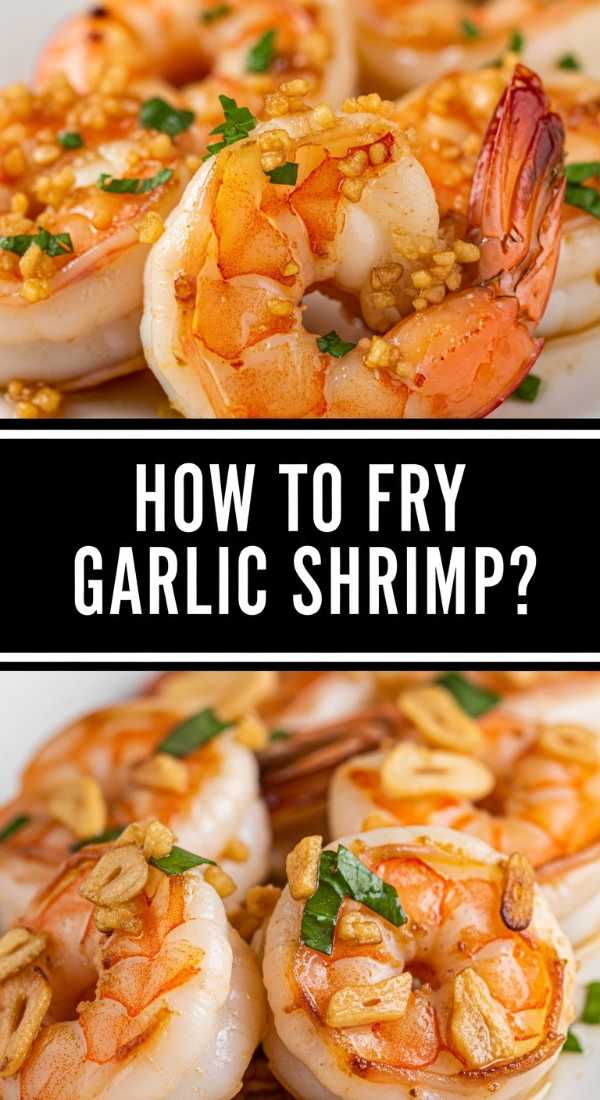
How to fry garlic shrimp?

Why we love this
Garlic shrimp are the ultimate ‘sparkle’ for a food board, offering a bright, zesty pop of flavor and a beautiful pink hue that draws the eye. The sound of shrimp hitting a hot pan with butter and garlic is the universal language of deliciousness. The aroma is instantly recognizable—sharp, buttery, and slightly sweet. Each shrimp offers a snap of freshness followed by the richness of the garlic infusion, providing a lighter but equally decadent option for your guests to graze on.
Ingredients
- 1 lb Large shrimp, peeled and deveined
- 4 cloves Garlic, thinly sliced
- 4 tablespoons Unsalted butter
- 1 Lemon, halved
How to make it
- The prep: Ensure your shrimp are completely thawed and patted dry. Wet shrimp will boil in the pan rather than searing, losing that vital ‘snap’ texture.
- Infusing the butter: Melt the butter in a large skillet over medium-low heat. Add the sliced garlic and cook slowly for 2 minutes. You want the garlic to turn golden and fragrant without browning or turning bitter.
- The high-heat sear: Crank the heat up to medium-high. Once the butter is bubbling, add the shrimp in a single layer.
- Timing is everything: Cook the shrimp for 90 seconds per side. Look for them to turn from translucent gray to an opaque, vibrant pink and curl into a ‘C’ shape. An ‘O’ shape means they are overcooked!
- The finish: Squeeze the fresh lemon juice over the pan in the final 10 seconds. The acidity will cut through the butter and brighten the entire dish. Serve immediately with the pan juices.
How to prep healthy bowls?
Why we love this
Healthy bowls are the vibrant, fresh counterpoint to the heavier elements of a food board, providing a burst of color and a variety of textures that keep the palate excited. There is a clean, garden-fresh aroma that comes from combining crisp greens and creamy fats, making the board feel balanced and thoughtful. The combination of cooling vegetables and nutrient-dense grains offers a refreshing break, ensuring that the meal feels sustaining rather than just heavy, and adding a beautiful aesthetic of greens, purples, and oranges to the spread.
Ingredients
- 2 cups Cooked quinoa
- 4 cups Baby spinach or kale
- 2 Ripe avocados, sliced
- 1/2 cup Lemon-tahini dressing
How to make it
- The grain base: Cook the quinoa according to package instructions but use vegetable broth instead of water for extra flavor. Once cooked, fluff with a fork and let it cool slightly so it doesn’t wilt the greens.
- Massaging the greens: If using kale, place it in a bowl with a teaspoon of olive oil and a pinch of salt. Massage with your hands for 2 minutes until the leaves become dark and tender. Skip this for spinach.
- The assembly: Create small ‘nest’ sections on your board. Place a mound of quinoa, topped with a handful of greens.
- The fat component: Add the sliced avocado right before serving to prevent browning. A squeeze of lemon over the slices will also help keep them vibrant.
- The drizzle: Just before guests arrive, drizzle the lemon-tahini dressing over the bowls. This adds a nutty, acidic finish that ties the earthy grains and fresh greens together perfectly.
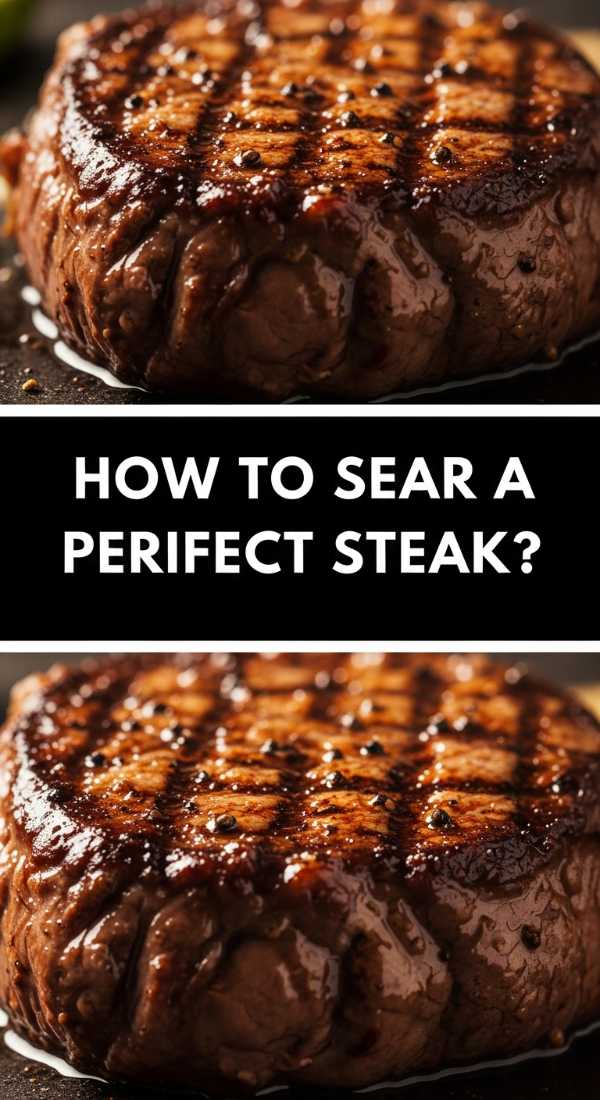
How to sear perfect steak?

Why we love this
A perfectly seared steak is the pinnacle of culinary confidence, offering a dramatic and savory experience that commands attention. The intense, smoky aroma of high-quality beef meeting a scorching pan is enough to make anyone’s mouth water. When sliced, the contrast between the dark, salty crust and the tender, ruby-red center is a visual masterpiece. Each bite is an explosion of juice and concentrated beef flavor, providing a satisfying, protein-packed anchor for your viral food board.
Ingredients
- 1 lb Ribeye or New York Strip steak
- 2 tablespoons Unsalted butter
- 2 cloves Garlic, smashed
- 1 tablespoon Kosher salt
How to make it
- The temper: Take the steak out of the fridge at least 45 minutes before cooking. A cold steak will not sear evenly and the center will remain raw while the outside burns.
- The heavy seasoning: Coat the steak heavily in salt. Don’t be afraid—most of it will fall off in the pan, and the rest creates that iconic crust.
- The smoking point: Heat a cast-iron skillet over high heat until it is literally smoking. Add a tiny bit of high-heat oil. Lay the steak away from you to avoid splatters.
- The sear: Sear for 3 minutes without moving it. Flip and immediately add the butter and smashed garlic.
- The butter baste: Tilt the pan so the melting butter pools at the bottom with the garlic. Use a large spoon to continuously pour that hot, flavored butter over the steak for the final 2 minutes. This adds a nutty richness and ensures an even cook. Rest for 10 minutes before slicing.
How to braise sticky ribs?

Why we love this
Sticky ribs are the ultimate ‘finger food’ luxury, offering a sweet, smoky, and slightly messy experience that encourages guests to relax and dig in. The sight of the dark, glistening glaze clinging to meat that is literally falling off the bone is incredibly enticing. The aroma is a heady mix of caramelized sugars and deep savory notes, creating an atmosphere of indulgence. These ribs provide a playful, interactive element to the board, ensuring that every guest leaves with sticky fingers and a very happy heart.
Ingredients
- 1 Rack Baby back ribs
- 1/2 cup Honey
- 1/4 cup Soy sauce
- 2 cloves Garlic, minced
How to make it
- The membrane removal: For the most tender ribs, peel the thin silver skin (membrane) off the back of the ribs. This allows the heat and flavors to penetrate the meat directly.
- The initial bake: Wrap the ribs tightly in heavy-duty aluminum foil. Bake at 300°F for 2.5 hours. This low-temperature steam-cooks the meat until it is tender.
- The glaze reduction: While the ribs bake, whisk together honey, soy sauce, and minced garlic in a small saucepan. Simmer over medium heat for 5 minutes until it thickens into a syrupy consistency.
- The sticky finish: Remove the ribs from the foil and brush them generously with the glaze.
- The caramelization: Turn the oven up to 425°F (or use a grill). Bake the glazed ribs for another 10-15 minutes, brushing with more glaze every 5 minutes, until the sauce is bubbling and charred in spots.
How to whip garlic pasta?
[IMAGE_10]
Why we love this
Garlic pasta, or Aglio e Olio, is the definition of ‘less is more,’ proving that four simple ingredients can create a dish that feels like a five-star meal. The aroma of garlic gently toasted in high-quality olive oil is one of the most comforting scents in the world. The way the silky, oil-coated strands of pasta glisten under the light, dusted with sharp parmesan, is a vision of Italian-inspired simplicity. It’s light yet filling, providing a perfect starchy base that complements every other protein on the board.
Ingredients
- 1/2 lb Spaghetti
- 4 cloves Garlic, thinly sliced
- 1/4 cup Extra virgin olive oil
- 1/2 cup Grated Parmesan cheese
How to make it
- The pasta water secret: Boil your spaghetti in heavily salted water (it should taste like the sea). Reserve 1 cup of the starchy pasta water before draining—this is the secret to a silky sauce.
- The gentle toast: In a large skillet, add the olive oil and sliced garlic. Turn the heat to medium-low. You want the garlic to slowly turn a pale golden color. If it turns brown, it will be bitter, so stay vigilant!
- The emulsion: Add the drained pasta and 1/2 cup of the reserved pasta water to the skillet. Turn the heat to medium-high and toss vigorously. The starch in the water and the oil will emulsify into a light, creamy sauce.
- The cheese integration: Turn off the heat and add the Parmesan cheese. Continue tossing until the cheese melts into the sauce and coats every strand of pasta.
- The presentation: Use a large carving fork to twirl the pasta into elegant nests directly onto your food board. Serve with an extra sprinkle of cheese while still steaming.
Conclusion
Creating a viral food board doesn’t require a culinary degree or a massive grocery bill; it simply requires a focus on the few things that matter: texture, temperature, and high-quality staples. By mastering these ten simple components, you can mix and match to create a unique spread every single time you host. Whether you’re leaning into the crunch of crispy chicken or the indulgence of sticky ribs, the beauty of this 4-ingredient approach is that it leaves you with the most important thing of all—the time to actually enjoy your guests. Happy hosting!