
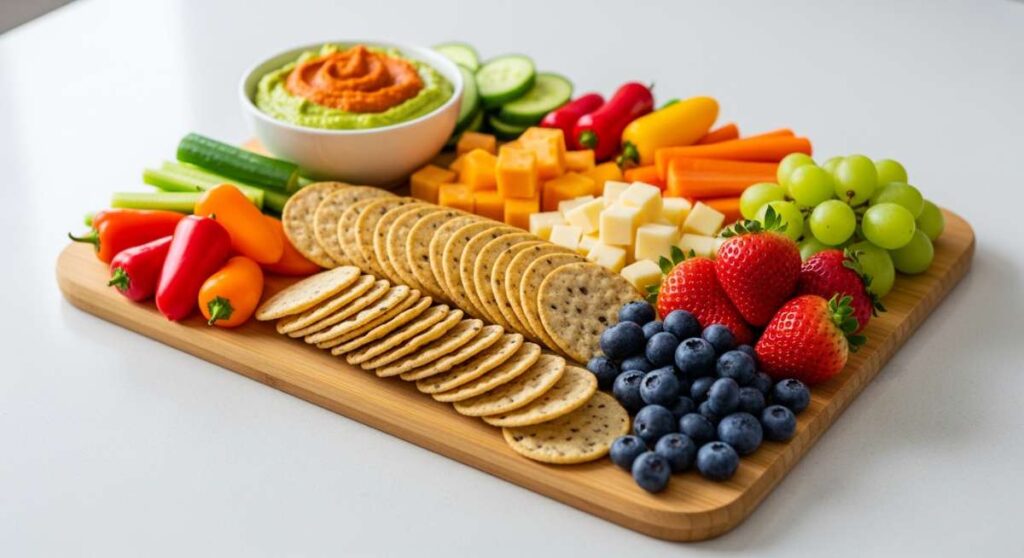
How to Build a Viral Snack Board with Just 5 Ingredients
There is something inherently communal and magical about a shared board, a tradition that transforms a simple meal into a shared experience. We’ve all seen those stunning spreads on social media that seem to stop the scroll, radiating warmth and effortless elegance. It’s not just about the food; it’s about the laughter that happens when hands reach for the same savory morsel and the way a beautifully arranged platter makes every guest feel like the guest of honor.
Building your own viral snack board doesn’t require a culinary degree or a mountain of expensive imports. The secret lies in picking five high-quality, high-impact elements that balance texture, temperature, and flavor. Whether you are hosting a cozy movie night or a festive holiday gathering, these ten cooking foundations will give you the tools to mix and match your way to a legendary spread. Let’s dive into the art of simple, delicious assembly.
How to Cook Crockpot Chicken

Why we love this
Crockpot chicken is the ultimate low-effort, high-reward protein that practically melts in your mouth with every bite. There is a deeply comforting aroma that fills the entire home as the chicken slowly bathes in its own juices, becoming so tender that it falls apart at the mere suggestion of a fork. The texture is incredibly succulent and moist, absorbing every ounce of seasoning and broth, making it a versatile powerhouse for any board that needs a hearty, savory anchor. It provides that rustic, homemade feel that guests gravitate toward immediately.
Ingredients
- 2 lbs boneless skinless chicken thighs
- 1 cup low-sodium chicken broth
- 1 tsp smoked paprika
- 1 tsp garlic powder
- Salt and cracked black pepper to taste
How to make it
- Begin by patting the chicken thighs dry with paper towels to ensure the seasonings adhere properly to the meat.
- Season both sides of the chicken generously with the smoked paprika, garlic powder, salt, and pepper, rubbing the spices in to create a flavorful crust.
- Place the seasoned chicken in the bottom of your slow cooker in a single layer if possible to ensure even cooking.
- Pour the chicken broth around the edges of the meat, being careful not to wash away the dry rub you just applied.
- Set the crockpot to the “Low” setting and cover tightly; let it cook for 6 to 7 hours. You’ll know it’s done when the internal temperature hits 165°F and the meat shreds easily with two forks.
- Once finished, remove the chicken, shred it in a separate bowl, and toss it with a splash of the remaining cooking liquid to keep it glistening and juicy before serving.
How to Make Crispy Potatoes
Why we love this
The perfect crispy potato is a study in contrasts: a jagged, golden-brown exterior that shatters with a satisfying crunch, revealing a center that is as light and fluffy as a cloud. The scent of roasting starch and rosemary is enough to make anyone’s mouth water, offering an earthy, salty satisfaction that grounds the more delicate elements of a snack board. These little golden nuggets catch the light beautifully and provide that essential starchy bite that makes a spread feel truly substantial and indulgent.
Ingredients
- 1.5 lbs Yukon Gold potatoes, cubed
- 3 tbsp extra virgin olive oil
- 2 sprigs fresh rosemary, chopped
- 1 tsp sea salt
- 1/2 tsp onion powder
How to make it
- Preheat your oven to 425°F (220°C) and place a large rimmed baking sheet inside to get it screaming hot; this prevents sticking and jumpstarts the browning.
- Place your cubed potatoes into a pot of cold salted water, bring to a boil, and simmer for just 5 minutes to soften the edges.
- Drain the potatoes and give them a vigorous shake in the colander to roughen up the surfaces—this creates more surface area for maximum crispiness.
- In a large bowl, toss the par-boiled potatoes with olive oil, rosemary, salt, and onion powder until every piece is thoroughly coated.
- Carefully spread the potatoes onto the hot baking sheet in a single layer, ensuring they aren’t touching so they roast rather than steam.
- Bake for 25-30 minutes, flipping halfway through, until they are deep amber and produce a hollow sound when tapped with a spatula.
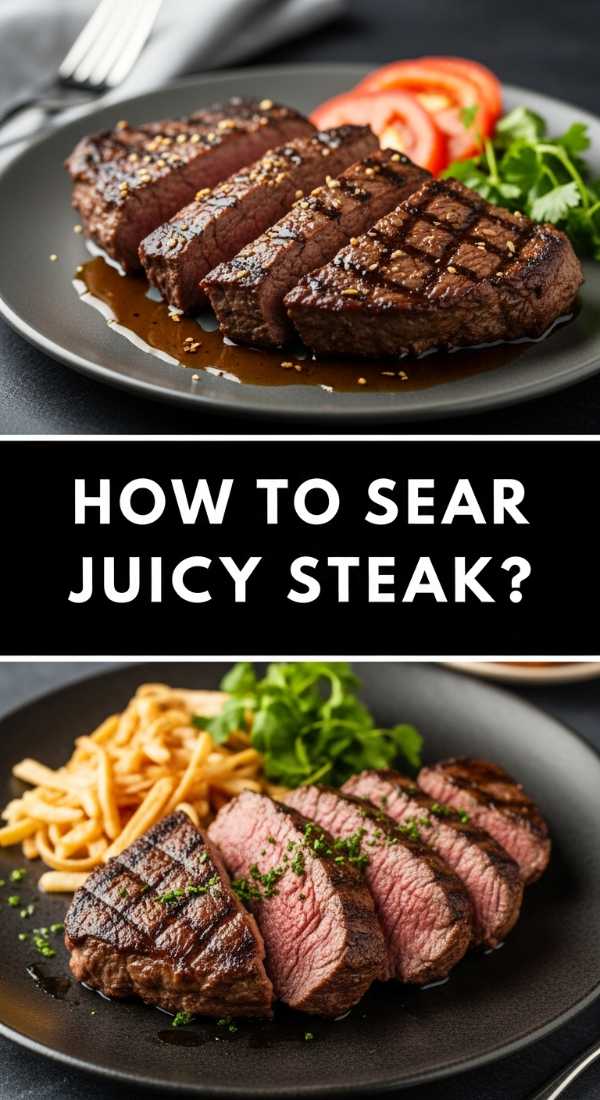
How to Sear Juicy Steak
Why we love this
A perfectly seared steak brings an air of luxury and a deep, umami complexity to your snack board that is hard to beat. The Maillard reaction creates a stunning dark crust on the outside that locks in the rich, iron-filled juices, resulting in a buttery texture that feels incredibly decadent on the palate. As the steak rests, the garlic and herb-infused butter pools around it, creating a glossy sheen that looks spectacular under dining lights. It is the ultimate centerpiece for those who crave a bold, protein-forward experience.
Ingredients
- 1 lb Ribeye or New York Strip steak
- 2 tbsp unsalted butter
- 3 cloves garlic, smashed
- 2 sprigs fresh thyme
- Coarse kosher salt and black pepper
How to make it
- Remove the steak from the refrigerator 30 minutes before cooking to bring it to room temperature; this ensures the center cooks evenly with the exterior.
- Pat the meat completely dry with paper towels and season aggressively with salt and pepper on all sides, including the fatty edges.
- Heat a cast-iron skillet over high heat until it starts to smoke slightly, then add a high-smoke-point oil (like avocado oil) to coat the bottom.
- Place the steak in the pan and sear without moving it for 3-4 minutes to develop a thick, caramelized crust.
- Flip the steak and immediately add the butter, garlic, and thyme to the pan; as the butter melts, use a spoon to continuously baste the steak with the foaming fat.
- Cook until the internal temperature reaches 130°F for medium-rare, then remove to a cutting board and let it rest for at least 10 minutes before slicing against the grain.
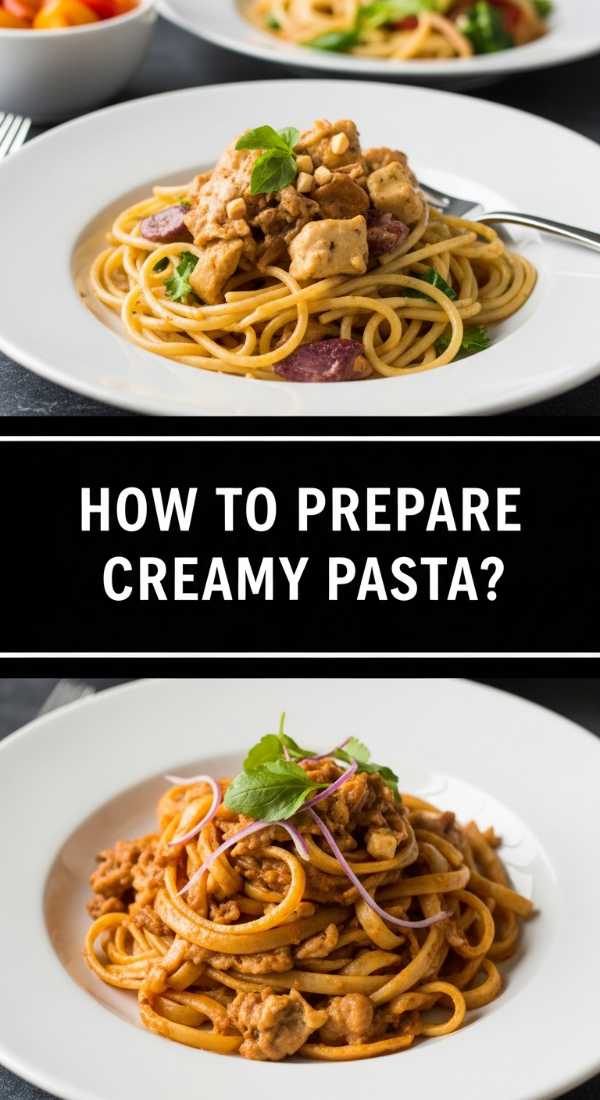
How to Prepare Creamy Pasta
Why we love this
There is nothing quite like the silky, velvet-like coating of a properly made creamy pasta to bring a sense of warmth and comfort to a meal. The aroma of nutty parmesan cheese and simmering cream is intoxicating, creating a dish that feels like a warm hug in a bowl. Each strand of pasta carries a luscious weight, providing a smooth mouthfeel that balances beautifully with the sharp or salty components on your board. It’s an elegant, crowd-pleasing addition that bridges the gap between appetizers and a full meal.
Ingredients
- 8 oz Fettuccine or Pappardelle
- 1 cup heavy cream
- 1/2 cup freshly grated Parmesan cheese
- 2 tbsp unsalted butter
- 1/4 tsp nutmeg
How to make it
- Bring a large pot of heavily salted water to a rolling boil and cook your pasta for one minute less than the package instructions for a perfect al dente texture.
- While the pasta cooks, melt the butter in a large skillet over medium-low heat and pour in the heavy cream.
- Simmer the cream gently for 3-5 minutes until it begins to slightly thicken, then whisk in the nutmeg and a pinch of salt.
- Before draining the pasta, reserve half a cup of the starchy pasta water—this is the secret to a glossy, emulsified sauce.
- Add the hot pasta directly into the cream sauce, then sprinkle in the Parmesan cheese while tossing constantly.
- Add small splashes of the reserved pasta water as needed to thin the sauce until it perfectly coats each strand of pasta in a shimmering, creamy glaze.
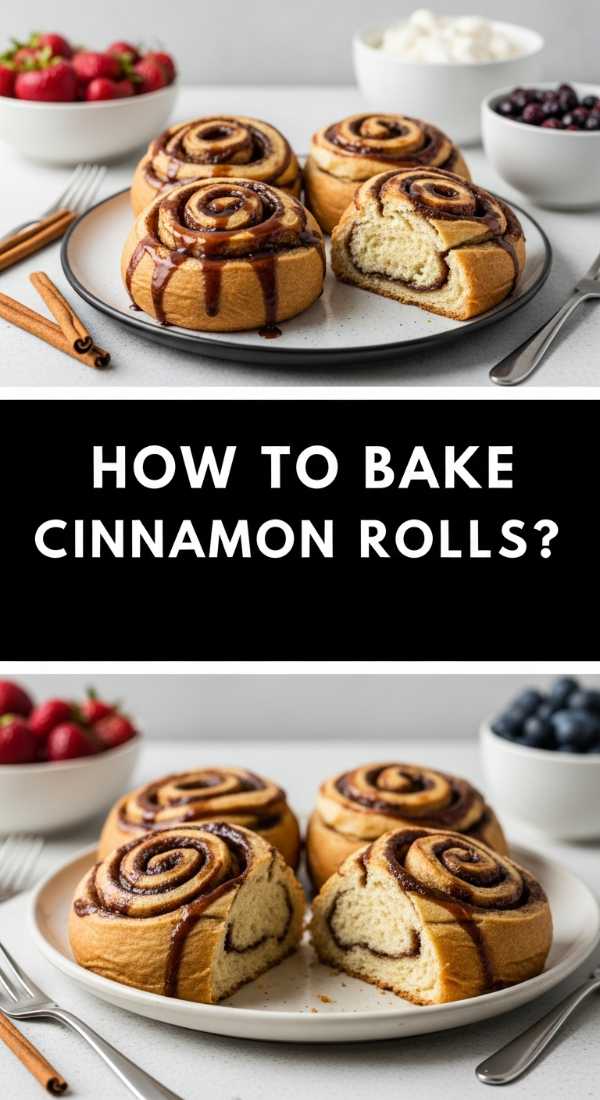
How to Bake Cinnamon Rolls

Why we love this
Baking cinnamon rolls is a sensory journey that starts with the sweet, yeasty scent of rising dough and ends with the gooey, spiced warmth of a fresh-from-the-oven treat. The texture is a marvelous spiral of soft, pillowy dough and a slightly grainy, caramelized cinnamon-sugar filling that melts into every crevice. When topped with a cloud of melting icing, they become a visual and literal treat that adds a necessary sweet element to a viral board, making it perfect for brunch-style gatherings where sugar and spice reign supreme.
Ingredients
- 1 tube refrigerated puff pastry or yeast dough
- 1/4 cup softened butter
- 1/2 cup brown sugar
- 2 tbsp ground cinnamon
- 4 oz cream cheese frosting
How to make it
- Preheat your oven to 375°F (190°C) and lightly grease a round baking dish or a cast-iron skillet for a more rustic presentation.
- Roll out your dough on a lightly floured surface until it forms a large rectangle about 1/4 inch thick.
- Spread the softened butter evenly across the dough, leaving a small half-inch border around the edges to ensure a clean seal.
- Mix the brown sugar and cinnamon in a small bowl, then sprinkle it generously over the buttered surface, pressing it in slightly with your palms.
- Starting from the long edge, roll the dough tightly into a log, then use unflavored dental floss or a sharp knife to cut into 1.5-inch thick rounds.
- Place the rolls in the prepared dish, bake for 20-25 minutes until golden brown, and slather with cream cheese frosting while they are still steaming hot.
How to Make Fluffy Pancakes

Why we love this
Fluffy pancakes are the quintessential comfort food, boasting a light, airy crumb and golden-brown edges that provide a delicate snap. They have a subtle sweetness and a hint of buttermilk tang that makes them the perfect canvas for syrups, berries, or savory toppings like bacon. Seeing a stack of these on a board evokes feelings of lazy Sunday mornings and shared breakfast memories, offering a soft, spongy texture that absorbs flavors beautifully. They add height and a whimsical, approachable vibe to any food display.
Ingredients
- 1.5 cups all-purpose flour
- 1.25 cups buttermilk
- 1 large egg
- 3 tbsp melted butter
- 1 tsp baking powder
How to make it
- In a large bowl, whisk together your flour and baking powder; in a separate jug, mix the buttermilk, egg, and melted butter until well combined.
- Make a well in the center of the dry ingredients and pour in the wet mixture, stirring with a spatula just until combined—remember, lumps are your friend for a fluffy result.
- Let the batter rest for 10 minutes; this allows the leavening agents to activate and the flour to hydrate, resulting in a much taller pancake.
- Heat a non-stick griddle or skillet over medium heat and lightly coat with a small amount of butter or neutral oil.
- Ladle about 1/4 cup of batter per pancake and cook until bubbles form on the surface and the edges look set and dry.
- Carefully flip and cook for another 1-2 minutes until the other side is golden brown and the pancake springs back when lightly pressed in the center.
How to Slow Cook Beef
Why we love this
Slow-cooked beef is a testament to the power of patience, resulting in meat that is so tender it practically dissolves into a rich, savory gravy. The flavor is deep and complex, enriched by the slow breakdown of connective tissue which adds a luxurious, silky mouthfeel to the dish. The aroma is heavy with the scent of roasted meat and root vegetables, creating a sense of rustic abundance that is perfect for a hearty evening board. It is a satisfying, warm component that pairs perfectly with crusty bread or crispy potatoes.
Ingredients
- 3 lbs beef chuck roast
- 2 cups beef stock
- 1 large onion, quartered
- 3 cloves garlic, minced
- 2 tbsp tomato paste
How to make it
- Start by searing your beef roast in a hot pan with a tablespoon of oil for 4-5 minutes per side until a dark, mahogany crust forms—this is vital for deep flavor.
- Transfer the meat to the slow cooker and add the onions and garlic around the base of the roast.
- Whisk the tomato paste into the beef stock and pour the liquid over the meat, ensuring it is at least halfway submerged.
- Cover and cook on the “Low” setting for 8 to 9 hours; the beef should be easily pierced with a fork and fall apart with no resistance.
- Remove the meat to a platter and strain the remaining liquid into a small saucepan, simmering it on the stove to reduce into a thick, glossy jus.
- Shred the beef into large, chunky pieces and pour the reduced jus back over the meat before arranging it on your snack board.
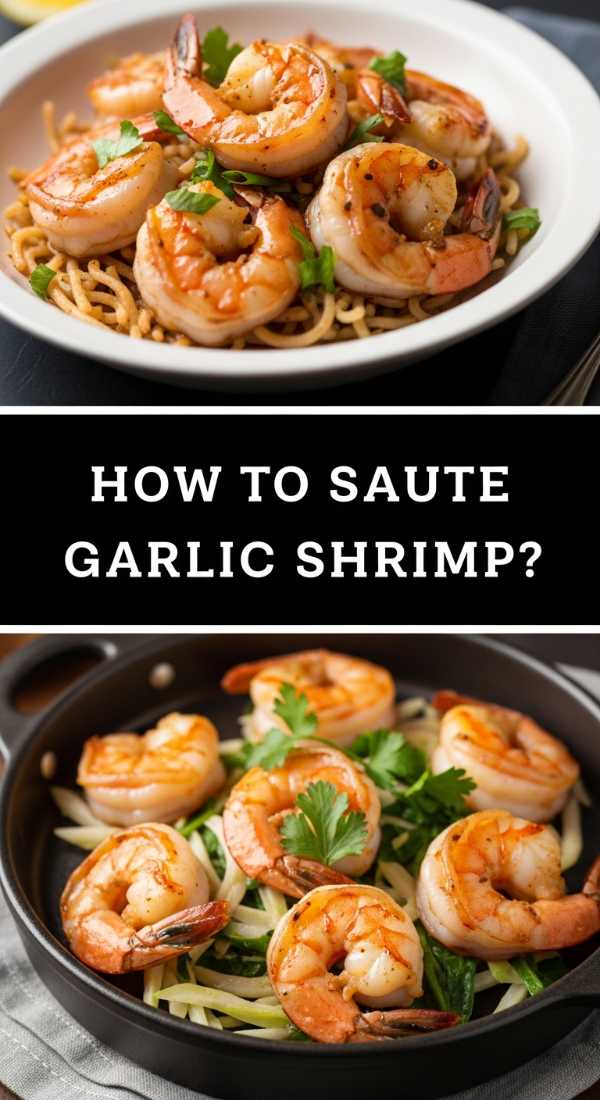
How to Saute Garlic Shrimp

Why we love this
Garlic shrimp offers a vibrant, snappy texture and an explosion of coastal flavor that brightens up any spread. The combination of pungent, sautéed garlic and the sweet, briny notes of fresh shrimp creates a sophisticated profile that feels light yet incredibly satisfying. The shrimp curl into beautiful pink shapes that look like little gems on your board, finished with a squeeze of lemon that cuts through the rich butter. It’s a fast, elegant addition that brings a touch of the seaside to your table.
Ingredients
- 1 lb large shrimp, peeled and deveined
- 4 cloves garlic, thinly sliced
- 1/4 cup unsalted butter
- 1/2 tsp red pepper flakes
- Fresh parsley for garnish
How to make it
- Pat the shrimp dry with a paper towel and season lightly with salt; moisture is the enemy of a good sear, so make sure they are very dry.
- In a large skillet, melt the butter over medium-high heat until it begins to sizzle and foam.
- Add the sliced garlic and red pepper flakes, cooking for just 30-60 seconds until the garlic is fragrant and turns a very light golden color.
- Add the shrimp to the pan in a single layer, ensuring they don’t overlap so they cook quickly and evenly.
- Cook for 2 minutes on the first side, then flip and cook for another 1-2 minutes until they turn opaque and form a tight “C” shape.
- Immediately remove from the heat to prevent overcooking, toss with fresh parsley and a squeeze of lemon, and serve while piping hot.
How to Bake Garlic Salmon

Why we love this
Baked garlic salmon is a showstopper, offering a beautiful pink hue and a delicate, flaky texture that feels both healthy and indulgent. The garlic creates a savory crust on top of the fish, which contrasts perfectly with the moist, tender meat that yields at the touch of a fork. The aroma is a wonderful mix of roasted garlic and the clean, fresh scent of high-quality fish, making it a sophisticated anchor for a viral board. It looks stunning when garnished with fresh herbs and lemon slices, adding a pop of color and elegance.
Ingredients
- 2 large salmon fillets
- 3 tbsp melted butter
- 2 cloves garlic, minced
- 1 tbsp honey
- 1 tsp dried dill
How to make it
- Preheat your oven to 400°F (200°C) and line a baking sheet with parchment paper or foil for easy cleanup.
- In a small bowl, whisk together the melted butter, minced garlic, honey, and dried dill to create a savory-sweet glaze.
- Place the salmon fillets on the baking sheet and pat the skin and flesh dry with a paper towel.
- Brush the garlic butter mixture generously over the top of the salmon, ensuring every inch is covered in the glaze.
- Bake for 12-15 minutes, depending on the thickness of the fillets; the salmon is done when it flakes easily with a fork and the internal temperature is 145°F.
- For an extra touch, switch the oven to broil for the last 2 minutes to slightly caramelize the honey and garlic on the surface.
How to Prepare Street Tacos
[IMAGE_10]
Why we love this
Street tacos are the ultimate interactive food, offering a vibrant mix of smoky, charred tortillas and bright, acidic toppings. The texture is a playful combination of the soft, warm corn tortilla and the crunch of fresh onions and cilantro, creating a bite that is balanced and exhilarating. They bring a fun, casual energy to a viral board, encouraging guests to assemble their own and customize their flavors. The smell of toasted corn and lime juice is instantly inviting, making these a guaranteed hit at any social gathering.
Ingredients
- 10-12 small corn tortillas
- 2 cups cooked carnitas or steak
- 1/2 cup diced white onion
- 1/2 cup chopped cilantro
- 3 limes, cut into wedges
How to make it
- Warm a dry cast-iron skillet or griddle over high heat until it is very hot to prepare the tortillas.
- Place each corn tortilla in the skillet for 30-45 seconds per side until they develop small charred spots and become pliable.
- Keep the tortillas warm by stacking them inside a clean kitchen towel or a dedicated tortilla warmer.
- Prepare your fillings by finely dicing the white onion and chopping the cilantro together in a small bowl for the traditional “street style” garnish.
- To assemble, place two tortillas together (for strength), add a generous portion of your warm protein, and top with the onion-cilantro mix.
- Serve immediately with plenty of lime wedges on the side, instructing guests to squeeze the juice over the top just before eating to brighten the flavors.
The Secret to a Viral Board
Once you’ve mastered these individual components, the magic of the snack board comes down to the arrangement. Use a large wooden board as your canvas and start by placing your larger items—like the steak or the slow-cooked beef—in the center. Fill in the gaps with the crispy potatoes or the street tacos, and use small bowls for the creamy pasta or shrimp. The goal is to create a sense of abundance, where every corner of the board offers something new to discover. Remember, the best boards are those that invite people to dig in, so don’t worry about perfect symmetry—worry about flavor and fun!
Frequently Asked Questions
Our community often asks about the best ways to keep boards looking fresh and tasting great. Here are a few tips to ensure your viral board is a success every single time.