
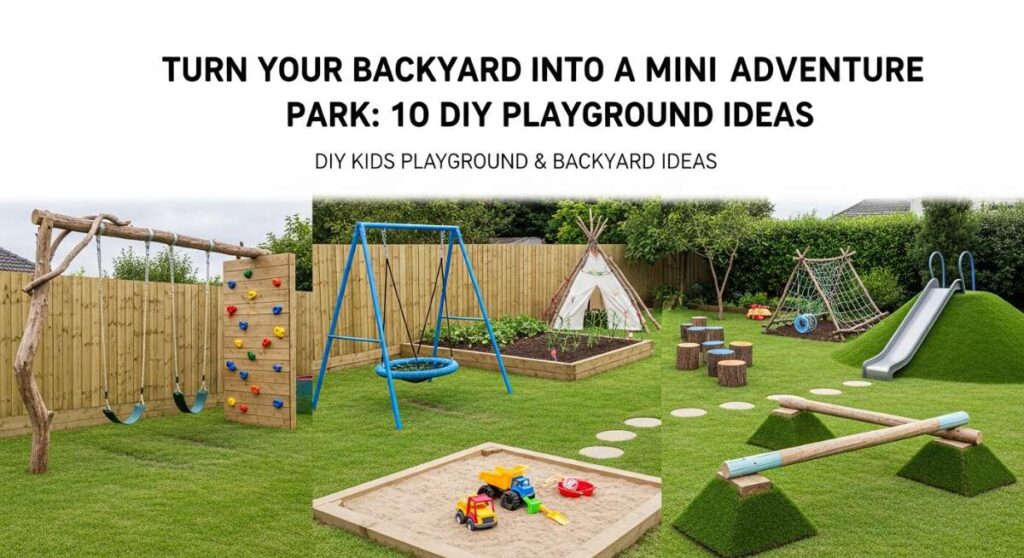
Remember those long, golden summer afternoons where the world felt like it ended at the garden fence, yet held infinite possibilities? There’s something truly magical about a child’s ability to turn a simple patch of grass into a kingdom, a spaceship, or a secret jungle. As parents, we often find ourselves longing to gift them that sense of wonder, away from the hum of tablets and the glow of television screens, right in the safety of our own backyards.
Creating a DIY playground isn’t just about the physical structures; it’s about building a sanctuary for growth, laughter, and messy, hands-on learning. Whether you have a sprawling lawn or a tiny urban patio, these ideas are designed to spark the imagination and get those little legs moving. Let’s roll up our sleeves and transform your outdoor space into an adventure park that your kids will remember for the rest of their lives.
How to Build a Natural Playground for Endless Outdoor Discovery
Why we love this
There is a grounded, earthy soul to a natural playground that synthetic plastics simply cannot replicate. We love the way the rough bark of cedar logs feels against small palms and the sweet, resinous scent of fresh wood chips underfoot after a light rain. This space invites a tactile connection to the earth, where the cool dampness of moss and the sun-warmed surfaces of smooth river stones provide a rich sensory tapestry that encourages children to explore the physical world with curiosity and respect.
Essential Elements:
- Large cedar or oak logs of varying heights
- Smooth river stones and boulders
- Organic wood chip mulch (playground grade)
- Native non-toxic shrubs and tall grasses
- Flat tree stumps for stepping stones
How to make it
- Begin by clearing a dedicated area of the yard, ensuring the ground is relatively level and free of sharp debris or hidden roots that could cause trips.
- Lay down a heavy-duty landscape fabric to prevent weeds, then border the area with larger logs or pressure-treated timber to contain your base material.
- Fill the basin with at least 9-12 inches of playground-grade wood chips; this depth is crucial for impact absorption when kids are jumping from stumps.
- Position your largest logs horizontally to create balance beams, securing them by digging shallow trenches and backfilling with soil and gravel to prevent rolling.
- Arrange tree stumps in a winding path, varying the heights slightly to challenge coordination; ensure each stump is buried at least 1/3 into the ground for maximum stability.
- Incorporate boulders and native plants around the perimeter to create a “secret garden” feel, checking that no plants have thorns or are toxic if accidentally nibbled.
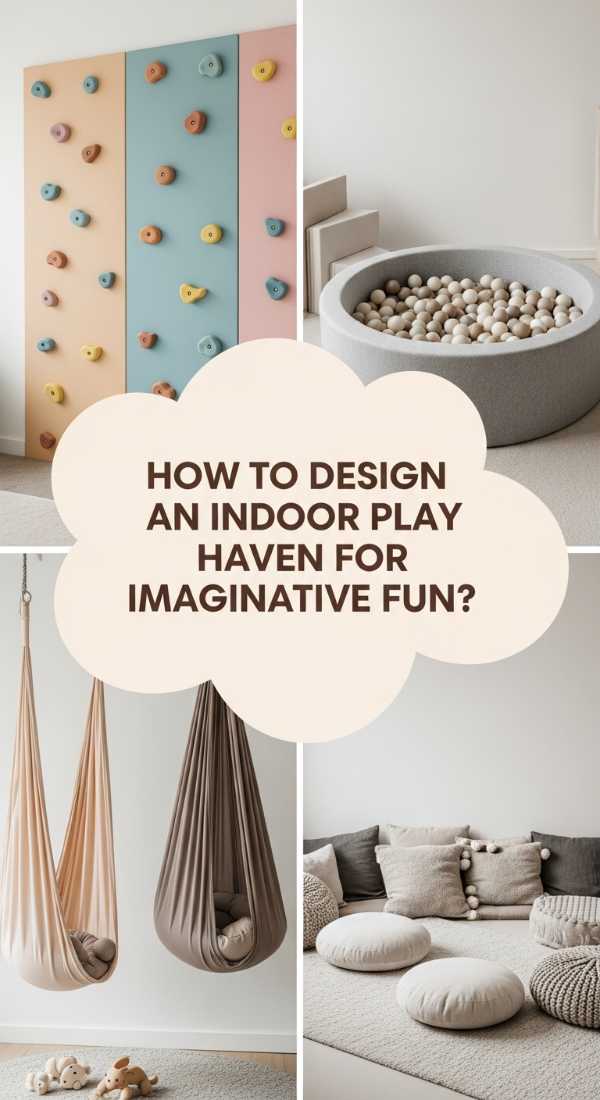
How to Design an Indoor Play Haven for Imaginative Rainy Day Fun
Why we love this
When the clouds roll in and the rain begins to drum against the windowpane, having a cozy, dedicated indoor haven turns a gloomy day into an epic adventure. We adore the softness of high-pile rugs under bare feet and the warm, amber glow of recessed LED lighting that makes the space feel like a hidden cavern. It’s a plush, safe retreat where the aroma of cedar wood accents blends with the comforting scent of clean cotton, creating an environment where imagination can flourish even when the outdoors are off-limits.
Essential Elements:
- Soft, modular foam play mats or a thick shag rug
- Wall-mounted rock climbing holds (bolted into studs)
- A suspended fabric swing or hammock chair
- Low-profile wooden bookshelves
- Soft, dimmable LED strip lighting
How to make it
- Identify a corner of a playroom or bedroom and clear the space, ensuring there are no sharp furniture edges or fragile items within a 6-foot radius.
- Install the wall climbing holds by locating wall studs using a high-quality stud finder; drill pilot holes and use heavy-duty lag bolts to ensure they can support the weight of a growing child.
- Secure a heavy-duty ceiling hook into a structural joist for the fabric swing, testing it with your own weight first to ensure it is rock-solid.
- Layer the floor with thick foam padding topped with a washable rug to provide a soft landing zone for climbers and swingers.
- Mount low-level shelving to keep toys organized, using anchors to prevent tip-overs, and finish the space with battery-operated puck lights for a magical, “starry” atmosphere.
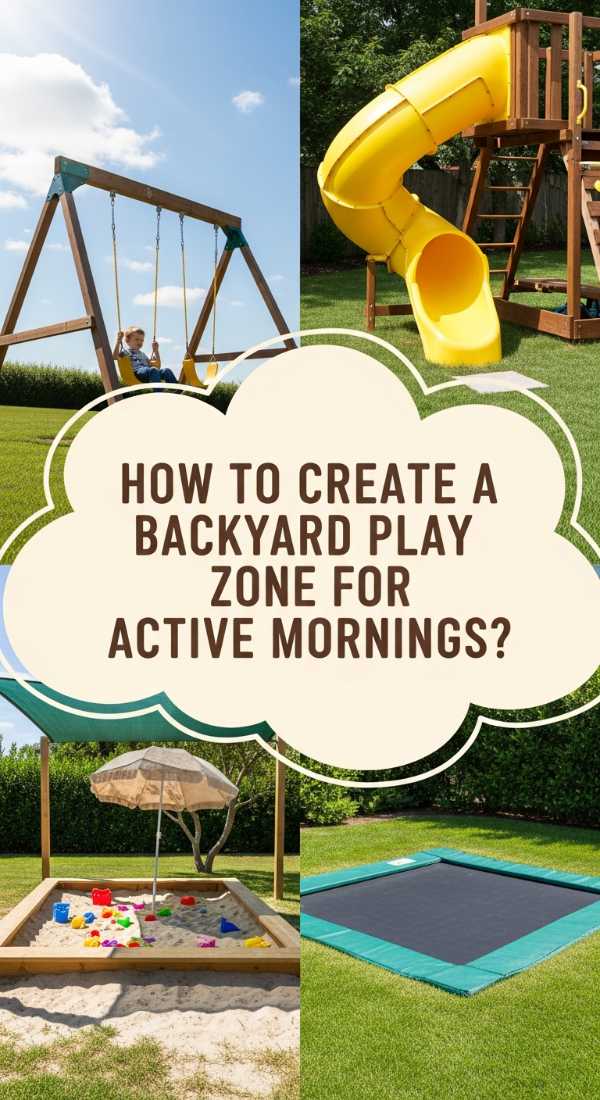
How to Create a Backyard Play Zone for Active Family Mornings
Why we love this
There is nothing quite like the crisp air of a Saturday morning, the grass still wet with dew, and the sound of joyful shouting as the family gathers for active play. We love this zone because it bridges the gap between structured exercise and pure, unadulterated fun, featuring textures of durable rubber, bouncy turf, and the metallic ring of a well-placed bell. It’s a high-energy space that smells of fresh-cut grass and sun-warmed rubber, designed to get the heart racing and the laughter flowing before the first pot of coffee is even finished.
Essential Elements:
- Interlocking rubber tiles or synthetic sports turf
- A mounted basketball hoop or low soccer goal
- Durable outdoor chalkboards
- A sturdy wooden bench for “spectators”
- Weather-proof storage bins for balls and jump ropes
How to make it
- Select a flat, sun-drenched portion of the yard and mark out a rectangular perimeter using spray paint or string.
- Excavate the top layer of grass (about 2-3 inches) and replace it with a leveled layer of crushed stone or sand to ensure proper drainage.
- Install your synthetic turf or rubber tiles, ensuring they are tightly interlocked and pinned down with landscape staples to prevent shifting during high-speed sprints.
- Mount the basketball hoop to a sturdy post or wall, ensuring the rim height is appropriate for your children’s age while allowing for future adjustments.
- Set up a “refueling station” with the wooden bench and storage bins, organizing equipment by size and type so kids can independently start their own games.
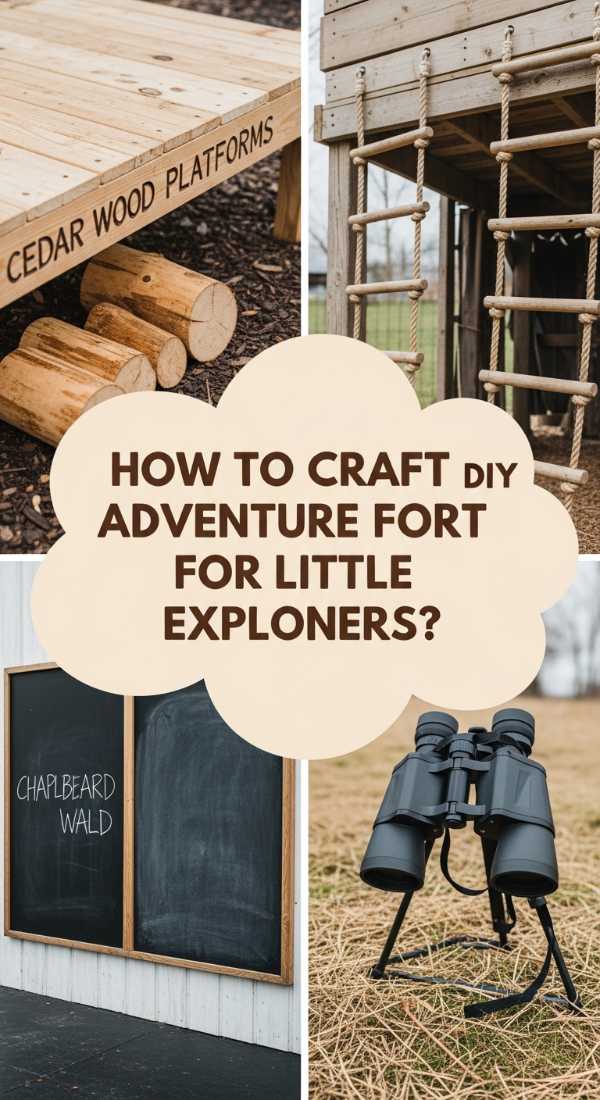
How to Craft a DIY Adventure Fort for Little Explorers
Why we love this
The adventure fort is the ultimate crown jewel of any childhood backyard, a secret headquarters where plans are made and kingdoms are defended. We love the sturdy, tactile weight of sanded pine planks and the way the sunlight filters through the cracks in the walls, creating dancing patterns on the floor. There is a nostalgic, woody aroma to a new fort that feels like pure potential, offering a high-vantage point where kids can feel like masters of their own tiny universe, tucked away in the rustling leaves.
Essential Elements:
- Pressure-treated 4×4 posts and 2×4 framing lumber
- Cedar fence pickets for siding
- Corrugated metal or asphalt shingles for the roof
- A sturdy wooden ladder or climbing ramp
- Telescopes and periscopes for the “lookout”
How to make it
- Dig four post holes at least 2 feet deep, set your 4×4 posts in concrete, and use a level to ensure they are perfectly vertical before the concrete sets (allow 24 hours).
- Construct a floor frame at your desired height (usually 3-5 feet for safety) and deck it with sturdy boards, ensuring there are no gaps where small toes could get pinched.
- Frame the walls with 2x4s, leaving openings for a door and windows to allow for airflow and visibility.
- Attach the cedar siding pickets, leaving a small 1/8-inch gap for natural wood expansion, and sand down every edge until it is smooth to the touch.
- Install the roof at a slight pitch to shed rainwater, and add the finishing explorer touches like a mounted telescope and a bucket-and-pulley system for hauling up “supplies.”
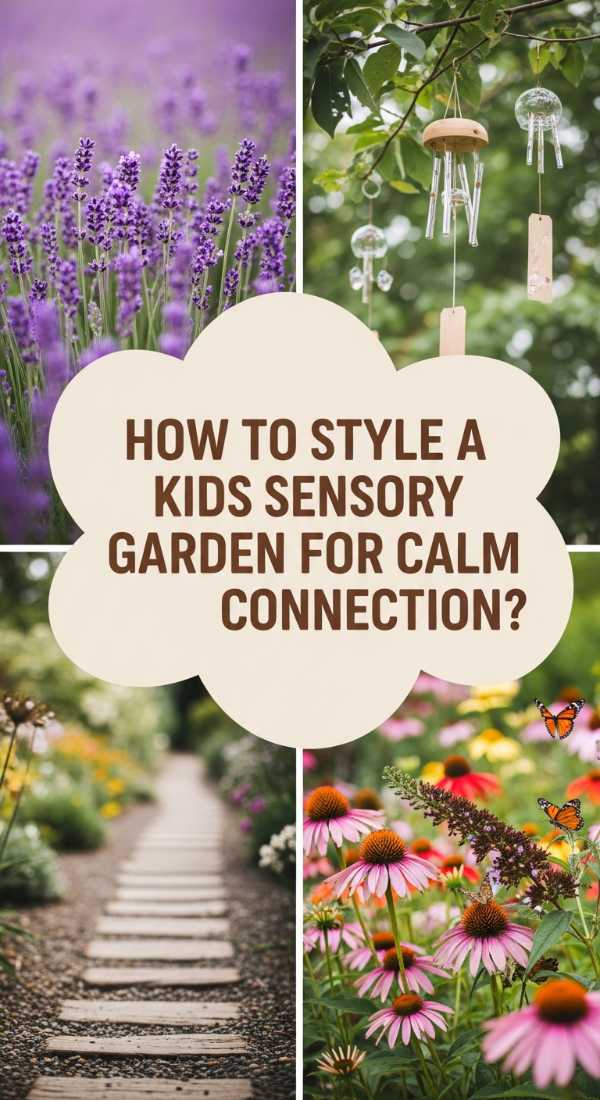
How to Style a Kids Sensory Garden for Calm Nature Connection
Why we love this
In a world that is often loud and fast, a sensory garden offers a soft place to land, a space designed for quiet wonder and mindful connection. We love the velvety texture of Lamb’s Ear leaves against the skin and the soothing, herbal fragrance of crushed mint and lavender that wafts through the air. The gentle chime of bamboo wind bells and the sight of butterflies hovering over bright zinnias create a peaceful sanctuary that grounds the spirit and encourages children to slow down and observe the small miracles of nature.
Essential Elements:
- Raised wooden garden beds at child-height
- A variety of non-toxic plants (Lamb’s Ear, Lavender, Mint, Marigolds)
- A small solar-powered water fountain
- Pea gravel or smooth pebble paths
- Bamboo wind chimes
How to make it
- Construct or purchase raised beds and fill them with high-quality organic potting soil mixed with compost for nutrient-rich growth.
- Organize the plants by sense: “Touch” (fuzzy leaves), “Smell” (aromatic herbs), “Sight” (vibrant colors), and “Sound” (rustling grasses or water features).
- Install a small solar fountain in a shallow basin to provide the gentle sound of running water, ensuring the basin is too shallow to pose any safety risk.
- Create winding paths between the beds using pea gravel, which provides a satisfying crunching sound when walked upon.
- Place a small wooden bench or a circle of smooth stones in the center of the garden to serve as a “reflection spot” for quiet reading or observation.
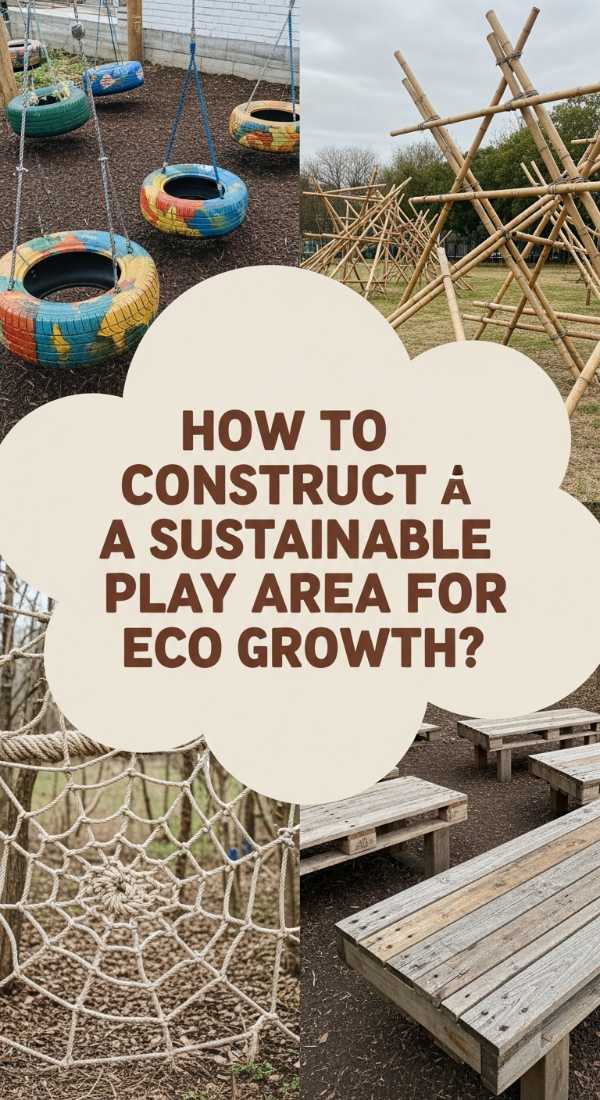
How to Construct a Sustainable Play Area for Eco Friendly Growth
Why we love this
Sustainability and play go hand-in-hand in this clever setup that teaches kids the value of repurposing while they have the time of their lives. We love the rugged, industrial feel of upcycled tires painted in vibrant primary colors and the smooth, weathered patina of reclaimed pallet wood. There’s a wonderful, earthy honesty to this space, smelling of rain-washed wood and outdoor air, where every element has a previous story and a new, playful purpose that honors the environment.
Essential Elements:
- Used tractor or car tires (thoroughly scrubbed)
- Reclaimed heat-treated pallets (marked HT)
- Natural hemp rope
- Non-toxic, low-VOC exterior paint
- River sand or pea gravel for the base
How to make it
- Source used tires from local shops and scrub them vigorously with soap and water to remove all grease and road debris; drill drainage holes in the bottom to prevent water pooling.
- Paint the tires with bright, weather-resistant paint and stack them in various configurations—a pyramid for climbing or a line for a tunnel—securing them together with heavy-duty bolts.
- Dismantle HT-marked pallets and use the wood to build simple structures like a low-profile bridge or a toy storage crate, ensuring all nails are removed and wood is sanded.
- Create a “tire swing” by suspending a tire horizontally from a strong tree limb using thick hemp rope and a heavy-duty swivel hook.
- Incorporate a small compost bin or a rain barrel nearby to involve children in the “cycle of the garden,” turning play into a practical lesson in ecology.
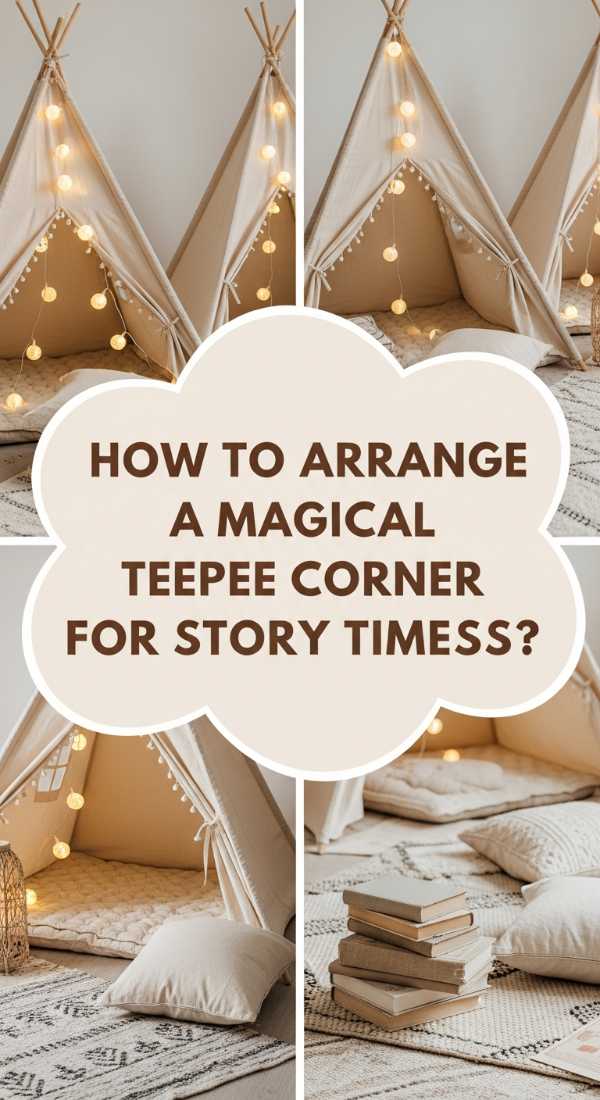
How to Arrange a Magical Teepee Corner for Enchanted Story Times

Why we love this
There is an undeniable enchantment in a teepee corner, a cozy nook that feels like it was plucked straight from a fairy tale. We love the heavy, comforting drape of canvas fabric and the way it muffles the outside world, creating a quiet sanctuary for reading. The space is filled with the soft texture of faux-fur pillows and the ethereal sparkle of fairy lights, smelling faintly of vanilla and cotton, making it the perfect spot for siblings to huddle together and get lost in the pages of a favorite book.
Essential Elements:
- Six 6-foot wooden poles (bamboo or dowels)
- A large canvas drop cloth or 4-5 yards of sturdy fabric
- Twine or heavy leather cord
- Warm-toned LED fairy lights (battery operated)
- Piles of floor cushions and blankets
How to make it
- Lash the tops of your six poles together using a tripod hitch with the twine, then fan them out at the base to create a stable, circular skeleton.
- Drape your fabric around the frame, pinning it at the top and leaving a flap in the front for the entrance; you can secure the fabric to the poles using small ties or heavy-duty staples.
- Wind the fairy lights around the interior poles, securing them carefully so they don’t hang low enough to become a tangle hazard.
- Fill the floor of the teepee with a thick rug and an assortment of plush cushions to create a nest-like environment.
- Place a small basket of books and a battery-powered lantern inside to invite immediate use, ensuring the teepee is placed in a low-traffic corner of the yard or playroom.
How to Plan a Custom Obstacle Course for Healthy Child Development

Why we love this
The obstacle course is where grit meets glee, providing a physical challenge that builds confidence with every completed lap. We love the variety of textures here—the rough grip of a climbing rope, the smooth slide of a plastic tunnel, and the springy resistance of a balance beam. It smells like sun-baked earth and effort, offering a dynamic environment where kids can test their limits, improve their motor skills, and celebrate the pure joy of movement in the fresh air.
Essential Elements:
- Plastic pop-up tunnels
- Hula hoops for agility rings
- A low-hanging monkey bar set or rope ladder
- Plywood and 2x4s for a slanted “A-frame” wall
- A stopwatch and a “finish line” ribbon
How to make it
- Map out a circuit that flows logically through your yard, alternating between high-intensity tasks (climbing) and precision tasks (balancing).
- Build a simple balance beam by securing a 4×4 beam across two low wooden blocks, keeping it only 6 inches off the ground for safety.
- Set up “agility rings” by laying hula hoops on the grass in a staggered pattern, securing them with small garden stakes so they don’t slide.
- Construct a small A-frame climbing wall using a plywood sheet reinforced with 2x4s; add wooden cleats for foot-holds and ensure the angle is not too steep for your child’s ability.
- Finish the course with a “crawl zone” using a pop-up tunnel or a series of low-hanging pool noodles that kids must wiggle under without touching.
How to Install a Modern Play Structure for Minimalist Backyard Beauty

Why we love this
For the design-conscious parent, this modern play structure is a breath of fresh air, proving that children’s spaces can be both functional and beautiful. We love the clean, architectural lines of dark-stained cedar and the sleek, matte finish of black powder-coated hardware. It’s a sophisticated play area that smells of high-quality wood sealant and crisp air, blending seamlessly into a contemporary landscape while providing a sturdy, minimalist canvas for high-altitude imagination.
Essential Elements:
- Pre-cut cedar lumber kits or architectural timber
- Powder-coated steel brackets and hardware
- A sleek, monochromatic slide (black or gray)
- Modern geometric climbing grips
- Minimalist pea gravel or poured-in-place rubber base
How to make it
- Design a structure based on clean geometric shapes (cubes or triangles), avoiding the cluttered look of traditional multicolored play sets.
- Use heavy-duty modern brackets to join your timbers, which provides both a structural advantage and a high-end, industrial aesthetic.
- Sand the cedar to a high finish and apply a modern transparent or semi-solid stain in charcoal or deep teak to protect the wood and elevate the look.
- Install a straight-line slide and geometric climbing holds that match your color palette, keeping the overall silhouette of the structure low and sleek.
- Surround the base with a uniform border of gray pea gravel or a dark rubber mulch to maintain the minimalist, clean-edged look of the entire installation.
How to Setup a Mud Kitchen Station for Messy Creative Learning
[IMAGE_10]
Why we love this
There is a profound, messy joy in a mud kitchen—a place where the finest “pinecone pies” and “leaf lattes” are served daily. We love the squelch of wet earth between fingers and the clinking sound of metal spoons against old stainless steel pots. It’s a space that smells of damp soil and rain, where the rules of cleanliness are suspended in favor of sensory exploration and the delightful, creative chaos of pretend play that only a bucket of water and a patch of dirt can provide.
Essential Elements:
- An old wooden potting bench or built-from-pallets station
- A stainless steel sink basin (or a plastic tub)
- Old pots, pans, whisks, and ladles
- A chalkboard for the “daily menu”
- A nearby water source (hose or water dispenser)
How to make it
- Build a simple waist-high counter using treated lumber or a repurposed table, ensuring it is sturdy enough to hold several gallons of water and mud.
- Cut a hole in the countertop to drop in a stainless steel mixing bowl or an old sink, allowing it to act as the primary “mixing station.”
- Install a series of hooks above the counter to hang utensils, and a lower shelf to store pots and pans when the “restaurant” is closed.
- Fill a dedicated bin with clean topsoil and provide a watering can or a small gravity-fed water barrel so kids can mix their own mud to the desired consistency.
- Add “garnish” stations nearby with baskets of pebbles, acorns, and dried leaves to encourage decorative (and messy) culinary masterpieces.
Conclusion
Transforming your backyard into an adventure park doesn’t require a professional contractor or a massive budget—it just takes a little imagination and a willingness to get your hands dirty. From the sensory heights of a garden to the structural wonder of a DIY fort, these projects create more than just play areas; they create the backdrop for your family’s most cherished memories. So pick a project, grab your tools, and watch as your backyard becomes the most popular destination in the neighborhood. Happy building!