
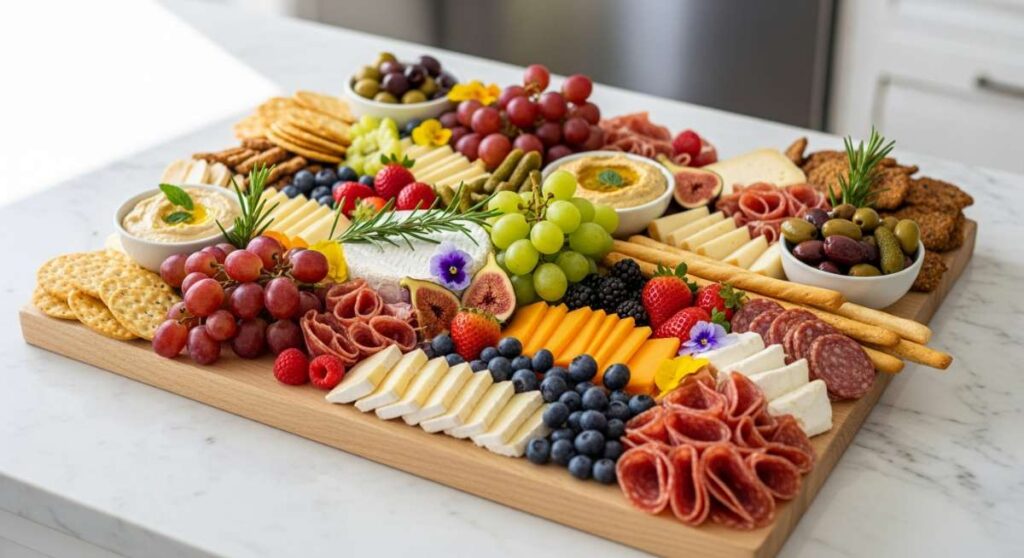
The Secret to Making Every Food Board Instagram-Worthy and Easy
We’ve all been there—scrolling through our feeds and stopping dead in our tracks at a perfectly curated food board. You know the ones: overflowing with colors, textures, and a certain ‘effortless’ charm that feels impossible to recreate in a real kitchen with a real schedule. But here is a little secret from my kitchen to yours: the most viral boards aren’t about expensive silver platters or professional catering. They are about the harmony of simple, well-executed dishes arranged with love and a bit of a creative eye.
Lately, I’ve found that the joy of hosting comes from taking the pressure off the ‘perfection’ and leaning into the ‘presentation.’ When you assemble a board, you aren’t just serving dinner; you’re inviting your friends and family to an interactive experience. It’s about the crunch of a fresh stirfry sitting next to the velvetiness of a creamy pasta, all nestled together in a way that says, ‘come and help yourself.’ This guide is my ultimate collection of the pillars that make every food board a masterpiece.
How to make crispy stirfry

Why we love this
There is something absolutely intoxicating about the sound of a hot wok and the immediate aroma of ginger and garlic hitting oil. This crispy stirfry brings a vibrant, snappy texture to your food board that provides a much-needed break from heavier proteins. We love it because it’s a celebration of freshness—the way the sugar snap peas retain their bright green hue and the bell peppers offer a sweet, smoky crunch. Every bite is coated in a glossy, umami-rich glaze that makes your palate dance, turning a simple side dish into the star of the show.
Ingredients
- 2 cups broccoli florets
- 1 red bell pepper, sliced thin
- 1 cup sugar snap peas
- 2 tablespoons soy sauce
- 1 tablespoon toasted sesame oil
- 1 teaspoon freshly grated ginger
- 2 cloves garlic, minced
- 1 tablespoon cornstarch mixed with 2 tablespoons water
- Garnish: toasted sesame seeds and sliced scallions
How to make it
- Begin by prepping all your vegetables to the same relative size to ensure even cooking. This is a fast-paced dish, so having everything ready (mise en place) is essential.
- Heat a large wok or a heavy-bottomed cast-iron skillet over high heat until a drop of water flicked onto it sizzles and evaporates instantly. Add a high-smoke-point oil like avocado or peanut oil.
- Toss in the broccoli and peppers first. Use a spatula to constantly move them around the pan for 2-3 minutes. You are looking for ‘char’ marks without losing the internal crunch.
- Create a well in the center of the vegetables and add your ginger and garlic. Sauté for only 30 seconds until fragrant to prevent burning.
- Pour in the soy sauce and sesame oil. Immediately follow with the cornstarch slurry. Stir vigorously as the liquid begins to bubble and thicken into a glossy lacquer.
- Turn off the heat the moment the sauce coats the vegetables. Transfer to your board and garnish immediately while the steam is still rising.
How to roast juicy chicken
Why we love this
A roast chicken is the ultimate anchor for any impressive food board, offering a golden, sun-kissed aesthetic that screams comfort. When done correctly, the skin achieves a glass-like crispness that shatters under the knife, revealing meat so tender it practically falls away from the bone. The aroma of rosemary and thyme infusing with rendered fat is enough to make anyone’s mouth water before they even sit down. It provides a savory, grounding element that pairs beautifully with both bright fruits and rich, starchy sides, making it a versatile centerpiece for any gathering.
Ingredients
- 1 whole chicken (about 4 lbs), patted completely dry
- 3 tablespoons softened salted butter
- 2 tablespoons olive oil
- 4 cloves garlic, smashed
- Fresh sprigs of rosemary and thyme
- 1 lemon, halved
- Kosher salt and freshly cracked black pepper
How to make it
- Preheat your oven to 425°F (218°C). High heat is the secret to rendering the fat quickly and achieving that coveted crispy skin.
- Remove any giblets and pat the chicken dry with paper towels—and I mean *thoroughly* dry. Moisture is the enemy of crispiness.
- Generously season the cavity with salt and pepper, then stuff it with the lemon halves and fresh herb sprigs.
- Rub the softened butter under the skin of the breast meat carefully, then coat the entire exterior of the bird with olive oil and a heavy dusting of salt and pepper.
- Place the chicken on a roasting rack in a pan. Roast for about 50-60 minutes. Use a meat thermometer to check the thickest part of the thigh; it should read 165°F (74°C).
- Crucial step: Let the chicken rest for at least 15 minutes before carving. This allows the juices to redistribute, ensuring every slice is incredibly succulent.
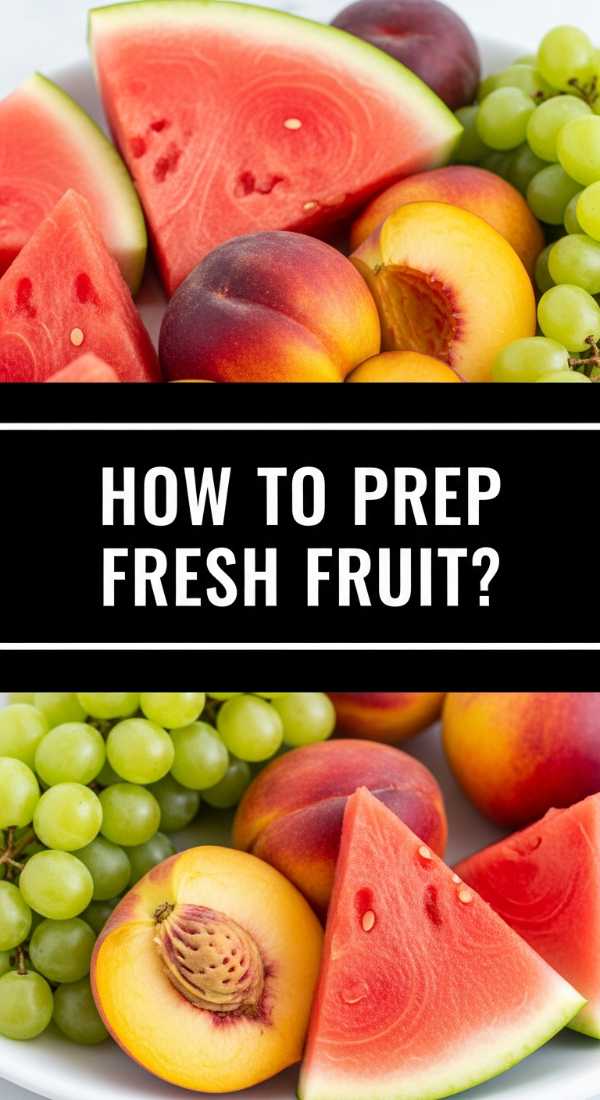
How to prep fresh fruit
Why we love this
Fruit isn’t just a side; it’s the jewelry of your food board. We love fresh fruit because it provides those pops of neon pinks, deep purples, and sun-drenched yellows that catch the eye and make a board look truly ‘Instagram-worthy.’ Beyond the aesthetics, the cold, refreshing burst of juice from a perfectly ripe slice of melon or a tart berry cleanses the palate between savory bites. It adds a natural sweetness and a structural variety that prevents a board from looking too flat or monochromatic, bringing a sense of life and seasonal freshness to the table.
Ingredients
- 1 small honeydew or cantaloupe melon
- 1 pint fresh raspberries
- 2 kiwis, peeled
- 1 bunch concord grapes
- Fresh mint leaves for garnish
- Optional: Honey for drizzling
How to make it
- Start by washing all fruit in a cold water bath with a splash of vinegar to remove any residue, then pat them dry gently.
- For the melon, slice it into thin wedges or use a melon baller for playful, uniform spheres that add height to the board.
- Slice the kiwis into perfect rounds or ‘star’ shapes by using a zig-zag cutting technique around the equator of the fruit.
- Keep the grapes on their stems in small clusters. This makes them easier for guests to grab and adds a rustic, vineyard-style look to your arrangement.
- Arrange the fruit by color, creating a gradient or placing contrasting colors (like green kiwi next to red raspberries) next to each other for maximum visual impact.
- Just before serving, tuck fresh mint leaves into the gaps and add a light drizzle of honey over the melon to make the fruit glisten under the light.
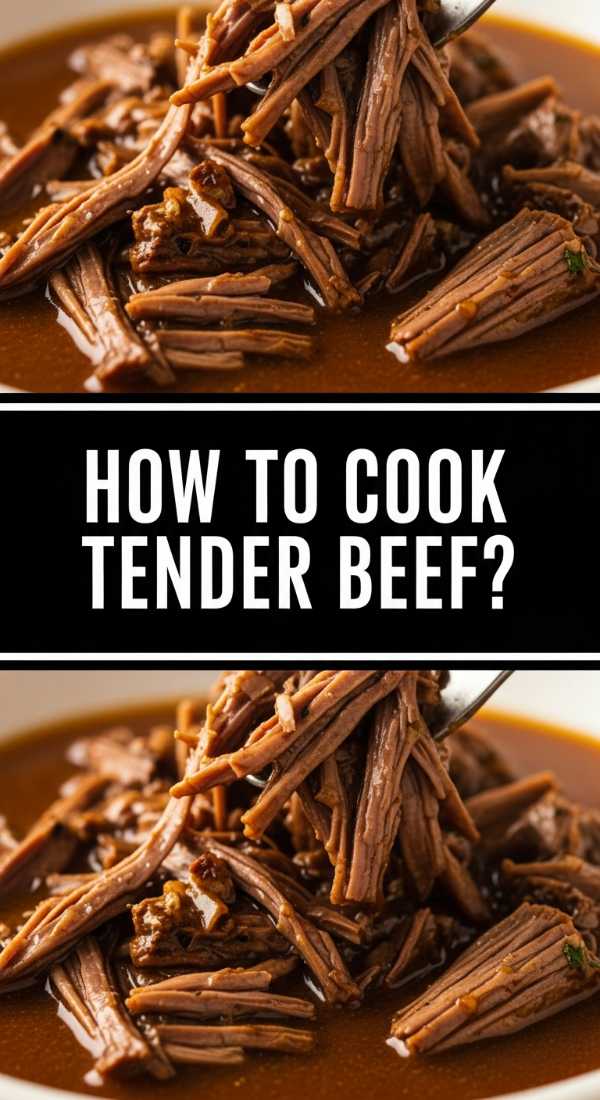
How to cook tender beef

Why we love this
Beef brings a sense of luxury and ‘wow’ factor to a food board that few other ingredients can match. When cooked to a perfect medium-rare, the beef offers a buttery, melt-in-your-mouth texture and a deep, earthy umami flavor that satisfies the soul. We love the contrast between the dark, caramelized crust—achieved through a hard sear—and the tender, pink interior that spills with flavor. It’s the kind of dish that feels celebratory and indulgent, making your guests feel truly pampered while providing a hearty, protein-rich foundation for the entire spread.
Ingredients
- 1.5 lbs flank steak or sirloin tips
- 2 tablespoons avocado oil
- 3 tablespoons butter
- 3 cloves garlic, crushed
- 2 sprigs fresh rosemary
- Flaky sea salt
How to make it
- Take the beef out of the refrigerator at least 30 minutes before cooking. Bringing the meat to room temperature ensures it cooks evenly from edge to center.
- Pat the meat extremely dry and season aggressively with salt and pepper. The salt helps create that beautiful brown crust (the Maillard reaction).
- Heat a cast-iron skillet over medium-high heat until it is smoking slightly. Add the oil.
- Lay the beef in the pan, searing for 3-4 minutes without moving it. You want a deep, dark brown crust to form. Flip and sear the other side.
- Lower the heat to medium and add the butter, garlic, and rosemary. As the butter melts and foams, use a large spoon to continuously baste the beef with the flavored fat for 2 minutes.
- Remove the beef when it reaches an internal temp of 130°F (for medium-rare). Let it rest for 10 minutes on a cutting board before slicing against the grain into thin strips.
How to make creamy pasta

Why we love this
There is nothing more comforting than a swirl of pasta bathed in a silky, rich sauce that clings to every strand. This dish is the ultimate ‘crowd-pleaser’ on a food board because it offers a soft, decadent texture that balances out the crunch of vegetables or the char of grilled meats. We love the way the aroma of aged parmesan and garlic fills the room, creating an instant sense of home and warmth. It’s a luscious, indulgent addition that feels like a hug in a bowl, making your food board feel complete and satisfyingly filling.
Ingredients
- 12 oz fettuccine or linguine
- 1 cup heavy cream
- 1/2 cup unsalted butter
- 1.5 cups freshly grated Parmesan cheese
- 2 cloves garlic, finely minced
- Pinch of nutmeg
- Fresh parsley, chopped
How to make it
- Boil a large pot of heavily salted water. Cook the pasta until it is just ‘al dente’—it should have a slight bite because it will finish cooking in the sauce.
- Reserve 1 cup of the starchy pasta water before draining. This liquid gold is the secret to a smooth, non-clumpy sauce.
- In a wide skillet over medium heat, melt the butter and sauté the minced garlic until it is translucent and fragrant, but not browned.
- Whisk in the heavy cream and a pinch of nutmeg. Let it simmer gently for 2-3 minutes until it begins to slightly thicken.
- Reduce heat to low and gradually whisk in the Parmesan cheese. Do this slowly to ensure it melts into a smooth emulsion rather than seizing up.
- Toss the pasta into the sauce, adding splashes of the reserved pasta water as needed to reach a glossy, creamy consistency. Garnish with parsley and serve immediately while hot.
How to bake lava cake
Why we love this
If you want to end your food board experience with a literal explosion of flavor, the lava cake is your best friend. There is something magical about piercing a firm, cakey exterior only to have a river of warm, molten chocolate flow out onto the board. We love it for the sheer drama it brings, but also for the intense, bittersweet cocoa aroma that lingers in the air. It’s a multi-sensory experience: the warmth of the chocolate, the coolness of any accompanying fruit, and the velvety smooth texture that feels like pure decadence in every bite.
Ingredients
- 4 oz high-quality semi-sweet chocolate, chopped
- 1/2 cup unsalted butter
- 2 large eggs plus 2 egg yolks
- 1/4 cup granulated sugar
- 2 tablespoons all-purpose flour
- Pinch of salt
- Powdered sugar for dusting
How to make it
- Preheat your oven to 425°F (218°C) and generously grease four ramekins with butter and a dusting of cocoa powder to ensure they pop out easily.
- Melt the chocolate and butter together in a double boiler or in 30-second intervals in the microwave, stirring until perfectly smooth.
- In a separate bowl, beat the eggs, egg yolks, sugar, and salt with a whisk or electric mixer until the mixture is thick, pale, and doubled in volume.
- Gently fold the melted chocolate into the egg mixture using a spatula. Sift the flour over the top and fold again just until combined—do not overmix, or the cake will be tough.
- Divide the batter among the ramekins and bake for exactly 12-14 minutes. The sides should be firm, but the center should still look soft and slightly jiggling.
- Let them cool for 1 minute, then run a knife around the edges and invert them onto your board. Dust with powdered sugar for that ‘snowy’ finish.
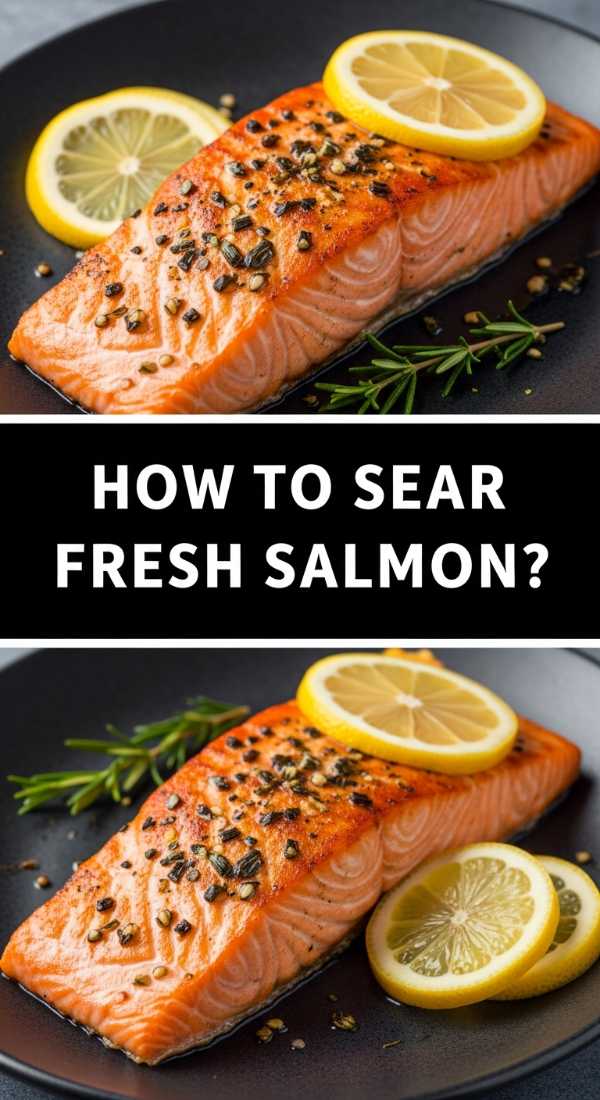
How to sear fresh salmon

Why we love this
Salmon is the elegant, sophisticated cousin of the food board family. We love it because it offers a striking coral-pink color that contrasts beautifully against dark wood or slate platters. When seared correctly, the skin becomes incredibly salty and crisp—almost like a potato chip—while the flesh remains buttery and tender. The light, clean aroma of fresh fish paired with a squeeze of bright lemon creates a high-end dining vibe that elevates the entire board from ‘casual snack’ to ‘gourmet feast.’ It’s healthy, beautiful, and undeniably delicious.
Ingredients
- 2 salmon fillets (6 oz each), skin-on
- 1 tablespoon olive oil
- 1 tablespoon butter
- 1/2 lemon, sliced
- Kosher salt and black pepper
How to make it
- Remove the salmon from the fridge 20 minutes before cooking. Use a paper towel to press down firmly on the skin side to remove every drop of moisture.
- Season the flesh side with salt and pepper. Leave the skin side plain for now to prevent the salt from drawing out moisture before it hits the pan.
- Heat a stainless steel or non-stick skillet over medium-high heat. Add the oil and butter. Once the butter stops foaming, it’s ready.
- Place the salmon skin-side down in the pan. Use a flexible spatula to press the fish down firmly for the first 30 seconds to prevent the skin from curling.
- Cook for 4-5 minutes undisturbed. You will see the cooked color creeping up the side of the fillet. Once the skin is golden and releases easily from the pan, flip it.
- Sear the flesh side for only 1-2 minutes for a medium-rare center. Finish with a squeeze of lemon juice directly into the pan to create a quick pan-sauce, then plate.
How to make tasty tacos

Why we love this
Tacos are the ultimate interactive food board element because they invite everyone to get their hands dirty and customize their meal. We love the vibrant chaos of a taco spread: the smell of toasted corn tortillas, the zesty hit of fresh lime, and the creamy richness of avocado. Every taco is a tiny, handheld explosion of texture, from the crunch of raw onions to the tender, spiced filling. They bring a fun, social energy to the board that encourages conversation and sharing, making them a viral favorite for any weekend gathering.
Ingredients
- 1 lb ground beef or shredded chicken
- 1 packet taco seasoning (or cumin, chili powder, garlic powder)
- Small corn or flour tortillas
- Toppings: diced onions, cilantro, crumbled cotija cheese, lime wedges, sliced jalapeños
How to make it
- Brown your protein in a large skillet over medium-high heat, breaking it into small crumbles. Drain any excess fat to keep the board from getting greasy.
- Add your spices and a splash of water. Simmer for 5 minutes until the liquid has evaporated and the meat is deeply seasoned and coated in a thick sauce.
- While the meat simmers, char your tortillas. This is the ‘secret’ step: place them directly over a low gas flame for 10 seconds per side until they have charred edges and are pliable.
- Place the tortillas in a clean kitchen towel to keep them warm and soft while you assemble the rest of the board.
- Prepare all your toppings in small, colorful pinch bowls. This keeps the juices from running into other foods on the board.
- Arrange the components in a ‘build-your-own’ fashion, placing the warm tortillas next to the protein and surrounding them with the bright, fresh garnishes.
How to grill perfect burgers

Why we love this
There is nothing quite like the smoky, charred aroma of a burger fresh off the grill to signal that the party has started. We love burgers on a board because they are the quintessential symbol of summer and togetherness. The sight of melted cheese dripping over a juicy patty, nestled in a pillowy, toasted brioche bun, is pure food photography gold. The combination of the hot, savory meat with cold, crisp lettuce and tangy pickles provides a satisfying contrast that makes every bite feel like a classic American indulgence.
Ingredients
- 1 lb ground chuck (80/20 fat ratio is key for juiciness)
- 4 brioche buns
- 4 slices sharp cheddar cheese
- Butter for toasting
- Salt and heavy black pepper
How to make it
- Form the ground beef into patties that are about 1 inch wider than the buns, as they will shrink during cooking. Press a small thumbprint into the center of each patty to prevent it from puffing up into a ball.
- Generously season both sides with salt and pepper right before they hit the grill. Seasoning too early can change the texture of the meat.
- Preheat your grill to high (about 450°F). Place the patties on the grates and sear for 3-4 minutes without pressing down on them (don’t squeeze out the juices!).
- Flip the burgers and immediately place a slice of cheese on each. Close the grill lid for 2 minutes to allow the cheese to melt into a gooey blanket.
- While the meat rests, butter the buns and toast them on the grill for 30 seconds until golden and fragrant.
- Assemble the burgers with minimal toppings to prevent sogginess, and place them on the board accompanied by extra pickles and condiments on the side.
How to stew savory soup
[IMAGE_10]
Why we love this
While most boards are dry, adding a small ‘soup station’ or a central bowl of savory stew brings a cozy, grounded element to your spread. We love the deep, complex aroma of a slow-simmered broth—it’s the scent of patience and care. The texture is smooth and warming, providing a liquid element that helps tie together drier components like crusty bread or roasted meats. It’s a sensory delight that appeals to our need for comfort, offering a steaming, aromatic experience that makes your board feel like a complete, multi-course meal in one frame.
Ingredients
- 1 quart high-quality beef or vegetable stock
- 2 carrots, diced
- 2 stalks celery, diced
- 1 yellow onion, minced
- 1 cup diced potatoes
- 2 sprigs thyme
- 1 tablespoon tomato paste
How to make it
- In a heavy Dutch oven, sauté the onion, carrots, and celery (the mirepoix) in olive oil over medium heat until softened and the onions are translucent.
- Stir in the tomato paste and cook for 2 minutes. This ‘browns’ the paste, deepening the color of the soup and removing the raw metallic taste.
- Add the potatoes and pour in the stock. Scrape the bottom of the pot to release any ‘fond’ (browned bits) into the liquid—this is where all the flavor lives.
- Add the thyme sprigs and bring to a boil, then immediately reduce to a low simmer. Cover and let it cook for at least 30-40 minutes.
- The soup is done when the potatoes are fork-tender and the broth has slightly reduced and intensified in flavor.
- Remove the thyme stems and ladle the soup into small, handled crocks or one large central tureen for the board. Top with a crack of fresh pepper and a sprig of green.
Conclusion: The Art of the Board
Creating an Instagram-worthy food board isn’t about being a professional chef; it’s about being a storyteller. By combining these different textures, temperatures, and colors, you’re creating a narrative of flavors that your guests will remember long after the last crumb is gone. Remember to fill in the gaps with nuts, herbs, and small garnishes to give it that ‘viral’ overflowing look. Now, grab your biggest platter and start building!