
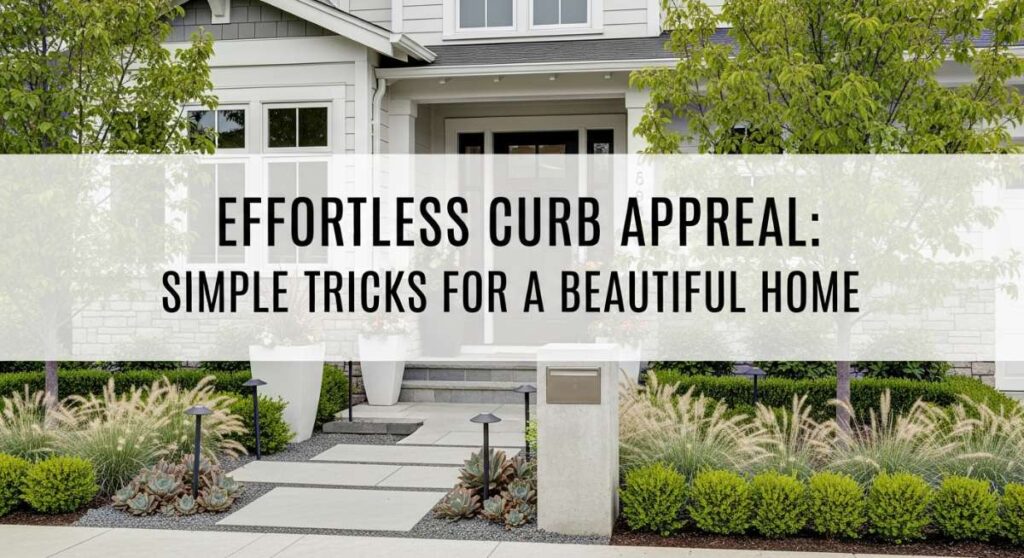
There is a specific kind of magic that happens when you pull into your driveway and feel an immediate sense of peace wash over you. We often think of our homes as the sanctuary inside the four walls, but the journey to that sanctuary starts the moment your feet hit the pavement. Curb appeal isn’t just about impressing the neighbors; it’s about creating a transition from the chaotic outside world into your own personal haven.
Lately, my Pinterest feed has been exploding with the ‘Viral Simple Home & Garden’ aesthetic—those perfectly curated yet attainable vibes that make a house look like it belongs in a glossy magazine. It’s all about the small, intentional touches: the glow of a warm light, the texture of natural stone, and the vibrant pop of a well-placed flower. These projects aren’t just chores; they are love letters to the space where you live your life.
Today, I’m sharing ten of my favorite effortless tricks to elevate your home’s exterior. Whether you have a sprawling backyard or a tiny front porch, these ideas are designed to be approachable, budget-friendly, and high-impact. Let’s roll up our sleeves and transform your home into the neighborhood’s most beautiful retreat.
How to Design a Low Retaining Wall for a Serene Garden Oasis

Why we love this
A low retaining wall provides a gorgeous architectural anchor that defines the edges of your garden with a sense of permanence and grace. We love the tactile contrast between the rugged, cool surface of the natural stone and the soft, swaying fronds of ferns or the vibrant petals of creeping phlox spilling over the edge. There is a deep, earthy aroma of damp soil and sun-warmed rock that accompanies this setup, making your garden feel like a timeless European courtyard. It creates a tiered visual interest that draws the eye upward, turning a flat lawn into a sophisticated, multi-dimensional sanctuary.
Essential Elements:
- Natural stone blocks or pre-cast concrete wall units
- Leveling sand and crushed gravel for the base
- Landscape fabric for drainage
- Rubber mallet and a long spirit level
- Perennial plants for the top tier
How to make it
- Begin by marking the path of your wall using a garden hose or spray paint; curved lines look more organic and serene.
- Excavate a trench about 6 inches deep and twice as wide as your stones to ensure a stable foundation.
- Fill the trench with 3 inches of crushed gravel, tamping it down firmly until it is rock-hard and perfectly level.
- Lay the first course of stones carefully; this is the most critical step, so use your spirit level on every single block to ensure it’s perfectly flat.
- Apply landscape fabric behind the first row and add a layer of gravel for drainage to prevent hydrostatic pressure from bowing the wall.
- Stack subsequent rows, staggering the joints like bricks for structural integrity, and use landscape adhesive between layers if the wall is over 12 inches high.
- Backfill the space behind the wall with high-quality garden soil and plant your favorite cascading flowers for that finished, lush look.
How to Build a DIY Planter Light Post for a Magical Porch Glow

Why we love this
When the sun dips below the horizon, there is nothing more inviting than the soft, golden amber glow of a lantern framed by lush greenery. This project combines the practicality of lighting with the organic beauty of a floral display, creating a welcoming beacon at the end of your walkway. We love the way the light catches the dew on the leaves at night, creating dancing shadows that make your porch feel like a whimsical forest clearing. It’s a sensory delight that blends the woody scent of cedar with the sweet perfume of night-blooming jasmine.
Essential Elements:
- Large heavy-duty ceramic or wooden planter
- 4×4 pressure-treated wood post (approx 6ft tall)
- Fast-setting concrete mix
- Solar-powered or hardwired outdoor lantern
- Potting soil and seasonal trailing flowers
How to make it
- Place your 4×4 post in the center of the large planter, ensuring it is perfectly vertical using a post level.
- Pour dry fast-setting concrete into the planter around the post, leaving about 6 inches of space at the top for soil.
- Add water to the concrete according to the package instructions and hold the post steady (or brace it) for 20-30 minutes until it sets.
- Once the concrete is fully cured (usually 24 hours), drill a small hole in the side of the planter just above the concrete line to allow for water drainage.
- Mount your lantern to the top of the post; if using solar, ensure the sensor isn’t blocked by the post cap.
- Fill the remaining space in the planter with nutrient-rich potting soil and a mix of upright and trailing plants like geraniums and sweet potato vine.
- Position the planter at the corner of your porch or the start of your path for an instant upgrade in evening ambiance.
How to Style Spring Flowers Wallpaper for a Refreshing Home Aesthetic

Why we love this
Bringing the outside in is the ultimate way to refresh your home’s aesthetic for the warmer months. A botanical wallpaper featuring delicate spring flowers creates a permanent garden indoors, offering a visual breath of fresh air every time you enter the room. We love the smooth, matte texture of high-quality paper and the way a floral pattern can make even a small entryway feel expansive and full of life. It evokes the feeling of a sun-drenched morning in a wildflower meadow, filling your space with a sense of optimism and timeless charm.
Essential Elements:
- Peel-and-stick or traditional floral wallpaper
- Wallpaper smoothing tool and a sharp utility knife
- Tape measure and a level
- Sugar soap or TSP for cleaning walls
- Seam roller
How to make it
- Prepare your walls by cleaning them thoroughly with sugar soap to remove any dust or oils, ensuring the adhesive bonds perfectly.
- Measure the height of your wall and cut your first panel, adding 2-3 inches of excess at the top and bottom for trimming.
- Use a level to draw a faint vertical line on the wall; never trust corners or door frames to be perfectly straight!
- Align the edge of your first panel with the leveled line and peel back the backing (if using peel-and-stick) or apply paste to the wall.
- Smooth the paper from the center outward using your smoothing tool, being careful to push out all air bubbles for a crisp finish.
- Align the pattern of the second panel perfectly with the first before pressing it down; this is the most time-consuming part, so take your time!
- Trim the excess at the ceiling and baseboard using a fresh, sharp blade for a professional-grade edge.
How to Create a Cute Campsite Setup for the Ultimate Glamping Experience
Why we love this
There is a soul-soothing quality to a well-styled campsite that makes you feel like you’ve escaped the modern world without sacrificing comfort. We love the juxtaposition of the rugged outdoors with the plush, soft textures of faux-fur throws and linen pillows. The scent of woodsmoke mingling with crisp pine needles and the sound of wind rustling through the canvas create a multi-sensory experience that is pure magic. It’s about creating a cozy pocket of warmth under the vast, twinkling night sky, turning a simple backyard sleepover into an epic, unforgettable glamping retreat.
Essential Elements:
- A-frame or bell tent
- Outdoor-rated rugs and floor cushions
- String lights (battery or solar)
- Low-profile folding table
- Portable fire pit and cozy textiles
How to make it
- Select a flat, well-drained area of your yard and clear away any sharp rocks or branches that could puncture the tent floor.
- Lay down a heavy-duty tarp slightly smaller than your tent’s footprint to prevent moisture from seeping through.
- Pitch your tent, ensuring the stakes are driven in at a 45-degree angle for maximum tension and stability.
- Layer the interior floor with a thick outdoor rug followed by plush blankets to provide insulation and a soft walking surface.
- Drape warm-toned LED string lights around the entrance and interior peaks to create a soft, diffused glow without the heat of traditional bulbs.
- Arrange a seating area outside with weather-resistant cushions and a small table for your evening cocoa or wine.
- Set up a safe perimeter for a small fire pit, ensuring it is at least 10 feet away from the tent and any low-hanging branches.
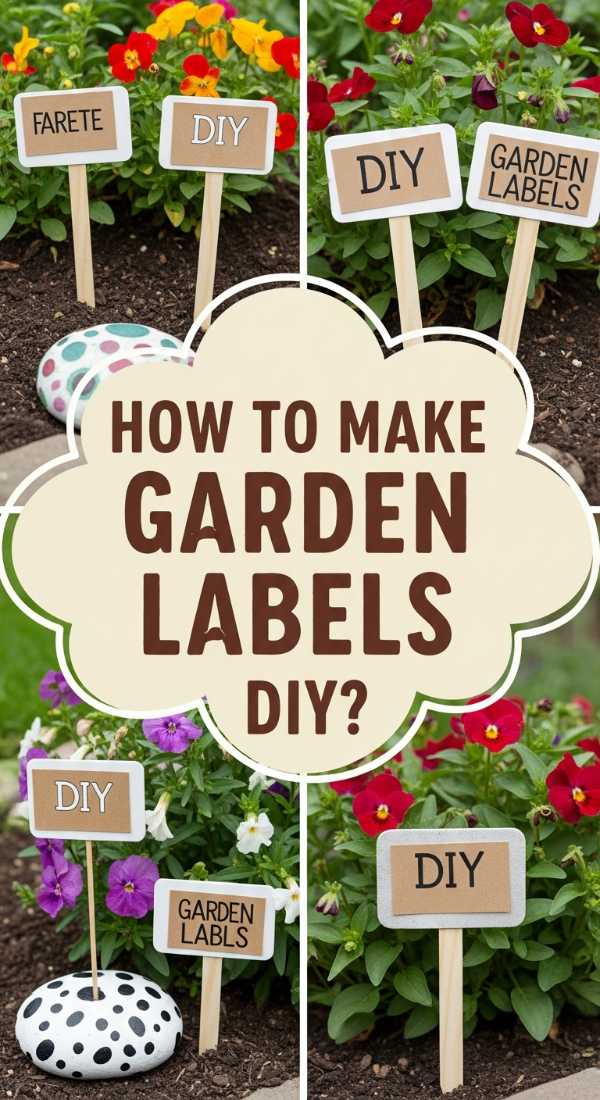
How to Make Garden Labels DIY for an Organized Backyard Sanctuary
Why we love this
A garden that is clearly labeled feels intentional, cared for, and deeply professional. We love the tactile satisfaction of writing out the names of heirloom tomatoes or fragrant basil onto smooth, weathered materials like wood or copper. These tiny details add a layer of rustic charm that makes your backyard feel like a curated botanical sanctuary. The sight of neat, uniform labels standing tall among the green leaves provides a sense of order that is incredibly grounding, turning the act of gardening into a beautifully organized ritual.
Essential Elements:
- Smooth river stones or wooden paint stirrers
- Waterproof permanent markers or acrylic paint pens
- Clear outdoor varnish or sealant
- Twine or copper wire (optional for hanging)
- Sandpaper
How to make it
- If using wood, sand the surface until it is buttery smooth to prevent the ink from bleeding into the wood grain.
- Plan your lettering on a piece of paper first to ensure the plant names fit perfectly on your chosen medium.
- Write the plant names clearly using a high-quality outdoor-rated marker; don’t be afraid to add little botanical sketches for flair!
- Let the ink dry completely (at least 1 hour) to avoid any smudging during the sealing process.
- Apply two thin coats of clear outdoor varnish, allowing for full drying time between coats, to protect the labels from rain and UV fading.
- If using stones, place them at the base of the plant; if using stakes, push them deep enough into the soil so they won’t lean.
- Refresh the labels every spring to keep your garden looking sharp and well-documented.
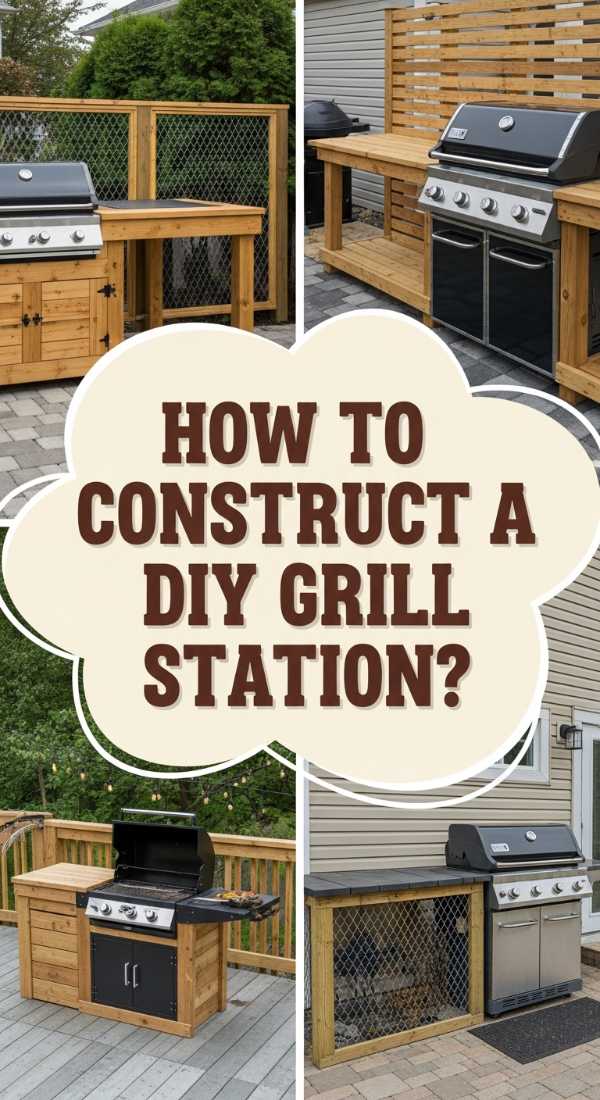
How to Construct a DIY Grill Station Cheap for Epic Summer Cookouts

Why we love this
There is nothing quite like the sizzle of a steak on a hot grate combined with the aromatic scent of cedar and charcoal on a summer evening. A dedicated grill station elevates the outdoor cooking experience from a chore to a culinary event. We love the sturdy, reliable feel of a custom-built countertop that gives you space to prep and serve without running back and forth to the kitchen. It becomes the heart of the backyard, a place where friends gather and stories are shared over the smoky heat of the grill.
Essential Elements:
- Pressure-treated 2x4s for the frame
- Cedar planks for the exterior siding
- Concrete pavers or a stainless steel sheet for the countertop
- Heavy-duty locking casters (optional for mobility)
- Outdoor hooks for utensils
How to make it
- Design a basic rectangular frame using 2x4s, ensuring the height is comfortable for cooking (typically 36 inches).
- Use 3-inch exterior-grade screws to assemble the frame, adding a middle shelf for storing charcoal, wood chips, or extra propane.
- Install your chosen siding; cedar is ideal because it smells wonderful and naturally resists rot and insects.
- For the countertop, lay down a piece of cement board and top it with large-format smooth concrete pavers for a heat-resistant surface.
- Sand all wooden edges thoroughly to prevent splinters and apply a food-safe exterior stain or sealer.
- Attach a magnetic strip or heavy-duty hooks to the side of the station to keep your tongs, spatulas, and grill brushes within reach.
- If you want a mobile station, attach heavy-duty casters to the legs so you can move the party wherever the shade is!
How to Arrange Front Door Baskets with Flowers for a Welcoming Entrance
Why we love this
A basket of fresh flowers hanging on the front door is like a warm hug for your guests before they even step inside. We love the soft, woven texture of seagrass or wicker baskets paired with the delicate, airy petals of seasonal blooms. The scent of fresh eucalyptus or sweet alyssum greets you every time you open the door, infusing your entryway with a natural perfume. It’s a simple, high-impact way to celebrate the seasons and show that your home is a place of care and hospitality.
Essential Elements:
- Flat-backed hanging basket (wicker or metal)
- Plastic liner or heavy-duty trash bag
- Floral foam or high-quality potting soil
- Assortment of ‘thriller, filler, and spiller’ plants
- Over-the-door wreath hanger
How to make it
- Line your basket with plastic to protect the wicker from moisture, poking a few small holes in the bottom for drainage.
- If using fresh-cut flowers, soak your floral foam in water until it sinks; if using live plants, fill the basket with potting soil.
- Start with your ‘thriller’—a tall, structural plant like a small ornamental grass or a snapdragon—placed in the center.
- Add your ‘fillers’ around the center; these should be mounding plants like pansies or petunias that give the basket volume.
- Finish with your ‘spillers’ like English ivy or lobelia, tucked into the front edges so they gracefully drape over the basket’s rim.
- Mist the arrangement with water daily to keep the blooms looking turgid and vibrant.
- Swap out the plants every few months to reflect the changing seasons—think kale and mums for fall, and tulips for spring.
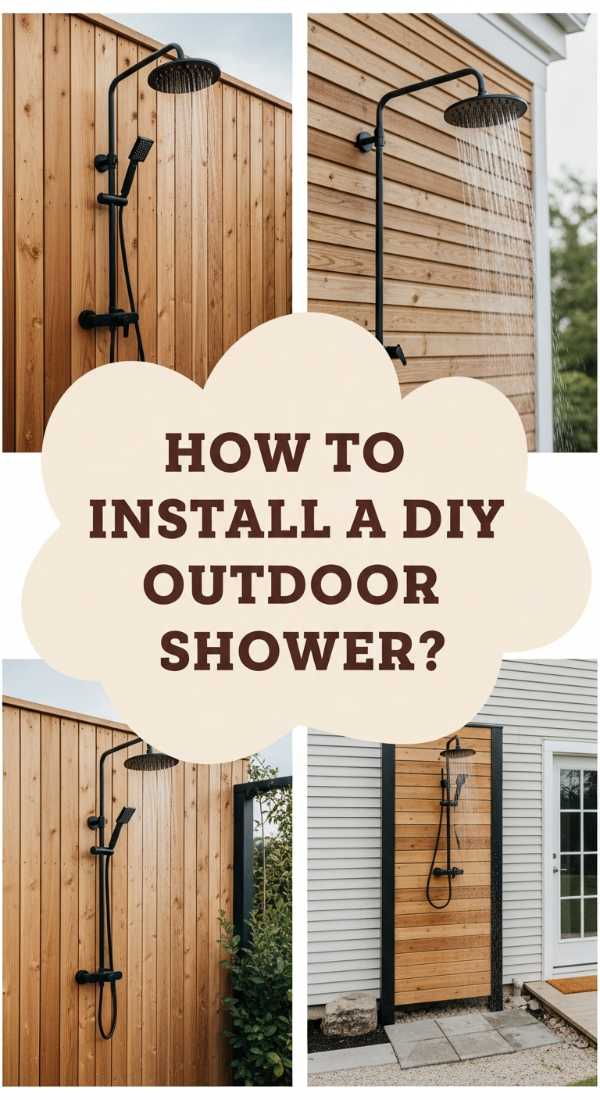
How to Install DIY Outdoor Shower Ideas Simple for a Spa-Like Retreat
Why we love this
Imagine the feeling of cool water on your skin after a long day in the sun, surrounded by the fresh scent of cedar and the privacy of lush green leaves. An outdoor shower is the ultimate luxury that connects you with nature in the most intimate way. We love the rustic, spa-like aesthetic of wood slats and chrome fixtures against a backdrop of blue sky. It’s a sensory escape that turns a basic rinse into a refreshing ritual, making your backyard feel like a high-end tropical resort.
Essential Elements:
- Outdoor shower kit (connects to a garden hose)
- Cedar or teak wood panels for the privacy screen
- Concrete pavers or river stones for the base
- Heavy-duty brackets and posts
- Solar-powered walkway lights
How to make it
- Choose a location with good natural drainage and access to an outdoor faucet; a sunny spot is best to help the area dry out quickly.
- Level the ground and lay down a 3×3 foot area of smooth river stones or large concrete pavers to act as a splash pad.
- Install two or three privacy panels using cedar slats; leave small gaps between the slats to allow for airflow and a peek of the garden.
- Mount the shower fixture to a sturdy post or the side of your house at a height of about 7 feet.
- Connect the fixture to your garden hose using a high-quality brass splitter so you can still use your hose for the lawn.
- Add a small wooden bench and a couple of hooks for towels to complete the spa-like atmosphere.
- Plant some moisture-loving greenery like hostas around the base to soak up the runoff and add to the lush vibe.
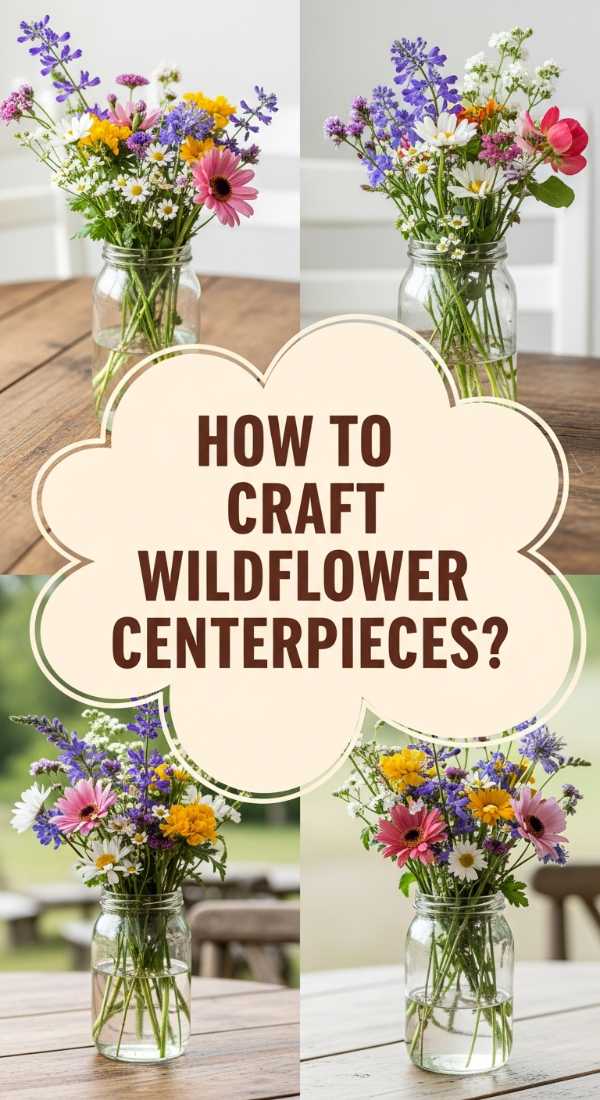
How to Craft Wildflower Centerpieces Round Table for a Dreamy Picnic Vibe
Why we love this
There is a wild, untamed beauty to a centerpiece that looks like it was gathered during a sunrise stroll through a meadow. We love the organic, asymmetrical shapes of wildflowers and the way their vivid colors pop against a simple linen tablecloth. The faint, honey-like scent of clover and the delicate rustle of dried grasses create an atmosphere of effortless elegance. It’s the perfect way to bring a sense of whimsy and romance to an outdoor meal, making even a casual lunch feel like a special celebration of the natural world.
Essential Elements:
- An assortment of local wildflowers and greenery
- Vintage glass jars or ceramic pitchers of varying heights
- Floral shears or sharp scissors
- Clear floral tape
- Fresh, cool water
How to make it
- Gather your flowers in the early morning when they are most hydrated; look for a mix of focal blooms, airy fillers, and interesting foliage.
- Strip all leaves from the bottom half of the stems so that no greenery is submerged in the water, which prevents bacterial growth.
- Fill your jars with cool water and create a grid across the top using clear floral tape to help the stems stay in place.
- Start by placing your heaviest, most vibrant flowers (the focal points) near the rim of the jar to ground the arrangement.
- Add your taller, more delicate stems toward the center, allowing them to lean at natural angles for that ‘just-picked’ look.
- Fill in any gaps with light, airy fillers like Queen Anne’s Lace or baby’s breath to add volume and texture.
- Group three or five jars of different heights in the center of your round table to create a dynamic, layered visual that doesn’t block conversation.
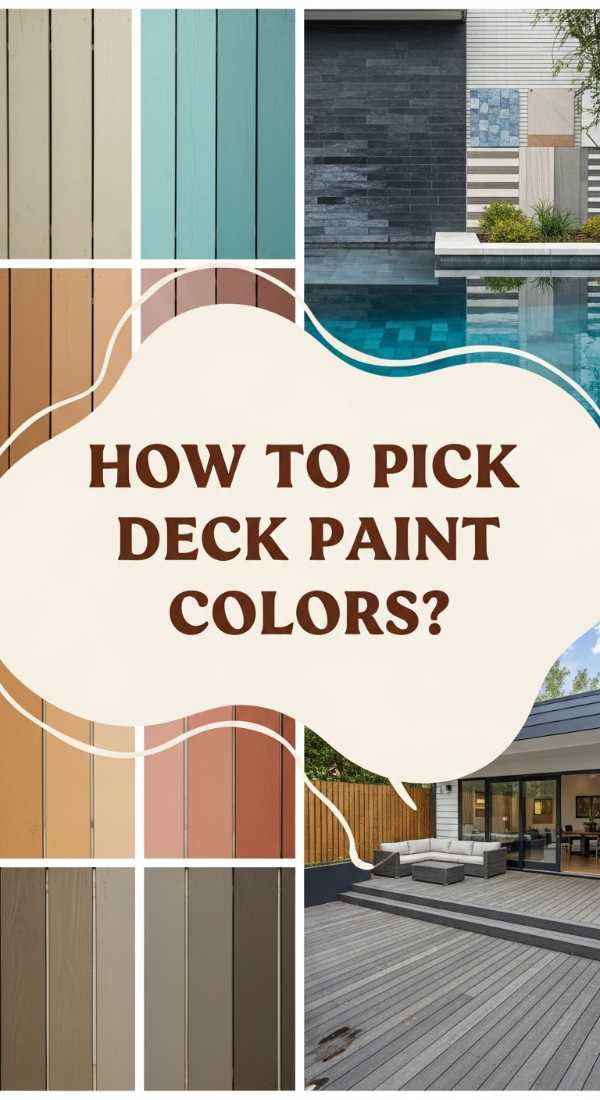
How to Pick Deck Paint Colors for a Modern Poolside Haven
[IMAGE_10]
Why we love this
The right paint color can transform an aging wooden deck into a sleek, modern oasis that feels like an extension of your indoor living space. We love the way a crisp, cool charcoal or a warm, sandy greige can make the blue of a pool or the green of the lawn pop with intensity. There is a satisfying, smooth feel to a freshly painted surface underfoot, and the clean lines of a uniform color provide a perfect canvas for your outdoor furniture. It’s a total reset for your home’s exterior, offering a polished and contemporary vibe that lasts for years.
Essential Elements:
- High-quality slip-resistant deck paint or solid stain
- Power washer and stiff scrub brush
- Wood filler and sandpaper
- Long-handled paint rollers and high-quality brushes
- Painter’s tape
How to make it
- Clean the deck thoroughly using a power washer to remove all dirt, mold, and old, flaking paint; let it dry for at least 48 hours.
- Inspect the wood for any cracks or holes; fill them with an exterior-grade wood filler and sand smooth once dry.
- Choose a color that complements your home’s siding; cool tones (blue-greys) are modern, while warm tones (taupes) feel more organic.
- Apply a primer if you are making a drastic color change or if the wood is particularly porous to ensure an even finish.
- Start by painting the railings and any tight corners with a brush before moving to the main deck boards.
- Use a long-handled roller to apply the paint to the boards, working in the direction of the grain and doing two boards at a time to avoid lap marks.
- Apply two thin, even coats rather than one thick one, allowing for the full recommended drying time between applications to ensure maximum durability.
Creating Your Own Outdoor Sanctuary
Transforming your home’s curb appeal doesn’t require a massive renovation or a professional crew. It’s found in the small details—the way a garden label looks in the soil, the glow of a porch light, or the fresh color of a painted deck. By taking these simple steps, you aren’t just improving your property value; you’re creating a space that welcomes you home every single day. I hope these projects inspire you to get outside, breathe in the fresh air, and start building the garden oasis of your dreams. Happy DIYing!
Frequently Asked Questions
How often should I refresh my front door basket? To keep it looking its best, I recommend swapping out the plants every season. Use bulbs and pansies in spring, heat-loving petunias in summer, mums in fall, and evergreen sprigs with berries for the winter months.
What is the best way to maintain a DIY grill station? Since it’s outdoors, you should re-seal the wood once a year with a clear outdoor UV-protectant. If you have a stone countertop, a simple wipe-down with soapy water after each use will keep it looking brand new.
Do I really need a gravel base for a low retaining wall? Yes! The gravel base is essential for drainage and to prevent the wall from shifting during freeze-thaw cycles. Without it, your beautiful wall will likely lean or crack within a single season.