
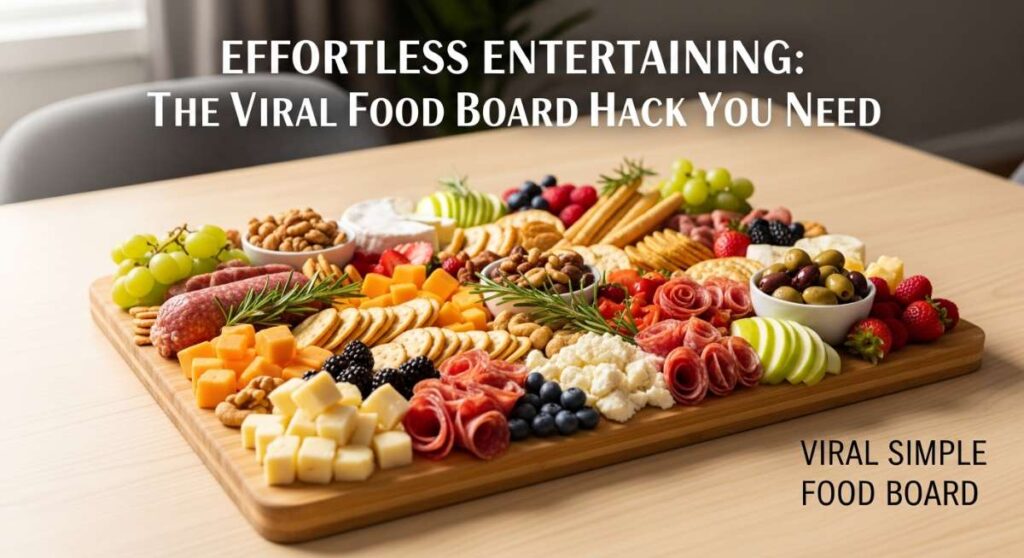
Effortless Entertaining: The Viral Food Board Hack You Need
There is something inherently magical about the way a beautifully arranged spread brings people together. I remember the first time I hosted a summer gathering; I spent hours trapped in the kitchen, missing the laughter and the stories unfolding in the living room, only to emerge exhausted with a single hot dish. That’s when I discovered the magic of the food board. It’s more than just a trend; it’s a philosophy of slow living and shared joy that prioritizes connection over kitchen-induced stress.
The beauty of this viral food board hack lies in its accessibility and visual impact. By transforming simple, everyday ingredients into a curated tapestry of colors and textures, you create an interactive experience that invites guests to graze, linger, and truly enjoy the moment. Whether you are hosting a formal brunch or a casual backyard hangout, these boards turn the act of eating into a vibrant celebration of life’s simple pleasures.
How to make aesthetic snacks?
Why we love this
Aesthetic snacks are the ultimate mood booster, turning a mid-afternoon slump into a moment of pure indulgence. We love how the combination of earthy rosemary, sea salt, and toasted nuts creates a sensory experience that is both sophisticated and comforting. The aroma of herbs hitting the warm oil fills the room, while the varying textures—from the airy crunch of popcorn to the buttery snap of pecans—provide a satisfying complexity that keeps you coming back for just one more handful.
Ingredients
- Organic popcorn kernels
- Whole raw almonds and pecans
- Fresh rosemary sprigs
- Extra virgin olive oil
- Flaky sea salt
- Smoked paprika
How to make it
- Begin by heating two tablespoons of high-quality olive oil in a heavy-bottomed pot over medium heat. To test the temperature, drop a single kernel in; when it spins, the oil is ready.
- Add 1/2 cup of kernels and cover with a lid, shaking the pot occasionally to ensure even heating and to prevent burning. Once the popping slows to 2 seconds apart, remove from heat immediately.
- In a small skillet, heat another tablespoon of oil and toss in three sprigs of fresh rosemary and your nuts. Toast them over medium-low heat for 3-5 minutes until the rosemary is crisp and the nuts are fragrant and golden brown.
- In a large wooden bowl, toss the warm popcorn with the herb-infused oil, the toasted nuts, a generous sprinkle of flaky sea salt, and a dash of smoked paprika for a hint of warmth.
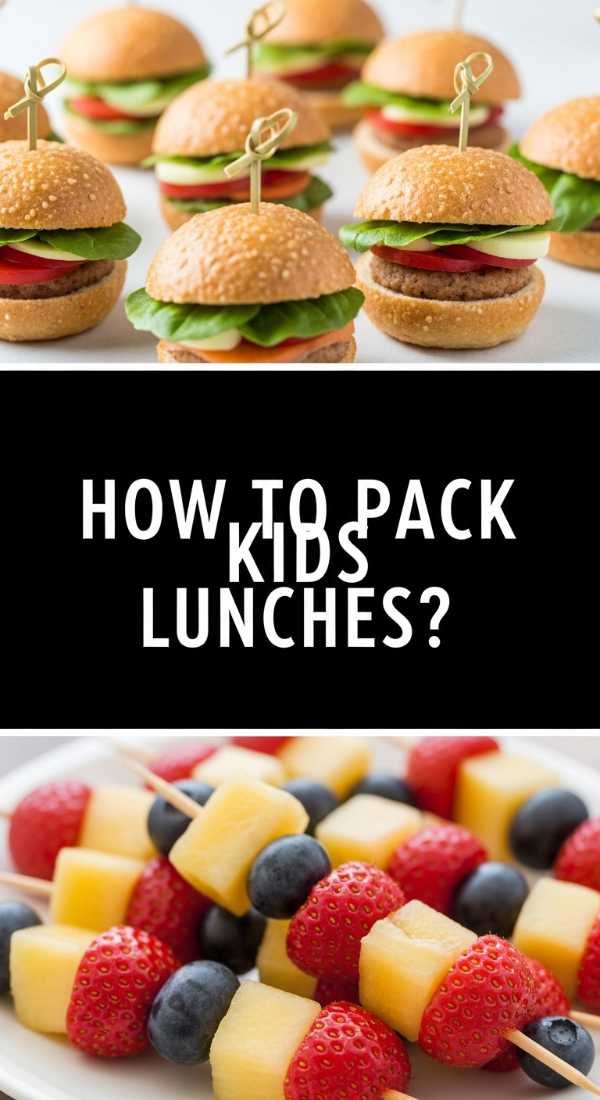
How to pack kids lunches?
Why we love this
Packing a lunch that is both nutritious and exciting can feel like a daily marathon, but the bento-board style changes everything. We love the vibrant pop of color from rainbow carrots and the playful shapes of star-cut cucumbers that make healthy eating feel like a game. There is a tactile joy in opening a box filled with variety, ensuring that even the pickiest eaters find something to love while the balanced textures keep them energized through the school day.
Ingredients
- Whole grain mini wraps
- Turkey or ham slices
- Mild cheddar cheese blocks
- Cucumber and rainbow carrots
- Hummus or cream cheese
- Grapes or berries
How to make it
- Start by prepping your vegetables; use a small star-shaped cookie cutter on thick cucumber slices and julienne the carrots into matchsticks for easy grabbing.
- Spread a thin layer of hummus or cream cheese onto a mini wrap, lay a slice of turkey on top, and roll it tightly. Slice the roll into 1-inch “sushi” rounds to make them bite-sized and fun.
- Cut your cheddar cheese into small cubes, ensuring they are uniform in size to maintain a clean, organized aesthetic within the lunch container.
- Partition your container into sections. Place the wrap rounds in the largest section, then flank them with the star cucumbers and carrot sticks. Fill the remaining gaps with washed grapes and berries to provide a sweet, refreshing finish.
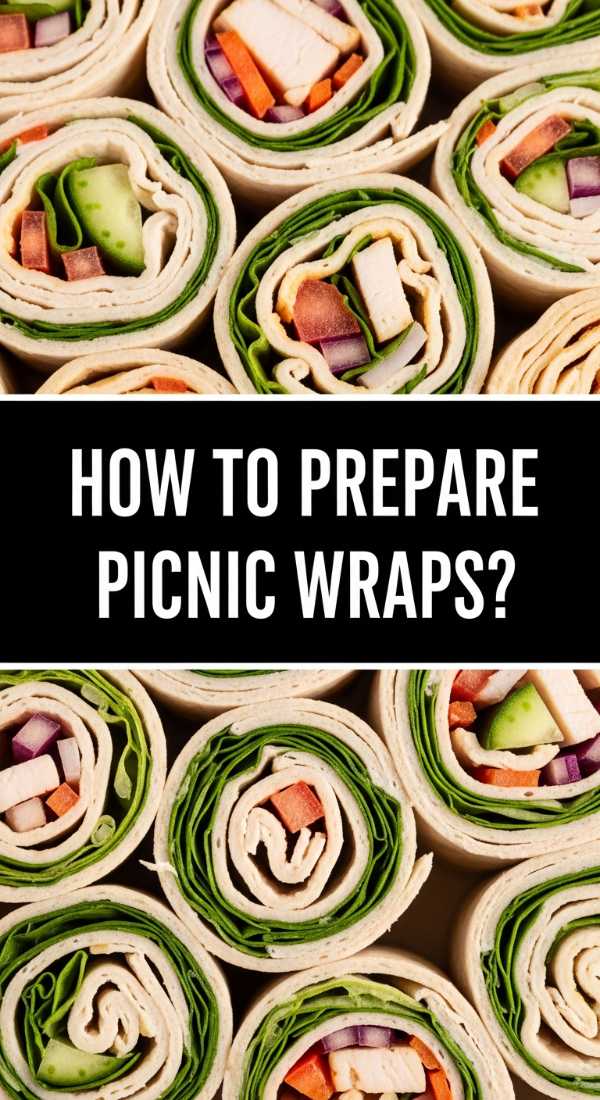
How to prepare picnic wraps?
Why we love this
Picnic wraps are the unsung heroes of outdoor dining, offering a self-contained explosion of freshness that travels perfectly. We adore the way the creamy hummus acts as a barrier against moisture, keeping the crisp, julienned peppers and leafy greens perfectly textured until you’re ready to eat. There’s a wonderful contrast between the soft, pliable flour tortilla and the crunch of the raw vegetables, all brought together by a zingy lemon-tahini drizzle that awakens the palate.
Ingredients
- Large spinach or flour tortillas
- Red pepper hummus
- Shredded carrots and purple cabbage
- Thinly sliced bell peppers
- Baby spinach leaves
- Lemon-tahini dressing
How to make it
- Warm each tortilla for 10 seconds in a dry pan over low heat; this makes them more pliable and less likely to tear during the rolling process.
- Spread a generous, even layer of red pepper hummus across the bottom two-thirds of the tortilla, leaving a one-inch border around the edges.
- Layer your spinach leaves first to create a structural base, then pile the shredded cabbage, carrots, and bell peppers in a horizontal line across the center.
- Fold the sides of the tortilla inward, then roll from the bottom up, tucking the ingredients tightly as you go. Slice on a sharp bias (45-degree angle) to showcase the vibrant “rainbow” interior and wrap tightly in parchment paper tied with twine for portability.
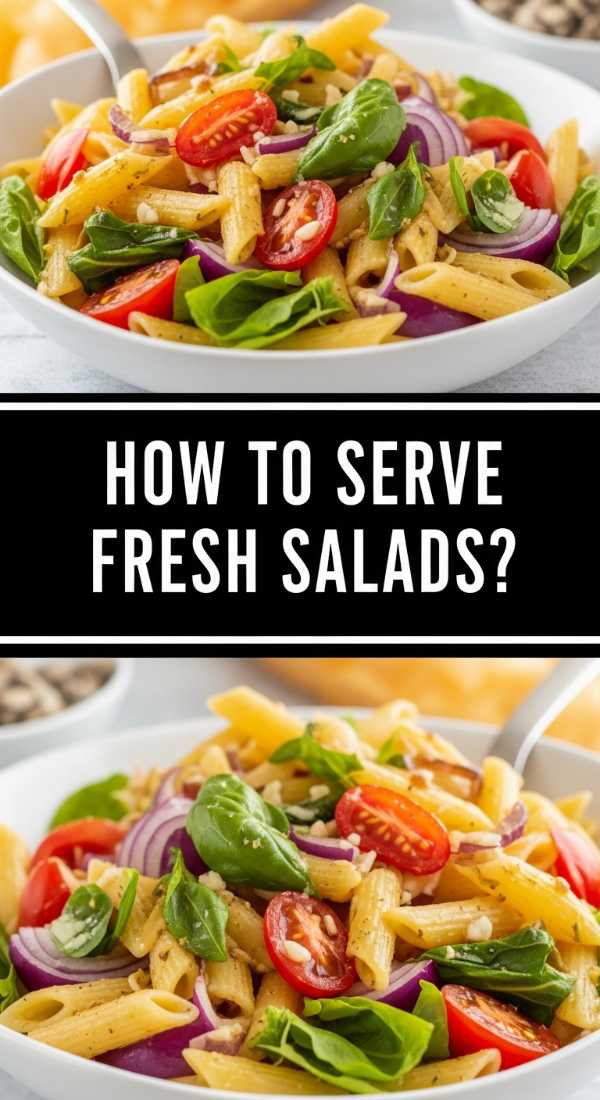
How to serve fresh salads?
Why we love this
The deconstructed salad board is a revelation for entertaining because it honors the integrity of every individual ingredient. We love how this method prevents the dreaded “soggy leaf” syndrome, allowing the peppery arugula to stay crisp and the creamy feta to remain distinct. The visual appeal of arranged rows of heirloom tomatoes, toasted pine nuts, and vibrant radishes is stunning, offering a customizable experience where every guest can build their perfect bite based on their own flavor preferences.
Ingredients
- Wild arugula and baby kale
- Heirloom cherry tomatoes
- Sliced radishes and cucumbers
- Toasted pine nuts or sunflower seeds
- Crumbled feta or goat cheese
- Balsamic glaze and olive oil
How to make it
- Thoroughly wash and spin-dry your greens. Arrange them as a lush, green carpet across one side of a large slate or wooden board.
- Halve the heirloom tomatoes and slice the cucumbers into thin rounds. Place them in organized, overlapping rows next to the greens to create a sense of movement and color.
- Group the radishes, seeds, and crumbled cheese in small, separate clusters or ramekins to maintain the “deconstructed” look and prevent flavors from bleeding together.
- Just before serving, drizzle the greens only with a touch of olive oil and sea salt. Place a small carafe of balsamic glaze on the board so guests can dress their portions to their liking.
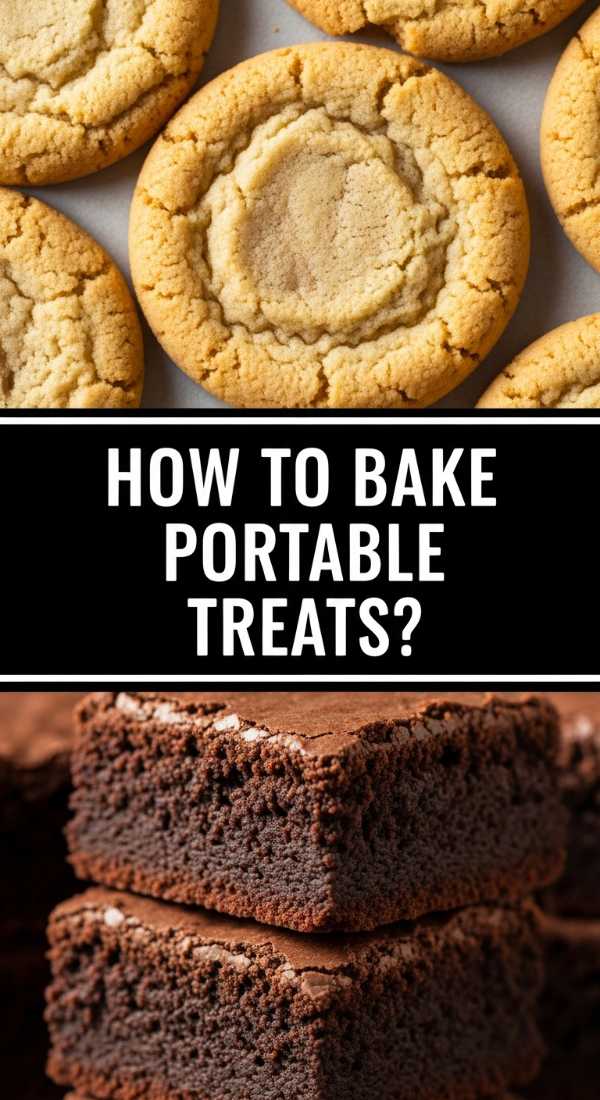
How to bake portable treats?
Why we love this
Mini lemon drizzle squares are the quintessential portable treat, offering a bright, zesty punch of flavor in a neat, easy-to-handle package. We love the buttery, shortbread-like base that melts in your mouth, contrasted by the sharp, crystalline crunch of the lemon sugar glaze on top. These squares fill the kitchen with a heavenly citrus aroma as they bake, and their sturdy nature makes them the perfect addition to a dessert board or a gift box for a friend.
Ingredients
- Unsalted butter (room temperature)
- Granulated sugar and powdered sugar
- All-purpose flour
- Fresh lemons (zest and juice)
- A pinch of salt
How to make it
- Preheat your oven to 350°F (175°C) and line an 8×8 inch baking pan with parchment paper, leaving an overhang on the sides for easy removal.
- Cream 1/2 cup of butter and 1/4 cup of granulated sugar until light and fluffy. Gradually mix in 1 cup of flour and a pinch of salt until a crumbly dough forms. Press this firmly into the bottom of the pan.
- Bake the base for 15-18 minutes until the edges are just barely golden. While it bakes, whisk together 1/2 cup of powdered sugar with 2 tablespoons of fresh lemon juice and a tablespoon of zest.
- Pour the glaze over the base as soon as it comes out of the oven. Let it cool completely in the pan before lifting it out and slicing into small, uniform squares with a sharp, warm knife.
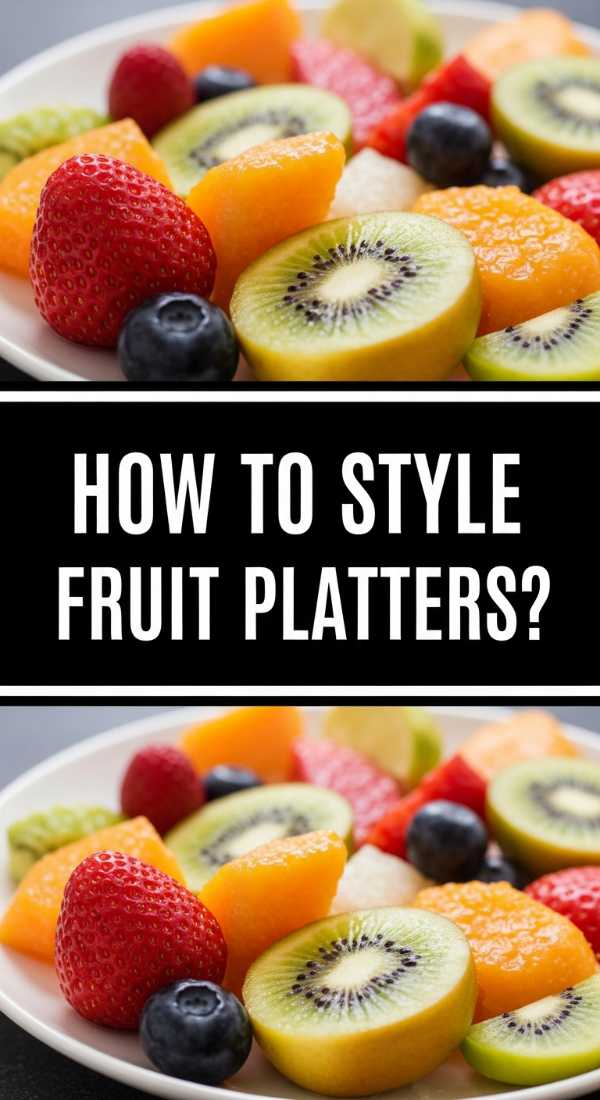
How to style fruit platters?
Why we love this
A styled fruit platter is nature’s candy presented as a work of art. We love the way an ombre arrangement—moving from deep purple blackberries to bright red strawberries and sunny pineapple—creates a visual feast that feels incredibly luxurious. The cooling sensation of chilled melon and the burst of sweetness from ripe stone fruits are elevated by the addition of fresh mint, which adds a refreshing herbal note that makes the fruit flavors pop even more vividly.
Ingredients
- Blackberries and blueberries
- Strawberries and raspberries
- Pineapple and mango
- Kiwi and green grapes
- Fresh mint leaves for garnish
- Lime wedges
How to make it
- Prepare your fruit by washing and drying them thoroughly; peel and slice larger fruits like pineapple and mango into uniform spears or wedges.
- Choose a large round platter and begin at one edge with the darkest fruits (blackberries and blueberries), laying them in a curved segment.
- Follow with the next color in the spectrum (strawberries/raspberries), then move into the yellows (pineapple/mango) and greens (kiwi/grapes) to create a seamless color transition.
- Intersperse small sprigs of fresh mint throughout the board to provide a vibrant green contrast and a fresh aroma. Squeeze a little lime juice over the lighter fruits to prevent browning and add a zesty finish.
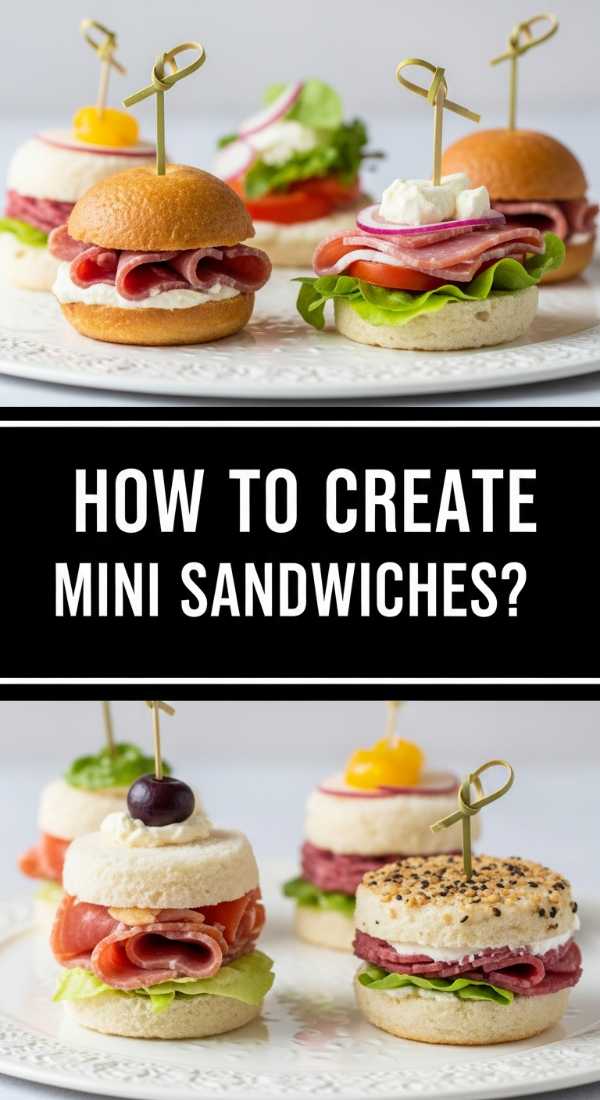
How to create mini sandwiches?

Why we love this
Mini Pesto Caprese Sliders are the ultimate crowd-pleaser, packing all the flavors of a classic Italian salad into a warm, toasted bite. We love the way the herbaceous pesto seeps into the soft brioche, and how the fresh mozzarella softens just enough to become creamy without losing its shape. The addition of a thick slice of tomato adds a juicy freshness that balances the richness of the cheese, making these small sandwiches feel substantial and deeply satisfying.
Ingredients
- Mini brioche rolls or sliders
- Fresh basil pesto
- Fresh mozzarella pearls or slices
- Roma tomatoes, sliced
- Fresh basil leaves
- Garlic butter
How to make it
- Slice the entire pack of slider rolls in half horizontally, keeping the rolls connected if possible. Place the bottom half on a baking sheet lined with foil.
- Spread a generous layer of basil pesto over the bottom half, then layer with tomato slices, fresh mozzarella, and a single basil leaf per slider.
- Place the top half of the rolls back on. Brush the tops with melted garlic butter (butter mixed with minced garlic and parsley) to ensure a golden, savory crust.
- Bake at 375°F (190°C) for about 10-12 minutes, or until the cheese has melted and the tops are toasted. Use a serrated knife to cut them into individual sliders and serve warm.
How to chill summer drinks?
Why we love this
There is nothing more revitalizing on a sweltering day than a Cucumber-Mint Sparkler served in a frosted glass. We love the clean, crisp essence of the cucumber paired with the cooling tingle of fresh mint, all brought to life by fine, effervescent bubbles. It’s a drink that feels like a spa day in a glass, offering a sophisticated non-alcoholic option that looks beautiful on a board and keeps everyone hydrated and refreshed throughout the afternoon.
Ingredients
- Sparkling mineral water
- English cucumber
- Fresh mint sprigs
- Agave syrup or simple syrup
- Fresh lime juice
- Ice cubes (extra points for herb-infused ice)
How to make it
- Use a vegetable peeler to create long, thin ribbons of cucumber. Place one ribbon inside each glass, pressing it against the inner wall for a decorative look.
- In a small pitcher, muddle several mint leaves with a splash of lime juice and a drizzle of agave syrup to release the essential oils.
- Fill the glasses with ice cubes—ideally, use large cubes that melt slowly to prevent dilution. Pour a small amount of the mint-lime mixture into each glass.
- Top with chilled sparkling water and stir gently with a long spoon to combine. Garnish with an extra sprig of mint and serve immediately while the bubbles are at their peak.
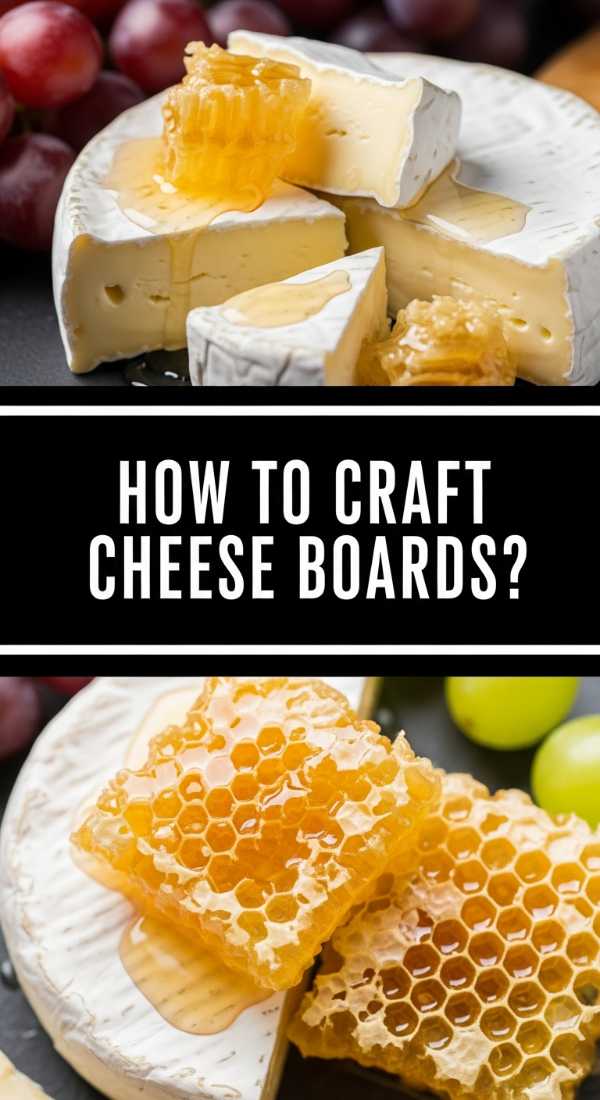
How to craft cheese boards?
Why we love this
The art of the cheese board lies in the balance of salt, fat, and acid. We love the ritual of selecting a range of textures—from a runny, decadent Brie to a crystal-flecked aged Cheddar—and finding the perfect jam or honey pairing to highlight their unique profiles. A well-crafted board is a conversation starter, encouraging guests to experiment with different combinations of fruit, nuts, and crackers while enjoying the slow development of flavors on the palate.
Ingredients
- 3 types of cheese (Soft, Hard, Blue)
- Assorted crackers and baguette slices
- Fig jam or honey
- Prosciutto or salami
- Marinated olives and dried apricots
- Walnuts or Marcona almonds
How to make it
- Place your three cheeses on the board first to act as anchors; keep them spaced out and pre-slice a few pieces of the harder cheeses to invite guests to start digging in.
- Place small bowls of fig jam and olives in the gaps. This creates structure and keeps the wetter ingredients from touching the crackers.
- Add your meats by folding salami into “flowers” or loosely draping prosciutto to create height and texture.
- Fill all remaining empty spaces with crackers, nuts, and dried fruit. The goal is a “bountiful” look with no visible board showing through, which makes the display look professionally styled and abundant.
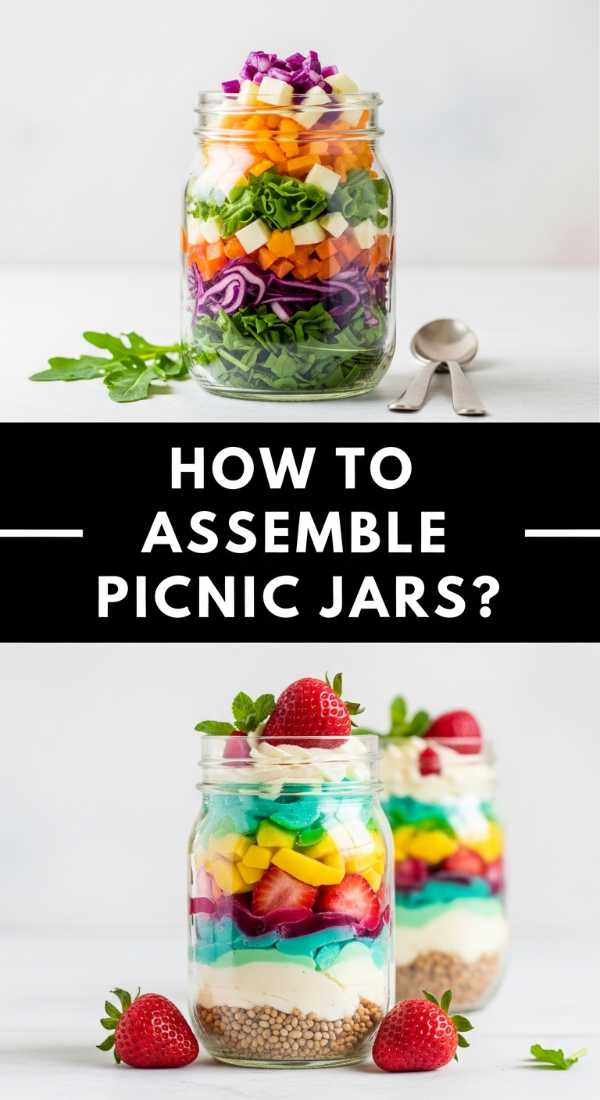
How to assemble picnic jars?
[IMAGE_10]
Why we love this
Picnic jars are the ultimate solution for outdoor meals, combining portion control with a clever layering technique that keeps everything fresh. We love the visual appeal of the distinct layers—vibrant dressing at the bottom, sturdy vegetables in the middle, and delicate greens on top—which ensures that nothing gets soggy. It’s an incredibly practical way to serve a full meal that is easy to transport, easy to hold, and even easier to clean up afterward.
Ingredients
- Glass mason jars (pint size)
- Vinaigrette dressing
- Cooked pasta or quinoa
- Chickpeas or grilled chicken
- Cherry tomatoes and cucumbers
- Mixed baby greens
How to make it
- Pour 2-3 tablespoons of your favorite vinaigrette into the bottom of each clean, dry mason jar. This is the most critical step for freshness.
- Add your sturdier ingredients next, like chickpeas, chopped cucumbers, or cherry tomatoes. These can sit in the dressing without losing their texture.
- Layer in your grains or pasta. They will act as a buffer between the moisture at the bottom and the delicate ingredients at the top.
- Fill the rest of the jar with packed mixed greens, leaving a tiny bit of headspace. Seal the lid tightly. When you’re ready to eat, simply shake the jar vigorously to distribute the dressing and enjoy straight from the jar or pour into a bowl.
The Joy of Effortless Hosting
Mastering the viral food board hack isn’t just about the food; it’s about reclaiming your time and energy so you can focus on what truly matters: your guests. By utilizing these simple, beautiful strategies—from aesthetic snacks to perfectly layered picnic jars—you transform the act of hosting from a chore into a creative outlet. The next time you have friends over, skip the complex multi-course meal and lean into the beauty of the board. Your stress levels will drop, and your guests will be talking about the spread for weeks to come.